How to Replace a Radiator Valve: Step-by-Step Guide for DIYers
To replace a radiator valve, start by isolating and depressurizing the heating system. Drain the radiator and remove the old valve using the right wrenches. Clean and inspect the pipe, then fit a compatible new valve with olives or PTFE tape. Tighten the connections carefully, avoiding over-torquing. Afterward, refill the system, bleed the radiators, and test for leaks and proper pressure. Ensure you have safety gear and the correct parts. Additional steps include troubleshooting tips, upgrading to thermostatic radiator valves (TRVs), and knowing when to consult a professional.
Overview of Replacing a Radiator Valve
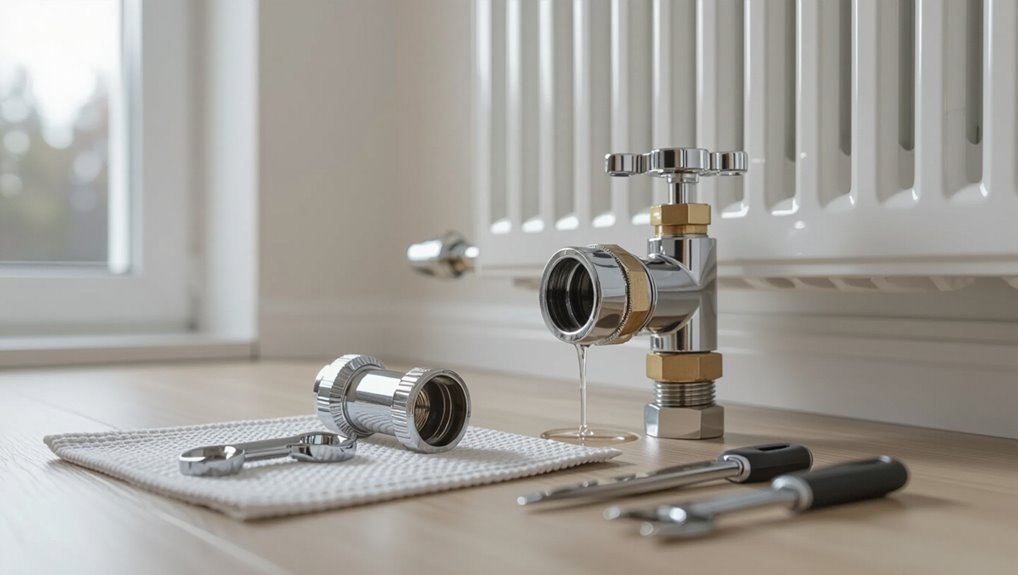
Replacing a radiator valve involves draining the system, removing the old valve, and fitting a compatible replacement while ensuring proper seals and alignment.
Replacement is recommended when valves leak, seize, or fail to control flow, or during radiator upgrades and pipework changes.
Basic tools and materials include adjustable wrenches, pipe sealant or PTFE tape, replacement valve and olives, buckets, and towels.
What replacing a radiator valve involves
Begin by isolating the radiator from the heating system and draining the section to be worked on; this prevents water damage and allows safe removal of the old valve.
Replacing a radiator valve involves shutting off and draining, loosening fittings, removing the old valve, preparing and fitting the new valve with correct seals, tightening connections, refilling and bleeding the system, and testing for leaks—how to replace radiator valve.
When and why to replace a radiator valve
Recognize a radiator valve needs replacement when it leaks, sticks, fails to seal, or shows visible corrosion or damage; these symptoms indicate impaired control, wasted energy, potential water damage, or risk of system contamination.
Replacement is warranted when repair parts are unavailable, intermittent failures recur, or upgrading for better temperature control and efficiency is desired.
Timely action prevents larger system issues.
Tools and materials required
Gathering the right tools and materials before starting guarantees the valve replacement proceeds efficiently and safely.
A clear checklist prevents delays and guarantees proper sealing, correct fittings, and safe draining. Essentials include tools for loosening joints, replacement valves sized to the radiator, and consumables for leak-proof connections.
- Adjustable wrench, pipe wrench, pliers
- New valve, compatible fittings, PTFE tape
- Bucket, towels, radiator bleed key
Safety Precautions Before You Start
Before beginning work, the heating system should be isolated and the boiler switched off to prevent flow and pressure changes.
The decision to drain the system or work on a closed section must be made based on valve location and the amount of water that will be released.
Appropriate personal protective equipment should be worn and the workspace cleared and prepared to manage spills and hot components.
Isolate the heating system and switch off boiler
Shut down the boiler and isolate the heating circuit to eliminate heat and pressure before working on a radiator valve.
The operator must switch off power and gas supply, wait for system cooldown, and close any relevant zone or radiator isolating valves.
Confirm no call for heat from controls and verify gauges show no pressure.
Use lockout/tagout if available to prevent accidental restart.
Draining vs. working on a closed section when to drain
Decide whether to drain the system or isolate a section based on valve accessibility, the number of radiators affected, and the potential for water escape during removal; draining the entire loop is safest when multiple radiators or a main feed will be opened, while working on a closed section may suffice for a single radiator if reliable isolation valves are present and tested.
Confirm isolation by relieving pressure and checking for dry downstream pipework.
Personal protective equipment and workspace preparation
Put on appropriate PPE and prepare the workspace to prevent injury and contain spills: safety glasses, impermeable gloves, and sturdy footwear protect against hot water and sharp edges; wear long sleeves and avoid loose clothing.
Clear area of tripping hazards, lay absorbent mats or trays, and have buckets and towels ready. Guarantee good lighting, ventilation, and an accessible shutoff.
Keep a first-aid kit nearby.
Identifying Valve Types and Compatibility
The guide outlines common radiator valve types—manual, thermostatic, angled and straight—and notes their typical applications.
It explains how to measure valve size and thread to guarantee a correct match.
Guidance is provided on selecting a replacement compatible with the radiator and the heating system.
Common radiator valve types (manual, thermostatic, angled, straight)
Radiator valves come in several common types—manual, thermostatic (TRV), angled, and straight—each designed for specific pipe layouts and temperature control needs.
A manual valve offers simple open/close control; a TRV adjusts flow to maintain set temperature.
Angled and straight describe inlet orientation for floor or wall pipe runs.
- Manual handle visual
- TRV head profile
- Angled vs straight alignment
How to measure and match valve size and thread
When replacing a valve, accurate measurement of pipe diameter and thread form is essential to guarantee compatibility and prevent leaks.
Measure outside diameter with calipers, count threads per inch or compare to a thread gauge, and note BSP versus NPT profiles.
Record whether connections are male or female and any compression or capillary fittings.
Photograph fittings for parts matching.
Selecting the correct replacement valve for your system
Several key factors determine which replacement valve will fit and function correctly in a heating system: valve type (thermostatic, manual, or lockshield), flow direction and size, connection style (compression, thread type, soldered), material compatibility with existing pipework, and the system’s pressure and temperature ratings.
The installer should verify manufacturer specifications, match thread standards, confirm compatible materials (brass, copper, steel), and guarantee pressure/temperature ratings meet system requirements.
Step-by-Step Guide to Replacing a Radiator Valve
The procedure begins by preparing the radiator and system, then isolating the unit by closing the lockshield and inlet valves.
Next, water is drained from the radiator—either partially or fully—while captured to prevent spills.
Finally, the old valve is loosened and removed, and the exposed threads and pipework are cleaned and readied for the new fitting.
Step 1 Prepare the radiator and system
Begin by ensuring the heating system is switched off and cold. Then isolate the radiator by closing its lockshield and thermostatic valve.
Drain nearby bleed points to reduce pressure. Place a drip tray and absorbent cloth beneath connections, and have adjustable spanners, a radiator key, PTFE tape, and replacement valve ready.
Verify the room is well lit and ventilated before proceeding.
Step 2 Isolate radiators and close lockshield and inlet valves
With the system cold and power isolated, close each radiator’s lockshield valve using a spanner and turn the inlet or thermostatic valve to the off position; this confines water to sections of the system and prevents flow into the work area.
Then check adjacent radiators for closed valves, tag or note closed positions, and guarantee isolation is secure before proceeding to valve removal.
Step 3 Drain the radiator (partial vs full) and capture water
Drainage is required next: decide whether a partial drain (isolating and draining only the radiator) or a full system drain is necessary based on valve location and system layout.
Then prepare suitable containers and absorbent materials to capture escaping water.
Drain slowly into a basin or hose to a drain point, monitor pressure, collect residual water with towels, and dispose of coolant per local rules.
Step 4 Loosen and remove the existing valve
After the radiator has been isolated and water removed, attention turns to the valve itself.
The technician fits a backup wrench to the pipe, grips the valve nut with a second wrench, and breaks the connection with steady counter‑torque.
Once loosened, the valve is unscrewed or separated from compression fittings, drained into a container, and lifted away for replacement.
Step 5 Clean threads and prepare pipework
Begin by inspecting and cleaning the exposed pipe end and valve threads to guarantee a proper seal for the new fitting.
Remove corrosion, debris and old sealant with a wire brush and cloth.
Deburr the pipe edge lightly, ensuring a smooth, square face.
Check for pitting or damage; replace the section if compromised.
Dry thoroughly before proceeding.
Step 6 Fit the new valve and use suitable seals (PTFE, olive, compression fittings)
With the pipe end cleaned, deburred, and inspected, the new valve can be positioned and sealed to guarantee a leak-free connection.
Apply PTFE tape clockwise to male threads or fit a new olive for compression joints.
Slide the valve onto the pipe, align correctly, then tighten the nut evenly.
Check alignment before final torque; avoid over-tightening to prevent damage.
Step 7 Refill, bleed radiator and restore pressure
Proceed to refill the heating system slowly, monitoring the boiler pressure gauge as water is added to restore the system to its normal operating pressure.
Open the filling loop gradually, top up to the recommended pressure, then close.
Bleed radiators starting nearest the valve work, releasing trapped air until a steady stream of water appears.
Recheck pressure and top up if necessary.
Step 8 Check for leaks and test valve operation
Inspect the replaced valve and surrounding joints for signs of leaking while the system is pressurized and the boiler is running at normal temperature.
Observe for drips and moisture, tighten fittings if necessary, and retest.
Operate the valve through its full range to confirm smooth movement and proper thermostatic response.
Monitor for several cycles, then recheck seals and system pressure to guarantee stability.
Common Problems and How to Troubleshoot Them
Common issues after replacing a radiator valve include leaks at the connection, a stiff or seized spindle, lack of heat due to poor flow or airlocks, and unexplained pressure drops in the system.
Each problem has targeted checks and remedies—from reseating or refitting joints and replacing worn valve parts, to bleeding radiators, testing flow, and inspecting the boiler and system for leaks.
The following guidance explains how to diagnose each fault and decide whether repair or replacement is the appropriate action.
Leaks at the valve connection causes and fixes
Leaks at the valve connection often arise from worn seals, loose fittings, or corrosion where the valve meets the radiator or pipework; identifying the specific source quickly narrows repair options and prevents water damage.
Tighten fittings, replace deteriorated washers or O‑rings, clean or replace corroded threads, and use appropriate joint compound or PTFE tape.
Test under pressure and monitor for recurrence.
Stiff or seized valve spindle options (repair vs replace)
After addressing leaks at the valve connection, attention often shifts to a valve that no longer turns smoothly: a stiff or seized spindle prevents proper flow control and can lead to overheating or difficulty isolating sections of the system.
Light lubricant, careful tapping, and partial disassembly can free many spindles; heavily corroded or damaged spindles require full valve replacement for reliable long-term operation.
Radiator won’t heat after replacement diagnosing flow and airlocks
Check basic flow and the presence of air first when a newly replaced radiator remains cold; inadequate circulation or trapped air are the most frequent causes and can be isolated quickly.
Verify valves fully open, feel inlet/outlet pipe temperatures, and bleed the radiator using a key until water appears.
Confirm lockshield setting, inspect for blockages or debris, and restart the system to reassess heating.
Pressure drops in the system where to look
Several likely causes should be considered when a system shows a dropping pressure: air ingress, persistent leaks in pipework or radiators, a failing expansion vessel or pressure relief valve, and issues with the filling loop or non-return valve.
Inspect visible joints, bleed points, and radiator valves for moisture.
Check the boiler condensate trap, expansion vessel charge, and pressure relief discharge pipe for signs of leakage or corrosion.
Time, Cost and When to Call a Professional
A straightforward radiator valve replacement typically takes an experienced DIYer one to two hours, while first-timers may need more time.
Parts generally cost modestly, but total expenses rise if a professional is required for labor or if additional components are needed.
A qualified heating engineer should be called for work under warranty, with complex or multi-zone systems, or when leaks or gas-connected appliances are involved.
Typical time required for a DIY replacement
Typical DIY radiator valve replacements take between 30 minutes and two hours, depending on the installer’s experience and the condition of the fittings.
Routine swaps with accessible valves and working tools often finish under an hour.
Corroded connections, tight spaces or unexpected leaks extend work, requiring careful sealing and testing.
Allow extra time for draining, refilling and bleeding the radiator to guarantee proper operation.
Estimated parts and labor costs
Many homeowners can expect parts and labor for a DIY radiator valve replacement to range from modest to moderate depending on valve type and local labor rates. Typical parts include valves, seals, and fittings; labor varies by experience. Use the table for quick estimates.
| Item | Low | High |
|---|---|---|
| Valve | $15 | $80 |
| Seals/fittings | $5 | $25 |
| Labor (per hour) | $0 (DIY) | $75 |
Signs you should hire a qualified heating engineer (warranty, complex systems)
After reviewing parts and labor estimates, homeowners should recognize situations where hiring a qualified heating engineer is advisable: warranty restrictions, complex or interdependent systems, and tasks requiring certification.
Professionals are recommended when work could void warranties, involves sealed or pressurized systems, smart/zone controls, gas connections, or radiator replacement affecting whole-system balance.
Time, safety, and compliance justify the added cost.
Preventive Maintenance and Tips to Extend Valve Life
Routine inspections and seasonal maintenance help identify leaks, corrosion, and wear before they force a replacement.
When adjusting valves, modest, steady turns and avoiding excessive force reduce the risk of stripping stems or damaging seals.
Consider upgrading to thermostatic radiator valves (TRVs) when better temperature control and energy savings are desired.
Regular checks and seasonal maintenance
Inspecting radiator valves at set intervals preserves function and prevents costly failures.
Visual checks, gentle operation, and leak detection should occur before heating season and after long inactivity.
Clean threads, replace worn seals, and verify thermostatic heads sit correctly.
Record dates and actions for patterns.
- Frosted pipe, dripping joint.
- Loose spindle, crusted grease.
- Corroded body, flaking paint.
Best practices when adjusting valves to avoid damage
Handle radiator valves with steady, deliberate movements to prevent stripping threads or damaging seals; small, measured adjustments reduce stress on spindle bearings and packing.
Use appropriate tools sized to the nut, avoid excessive torque, and lubricate stems with suitable lubricant.
Tighten compression fittings only to manufacturer torque, inspect for leaks after each tweak, and document adjustments for future reference.
When to upgrade to thermostatic radiator valves (TRVs)
When homeowners seek greater control over room-by-room comfort and energy bills, upgrading to thermostatic radiator valves (TRVs) becomes a practical preventive step.
TRVs automatically regulate flow based on temperature, reducing wear from constant manual adjustments and minimizing pressure fluctuations that stress valve components.
Consider upgrading when rooms have uneven heating, frequent manual adjustments, or when aiming for energy savings and prolonged valve lifespan.
Quick Reference Checklists
A concise pre-replacement checklist guarantees all tools, shutdown procedures, and safety measures are in place before work begins.
A post-replacement testing checklist verifies leak-tight connections, correct valve operation, and system pressure restoration.
Together these quick reference lists reduce errors and confirm a successful installation.
Pre-replacement checklist
Before beginning valve removal, confirm that the heating system is fully isolated and depressurized, the correct replacement valve and fittings are on hand, and all required tools and safety gear are available.
A concise pre-replacement checklist prevents surprises and damage.
- Drain bucket, towels, and radiator bleed key ready.
- Replacement valve, compression fittings, and PTFE tape.
- Adjustable spanner, pipe wrench, and eye protection.
Post-replacement testing checklist
Begin by restoring system pressure slowly and observing for leaks or pressure loss for several minutes; this confirms fittings are tight and seals seated.
Then bleed radiators, recheck thermostat response, and monitor system temperature stability.
Finally, document pressure, valve position, and any observed drip for future reference.
- Visual leak inspection with towel
- Thermostat and temperature probe check
- Pressure log and photo record
Conclusion
Like a steady lantern guiding hands through dusk, the replaced radiator valve restores warmth and order to a home’s quiet machinery. Completing the task seals small leaks of time and worry, each tightened nut a stitch in domestic comfort. The work, done with care and caution, becomes a quiet promise: maintenance honors the rhythms of daily life, turning routine attention into lasting safety and steady heat for seasons yet to come.