How to Disassemble a Faucet: Step-by-Step Guide for Any Type
To disassemble a faucet, start by shutting off the water supply and gathering necessary tools like wrenches, screwdrivers, and pliers. Identify the type of faucet—cartridge, ball, ceramic-disc, or compression. Carefully remove the handles, retainers, and internal components in the correct order. Clean and inspect parts, replacing O-rings or cartridges as needed. Finally, reassemble the faucet by reversing the disassembly steps. This guide will help you effectively address leaks, worn seals, or mineral buildup in your faucet.
What disassemble a faucet means and when you should do it
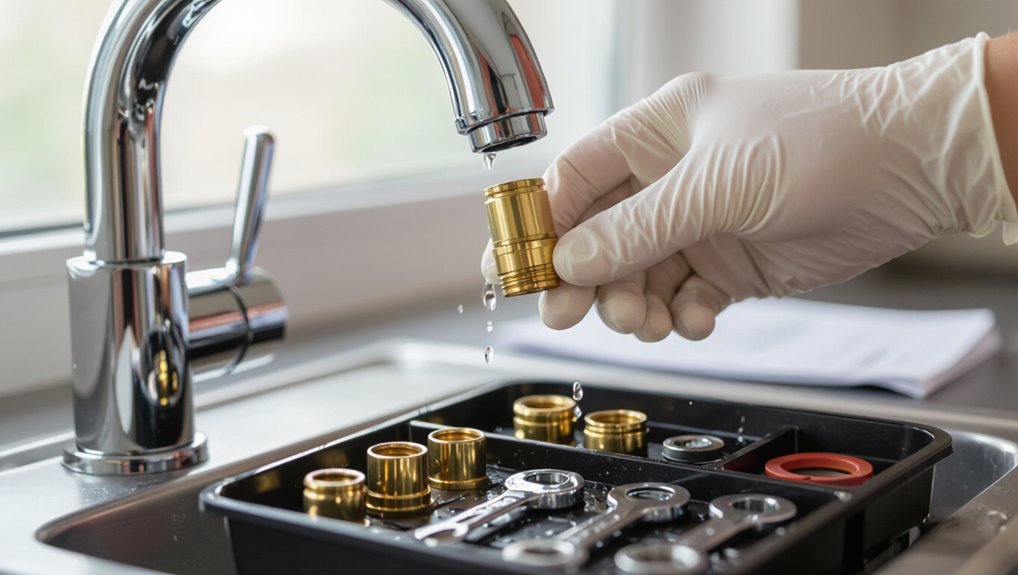
Disassembling a faucet means systematically removing its external and internal components to access cartridges, seals, and valves for repair or replacement. Homeowners commonly perform this for leaks, worn parts, mineral buildup, or when upgrading fixtures, noting that steps differ between ball, cartridge, ceramic disc, compression, single-handle, and widespread designs.
Before starting, water should be shut off, the area cleared, and basic safety precautions taken, including using the correct tools and protecting finishes.
Common reasons to disassemble a faucet (leaks, replacing parts, cleaning, upgrading)
When water drips from a faucet, parts feel stiff, mineral buildup accumulates, or an aesthetic upgrade is planned, taking the fixture apart lets one identify and address the underlying issue.
Typical reasons to disassemble include stopping leaks, replacing worn cartridges or seals, descaling aerators and valves, and installing new finishes or upgraded components.
Clear inspection guides how to disassemble a faucet safely and efficiently.
Types of faucets and why disassembly steps vary (ball, cartridge, ceramic disc, compression, single-handle, widespread)
After identifying a problem like a leak or mineral buildup, the next consideration is which faucet type is being worked on—ball, cartridge, ceramic disc, compression, single-handle, or widespread—because internal parts and fasteners differ considerably.
Disassembly means removing handles, trim, and internal mechanisms to access worn seals, valves, or cartridges. Choosing correct steps prevents damage and guarantees proper reassembly and repair.
Safety and preparatory precautions before starting
Before starting, the homeowner should understand that to disassemble a faucet means systematically removing external handles, trim, and internal components to expose seals, valves, or cartridges for inspection or replacement.
Prioritize shutting off water, draining lines, protecting surfaces, and assembling necessary tools.
Wear gloves and eye protection, document parts and fastener locations, and verify replacement parts and workspace lighting before proceeding.
Tools and materials needed for any faucet disassembly
A concise list of essential tools—adjustable wrench, screwdrivers, hex keys, pliers and basin wrench—sets the foundation for any faucet disassembly.
Recommended optional supplies and spare parts, such as replacement cartridges, O-rings, plumber’s tape and thread sealant, should be kept on hand to address common failures quickly.
Protective measures like using towels, masking tape, and sink covers prevent scratches to finishes and shield surrounding plumbing during the work.
Essential tools checklist
One dependable toolkit can simplify most faucet disassembly tasks: pliers (needle-nose and adjustable), an adjustable wrench, a basin wrench for hard-to-reach nuts, screwdrivers (flat and Phillips), hex/Allen keys, plumber’s grease, replacement O-rings and washers, penetrating oil, plumber’s tape, rags, and a small container for parts.
- Safety: gloves, eye protection.
- Fastening: correct drivers and wrenches.
- Cleaning: rags, penetrating oil, grease.
Optional supplies and replacement parts to have on hand
Beyond the core toolkit, keeping a selection of optional supplies and common replacement parts on hand prevents delays and enables straightforward fixes during faucet disassembly.
Include spare O-rings, cartridge or valve seats specific to the model, faucet grease, plumber’s tape, nylon brush, silicone sealant, and small replacement screws.
A parts tray and soft cloths help organize components and protect finishes.
How to protect finishes and surrounding plumbing during work
Protecting the faucet’s finish and nearby fixtures prevents scratches, stains, and accidental damage while disassembly proceeds.
Use soft towels, painter’s tape, and foam padding around handles and spouts.
Place a basin or bucket to catch small parts and protect cabinetry.
Shut off water, isolate exposed pipes with cloth, and lay down a waterproof mat to prevent corrosion, stains, and slipping hazards.
How to identify your faucet type and key components
A quick visual inspection reveals the faucet type—ball, cartridge, ceramic disc, or compression—by noting handle count, spout shape, and visible seams.
Identifying core components such as handles, cartridges or spindles, seats and springs, O-rings, and bonnet nuts helps determine which parts must be removed.
Photographing each step and jotting brief notes guarantees accurate reassembly.
Visual cues for each faucet type
Visual identification begins with the faucet’s silhouette and handle style: single-handle faucets usually have one lever or knob controlling both temperature and flow, while double-handle models feature separate hot and cold handles mounted on a shared spout or on separate valves.
Additional cues include wall‑mount versus deck‑mount placement, exposed versus concealed valves, pull‑out or pull‑down spray heads, and visible escutcheon shapes.
Anatomy of a faucet: handles, cartridges, seats, springs, O-rings, bonnet nuts, spindles
After identifying a faucet by silhouette and handle style, attention shifts to the parts that make it work: handles, cartridges or valves, seats and springs, O-rings, bonnet nuts, and spindles.
Each component’s shape and mounting reveals the faucet type: cartridge bodies slide out, ceramic discs sit flush, ball assemblies use springs and seats, and bonnet nuts secure stems and spindles.
Taking photos and notes for reassembly
Begin by photographing the faucet from multiple angles—front, sides, top, and any hidden access points—so that handle orientation, escutcheon placement, and mounting hardware are clearly recorded.
Then catalog each removed part: label photos, note sequence, fastener sizes, and part orientation.
Include close-ups of cartridges, seats, O-rings, and mounting brackets to guarantee accurate identification and smooth reassembly.
Step-by-step disassembly procedure for single-handle cartridge faucets
Before beginning, the water supply should be shut off and lines drained to prevent spills.
The procedure then proceeds by removing the handle and any decorative pieces, extracting the cartridge retaining clip to remove the cartridge, and inspecting and removing seals, O-rings, and seats.
Finally, parts are cleaned and inspected, with worn components replaced as needed.
Turn off water and drain lines
Shut off the supply valves and relieve pressure in the lines before loosening any fittings to prevent water spray and mess.
Close both hot and cold shutoffs beneath the sink, then open the faucet to drain residual water.
Place a bucket and towels under the basin.
Inspect flexible supply lines and shutoff handles for leaks; if valves are stiff, use penetrating lubricant and proceed cautiously.
Remove handle and decorative pieces
Loosen the handle set screw and remove any decorative cap to expose the fastener, then lift the handle straight off the cartridge assembly.
Next, unscrew or pry off escutcheon plates, collars, and trim rings, noting orientation.
Remove aerator and spout covers if present.
Store small decorative screws and caps together.
Photograph parts layout for accurate reassembly and keep them in a labeled container.
Extract cartridge retaining clip and remove cartridge
With the handle and trim removed and parts organized, the next step is to access the cartridge retaining clip.
The technician locates the clip—usually C-shaped or U-shaped—at the cartridge base, then uses needle-nose pliers or a flat screwdriver to pry it free gently.
With the clip removed, the cartridge is pulled straight up or twisted slightly and lifted out for inspection or replacement.
Inspect and remove seals, O-rings, and seats
Next, the technician inspects the cartridge bore and surrounding components for seals, O-rings, and seats, noting wear, mineral buildup, or deformities that can cause leaks.
Using pick tools and needle-nose pliers, the technician carefully extracts seals and O-rings.
Then, the technician removes valve seats with a seat wrench or screwdriver, keeping parts organized and avoiding damage to bores or threads for reassembly.
Cleaning, inspection, and when to replace parts
Begin by rinsing loose debris from the cartridge bore and components with clean water. Then apply a mild descaling solution to mineral deposits and allow it to sit briefly before scrubbing with a soft brush.
Inspect seals, O-rings, and valve seats for cracks, flattening, or pitting. Replace any compromised parts; reuse only intact components.
Lubricate new O-rings with plumber’s grease before reassembly.
Step-by-step disassembly procedure for ball-type faucets
Before beginning, the technician prepares the work area and shuts off the water to prevent spills.
The procedure then removes the handle and cap assemblies, followed by extraction of the ball assembly, springs, and seats.
Attention is paid to common trouble spots and orientation markers on parts to guarantee correct reassembly.
Prepare work area and shut off water
Clear the area around the sink and place a bucket and towels within reach; this prevents water damage and keeps removed parts organized.
The technician locates and shuts off both hot and cold supply valves or the main shutoff, then opens the faucet to relieve pressure.
Labels or tape mark disconnected lines.
Adequate lighting and a tray for fasteners guarantee an efficient, safe workspace.
Remove handle and cap assemblies
To remove the handle and cap assemblies on a ball-type faucet, the technician first locates the small set screw or decorative cap on the handle, using a flat screwdriver or Allen wrench as appropriate to expose fasteners.
They loosen the set screw, lift off the handle, pry off retaining caps, and unscrew bonnet nuts or collar pieces, keeping parts organized for reassembly.
Take out ball assembly, springs, and seats
With the handle, caps, and bonnet removed and parts set aside, the technician moves on to extract the internal components: the chrome ball, the two rubber seats, and the small springs that hold the seats in place.
Using pliers or gloved fingers, the ball is lifted straight out, followed by each spring and seat. Components are placed on a clean cloth in removal order.
Common trouble spots and part orientation markers
Inspect the exposed cavity and components for predictable failure points: worn rubber seats and springs, scored or pitted ball surfaces, corroded cam and rotor areas, and hardened or compressed seals.
Note orientation marks: alignment tabs on the cam, groove direction on the ball, keyed flats on the stem, and asymmetric seat lips.
Photograph or mark positions before removal to guarantee accurate reassembly and leak-free operation.
Step-by-step disassembly procedure for ceramic-disc and mixer faucets
The procedure begins with removing handles and extracting the cartridge to access the ceramic discs.
Each disc should be lifted straight out for inspection, with seals checked for wear or damage.
Careful handling is required because ceramic discs are fragile, and reassembly notes include proper seal placement and avoiding overtightening.
Removing handles and disc cartridges
Begin by shutting off the water supply and relieving pressure in the lines to prevent leaks during disassembly.
Remove decorative caps, loosen set screws with the correct Allen key or screwdriver, and lift handles straight off.
Unscrew retaining nuts or clips securing the cartridge.
Extract ceramic-disc or mixer cartridges carefully, noting orientation.
Label parts and photograph positions for accurate reassembly.
Lifting out discs and checking seals
With handles and cartridges removed as outlined previously, attention turns to lifting the ceramic discs or mixer internals out of the valve body.
Using pliers or a disc extractor, withdraw components straight up to avoid chipping.
Inspect O‑rings, seat seals and guide surfaces for wear, scoring or mineral buildup.
Note warped or compressed seals for replacement and clean mating surfaces before any further work.
Handling fragile ceramic discs and reassembly notes
Handle ceramic discs gently, supporting them flat and lifting straight up to prevent chipping or cracking.
Inspect for hairline fractures and wear; replace damaged discs.
Keep seals, springs, and spacers in order or tag them for correct orientation.
Clean seats with nonabrasive cloth and mild vinegar solution.
Reassemble in reverse, ensuring alignment and even torque on retaining nuts to avoid distortion.
Step-by-step disassembly procedure for compression (two-handle) faucets
The procedure for compression (two-handle) faucets begins with removing bonnets and extracting the stem assemblies to expose internal components.
Technicians then inspect and replace worn washers and seats, noting seat condition and matching washer size.
If seats are pitted or stems show excessive wear, valve regrinding or full replacement is recommended.
Removing bonnets and stem assemblies
Begin by shutting off the water supply and opening both faucet handles to relieve pressure.
Using a screwdriver, remove handle caps and screws, then lift handles off.
Unscrew the bonnet nut with an adjustable wrench, turning counterclockwise.
Withdraw the stem assembly straight out, noting orientation and any packing material.
Repeat for the other side.
Keep parts organized and inspect threads for damage.
Identifying and replacing washers and seats
Next, identify the washer and seat components removed from the stem assembly by placing each stem on a clean surface and visually comparing the disc-shaped rubber washer at the tip with the threaded brass or plastic seat in the valve body.
Remove the worn washer from the stem, note its size and thickness, extract the seat with a seat wrench if needed, and install matching replacements, ensuring proper seating and torque.
When valve regrinding or full replacement is needed
Inspect the valve components for scoring, pitting, or deformation to determine whether regrinding the valve seat and disc will restore a watertight seal or if full replacement of the valve assembly is required.
Minor surface irregularities and shallow pits can be resurfaced; deep grooves, warped stems, or extensive corrosion necessitate replacing cartridges, seats, or the entire valve body.
Follow manufacturer limits and test after reassembly.
Dealing with stubborn, corroded, or stuck faucet parts
When parts resist separation, the writer recommends beginning with safe penetrating lubricants and controlled soaking to break corrosion bonds.
For stubborn screws, seized stems, or rounded fittings, careful use of impact drivers, extractors, and appropriate grips is advised to prevent further damage.
Heat application or cutoff tools is reserved for irreparable components, emphasizing safety and replacement planning before escalation.
Safe penetrating lubricants and soaking methods
Apply a safe penetrating lubricant to loosen seized components, then allow time for it to work before attempting further disassembly.
Use water-displacing, non-toxic products rated for plumbing or household use.
For heavily corroded parts, apply lubricant, cover with plastic wrap or a damp cloth to retain moisture, and wait several hours or overnight.
Rinse surfaces and reapply as needed before trying removal.
Techniques for stuck screws, seized stems, and rounded fittings
Tackle stuck screws, seized stems, and rounded fittings with a sequence of targeted techniques designed to minimize damage and restore function:
apply penetrating lubricant, work fasteners gently back and forth, use correct-size drivers and impact turns, insert rubber or socket grips over rounded heads, tap components lightly to break corrosion, protect finished surfaces, and remove debris.
Test operation frequently to avoid overforce.
When to use heat, extractors, or cutoff tools
Use heat, extractors, or cutoff tools only after gentler methods—penetrating oils, correct drivers, and careful tapping—have failed, and always with a clear plan to limit damage.
Apply heat briefly to expand metal, avoiding nearby seals and finishes.
Use extractors for rounded fasteners, matching size and torque.
Reserve cutoff wheels or saws for irreparable parts, protecting surrounding surfaces and plumbing.
Proceed cautiously.
Inspecting parts and deciding what to repair vs replace
A visual and tactile inspection should assess O-rings, seats, seals, and cartridges for cracking, deformation, mineral buildup, or scoring that impairs sealing.
Exact replacement parts are identified by reading part numbers or matching dimensions and sourcing OEM or compatible aftermarket components.
If multiple major components are damaged, parts are obsolete, or repair costs approach the price of a new unit, a full faucet replacement is typically more economical.
How to examine O-rings, seats, seals, and cartridges for wear
Begin by laying out the disassembled components on a clean, well-lit surface and grouping O-rings, seats, seals, and cartridges together for systematic inspection.
Check O-rings for cracks, flattening, or stickiness.
Examine rubber seats and seals for hardening or deformation.
Inspect cartridges for scoring, mineral buildup, or wobble.
Note parts that deform, leak, or no longer seal; those require replacement.
Sourcing exact replacement parts and reading part numbers
Identify exact replacements by matching visible part numbers, maker marks, and dimensional features before ordering.
The technician documents stamped codes, measures diameters and lengths, and photographs assemblies for reference.
Use OEM sources when codes match; note cross-reference alternatives cautiously.
- Record part number and maker mark.
- Measure critical dimensions.
- Verify seal materials and finish compatibility.
When a full faucet replacement is more cost-effective
When inspection reveals multiple failed components, extensive corrosion, or obsolete parts that are costly or impossible to source, replacing the entire faucet often becomes the more economical and reliable option.
The decision balances labor, parts cost, and future failure risk. If repair exceeds roughly half the price of a new unit or involves unreliable substitutes, replacement minimizes downtime and guarantees warranty coverage and updated functionality.
Cleaning and preparing parts for reassembly
After parts are removed, mineral deposits and debris are gently cleaned with appropriate tools and noncorrosive agents to avoid damage.
The selection of compatible lubricants and thread sealants is noted to guarantee smooth operation and watertight reassembly.
Water passages and aerators are sterilized and inspected for blockages before final assembly.
Removing mineral deposits and debris safely
Begin by inspecting each disassembled part for scale, mineral buildup, and trapped debris, noting areas that will need soaking, scrubbing, or gentle scraping.
Use vinegar or a mild descaler in plastic containers for soaking small metal pieces; avoid prolonged exposure for plated finishes.
Gently brush with a soft toothbrush, pick debris with a plastic or wooden tool, rinse thoroughly, and dry parts completely before inspection.
Lubricants and sealants to use for reassembly
Select lubricants and sealants that are compatible with the faucet’s materials and the water system to guarantee reliable operation and prevent damage.
Use silicone-based plumber’s grease on O-rings and ceramic cartridges; avoid petroleum products that degrade rubber.
Apply PTFE tape to threaded connections for a watertight seal, and use non-toxic, NSF-approved sealants where joints require extra adhesion.
Wipe excess before reassembly.
Sterilizing water passages and checking aerators
With lubricants and sealants applied and excess wiped away, attention turns to cleaning the internal passages and inspecting the aerator before reassembly.
Flush lines with a bleach solution or vinegar for mineral buildup, then rinse thoroughly.
Remove the aerator, soak in vinegar, brush debris, and replace screens or seals as needed.
Verify all passages are clear and dry prior to reinstallation.
Reassembly best practices and testing for leaks
Reassembly follows the reverse-order checklist to guarantee each cleaned component returns to its proper place.
Proper torque and alignment are emphasized to seat seals without cracking or misaligning parts.
Once assembled, water should be restored slowly while inspecting joints and operating valves to confirm no leaks and correct function.
Reverse-order reassembly checklist
Work backward through the teardown steps, reinstalling parts in the exact inverse order they were removed so each component seats properly and no seals or fasteners are missed.
Verify clean mating surfaces, replace all O-rings and gaskets, apply plumber’s grease sparingly, hand-start threads, tighten to manufacturer specifications, reconnect water lines, restore supply, operate handles, observe for drips, and retorque if slight leaks appear.
Torque and alignment tips to avoid damage
Pay attention to torque and alignment to prevent stripped threads, cracked fittings, and warped seals during reassembly.
Use specified torque values or hand-tight plus quarter-turn where appropriate. Align components before tightening, snug fasteners progressively in a cross pattern, and seat seals evenly.
Avoid overtightening; stop when parts sit flush. Inspect threads and compressions for correct engagement before final torque.
How to slowly restore water and test for leaks and proper operation
Open the shutoff slowly and monitor each connection as pressure builds, stopping immediately if any seepage appears.
After full pressure returns, operate the faucet through hot, cold, and mixed settings to purge air and debris.
Inspect beneath for drips and recheck tightened fittings. Confirm smooth handle action and normal flow.
Tighten or reseat components if leaks or irregularities persist; retest until secure.
Troubleshooting common problems after reassembly
After reassembly, the guide outlines diagnostic steps for persistent dripping or reduced flow, including cartridge inspection and aerator cleaning.
It then addresses remedies for handle stiffness or misalignment, such as lubrication and alignment adjustment.
Finally, it specifies clear signs and situations that warrant calling a professional plumber.
Persistent dripping or low flow diagnostic steps
Many homeowners encounter persistent dripping or reduced water flow even after reassembling a faucet. Diagnosing these issues requires a systematic check of seals, cartridge alignment, and aerator condition.
Inspect O-rings and seat washers for wear or improper seating. Confirm cartridge or valve stem is fully seated and torqued. Clean or replace a clogged aerator, and verify supply shutoff valves are fully open and debris-free.
Handle stiffness or misalignment fixes
Tighten, realign, and test each component systematically when a faucet handle feels stiff or sits off-center after reassembly.
Inspect handle set screw, bonnet nut, and retaining clip for proper seating. Clean and lightly lubricate cartridge stem with plumber’s grease.
Verify valve cartridge orientation and mounting plate alignment.
Adjust stop-screws and trim position incrementally until smooth motion and centered return are restored.
When to call a professional plumber
When should a homeowner call a professional plumber? A professional is advised if leaks persist after tightening, water pressure remains unusually low, visible corrosion or damaged valves are found, or complex cartridge replacement is required.
Also call a plumber for recurring issues, sewage odors, or uncertain piping connections.
Safety concerns like gas lines near the work area warrant immediate professional intervention.
Time estimates, difficulty levels, and cost ranges by faucet type
Different faucet types—ball, cartridge, ceramic-disk, and compression—have distinct disassembly times, difficulty levels, and potential costs; simple compression faucets can often be taken apart in 20–40 minutes by a novice, while cartridge and ball models typically require 30–60 minutes and moderate skill, and ceramic-disk faucets usually demand 45–90 minutes and greater care.
| Type | Time | Cost range |
|---|---|---|
| Compression | 20–40 min | $0–$30 |
| Cartridge/Ball | 30–60 min | $10–$60 |
| Ceramic-disk | 45–90 min | $20–$100 |
Preventive maintenance to reduce future disassembly needs
Preventive maintenance can greatly reduce the frequency of full faucet disassembly by addressing common issues early.
A regular schedule for cleaning fixtures and servicing aerators, along with simple water treatment or descaling measures, helps prevent buildup that impairs function.
Keeping a small kit of recommended spare parts—such as O-rings, cartridges, and supply-line washers—minimizes downtime when minor repairs are needed.
Routine cleaning and aerator maintenance schedule
Although routine cleaning requires little time, establishing a simple schedule for aerator maintenance greatly reduces buildup and the need for frequent disassembly.
Routine checks prevent flow issues and spot mineral deposits early.
Suggested schedule:
- Monthly visual inspection and wipe.
- Quarterly removal and debris rinse.
- Annual soak and inspection of seals.
Adhere to gentle tools and document date of service.
Water treatment and scale prevention tips
Beyond routine aerator care, addressing water quality reduces mineral buildup and the frequency of disassembly.
Install a point-of-use softener or scale inhibitor for hard-water areas, and use a carbon filter to limit chlorine and sediments.
Regularly monitor hardness and pH.
Flush lines seasonally, and apply manufacturer-recommended protective coatings to exposed metal to delay corrosion and scaling.
Recommended spare parts to keep at home
A small kit of commonly needed faucet components can prevent many emergency repairs and reduce how often full disassembly is required.
Recommended spares include O-rings, cartridge or ceramic disc cartridges matching fixture make, rubber seats and springs, faucet aerators, mounting screws, supply line washers, and silicone grease.
Stored with basic tools and parts list, the kit enables quick preventive swaps and minor fixes.
Quick reference: step checklists for each faucet type
Begin with a simple checklist tailored to the faucet type to guarantee efficient, safe disassembly. A concise reference helps technicians match tools, parts, and sequence to single-handle, two-handle, or wall-mounted models.
Include safety steps, common failure points, and reassembly notes.
- Shut water, gather tools, document assembly.
- Remove handles, note cartridge/type, inspect seals.
- Clean, replace worn parts, reassemble and test.
Conclusion
With clear steps and the right tools, disassembling a faucet becomes manageable for most homeowners; it’s not rocket science but does call for patience and caution. Whether handling a single-handle cartridge or a ball-type unit, documenting parts and following torque and seal recommendations keeps surprises at bay. After reassembly, test for leaks and smooth operation. When in doubt, consult a pro—an ounce of prevention now saves a pound of cure later.