How to Bleed a Hot Water Heater Safely: Step-by-Step Guide for Homeowners
How to Bleed a Hot Water Heater Safely: A Step-by-Step Guide
Bleeding a hot water heater involves releasing trapped air and flushing out sediment to improve its efficiency. To do this safely, first, turn off the power or gas supply and shut the cold-water inlet. Next, attach a hose to the drain valve, open a hot faucet to relieve pressure, and then slowly open the drain valve. Allow the water to flow out until it runs clear. Once done, close the drain valve, refill the tank, restore power, and check for leaks. Follow the detailed steps below for a comprehensive guide, including variations and safety tips.
What Bleeding a Hot Water Heater Means and Why It Matters
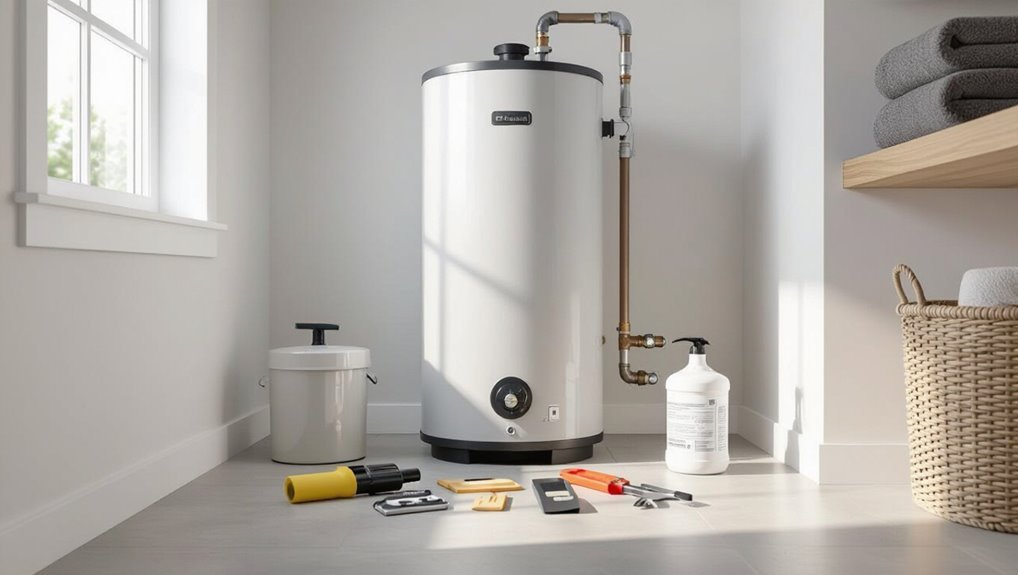
Bleeding a hot water heater refers to releasing trapped air and flushing out accumulated sediment from the tank.
Air pockets and sediment can cause noisy operation, reduced heat transfer, uneven heating, and increased corrosion risk.
Regular bleeding improves energy efficiency, reduces safety hazards, and prolongs the unit’s service life.
Definition of “bleeding” a hot water heater
One common maintenance task for hot water heaters involves releasing trapped air and sediment from the tank to restore efficient operation.
Bleeding a hot water heater means opening valves or faucets to purge air pockets and loosened debris, improving flow and heat transfer.
This procedure, described in guides on how to bleed hot water heater, is a controlled release requiring basic safety and correct sequence.
Common problems caused by trapped air or sediment
Trapped air and accumulated sediment in a hot water heater can reduce efficiency, damage components, and shorten the unit’s service life.
Sediment causes noisy operation, overheating of the tank bottom, reduced heating capacity, and sediment-clogged pipes or valves.
Air pockets produce sputtering faucets and uneven water flow.
Left unaddressed, these issues lead to frequent repairs, leaks, and premature replacement.
Benefits of bleeding for efficiency, safety, and lifespan
Regular maintenance that releases air and sediment from a hot water heater restores proper function and prevents progressive damage.
Bleeding improves heating efficiency by ensuring full heat transfer, reduces noisy operation, and lowers energy bills.
It minimizes corrosion and pressure buildup that can cause leaks or ruptures, extending appliance lifespan and enhancing household safety through more reliable temperature control and reduced emergency repairs.
How to Know If Your Hot Water Heater Needs Bleeding
Visible signs such as sputtering taps, reduced hot water flow, or unusual noises can indicate trapped air or sediment that may require bleeding.
Homeowners should attempt simple, safe DIY bleeding when comfortable with shutoff and drain valve operation, but call a professional if corrosion, leaks, or unclear causes are present.
Ignoring these symptoms risks scalding, pressure buildup, or premature tank damage.
Signs and symptoms to watch for
Rust-colored water, sputtering taps, and uneven heating are common indicators that air or sediment is impairing a hot water heater’s performance.
Visible signs and sounds help determine if bleeding is needed.
- Reduced hot water flow or intermittent bursts during use.
- Rust or brown discoloration from taps or showerheads.
- Gurgling, banging, or continuous sputtering noises inside the tank.
When to call a professional vs. DIY
When should a homeowner attempt bleeding and when is it wiser to call a professional?
A homeowner may DIY if comfortable with basic valves, shutoffs, and draining procedures, and if symptoms are minor (gurgling, intermittent sputtering).
Call a professional when leaks, rust, persistent pressure issues, unclear valve operation, gas connections are involved, or if electrical/gas isolation is uncertain.
Safety and warranty concerns also justify professional service.
Safety risks of ignoring the issue
If sediment buildup and trapped air are left unaddressed, the water heater can develop reduced efficiency, louder operation, and increased risk of component failure—symptoms that often start as minor gurgling or sputtering but can escalate to overheating, rupture of heating elements or tank lining, and even leaks that cause water damage or mold.
Ignoring it shortens appliance life, raises energy bills, risks scalding, and may cause sudden failures requiring costly replacements.
Tools, Materials, and Safety Gear You’ll Need
This section lists the essential tools and a few optional accessories that make bleeding a hot water heater efficient and safe.
It also outlines required personal protective equipment and basic safety precautions to reduce risk.
Finally, it explains how to prepare the workspace and shut off electricity and water before beginning.
Required tools and optional accessories
A concise kit of tools and safety gear streamlines bleeding a hot water heater and reduces risk: essential items include adjustable wrenches or pliers, a garden hose long enough to reach an appropriate drain, a bucket for sediment checks, work gloves, and safety glasses; optional but helpful accessories are a hose-to-faucet adapter, a wet/dry vacuum for heavy sludge, and a pressure-relief valve wrench.
- Adjustable wrench or pliers
- Garden hose and bucket
- Hose adapter, vacuum, valve wrench
Personal protective equipment and safety precautions
Before beginning work on a hot water heater, wear appropriate personal protective equipment and follow basic safety precautions to minimize burns, chemical exposure, and injury.
Protective items and practices include insulated gloves, eye protection, and closed-toe shoes. Guarantee proper ventilation and avoid direct skin contact with hot water or additives.
- Insulated chemical-resistant gloves
- Safety goggles or face shield
- Sturdy footwear
Preparing the workspace and shutting off utilities
Several clear steps prepare the workspace and guarantee utilities are safely shut off before bleeding a hot water heater: gather the necessary tools and PPE, clear the area around the unit for access and drainage, and locate and turn off both the cold-water supply valve and the heater’s power source (electric breaker or gas supply).
Verify valve closure, vent pressure, position a drain pan, and have a garden hose ready.
Step-by-Step Guide to Bleeding a Hot Water Heater Safely
The procedure begins by powering down the heater and shutting the cold-water supply to prevent new water from entering the tank.
Next, a hot-water faucet is opened to relieve system pressure before attaching a hose to the drain valve and routing it to a safe drain.
Finally, the drain valve is opened to expel air and any accumulated sediment.
Step 1 Turn off the heater and shut off power or gas
Shut down the heater and cut its energy supply to eliminate the primary risks of electrical shock or gas ignition before any bleeding work begins.
For electric units, switch off the circuit breaker; for gas units, turn the gas valve to pilot or off.
Confirm power is off using a tester or by noting the control panel is unpowered before proceeding with any maintenance.
Step 2 Shut off the cold-water supply valve
One valve must be closed next: locate the cold-water inlet at the top of the tank and turn its shutoff clockwise until it stops, isolating incoming water so draining and bleeding can proceed without added pressure or fresh flow.
Confirm closure visually and by feeling for resistance. Use pliers only if necessary, avoid over-tightening, and guarantee a secure seal before continuing work.
Step 3 Open a hot-water faucet to relieve pressure
With the cold-water inlet secured, a nearby hot-water faucet should be opened to relieve pressure in the system.
Opening a faucet allows trapped hot water and vapor to vent, reducing tank pressure and preventing sputtering when draining begins.
Use a faucet near the heater for fastest depressurization, keep it fully open, and monitor for steady flow and diminished sputter before proceeding.
Step 4 Attach a hose to the drain valve and route to safe drainage
Attach a garden hose to the heater’s drain valve and direct the other end to an appropriate disposal point, ensuring the connection is snug to prevent leaks.
Verify the hose material resists hot water, route it downhill or use gravity to avoid kinks, and secure it to prevent dislodging.
Confirm the discharge location complies with local codes and won’t cause property damage.
Step 5 Open the drain valve to remove air and sediment
After confirming the hose is secure and routed to a safe discharge point, the technician slowly opens the drain valve to begin expelling air and sediment.
A steady flow releases trapped air first, followed by discolored water and particles.
The technician watches flow and hears for air pockets, periodically closing briefly if surges occur, then reopens until discharge shows reduced debris.
Step 6 Flush the tank with cold water until clear
Flush the tank by opening the cold-water supply briefly to force clean water through the heater until the discharge runs clear.
Continue pulsing the inlet to agitate and suspend remaining sediment, monitoring the outflow for color and particles.
Repeat as necessary until water is visibly free of debris.
Maintain control of flow to prevent splashing and avoid prolonged drains that cool the tank excessively.
Step 7 Close the drain valve, remove hose, and restore water supply
Close the drain valve firmly, coil and remove the hose, then slowly reopen the cold-water supply to refill the tank while checking for leaks.
Observe the drain area and hose connection for dripping. Allow the tank to fill until water exits a nearby hot faucet, indicating air displacement.
Tighten any fittings if necessary and confirm the drain valve is fully closed before proceeding.
Step 8 Restore power or gas and check for normal operation
With the tank refilled and the drain valve secured, the next task is to restore the heater’s power or gas supply and confirm normal operation.
Turn the circuit breaker on or relight the pilot/restore gas per manufacturer’s instructions.
Observe for ignition, normal burner/flame behavior, and listen for unusual noises.
Check hot water at a faucet and inspect for leaks or error indicators before concluding the procedure.
Troubleshooting common issues during the procedure
Although bleeding a hot water heater is straightforward when everything functions properly, common problems can arise that require prompt, methodical troubleshooting.
Follow concise checks:
- No water flow — confirm shutoffs, open drain valve fully and clear sediment with gentle tapping.
- Persistent air pockets — repeat short flushes and slightly raise inlet pressure.
- Leaks at fittings — tighten connections or replace washers, then recheck for proper sealing.
Variations for Different Heater Types and Setups
Different heater designs and fuel types require tailored bleeding and maintenance procedures.
Tankless, storage-tank, gas, electric, and hybrid systems each present specific access points, component sensitivities, and safety steps.
Older units and installations in hard-water areas often need additional precautions such as sediment removal, corrosion checks, and more frequent servicing.
Tankless vs. storage tank water heaters
Because their designs and operation differ markedly, tankless and storage tank water heaters require different bleeding and maintenance approaches.
Tankless units rarely accumulate standing water, so flushing to remove scale and occasional descaling are primary tasks.
Storage tanks collect sediment that must be drained from the tank via the drain valve until clear.
Both need manufacturer-specific procedures and safety precautions.
Gas, electric, and hybrid models: key differences
Having noted how tankless and storage systems differ in maintenance needs, attention turns to the distinctions among gas, electric, and hybrid heaters, which affect bleeding and safety procedures.
Gas units require gas supply shutoff and combustion checks; electric models demand power isolation and thermostat awareness; hybrids combine heat-pump components with electric backup, needing both electrical safety and refrigerant-aware handling.
Follow manufacturer guidance.
Special considerations for older units and hard-water areas
Older and hard-water–exposed hot water heaters present unique bleeding challenges that require extra caution and preparatory steps.
Corrosion, sediment buildup, and weakened fittings increase leak and rupture risk.
Recommend lowering pressure, using smaller-diameter hoses, inspecting and replacing brittle valves, and flushing longer to remove scale.
Consider professional inspection for tank integrity and water-softening solutions to prevent recurrence.
How Often to Bleed or Flush Your Water Heater
Recommendations for flushing frequency generally vary with household usage and local water hardness, ranging from annual to every few years.
High-use systems or areas with hard or sediment-rich water often require more frequent maintenance, while low-use homes with soft water can extend intervals.
Other factors—such as tank age, observed sediment buildup, and manufacturer guidelines—can shorten or lengthen the suggested schedule.
Recommended schedules by usage and water quality
Because sediment buildup depends on both household demand and local water hardness, the frequency for bleeding or flushing a hot water heater should be tailored to those factors. Light use/soft water: annual flush. Moderate use/moderate hardness: biannual. Heavy use/hard water: quarterly.
| Usage level | Suggested interval |
|---|---|
| Light | 12 months |
| Moderate | 6 months |
Factors that shorten or lengthen maintenance intervals
Household demand and water hardness are the baseline drivers for flushing frequency, but several other variables can shorten or lengthen those intervals.
Factors include sediment-prone well water, iron content, municipal treatment changes, and frequent temperature adjustments.
Older tanks, intermittent usage, and multiple occupants increase buildup. Conversely, softened water, filtration, and routine low-flow use extend intervals.
Professional inspections refine timing.
Common Mistakes and How to Avoid Them
Common mistakes when bleeding a hot water heater include loosening connections that cause leaks, exposing skin to scalding water, or operating valves in a way that damages the system.
Preventing contamination and sewer backflow requires proper hose placement, use of air gaps or backflow preventers, and avoiding connections to drain lines that could introduce waste.
Additionally, certain bleeding procedures or unauthorized modifications may void manufacturer warranties, so users should check warranty terms and follow approved methods.
Mistakes that can cause leaks, burns, or system damage
Ignoring proper precautions when bleeding a hot water heater can quickly lead to leaks, scalding, or damage to the plumbing system.
- Overpressurizing by forcing valves open — may burst fittings or hoses; open valves slowly and relieve pressure first.
- Touching hot surfaces or steam — causes burns; wear gloves and let tank cool.
- Removing parts incorrectly — risks leaks or valve failure; follow manufacturer steps and use proper tools.
How to prevent cross-contamination and sewer backflow
Cross-contamination and sewer backflow present serious health and property risks during bleeding if wastewater or contaminated water is allowed to re-enter potable lines or drains.
To prevent this, isolate the heater from house plumbing, use a dedicated drain hose routed to sanitary sewer or outside, install or check backflow preventers, avoid submerging hose ends, and wear protective gear.
Confirm proper valve positions before finishing.
When bleeding can void warranties
Several routine bleeding mistakes can void a water heater’s warranty if manufacturers’ instructions are not followed precisely.
Unauthorized modifications, using incompatible valves or fittings, bypassing pressure-relief devices, or failing to use recommended connectors can be grounds for denial.
Homeowners should consult the manual, use OEM parts, document maintenance, and contact the manufacturer before performing atypical procedures to preserve warranty coverage.
When to Call a Professional
If persistent leaks, unusual noises, or signs of mechanical failure appear, professional attention is warranted.
A licensed plumber can diagnose hidden issues, guarantee safe repairs, and prevent further damage.
During a service visit, expect inspection of the tank and valves, clear explanation of needed work, and written estimates or warranties.
Signs of serious mechanical problems or leaks
A homeowner should recognize certain signs that indicate bleeding the hot water heater is not a DIY task and that a licensed technician is required; persistent or worsening leaks, corrosion eating through fittings or the tank, rumbling noises that persist after flushing, sudden loss of hot water or pressure, and visible cracks or bulging on the tank all warrant immediate professional inspection and repair.
Additional indicators include foul odors, continuous dripping from the pressure relief valve, and unexplained water pooling beneath the unit.
Benefits of hiring a licensed plumber
Call a licensed plumber when the situation exceeds basic maintenance.
A licensed plumber provides expertise diagnosing complex faults, guarantees code-compliant repairs, and reduces risk of injury or property damage.
They carry proper tools, parts, and insurance, assuring reliable, long-term fixes.
Hiring a professional can prevent recurring issues, preserve warranties, and offer documented work for future resale or inspection requirements.
What to expect from a professional service visit
Schedule a service visit when issues go beyond routine flushing or simple troubleshooting; during the appointment, the technician will perform a diagnostic inspection, explain findings, outline recommended repairs or replacements, provide a written estimate, and answer questions about timelines, warranties, and safety steps to follow until work begins.
The professional will test valves, check for leaks or corrosion, assess heating components, and recommend immediate or scheduled actions with clear cost and safety guidance.
Long-Term Maintenance Tips to Prevent Air and Sediment Build-Up
Long-term prevention of air and sediment buildup relies on proactive measures such as installing water-softening systems, sediment filters, and replacing sacrificial anodes as recommended.
Homeowners should perform seasonal quick inspections to check for signs of corrosion, leaks, or reduced flow and address issues promptly.
Keeping clear maintenance logs with dates of service, component replacements, and observations simplifies tracking and helps inform professional service when needed.
Water-softening, sediment filters, and sacrificial anodes
Several preventative measures—water softeners, inline sediment filters, and regularly inspected sacrificial anodes—significantly reduce mineral buildup and sediment accumulation in hot water heaters, minimizing the frequency of air pockets and the need for bleeding.
Water softening prevents scale; sediment filters trap particles before they enter the tank. Sacrificial anodes corrode instead of the tank, extending lifespan.
Installations and replacements follow manufacturer guidance.
Seasonal checks and quick inspections
Because seasonal temperature shifts and varying household use affect sediment settling and air entry, brief quarterly inspections help catch early signs of buildup or leaks before they worsen.
- Check pressure relief valve and visible fittings for drips or corrosion.
- Inspect tank base for sediment accumulation, moisture, or rust.
- Run a short drain to observe debris and confirm clear outflow.
Record-keeping and maintenance logs for homeowners
After quarterly checks and short drains confirm system behavior, maintaining a simple log helps homeowners spot patterns in sediment buildup, air entry, and component wear.
Record date, drain volume, water clarity, pressure readings, valve function, and any repairs or part replacements. Note unusual noises and frequency of bleeding.
Review entries semiannually to schedule targeted flushing, anode inspection, or professional service when trends indicate deterioration.
Quick Reference Checklist for Bleeding a Hot Water Heater
Start with a concise checklist that outlines each step, required tool, and safety precaution so the bleeding procedure can be completed quickly and correctly; include items such as shutting off the heater’s power and water supply, attaching a hose to the drain valve, opening a nearby hot faucet, and wearing protective gloves and eyewear.
- Confirm power and water are off; gather hose, bucket, gloves.
- Attach hose to drain valve; open hot faucet to vent.
- Open drain, flush until clear; close, refill, restore power.
Safety Reminders and Final Safety Checks Before Leaving the Job Site
Before leaving the site, perform a final safety sweep to verify the heater and surrounding area are secure:
Conduct a visual inspection for leaks, make sure valves are correctly positioned, and verify tools and debris are cleared.
Then complete these checks:
- Confirm gas/electric supply is restored or safely isolated.
- Ensure pressure relief valve is closed and not leaking.
- Remove tools, wipe spills, and document work completed.
Conclusion
Bleeding a hot water heater restores flow, prevents sputtering, and protects plumbing; bleeding regularly prevents damage, saves energy, and extends appliance life. Homeowners should inspect, prepare, and act with care; they should follow steps, heed variations, and call professionals for doubts. Maintain schedules, flush sediments, and watch pressure. Respect safety gear, isolate power, and relieve pressure. Act proactively to avoid crises, act patiently to preserve systems, and act wisely to protect home comfort.