How to Cut Copper Tube Cleanly: Tools, Techniques, and Pro Tips
To cut copper tube cleanly, use a quality tubing cutter for most sizes, a hacksaw for larger diameters, or a rotary tool for tight spaces. Secure the tube, mark the cut, and rotate the cutter evenly. After cutting, remove any burrs with a reamer or deburring tool. Always wear gloves and eye protection, and inspect the ends for any damage or shavings. Proper technique ensures reliable joints. For further tips and tool recommendations, continue reading.
How to Choose the Right Tool for Cutting Copper Tube
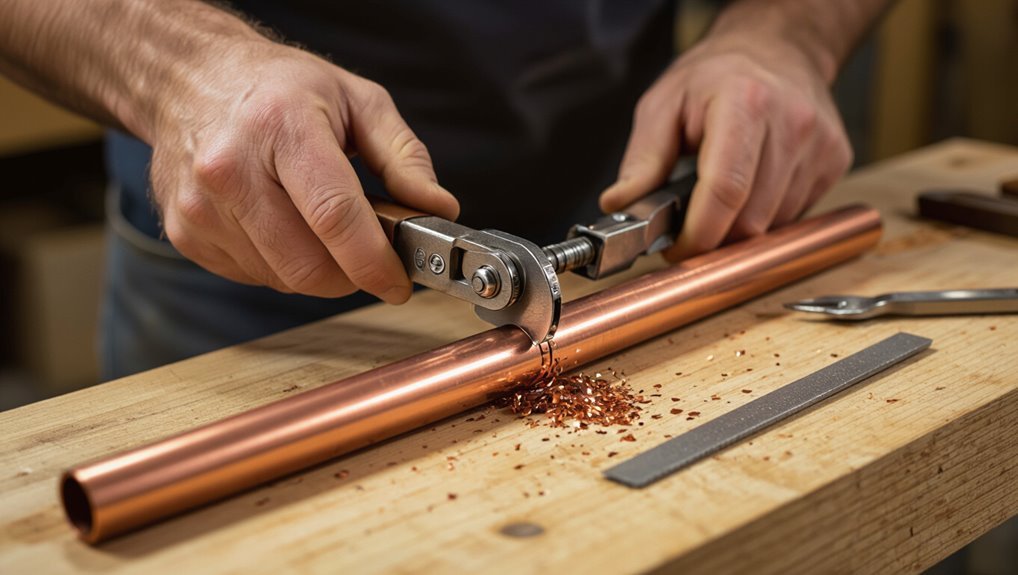
Selecting the right cutting tool depends on tube size, access, and the desired finish.
The text compares tubing cutters, hacksaws, and rotary tools, explains when each is most appropriate, and highlights the benefits of purpose-built copper tube cutters.
It also notes recommended blade and wheel types for clean, burr-free cuts.
Comparing cutting tools
Compare the available cutting tools by matching their strengths to the job’s requirements: speed, edge quality, tube diameter, access space, and operator skill. A concise comparison helps select the right method for how to cut copper tube without overcutting or deforming it.
| Attribute | Tool fit |
|---|---|
| Speed | High vs controlled |
| Clean edge | Excellent vs fair |
| Access | Tight vs open |
When to use a tubing cutter vs hacksaw vs rotary tool
Having matched tool strengths to job demands, the next decision is which specific cutter to use for a given copper tube task.
For straight, accessible runs and precise, burr‑free ends, choose a tubing cutter.
For rough cuts, occasional jobs, or very large diameters, a hacksaw suffices.
Use a rotary tool for tight spots, trim work, or when speed and contouring outweigh finish quality.
Advantages of specialized copper tube cutters
While general-purpose cutters can handle occasional work, specialized copper tube cutters deliver cleaner, faster, and more consistent results tailored to tubing tasks.
They maintain proper alignment, minimize deformation, and produce burr-free ends that simplify fitting and soldering.
Ergonomic designs reduce hand fatigue during repetitive jobs, and integrated features like reamers and stop collars increase repeatability and job-site efficiency compared with improvised tools.
Recommended blade and wheel types
Selecting the right blade or cutting wheel depends on tube diameter, wall thickness, and the desired finish: small-diameter or thin-walled copper favors sharp, fine-toothed rotary blades or carbide-tipped wheels for clean cuts with minimal deformation, while thicker or work-hardened tubing benefits from abrasive or reinforced diamond-grit wheels that cut quickly without excessive torque.
Use 0.8–1.2 mm tooth pitch for saw blades; choose 36–80 grit for wheels.
Essential Safety Gear and Preparation
Before cutting, the article notes that appropriate personal protective equipment—gloves, eye protection, and a mask—reduces injury and inhalation risks.
The workspace should be cleared, well-lit, and the tube firmly secured to prevent movement during cutting.
Accurate measuring and clear marking guarantee clean, correctly sized cuts and minimize rework.
Personal protective equipment (gloves, eye protection, mask)
Every person handling copper tube cutting should wear appropriate personal protective equipment: cut-resistant gloves to protect hands from sharp edges, safety glasses or goggles to shield eyes from metal shavings, and a dust mask if filing or sanding produces fine particles.
Gloves must fit well for dexterity; eyewear should be impact-rated. Replace damaged PPE and follow manufacturer care and disposal guidelines to maintain protection.
Preparing the workspace and securing the tube
A clear, well-lit work area with a stable surface and adequate ventilation reduces mistakes and hazards when cutting copper tube.
The workpiece should be clamped squarely in a bench vise or tubing holder with protective jaws to prevent marring.
Remove nearby flammable materials, keep tools organized, and guarantee discard of swarf in a closed container.
Maintain unobstructed access to safety gear.
Measuring and marking best practices
When preparing to measure and mark copper tube, the technician should don eye protection, gloves, and hearing protection, and confirm good lighting to maintain accuracy and safety.
Use a reliable tape measure or caliper, mark with a fine-tip permanent marker, and allow layout for fittings. Double-check measurements, scribe cut lines for visibility, and clamp securely before cutting to prevent movement and guarantee clean ends.
Step-by-Step Guide to Cutting Copper Tube Cleanly
The following step‑by‑step guide explains how to set up and align cutting tools, choose the right method for the situation, and finish the cut for square ends.
It covers tube cutter technique and pressure control, hacksaw or reciprocating saw stroke patterns and blade selection, and using rotary or compact pipe cutters in tight spaces.
Final steps describe deburring and squaring to guarantee a clean, accurate joint.
Setting up and aligning the tool
Begin by inspecting the cutting tool and tube to confirm the cutter, guides, and housing are clean, undamaged, and free of burrs or grit; proper setup prevents misalignment and poor cuts.
Position the tube squarely in the cutter’s rollers, align the cutting wheel with the designated mark, tighten just enough to hold without deforming, and verify rotation clearance and stable support before proceeding.
Cutting with a tube cutter: technique and pressure control
Rotate the cutter steadily around the tube while applying measured incremental pressure so the wheel scores evenly without pinching or crushing the copper.
After each full turn, tighten slightly, maintaining alignment and inspecting the score.
Continue until the tube separates with a clean, controlled snap.
Deburr the inside edge with a reamer, then verify roundness and remove any remaining burs before fitting.
Cutting with a hacksaw or reciprocating saw: strokes and blade choice
When a tube cutter is impractical—such as with oversized pipe, limited access, or damaged cutters—cutting by hand or with a reciprocating saw becomes the preferred method.
Use a fine-tooth bi-metal blade (18–24 TPI) for clean cuts. Employ steady, even strokes; let the tool do the work.
Secure tubing, mark cut, deburr after cutting to restore a square, smooth edge.
Using a rotary tool or pipe cutter for tight spaces
For tight or confined areas where a standard tube cutter or saw won’t fit, a rotary tool with a cutting wheel or a compact mini pipe cutter provides precise, controlled cuts without disturbing nearby fittings.
The operator secures the tube, uses steady, light passes with the rotary wheel or rotates the mini cutter uniformly, monitors alignment, and pauses to clear debris and prevent overheating.
Finishing the cut to ensure square ends
Although the cut may look complete, ensuring square, burr-free ends requires a few precise finishing steps:
Deburr inside and outside with a flat file or dedicated deburring tool, rotating evenly.
Square the endface by holding the tube against a flat surface and refinishing with a file or sandpaper wrapped on a block.
Clean filings and recheck with a square; repeat until perfectly perpendicular and smooth.
Deburring, Reaming, and Smoothing the Cut Edge
Proper deburring and reaming prevent leaks and maintain smooth flow by removing sharp edges and internal burrs that can interfere with fittings and restrict water passage.
Common tools include a handheld deburring tool, a ratcheting reamer, and a fine file or emery cloth for final smoothing.
The recommended technique is to remove external burrs, ream the inside with a turning motion, and then inspect the cut for remaining burrs or squash marks before assembly.
Why deburring and reaming matter for fittings and flow
Deburring and reaming remove the sharp burrs and uneven edges left by cutting tools, ensuring fittings seat fully and seals engage without obstruction.
Properly finished ends prevent leaks, reduce turbulence and particulate generation inside the line, and maintain consistent flow rates.
They also ease insertion, prevent seal damage, and prolong system life by eliminating stress concentrations that can initiate corrosion or mechanical failure.
Tools for deburring
Having cleanly cut ends is only half the job; the right tools finish the work by removing burrs, sizing the bore, and smoothing the outside edge to guarantee reliable joints and flow.
Common deburring tools include:
- Hand reamers for inside burr removal and slight sizing.
- Rotary deburring wheels for external edges.
- Tube deburring inserts for speed and consistency.
- Swiss files for fine edge finishing.
Step-by-step deburring and inside reaming technique
Begin the process by securing the cut tube in a vise or fixture to prevent movement.
Rotate a deburring tool around the outer edge to remove sharp lips.
Insert an internal reamer and turn clockwise to shave the bore, repeating until smooth.
Finish with a microfile or emery cloth for chamfered edges.
Clean swarf from the tube before fitting or soldering.
Checking for burrs and squash marks
After reaming and smoothing the cut edge, the tube should be inspected for remaining burrs and any squash marks caused by the cutter or vise.
Visually and by touch, run a fingertip around inner and outer edges to detect fragments or deformations.
Light burrs require fine file or stone; squash marks that affect fit demand recut or minor reshaping with a file to guarantee sealing and proper joint assembly.
Common Problems and How to Fix Them
Common issues when cutting copper tube include distorted or crushed ends, uneven or angled cuts, and metal shavings that can contaminate the system.
Each problem has straightforward causes—improper clamping or blade selection, misalignment, and inadequate cleanup—and corresponding remedies to restore fit and function.
The following section outlines simple prevention steps and repair techniques for each scenario.
Distorted or crushed tube ends: causes and remedies
Crushed or distorted copper tube ends occur when cutting tools grip too tightly, blades wander, or the tube is unsupported, producing deformed edges that prevent proper fitting and sealing.
Remedies include loosening the cutter, using a proper tube cutter with smooth rotation, supporting the tube near the cut, replacing damaged sections, and filing minor deformations with a fine file or rotary deburring tool for a true mating surface.
Uneven or angled cuts: how to correct and prevent
When a cut is uneven or angled, the tube will not seat properly in fittings and can leak or stress joints; correcting the problem requires identifying whether the cause is poor tool alignment, a dull blade, lateral movement during cutting, or incorrect tube support.
To fix, square the cutter, replace or sharpen blades, clamp the tube, stabilize with a vice or guide, and re-cut or file the end true.
Metal shavings and contamination: cleanup tips
Brush away metal shavings immediately after cutting to prevent debris from entering fittings, clogging valves, or abrading seals.
Use a soft brush and compressed air to remove particles, then wipe with a lint-free cloth.
Inspect interiors with a flashlight. Flush lines where possible and magnetically capture ferrous swarf.
Wear gloves and eye protection; dispose of shavings responsibly to avoid contamination.
Cutting Different Sizes and Types of Copper Tube
Different copper tube types and wall thicknesses require distinct cutting approaches and tools.
Soft (annealed) tube is more prone to deformation, while hard tube demands sharper blades or more robust cutters.
Coatings or insulation require protection or removal to prevent damage and guarantee a clean cut.
Soft vs hard (annealed) copper tube: differences in cutting
Cutting copper requires recognition of whether the tube is soft (annealed) or hard, because the metal’s temper affects cutter choice, blade sharpness, and the risk of deforming the tube.
Soft copper crushes easily, so light pressure, sharp tubing cutters, and deburring are essential.
Hard (drawn) copper demands more force, robust cutters or saws, slower feeds and frequent blade inspection to prevent chipping.
Cutting thin-walled vs thick-walled tubing
When working with thin-walled versus thick-walled copper tubing, the wall thickness fundamentally changes cutter selection, feed rate, and deburring technique.
Thin-walled tube favors light cutting action, fine-toothed saws or tube cutters with minimal compression, slow rotation, and delicate deburring to avoid collapse.
Thick-walled tube requires sturdier cutters, higher feed, slower cutting speed, and more aggressive chamfering to remove burrs and guarantee fit.
Considerations for copper pipe with coating or insulation
After addressing wall-thickness differences and tool selection, attention must shift to copper pipe that carries coatings, lacquers, or insulation, since these layers affect cutting technique and safety.
Remove combustible or fibrous insulation first; score painted or lacquered finishes to prevent flaking.
Use blades or cutters suited to the added thickness, control burrs, and contain debris.
Wear respiratory and eye protection; dispose contaminated waste per regulations.
Tools Maintenance and Care
Proper maintenance of cutters and blades guarantees clean, consistent cuts and extends tool life.
Routine sharpening, appropriate lubrication, and dry, organized storage prevent corrosion and wear.
Worn or damaged components should be replaced promptly, and whole tools upgraded when repairs no longer restore reliable performance.
Keeping cutters and blades sharp
Keep cutters and blades sharp to guarantee clean, square cuts and extend tool life.
Regular inspection identifies nicks, burrs, and dull edges. Replace or resurface cutting wheels and blades when performance degrades.
Use appropriate sharpening stones or grinding wheels at correct angles. Balance speed with light pressure to avoid overheating.
Document maintenance intervals and record parts replaced for consistent, reliable cutting results.
Lubrication and storage tips
Lubricate moving parts and lightly oil cutting edges to reduce friction, prevent corrosion, and guarantee smooth operation between uses.
After cleaning chips and debris, apply a light machine oil sparingly, wipe excess, and cycle mechanisms.
Store tools in a dry, sealed case or hang to avoid moisture and impact.
Include silica packs for humidity control and label storage locations for easy retrieval.
When to replace parts or buy new tools
When wear begins to affect cutting accuracy or safety, components should be inspected and replaced rather than relied on indefinitely.
Blades, rollers, and guide bearings showing nicks, burrs, or wobble reduce cut quality.
Replace consumables on schedule; recalibrate adjustable tools after part changes.
Invest in new cutters when repairs cost more than replacement or performance is compromised, prioritizing safety and consistent results.
Time-Saving Pro Tips and Best Practices
A set of time-saving practices transforms cutting from a slow task into a consistent, efficient process.
Marking, clamping, and using guides guarantee repeatable cuts while techniques that prevent rework during soldering or fittings keep installations right the first time.
A quick pre-cut checklist ties these steps together, reducing mistakes and wasted time.
Marking, clamping, and using guides for repeatable cuts
Marking, clamping, and using guides turn one-off cuts into a predictable workflow that saves time and reduces rework.
The technician aligns marks, secures the tube, and repeats measured stops to guarantee consistent lengths and square ends.
Jigs and stop blocks cut setup time; clear marking minimizes errors.
- Use permanent marker
- Employ clamp with padding
- Mount adjustable stop
- Verify alignment before cutting
Techniques to avoid rework during soldering or fittings
Plan solder joints and fittings with deliberate sequencing and proper preparation to minimize callbacks and wasted material.
Clean tube ends, remove burrs, and guarantee mating parts are dry and degreased. Use correct flux amount and even heat to prevent cold joints.
Support assemblies to avoid movement during cooling. Verify fit tolerances and test alignment before soldering to reduce rework and leaks.
Quick checklist before making the cut
Before any blade touches the copper, the installer runs a concise pre-cut checklist: confirm tube material and diameter, measure and mark cut locations with a single clear line, inspect for existing corrosion or deformities, select the correct cutter or saw blade, clamp or support the tube to prevent flexing, and guarantee personal protection and a clean work area.
Then verify access, plan chip containment, set cut depth, and confirm alignment.
Recommended Tools and Accessories to Buy
A concise starter kit for cutting copper tube typically includes a quality tube cutter, deburring tool, tape measure, and marker to guarantee clean, accurate cuts.
For professionals and frequent users, upgraded options like ratcheting cutters, tubing shears, and a compact vise improve speed and repeatability.
Accessories such as replacement cutting wheels and a deburring brush round out a practical toolkit.
Essential starter kit for cutting copper tube
Because clean cuts depend on the right gear, assembling a compact starter kit saves time and prevents common mistakes.
The kit should prioritize accuracy, safety, and deburring for novice to occasional users. Essential items include a quality tube cutter, a fine file or deburring tool, measuring and marking tools, and safety gear to protect eyes and hands.
- Tube cutter
- Deburring tool/file
- Tape measure/marker
- Safety goggles/gloves
Upgrades for professionals and frequent users
When moving beyond a basic starter kit, professionals and frequent users will benefit from more durable, precise, and faster tools that reduce cycle time and improve joint quality.
Recommended upgrades include ratcheting tubing cutters, high-quality deburring tools, compact hydraulic or battery-powered pipe cutters, adjustable flaring tools, tubing benders, calibration mandrels, and durable brushes.
Invest in hardened cutting wheels, spare blades, and a portable workstand for efficiency and consistency.
Visual Guide and Reference Images
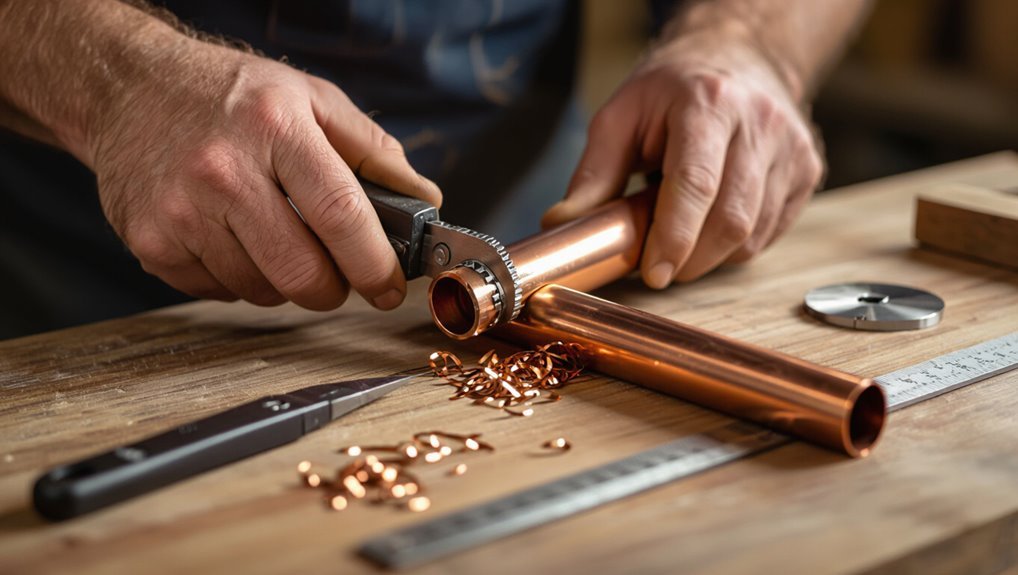
Refer to clear, labeled images that show each step of cutting copper tube: mark, clamp, score, cut, deburr, and inspect.
Include close-ups of hand positions, tool alignment, and tube rotation.
Show before-and-after edges, common mistakes, and proper burr removal.
Provide scale references and callouts for safe clearances.
Use consistent lighting and neutral background for reproducible comparison.
Conclusion
Cutting copper tube cleanly is straightforward with proper tools and technique. Studies show professional plumbers waste up to 15% more materials when using improper cutters, underscoring the value of the right method. By choosing an appropriate cutter, wearing safety gear, deburring carefully, and maintaining tools, users minimize leaks and rework. Consistent practice and simple pro tips—proper clamping, slow rotation, and regular blade replacement—yield straight, burr-free cuts and faster, more reliable installations.