How to Cut a Sprinkler Riser Safely: Step-by-Step Guide for DIY Repair
To safely cut a sprinkler riser, first shut off the zone and relieve any pressure. Next, expose and mark the riser before selecting the appropriate cutting tool: use a ratcheting cutter or hacksaw for PVC, and a sharp tubing cutter or blade for soft polyethylene. Ensure you support the material while cutting, deburr and clean the edges, then fit matching couplings with sealant and test for leaks. Always wear safety gear and follow tool precautions. For detailed, step-by-step instructions, continue reading.
How to Cut a Sprinkler Riser Safely: Quick Overview
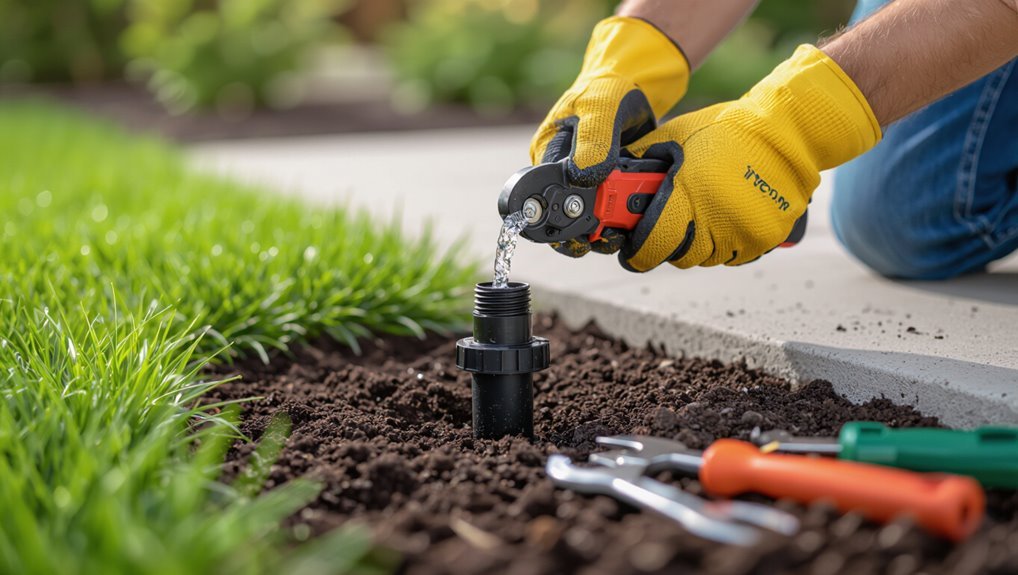
A sprinkler riser is the vertical pipe that connects underground irrigation lines to aboveground sprinkler heads. It may need cutting for replacement, height adjustment, or to remove damaged sections.
For safety, cutting should be done only after shutting off and depressurizing the irrigation zone and wearing gloves and eye protection.
When done correctly, using the proper cutter or saw and making a clean, square cut minimizes risk and guarantees a reliable reconnection.
What a sprinkler riser is and why you might need to cut it
Sprinkler risers are short vertical pipes that connect underground irrigation lines to aboveground sprinkler heads, providing water delivery and height adjustment for proper spray coverage.
A riser may require cutting when replacing damaged heads, adjusting height for new landscaping, fixing leaks, or modifying coverage.
Understanding how to cut sprinkler riser correctly helps avoid leaks, maintain pressure, and guarantee proper alignment with sprinkler heads.
Quick safety-first answer: when and how to cut with minimal risk
Cutting a riser should only be attempted after shutting off the irrigation supply and relieving pressure—this prevents water damage and reduces injury risk.
Then confirm no electrical hazards, wear gloves and eye protection, and use a sharp PVC or tubing cutter sized to the riser.
Mark the cut, support the pipe, make a single smooth cut, deburr edges, and cap or fit replacement immediately to avoid leaks.
Tools and Materials Needed
The section lists the essential tools for cutting a sprinkler riser—pipe cutter or hacksaw, utility knife, pruning shears and an adjustable wrench—along with protective gear such as gloves, safety glasses and knee pads.
It also specifies common replacement parts and supplies to keep on hand, including couplings, riser nipples, Teflon tape and PVC primer/solvent.
Recommended tool alternatives and guidance on when to use them are provided to match different pipe materials and site conditions.
Essential tools (pipe cutter, hacksaw, utility knife, pruning shears, adjustable wrench)
Gathering the right tools guarantees a clean, safe riser cut and minimizes damage to pipe fittings.
A compact pipe cutter gives square, burr-free cuts on PVC or copper. A fine-tooth hacksaw serves larger diameters or tight spaces. A utility knife scores tape and thin tubing.
Pruning shears trim vegetation around the riser. An adjustable wrench secures and loosens fittings during replacement.
Safety gear (gloves, safety glasses, knee pads)
Personal protective equipment is essential when working on a sprinkler riser.
Gloves protect hands from sharp edges, dirt, and chemical exposure. Safety glasses shield eyes from debris, pressurized spray, and solvent splashes.
Knee pads provide cushioning and prevent strain during prolonged kneeling. Each item should fit properly, be in good condition, and be worn throughout cutting, handling, and reconnecting to minimize injury.
Replacement parts and fittings to have on hand (couplings, riser nipples, Teflon tape, PVC primer/solvent)
Several essential replacement parts and consumables should be kept on hand to complete a sprinkler riser repair without delay.
Stock PVC couplings and threaded riser nipples in common sizes, a variety of male/female adapters, Teflon tape for threaded seals, and PVC primer plus solvent cement for permanent glued joints.
Small spare sprinkler heads and O-rings are also recommended for quick fixes.
Recommended tool alternatives and when to use them
Select tools that match the job and site constraints: a small handsaw or tubing cutter works for clean cuts on PVC risers in tight spaces, while a reciprocating saw or PVC pipe cutter speeds removal when access and power are available; similarly, use adjustable wrenches or channel-lock pliers for light threaded connections, but switch to a strap wrench or pipe wrench when fittings are stuck to avoid rounding.
- Use tubing cutter for neat, burr-free cuts
- Choose reciprocating saw for fast removal
- Prefer strap wrench to protect plastic fittings
Preparing the Site Before Cutting
Before any cutting begins, the water supply to the affected irrigation zone should be shut off and residual pressure safely relieved and drained.
The riser must be located and exposed with care to avoid damaging adjacent components, and the exact cut line clearly marked.
Finally, the material of the riser (PVC, polyethylene, or metal) should be identified so the correct cutting method and tools are selected.
Shutting off the water supply to the irrigation zone
Once the area is prepared, the irrigation zone’s water supply must be shut off to prevent pressure and flow during the cut.
Locate the zone valve at the controller or manifold, switch it to OFF, or close the manual gate valve supplying that zone.
Confirm the valve is fully closed by attempting to run the zone from the controller and observing no water activation.
Relieving pressure and draining the line safely
Relieve system pressure and drain the riser to prevent sudden spray or water hammer when cutting: open the nearest manual bleeder or zone drain, partially open a nearby sprinkler head to vent trapped water, and crack the main shutoff slightly if needed to allow air in and accelerate draining.
Verify flow has stopped, repeat venting until dry, and collect residual water with a rag or small container before cutting.
Locating and exposing the riser without damaging nearby components
Locate the riser by tracing the visible sprinkler heads back to their nearest lateral line, then follow the line to the vertical riser point, noting proximity to valves, wiring, and irrigation fittings.
Clear surrounding soil gently with hand tools, exposing only necessary pipe length.
Use a probe to detect buried utilities, avoid heavy digging near fittings, and keep displaced dirt aside for backfill.
Marking the cut line and assessing the riser material (PVC, polyethylene, metal)
Measure and mark a clear cut line around the riser at the chosen height. Then identify the material—PVC, polyethylene, or metal—by appearance and feel to determine cutting tools and safety precautions.
Note diameter and wall thickness, check for fittings or adhesive joints near the line, and look for corrosion or brittleness.
Choose the correct cutter, blade, and PPE accordingly before proceeding.
Step-by-Step Procedure to Cut a Sprinkler Riser
The procedure begins with confirming the water supply is shut off and any residual pressure has been released before handling the riser.
Next, the riser and adjacent piping are secured and the appropriate cutting method is chosen—pipe cutter or hacksaw for PVC, and shears or a fine-tooth blade for polyethylene or other soft plastics.
Finally, cut edges are de-burred, cleaned, and prepared for fittings or caps to guarantee a watertight, safe reassembly.
Step 1 Confirm water is off and pressure released
Before any cutting begins, guarantee the irrigation system is fully shut off and residual pressure is relieved to prevent sudden water discharge.
Verify the main shutoff and individual zone valves are closed. Open a nearby manual drain or sprinkler head to bleed trapped water and confirm no flow.
Use pressure gauges or feel lines for pressure; proceed only when lines are fully depressurized.
Step 2 Secure the riser and surrounding piping
Clamp the riser firmly and support adjacent piping to prevent movement or stress during cutting.
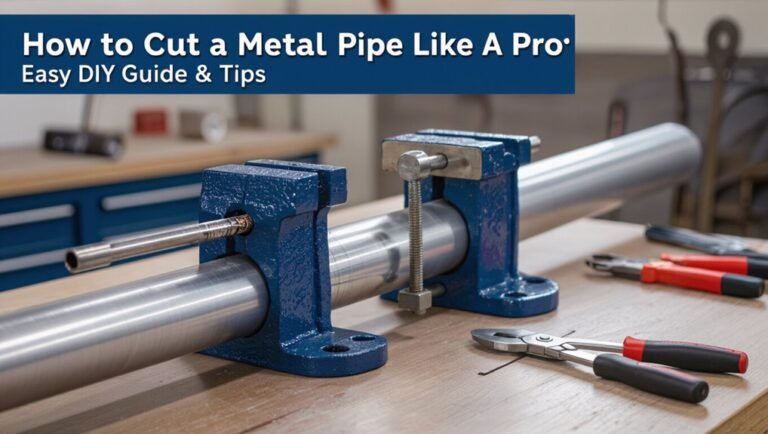
Use adjustable pipe clamps or a bench vise with soft jaws to avoid crushing.
Add temporary supports or straps to nearby lines and secure fittings to prevent torque.
Verify stability by gently applying pressure; nothing should shift.
Ascertain access for tools and maintain a clear workspace before proceeding.
Step 3 Cut techniques for PVC risers (pipe cutter vs hacksaw)
Choose the cutting method based on riser diameter, available tools, and the desired finish: a ratcheting PVC pipe cutter delivers fast, clean cuts on 1/2″–1″ risers with minimal burrs and no sawing, while a fine-tooth hacksaw suits larger diameters or when a cutter won’t fit but requires steady, square strokes and subsequent deburring.
After cutting, remove burrs with a deburring tool or utility knife and verify a square face.
Step 4 Cut techniques for polyethylene or soft plastic risers
Cutting polyethylene or other soft-plastic sprinkler risers requires a gentler, controlled approach than rigid PVC: the material deforms easily, so the operator should stabilize the riser, mark the cut clearly, and use a sharp blade or tubing cutter designed for soft plastics to slice with steady pressure and minimal twisting.
Small incremental passes prevent crushing; support beneath the cut avoids pinching. Clean, straight cuts ease reconnection.
Step 5 De-burring, cleaning, and preparing cut edges
After making a controlled, straight slice, attention shifts to preparing the new edges for a reliable seal and smooth flow.
Burrs are removed with a deburring tool or fine file, followed by light sanding to round sharp edges.
Debris and plastic dust are wiped away with a clean, lint-free cloth and solvent if needed.
Inspect for uniformity and true circularity before proceeding.
Step 6 Installing replacement fittings or riser extension
Begin by confirming that the riser ends are clean, round, and free of burrs.
Select matching fittings or an extension of the correct material and size.
Apply thread sealant or primer and solvent for PVC as appropriate.
Seat fittings fully, align orientation, and tighten to manufacturer torque recommendations.
Support the riser to prevent stress at joints and verify proper alignment before restoring system pressure.
Step 7 Re-pressurizing and checking for leaks
With the replacement fitting or riser extension securely seated and supported, the system can be slowly brought back up to operating pressure to verify integrity.
Open the main valve gradually, watch for immediate leaks at joints, and inspect the repaired riser and nearby fittings.
If no leaks appear, run a brief cycle to confirm performance.
Tighten or reseat fittings if any seepage occurs.
Material-Specific Instructions and Variations
Different riser materials require distinct cutting techniques and joining methods to guarantee a reliable repair.
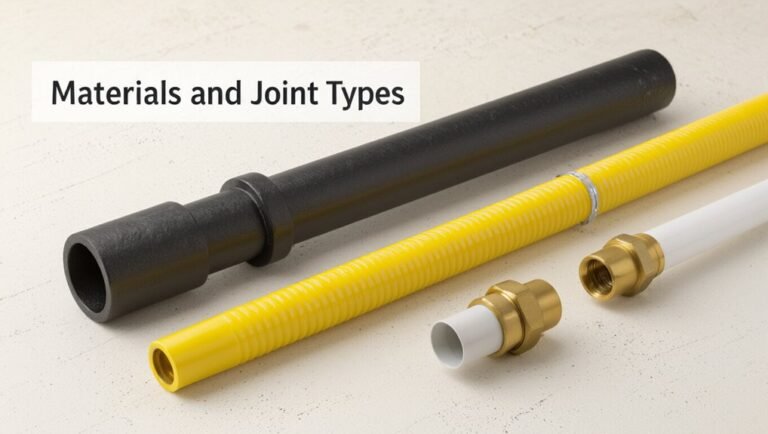
For PVC, best practices include clean cuts, chamfering, and proper solvent welding; for polyethylene, insert fittings or clamp-style couplers are commonly used.
Metal risers may need threading, soldering, or full replacement depending on corrosion and damage.
Cutting PVC risers: best practices and solvent welding tips
When cutting PVC sprinkler risers, prioritize clean, square cuts and secure, properly prepared joints to guarantee a leak-free solvent weld.
Deburr and chamfer edges, dry-fit components, then apply primer where required.
Use compatible PVC cement, rotate fittings during assembly for even coverage, and hold per manufacturer cure time.
Test under low pressure first, then monitor for leaks before full operation.
Cutting polyethylene risers: insert fittings and clamp methods
Cut polyethylene risers squarely and remove burrs before inserting fittings to guarantee a tight mechanical seal; unlike solvent-welded PVC, polyethylene systems rely on properly sized insert fittings and secure clamps (or compression sleeves) to prevent leaks.
Measure depth, mark pipe, push insert fully, and align collar. Use stainless-steel or approved clamps, tighten evenly, then pressure-test for leaks.
Replace damaged sections as needed.
Cutting metal risers: threading, soldering, and replacement considerations
Polyethylene risers require insert fittings and clamps for a reliable seal; metal risers, by contrast, demand techniques suited to their thickness and threading capabilities.
Cutting requires a hacksaw or pipe cutter, deburring, and measuring for proper thread length.
Threading taps or die sets restore threads; soldering or brazing seals joints on copper, while corroded sections usually warrant full replacement to guarantee durability and leak-free operation.
Common Problems During or After Cutting and How to Fix Them
Common problems after cutting a sprinkler riser include leaks at the cut joint, damaged threads or fittings, and cracked or brittle pipe that may require full replacement.
The text will outline step-by-step troubleshooting for leaks, repair options for stripped threads or broken fittings, and criteria for when a riser should be replaced rather than repaired.
It will also cover immediate responses for unexpected pressurized water to minimize damage and guarantee safety.
Leaks at the cut joint and step-by-step troubleshooting
Address leaks at the cut joint immediately to prevent water loss and soil erosion around the riser.
Inspect the cut for burrs, misalignment, or insufficient overlap.
Shut off water, dry the area, and re-cut or deburr as needed.
Re-seat fittings with appropriate thread tape or a gasket, tighten to spec, then pressure-test.
If leaking persists, isolate and replace the damaged section.
Damaged threads or fittings and repair options
If leaks persist after re-seating or replacing the cut joint, damaged threads or fittings are often the underlying cause and require focused repair to restore a watertight connection.
Inspect threads for cross-threading, corrosion, or stripped material.
Options include replacing the fitting, using a threaded repair coupling, applying appropriate sealant tape, or installing a short replacement riser section with compatible connectors to guarantee proper engagement.
Cracked riser or brittle PVC when to replace the whole riser
When a riser shows visible cracks or the PVC feels brittle and flakes under light pressure, the component should be replaced rather than patched. This is because those conditions indicate structural failure that will recur under pressure and weathering.
Replacement prevents leaks, reduces future labor, and restores system integrity.
Inspect adjacent fittings; replace any discolored or embrittled sections and use compatible PVC schedule and proper solvent welds for durability.
Unexpected pressurized water emergency responses
Replacing a cracked or brittle riser reduces the chance of failure, but cutting into a sprinkler line can still trigger sudden pressurized outflow or hidden leaks that require immediate action.
The operator should shut the main water valve, depressurize lines, towel or soil-dam leaks, and cap ends.
For persistent pressure or unclear damage, stop work and call a professional plumber or irrigation technician immediately.
Safety Hazards and How to Avoid Them
Before cutting a sprinkler riser, attention must be given to electrical hazards and buried utility checks to prevent strikes or electrocution.
Proper tool handling, personal protective equipment, and maintenance reduce the risk of cuts, eye injuries, and amputations.
Additionally, environmental concerns—such as soil contamination and correct disposal of removed parts—should be addressed to avoid pollution and regulatory issues.
Electrical hazards and buried utility checks
Any excavation near a sprinkler riser carries the risk of striking buried electrical lines or conduits, which can cause shock, fire, or service disruption.
Before cutting, contact local utility marking services to locate mains, cables, and irrigation wiring.
Hand-dig cautiously within marked zones, maintain safe distance from identified utilities, and halt work if unmarked lines are suspected; consult a licensed electrician or utility provider immediately.
Tool-related injuries and prevention
After verifying utility locations and clearing the work area, attention shifts to the tools used to cut a sprinkler riser, since improper use can cause lacerations, punctures, eye injuries, and amputations.
Use sharp, well-maintained tools; secure the riser; wear cut-resistant gloves, eye protection, and hearing protection; follow manufacturer instructions; disconnect power for powered tools; keep bystanders clear; inspect blades and cords before use.
Environmental concerns (soil contamination, proper disposal of removed parts)
When soil around a sprinkler riser shows oil stains, PVC fragments, or corroded metal residues, there is a risk of contamination that can harm plants, leach into groundwater, or attract regulatory attention.
Inspect and remove polluted soil, bag waste separately, and contact local hazardous-waste services for oil-soaked material.
Recycle clean metal and PVC per local rules.
Document actions to demonstrate compliance.
Preventive Maintenance to Reduce Future Cuts
A regular inspection schedule for risers and sprinkler heads helps identify wear and misalignment before cuts become necessary.
Protective measures—such as marking riser locations, using sleeves, and winterizing to prevent freezing—reduce accidental damage from lawn equipment and cold.
Strategic upgrades like flexible risers and durable protective sleeves further minimize the need for future repairs.
Routine inspection schedule for risers and sprinkler heads
Monthly inspections provide the most consistent balance between early problem detection and manageable labor for most irrigation systems.
Technicians should check riser alignment, head operation, visible leaks, and debris buildup monthly; perform a more thorough seasonal review quarterly to assess wear, pressure, and valve function.
Document findings, schedule repairs promptly, and adjust inspection frequency after storms or landscape changes to prevent future failures.
How to protect risers from lawn equipment and freezing
Protect risers by creating clear physical and seasonal protections that reduce accidental cuts and freeze damage.
Mark riser locations with visible flags or low-profile stakes, trim grass around heads, and keep mower blades raised.
Winterize by draining lines, shutting valves, and insulating aboveground risers with removable covers.
Schedule inspections after landscaping or cold snaps to catch damage early and prevent costly repairs.
Upgrades that minimize future repairs (flexible risers, protective sleeves)
When homeowners install flexible risers and protective sleeves, future repairs from accidental cuts and ground movement are greatly reduced.
Flexible risers absorb soil shifts and mower strikes, preventing brittle PVC breaks. Protective sleeves shield fittings from blade contact and abrasion.
Both upgrades simplify repairs when needed and extend system lifespan. Installations require proper fittings and slight extra depth to guarantee effectiveness and accessibility.
When to Call a Professional
If leaks are extensive, involve the mainline, or require complex fittings, a homeowner should recognize the repair may be beyond typical DIY skills.
A professional irrigation technician can assess the system, perform reliable repairs or replacements, and provide guarantees on work.
When weighing the decision, compare parts and tool costs plus time against professional labor rates and the risk of causing further damage.
Signs the repair is beyond DIY (complex leaks, mainline involvement)
Although many riser issues are straightforward, some signs clearly indicate the job exceeds typical DIY skill and tools.
Persistent dampness despite repairs, multiple leaking joints, unstable water pressure, mainline or valve box involvement, deep or buried pipe damage, and visible corrosion or shearing require professional assessment.
Attempting these can worsen damage, cause water waste, or violate local codes; call a licensed irrigation specialist.
What to expect from a professional irrigation repair service
Because sprinkler systems can affect landscaping, water bills, and property structures, homeowners should expect a professional irrigation repair service to provide a clear diagnosis, a scope of work, and an estimate before any repairs begin.
Technicians should verify system pressure, locate hidden or underground damage, recommend reliable parts, obtain permits if needed, and offer a warranty on labor and components.
Cost considerations: DIY vs professional repair
Weigh costs carefully when deciding between a DIY sprinkler riser repair and hiring a professional: small fixes like replacing a visible riser or tightening fittings may only require basic tools and a few dollars for parts, while concealed breaks, high-pressure issues, or systems tied into irrigation controllers and backflow devices can incur significant time, risk, and expense if handled incorrectly.
| DIY | Professional |
|---|---|
| Parts cost low | Diagnostic fee |
| Time investment | Warranty |
| Risk of error | Higher labor |
| Limited tools | Specialist equipment |
Quick Reference: Do’s and Don’ts for Cutting Sprinkler Risers
A compact checklist of do’s and don’ts helps guarantee safe, efficient cuts on sprinkler risers: follow clear safety steps, verify water is off, and measure accurately before cutting.
Avoid rushing, cutting under pressure, or using damaged tools. Keep cuts square and deburr edges for reliable fittings.
- Do: shut off water and wear PPE
- Don’t: force or rush cuts
- Do: measure twice, cut once
Conclusion
The garden’s quiet machinery, once laid bare, teaches that careful hands and clear plans tame hidden springs. By preparing tools, noting materials, and respecting pressure and wear, the do-it-yourselfer prunes problems without severing life’s green pulse. Each cautious cut is a small act of stewardship, turning potential rupture into renewed flow. When uncertainty gathers like storm clouds, calling a professional is the wiser tide that keeps the landscape whole.