How to Glue PVC Water Pipe: Step-by-Step Guide for a Leak-Proof Bond
To create a strong, leak-proof bond when gluing PVC water pipes, follow these essential steps: Begin by cutting the pipes square, deburring the edges, and dry-fitting the pieces. Clean and prime all surfaces, then apply NSF-rated solvent cement evenly to both the socket and spigot. Insert the pipe fully with a slight twist, hold it in place for the manufacturer’s recommended time, and allow adequate curing before applying pressure. Always wear personal protective equipment (PPE) and ensure proper ventilation. Adhere to local plumbing codes and curing charts for best results. For detailed guidance and troubleshooting tips, continue reading.
What You Need to Know Before Gluing PVC Water Pipe
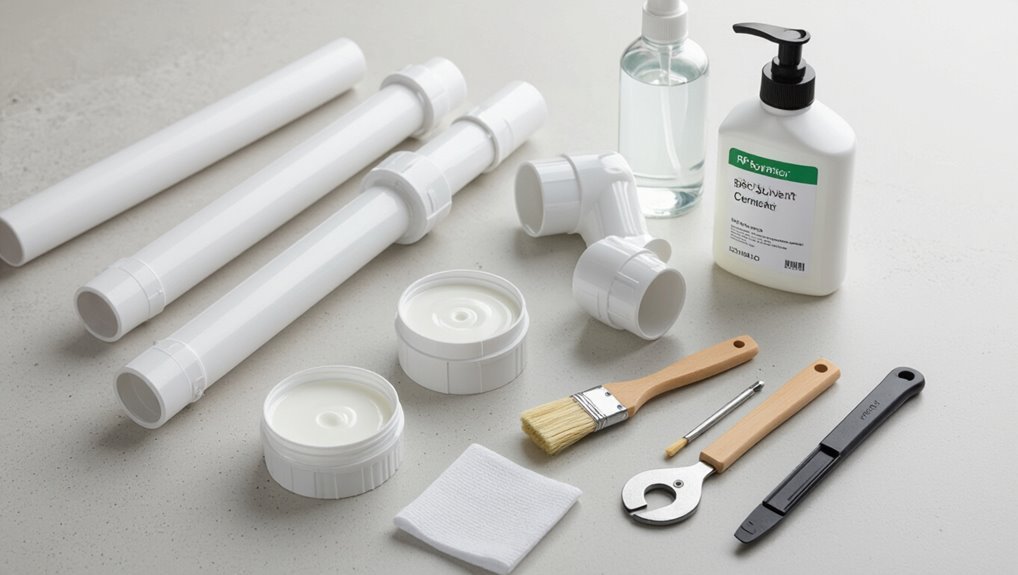
Before starting, the reader should understand when solvent cement is appropriate compared with mechanical fittings or threaded connections and which pipe types and sizes are acceptable for potable water.
Safety considerations and required PPE must be reviewed alongside a concise tools and materials checklist.
Clear knowledge of these points guarantees correct, code-compliant, and safe joins.
When to use PVC solvent cement vs other methods
Choose the attachment method based on pipe material, pressure requirements, and whether the joint must be permanent or removable.
For typical household plumbing, solvent cement offers strong, permanent bonds and is ideal when learning how to glue pvc water pipe.
Mechanical fittings, compression joints, or threaded connections suit temporary, high-pressure, or disassemblable needs.
Match method to code, fluid type, and accessibility for maintenance.
Types and sizes of PVC pipe for water systems
Pipe selection for a water system depends on material, schedule (wall thickness), diameter, and planned application; these factors determine strength, flow capacity, and compatibility with solvent cement.
Common choices include PVC-U for cold potable water, CPVC for hot water, and SCH 40 or SCH 80 schedules for pressure needs.
Nominal diameters range from 1/2″ to several inches; fittings must match pipe type.
Safety precautions and required PPE
Wear appropriate personal protective equipment and guarantee adequate ventilation when preparing and solvent-cementing PVC water pipe, as the solvents emit fumes that can irritate eyes, skin, and lungs and the work involves cutting tools and pressurized systems. The technician should use PPE, monitor air, depressurize lines, and follow label instructions to reduce exposure and injury risk.
| Item | Purpose |
|---|---|
| Gloves | Chemical/abrasion protection |
| Goggles | Eye splash protection |
| Respirator | Fume control |
| Long sleeves | Skin protection |
| Ventilation | Fume dilution |
Tools and materials checklist
A concise kit of tools and properly rated materials is essential before starting any PVC water-piping joint; this prevents interruptions, guarantees reliable bonds, and reduces rework.
- PVC cutter or saw, deburring tool, and measuring tape.
- Clean rags, primer, and PVC solvent cement rated for potable water.
- Clamp or vise for alignment and short waits.
- Marker, gloves, eye protection, and a small brush for applying primer.
Quick Overview: Steps to Glue PVC for a Leak-Proof Joint
A concise, step-by-step summary guides experienced DIYers through preparing, priming, and solvent-welding PVC to guarantee a leak-proof joint.
It highlights pipe and fitting cleaning, correct primer and cement application, and proper alignment with appropriate cure time.
Quick reminders cover pressure testing and common pitfalls to avoid.
Short, step-by-step summary for experienced DIYers
Start by cutting and deburring the pipe squarely. Dry-fit the joint to confirm proper alignment.
Then apply primer followed by PVC cement to the fitting and pipe. Insert with a 1/4-turn, hold for the specified set time, and wipe away excess.
Verify cure time, pressure-test at recommended PSI, secure supports, and note ambient temperature for curing adjustments.
Keep solvent cans sealed.
Preparing Pipes and Fittings for a Reliable Bond
Before applying solvent cement, the workpiece should be checked for cracks, burrs, or debris and squarely cut to the proper length.
Components are dry‑fitted to confirm alignment, then pipe ends and sockets are cleaned and, where required, primed according to the manufacturer’s guidance.
These preparatory steps guarantee a true fit and proper chemical bonding for a lasting, leak‑free joint.
Inspecting pipe ends and fittings for damage or debris
Several visual and tactile checks guarantee pipe ends and fittings are free from damage or debris before gluing.
Inspect for cracks, splits, scoring, or deformities at sockets and spigots.
Remove burrs, flashing, dirt, and grease with a clean cloth and plastic scraper.
Verify chamfers and mating surfaces are intact.
Reject or replace any part showing warping, deep gouges, or contamination that cannot be cleaned.
Measuring, cutting, and deburring PVC pipe
With ends and fittings confirmed clean and undamaged, precise measuring and cutting of PVC pipe guarantees a snug, reliable fit that promotes a strong solvent weld.
Mark cut lines with square, clear measurements. Use a fine-toothed saw, PVC cutter, or miter tool for straight cuts.
Remove burrs and shaving with a deburring tool or utility knife, then chamfer edges slightly to ease insertion and bonding.
Dry-fitting components to ensure correct alignment
Test-fit each pipe and fitting in sequence to verify alignment, orientation, and adequate insertion depth before applying primer or cement.
Assemble the system dry to confirm fit, angle, and clearance. Mark relative positions with a pencil or tape for reassembly.
Check threads, chamfers, and socket seats for interference. Guarantee joints sit fully home without forcing components.
Cleaning and priming: when and how to use PVC primer
Before applying solvent cement, surfaces must be cleaned and primed so the PVC will fuse properly: remove dirt, grease, and loose burrs with a clean rag and a deburring tool.
Then use an appropriate purple primer to soften and prepare the pipe exterior and the fitting’s socket interior.
Apply primer evenly, allow brief dwell time, avoid excess pooling, and follow manufacturer cure times before cementing.
Applying PVC Cement: Detailed Step-by-Step Procedure
The procedure for applying PVC cement begins with selecting the correct cement rated for pressure water lines and preparing the joint with primer.
The technician should then apply primer and solvent cement in the proper sequence, insert to the correct depth with a quarter-turn twist, and hold the joint for the specified set time.
Finally, curing time and environmental conditions—including temperature and humidity adjustments—must be observed before the system is pressurized.
Choosing the correct cement for pressure water lines
Selecting the correct PVC cement for pressure water lines is critical because the wrong type can compromise joint strength, cause leaks, or fail under system pressure.
Choose cements labeled for Schedule 40/80 pressure systems and potable water use, matching pipe material (PVC).
Verify cure times, temperature range, and ASTM/NSF certifications.
Use solvent cement formulated for pressure applications rather than general-purpose adhesives.
How to apply primer and solvent cement correctly
Begin by preparing a clean, dry workspace and assembling all necessary tools—primer, PVC solvent cement rated for pressure lines, applicator, deburring tool, and a clean rag—so each step flows without interruption.
Apply primer to pipe exterior and fitting interior until softened. Wipe excess.
Immediately coat both surfaces with solvent cement, ensuring even coverage. Avoid drips and prolonged exposure; work within product pot life.
Joining technique: insertion depth, twist, and hold time
One clear rule governs proper joining: insert the pipe fully to the fitting’s shoulder, apply a 1/8–1/4 turn twist to evenly distribute cement, and hold the assembly steady until initial set.
Seating depth guarantees adequate bonding surface; the brief twist removes air and spreads solvent.
Hold time varies by size and temperature—maintain alignment without movement until the joint resists light manual stress.
Curing time and conditions before pressurizing the system
Although ambient temperature and humidity considerably influence cure rate, the essential guideline is to allow the joint to set long enough for the solvent weld to achieve handling strength and then to continue curing to reach full pressure rating.
Typically wait at least 15–30 minutes for handling, then 24 hours before pressurizing.
Verify manufacturer times; inspect joints for gaps, excess cement, or movement before testing.
Special considerations for cold, hot, or humid environments
Many environmental factors—temperature extremes and high humidity—directly alter PVC cement behavior and joint performance, so installers must adjust preparation, application speed, and cure times accordingly.
In cold, warm glue thickens and requires slower assembly and extended cure; use primer rated for low temperatures.
In heat, solvent evaporates faster—work quickly and allow longer pressure-free cure.
In humidity, surface drying and bond strength vary; follow manufacturer charts.
Testing and Verifying Leak-Proof Joints
After curing, the installer should verify each joint with a pressure test appropriate for residential water lines and monitor for drops over a set interval.
In addition to pressure testing, visual inspection and tactile checks—looking for gaps, misalignment, or soft spots and feeling for moisture—help confirm a proper bond.
If a joint leaks after curing, the recommended steps are to shut off water, relieve pressure, cut out the failed section, re-prepare the pipe ends, and re-glue or replace fittings as needed.
Pressure testing methods for residential water lines
Pressure testing residential PVC water lines verifies joint integrity by subjecting the system to controlled internal pressure and observing for drops or visible leaks. Common methods include hydrostatic testing with water, air testing with gauges and soap solution, and using temporary caps and pressure regulators to isolate sections.
Tests use recommended pressure ranges, hold periods, monitored gauges, and visual inspection for bubbles or moisture to confirm leak-free joints.
Visual and tactile checks for proper bond
Inspectors evaluate bonded PVC joints primarily by visual and tactile checks that reveal incomplete solvent welding, misalignment, or contamination.
They look for continuous solvent fillets around the hub, uniform joint gaps, and smooth mating surfaces.
Tactilely, a solid, immovable fit without soft spots or sliding indicates cure integrity.
Any irregularities prompt reinspection before pressure testing or final commissioning.
What to do if a joint leaks after curing
If a joint shows signs of leakage despite appearing sound by visual and tactile checks, immediate containment and diagnosis are required.
The area should be shut off, dried, and inspected for adhesive gaps, misalignment, or cracked fittings.
Small leaks may be resealed by cutting out the joint and recementing with proper primer and cement; otherwise replace the damaged section and retest under pressure.
Common Problems and How to Fix Them
Common causes of weak or failed PVC joints include improper surface preparation, incorrect primer or cement usage, and curing under stress or moisture.
Repair options range from re-cutting and re-gluing sections to using mechanical couplings or solvent-weld repair kits.
If fittings are cracked, warped, or repeatedly failing, replacing the fitting or the entire pipe section is usually the most reliable solution.
Causes of weak or failed PVC joints
Weak or failed PVC joints most often result from surface contamination, improper solvent-cement application, or incorrect pipe and fitting alignment; each of these issues undermines the chemical bond or creates mechanical stress that can lead to leaks or joint separation.
Additional causes include inadequate primer, expired or mismatched cement, insufficient cure time, thermal cycling, or mechanical loads exceeding joint design, all compromising integrity.
Repair options for failed glue joints
Begin by evaluating the extent and cause of the failure: small leaks or loose bonds from surface contamination often respond to localized re-cleaning and reapplication of primer and solvent cement, while cracked, severely misaligned, or mechanically stressed joints typically require section removal and replacement.
- Clean and dry the joint; remove old cement and debris.
- Re-prime and apply correct solvent cement technique.
- Clamp or support restrained joints during cure.
- Pressure-test after cure; monitor for recurring leaks.
When to replace fittings or sections instead of repairing
When is repair no longer sufficient and replacement becomes necessary?
Persistent leaks, extensive cracks, warped or brittle tubing, corroded metal inserts, repeated joint failures, or fittings near valves and stress points warrant replacement.
If repair attempts fail, solvent-weld evidence is compromised, or matching sizes/materials are unavailable, replace the section or fitting to guarantee integrity, code compliance, and long-term reliability rather than temporary fixes.
Code, Standards, and Best Practices
The discussion turns to applicable plumbing codes and the requirement that solvent cements be approved for potable water systems.
It notes which product certifications to seek (NSF/ANSI listings, local approvals) and recommends specifying tested, labeled cements and primers.
It also emphasizes keeping installation records and labeling joints to demonstrate compliance for inspections and future maintenance.
Plumbing codes and solvent cement approvals for potable water
Compliance with plumbing codes and solvent-cement approvals is essential to confirm glued PVC potable-water systems are safe, durable, and legal.
Installers must follow local plumbing codes, national standards (e.g., ASTM, NSF), and manufacturer instructions.
Approved solvent cements and primers for potable water, correct application, curing times, and pressure ratings confirm compliance.
Inspections and documentation verify installations meet health and safety requirements.
Recommended products and certifications to look for
Having established the regulatory framework and approval requirements for potable PVC solvent-weld systems, attention shifts to selecting products and certifications that demonstrate conformity and reliable performance.
Recommended choices include NSF/ANSI 61-certified cements and primers, ASTM D2564 or D2855 compliance, and manufacturer listings for pipe size/material.
Look for UL listings, third-party test reports, and clear application instructions to guarantee compatibility and durable, code-compliant joints.
Recordkeeping and labeling for plumbing work
Maintain precise records and consistent labeling to confirm traceability, verify materials and methods, and facilitate inspections and future maintenance.
Document job details: installer, date, pipe types, adhesive batch numbers, joint locations, test results and deviations.
Label pipes with service type and installation date.
Retain records per local code and manufacturer recommendations.
Ascertain accessibility of labels and archives for inspections, repairs, and warranty claims.
Time-Saving Tips and Professional Tricks
The section highlights practical strategies for faster, cleaner PVC bonding, starting with batch prepping multiple joints to streamline workflow.
It also covers methods for working in tight spaces and awkward angles, including tool choices and positioning tips.
Emphasis is placed on common installation errors and simple preventive measures to reduce rework.
Batch prepping multiple joints efficiently
Prepare a workspace and organize materials before cutting or applying solvent cement so multiple PVC joints can be assembled without interruption.
Components should be measured, cut, deburred, and dry-fit in logical sets. Label assemblies and line up fittings to maintain sequence.
Apply primer and cement systematically, working one cluster at a time to maximize open working time, minimize waste, and guarantee consistent bond quality.
Techniques for tight spaces and awkward angles
Once batch-prepped assemblies are staged, attention shifts to joints located in confined or awkward positions where standard brushing and alignment techniques falter. The installer uses short applicator tips, angled brushes, and shimmed supports, working methodically to avoid excess cement while maintaining alignment. Slow set adhesives and quick clamps help. Illustrative table:
| Tool | Purpose |
|---|---|
| Angled brush | Reach offset sockets |
| Short tip | Precise solvent placement |
| Shim | Hold alignment |
| Mini clamp | Stabilize during cure |
| Light | Improve visibility |
Preventing common mistakes during installation
Avoiding common installation errors saves time and prevents rework: experienced installers prioritize consistent joint preparation, measured cement application, and proper cure times to guarantee reliable seals.
They double-check pipe alignment, cut squarely, deburr edges, and remove contaminants. Use the correct primer and cement, apply evenly without excess, and allow full set time.
Test under pressure gradually to confirm integrity.
Tools and Product Recommendations
Recommended solvent cements, primers, and applicators are compared for bond strength and cure time to verify reliable PVC water pipe joints.
Essential cutting, deburring, and alignment tools—such as ratchet cutters, deburring tools, chamferers, and alignment clamps—are highlighted for accurate, clean fittings.
Practical product picks and brief usage notes follow to guide proper selection and safe application.
Best solvent cements, primers, and applicators for PVC water pipe
When joining PVC water pipe, selecting the right solvent cement, primer, and applicator directly affects joint strength and longevity; quality products matched to pipe size, pressure rating, and local code guarantee reliable results.
- Use NSF‑approved PVC solvent cement rated for potable water and matching pipe schedule.
- Select purple or clear primer specified by code for proper cleaning and softening.
- Choose applicator sizes (dauber, brush, or bottle) matching pipe diameter.
- Prefer reputable brands with clear cure charts and VOC compliance.
Useful tools for cutting, deburring, and aligning
Cutting, deburring, and aligning PVC water pipe requires a small set of purpose-built tools to guarantee clean ends, proper fit, and leak-free joints.
- Ratchet PVC cutter for straight, burr-free cuts.
- Fine-tooth hacksaw when larger diameters require it.
- Deburring tool or round file to remove burrs and chamfer edges.
- Pipe clamps and alignment fixtures to square joints during solvent application.
Visual Guide and Step Photos
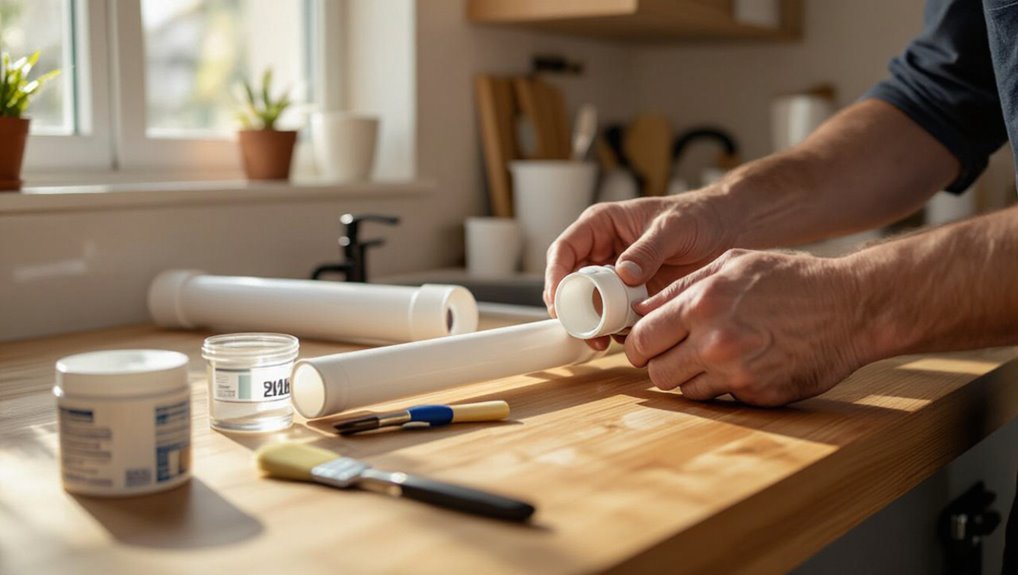
A sequence of clear photos paired with brief captions helps users understand each stage of PVC pipe joining: fitting and marking, deburring, solvent application, assembly, and curing.
Photographs should show hand positions, tool alignment, and solvent amount. Include close-ups of joint faces before and after solvent, timed curing labels, and a final pressure-tested assembly.
Numbered steps improve quick reference and accuracy.
Conclusion
Like a bridge-builder joining two riverbanks, the careful gluer aligns, cleans, and bonds PVC pieces so water may pass safely beneath. Each scrub, primer stroke, and timed press becomes a plank laid true; curing is the arch settling into place. When testing proves watertight, the structure stands—quiet, reliable—its hidden strength born of patient preparation and correct technique, a simple craft forming lasting connections beneath the surface.