How to Cover Water Pipe Outside: 10 Durable, Weatherproof Solutions to Protect and Insulate Pipes
To protect outdoor water pipes from freezing, corrosion, UV damage, and rodent interference, consider these 10 durable and weatherproof solutions: closed-cell foam with foil jacketing, fiberglass wrap with weather sleeves, PVC shrouds, rigid foam enclosures, heat-trace cable, split conduit covers, metal armored casings, reflective barriers, sealed jacketing, and secure drainable boxes. When installing, use outdoor-rated tape, sealants, and corrosion-resistant fasteners, ensuring access to valves. Your choice should depend on your climate and local codes, and be sure to follow proper installation and maintenance guidelines for optimal protection.
Why Covering Outdoor Water Pipes Matters
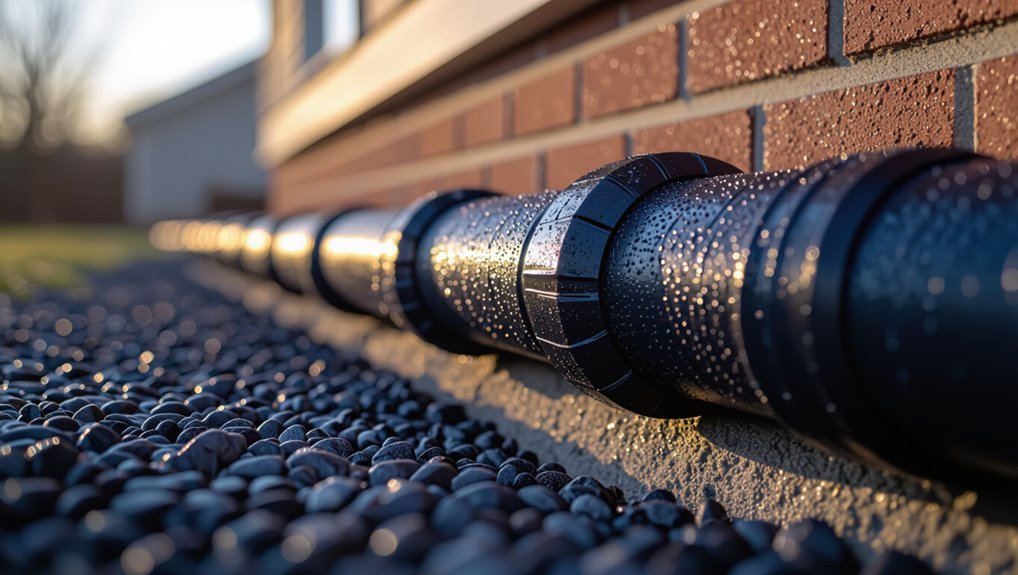
Exposed outdoor water pipes face risks such as freezing, corrosion, UV degradation, and damage from rodents.
The level and type of protection needed vary with local climate and site conditions. Homeowners should also account for applicable building codes and maintenance responsibilities when selecting coverings.
Risks of leaving pipes exposed (freezing, corrosion, UV damage, rodents)
Leaving outdoor water pipes unprotected invites several avoidable hazards that compromise function and longevity.
Exposed lines risk freezing and bursting, accelerated corrosion from moisture and salts, UV degradation of plastics, and rodent chewing that causes leaks.
Homeowners seeking how to cover water pipe outside reduce repair costs and service interruptions by preventing mechanical, chemical, and biological damage through appropriate shielding and insulation.
Climate and location factors that change protection needs
Because temperature ranges, precipitation patterns, soil composition, and local wildlife vary widely, the level and type of protection required for outdoor water pipes depends heavily on climate and location.
Cold regions need thick insulation and frost-proof routing; wet climates demand corrosion-resistant covers and drainage; sandy or acidic soils require physical barriers; areas with burrowing animals benefit from armored casings and elevated runs.
Building codes and homeowner responsibilities to consider
Local climate and site conditions shape the technical requirements for pipe protection, but regulatory frameworks and homeowner obligations ultimately determine what must be done and who is responsible.
Homeowners must follow local building codes, permits, and inspection schedules; comply with setback, burial depth, and material standards; and maintain accessible shutoffs.
Liability, insurance implications, and contractor licensing affect installation choices and long-term upkeep.
Quick Overview: Best Methods to Cover and Protect Outdoor Water Pipes
The article identifies the top three fastest and most durable solutions for protecting outdoor water pipes: foam insulation sleeves, insulated pipe wrap with heat tape, and rigid protective covers or conduit.
It explains when to prefer flexible insulation for freeze prevention and when to use hard covers for impact and UV protection.
Guidance is concise so readers can quickly match pipe conditions to the appropriate method.
Direct answer: Top 3 fastest and most durable solutions
Practicality and longevity guide the top three fastest, most durable solutions for covering outdoor water pipes: thick closed-cell foam sleeves, insulated rigid insulation boxes with weatherproof cladding, and custom-fitted heat-traced enclosures.
Each offers rapid installation, robust freeze protection, and resistance to moisture and UV.
Selection depends on pipe exposure, required thermal performance, and maintenance access; all minimize burst risk and prolong service life.
When to choose insulation vs. hard protective covers
Choose insulation when the primary concern is thermal protection and moisture control, and opt for hard protective covers when mechanical damage, vandalism, or prolonged UV exposure pose greater risks.
Insulation suits exposed copper or PVC to prevent freezing and condensation.
Hard covers protect against impact and animals, allow removable access, and pair with insulation for combined benefits where both thermal and physical hazards exist.
Durable, Weatherproof Solutions (10 Options)
A concise overview presents ten durable, weatherproof options for protecting outdoor water pipes, focusing on materials and assemblies that resist moisture, UV, and temperature extremes.
The following four representative solutions illustrate common approaches used by homeowners and professionals. Each option can be combined or adapted to site conditions and pipe configurations.
- Closed-cell foam pipe insulation with foil jacket
- Fiberglass pipe wrap with weatherproof outer sleeve
- PVC pipe shrouds and split conduit covers
- Rigid foam board enclosures with sealed edges
1. Closed-cell foam pipe insulation with foil jacket
Closed-cell foam pipe insulation with a foil jacket combines a dense, impermeable core that resists moisture absorption with a reflective outer layer that sheds water and UV.
It offers low thermal conductivity, resists mold and pests, and installs easily with slit or preformed sections.
Seams sealed with foil tape improve weatherproofing.
Suitable for exposed outdoor runs where durability and simple maintenance are priorities.
2. Fiberglass pipe wrap with weatherproof outer sleeve
Where foil-jacketed closed-cell foam prioritizes ease of installation and moisture resistance, fiberglass pipe wrap with a weatherproof outer sleeve offers greater thermal performance for longer runs and higher-temperature lines.
It consists of fiberglass batting wrapped tightly around the pipe, sealed with a UV- and moisture-resistant outer sleeve.
Suitable for hot and cold lines, it resists compression and retains R-value but requires careful sealing at joints and terminations.
3. PVC pipe shrouds and split conduit covers
Install PVC pipe shrouds or split conduit covers to provide a rigid, weatherproof barrier around outdoor plumbing runs.
These durable housings snap or screw closed over insulated or bare pipes, shielding against UV, impact, and precipitation. They permit ventilation to prevent trapped moisture, allow access for maintenance, and are compatible with insulation wraps and sealant at joints for a neat, long-lasting exterior finish.
4. Rigid foam board enclosures with sealed edges
Rigid foam board enclosures provide a lightweight, insulating shell that can be cut and joined around outdoor pipes for year-round protection.
Panels are taped or glued at seams, edges sealed with foam-compatible caulk or weatherproof tape to block drafts and moisture.
Rigid boards resist compression, shed water when properly flashed, and permit painting or cladding for UV protection.
Fastenings and joints must remain watertight.
5. Heat-traced (self-regulating) cables inside insulated wrap
Moving from sealed foam enclosures to an active prevention option, heat-traced self-regulating cables provide controlled warmth inside an insulated wrap to keep outdoor pipes above freezing.
They adjust output with pipe temperature, reducing energy use and burn risk. Installed along pipe length, then wrapped with weatherproof insulation and secured, they require proper electrical protection, grounding, and adherence to manufacturer and local code specifications.
6. Preformed neoprene insulation with UV-resistant coating
Choose preformed neoprene insulation with a UV-resistant coating when durability and long-term outdoor exposure are priorities.
Molded sleeves fit securely around standard pipe sizes, providing consistent thermal resistance and moisture resistance. The UV coating prevents sun degradation and cracking.
Installation is straightforward with adhesive seams or mechanical fasteners.
Maintenance is minimal; inspect periodically for cuts, chemical damage, or seam failure and replace as needed.
7. Metal (aluminum) pipe chase or box with insulated liner
Encase exposed outdoor pipes in an aluminum chase or box lined with insulating material to combine physical protection and thermal performance.
Rigid aluminum housings resist impacts, pests and UV, while interior liners (closed-cell foam, fiberglass with vapor retarder) reduce heat loss and condensation.
Install sealed access panels for maintenance, guarantee drainage and fastenings resist corrosion.
Suitable for visible runs and commercial or residential applications.
8. Rubberized foam sleeves with vapor barrier
Protect outdoor pipes with rubberized foam sleeves wrapped in an integral vapor barrier to combine insulation, moisture control, and durability.
These closed-cell neoprene or EPDM sleeves resist condensation, UV, and ozone while minimizing thermal loss.
Easy to slip on and seal with adhesive-backed tape or factory seams, they suit exposed runs, hangers, and fittings.
Periodic inspection guarantees barrier integrity and long service life.
9. Weatherproof insulated box with access door for valves
Moving from fitted foam sleeves to a more robust solution, a weatherproof insulated box with an access door shelters outdoor valves and exposed fittings while maintaining thermal protection.
Constructed from rot-resistant materials and lined with rigid foam, the box resists moisture, wind, and rodents.
The hinged or removable door provides easy service access while seals and gasketing prevent drafts, extending valve lifespan and reducing freeze risk.
10. Buried pipe with proper trenching and foam sleeve
Burying outdoor pipes in a properly graded trench and covering them with a closed-cell foam sleeve combines mechanical protection with thermal insulation to reduce freeze risk and physical damage.
Proper depth, gravel bedding, and slope prevent standing water and shifting. The foam sleeve limits heat loss and condensation; joints receive tape or sealant.
Backfill in layers, compacting gently to avoid crushing the pipe and maintaining insulation integrity.
Step-by-Step Installation Guides for Top Methods
The following section provides concise, step-by-step installation guides for the most effective exterior pipe covers.
Each guide covers installing closed-cell foam with a foil jacket, building and sealing rigid foam board enclosures, fitting heat-trace cable with proper insulation layering, and mounting PVC shrouds secured to exterior walls.
Practical tips on tools, fastening, and weatherproof sealing are included to guarantee reliable results.
Installing closed-cell foam insulation with foil jacket
Begin by measuring each exposed pipe run and cutting closed-cell foam tubes with an integrated foil jacket to length, ensuring snug fits at joints and bends.
Slide tubes over pipes, seal longitudinal seams and end caps with foil tape rated for outdoor use, and wrap elbows with prefabricated foam covers.
Inspect for gaps, add sealant at fittings, and secure with UV-resistant zip ties or straps.
Building and sealing a rigid foam board enclosure
After installing closed-cell foam tubing, a rigid foam board enclosure can be added for greater protection and thermal mass. This method surrounds pipes with cut-to-fit, weather-resistant panels that are mechanically fastened and sealed to block wind and moisture.
Measure and cut panels, secure with corrosion-resistant screws and washers into framing or masonry anchors, seal joints with exterior-grade tape and caulk, and add a removable access panel.
Installing heat-trace cable and layering insulation safely
Install heat-trace cable and layer insulation in a deliberate sequence to maintain pipe temperature, prevent freezing, and minimize fire or moisture risks.
Begin with a manufacturer-approved trace cable, secure per instructions using non-conductive clips, then apply pipe-wrap insulation snugly over the cable.
Seal seams with waterproof tape, add vapor barrier where required, and test the system before burying or closing to guarantee safe continuous operation.
Fitting PVC shrouds and securing to exterior walls
Fit PVC shrouds over insulated exterior pipes by selecting appropriately sized sections, aligning access joints with wall penetrations, and fastening each piece securely to the wall using corrosion-resistant screws and anchors rated for the substrate.
Seal seams with UV-resistant exterior caulk or foam tape, trim cleanly at ends, provide ventilation gaps where required, and inspect fastenings periodically for movement, seal integrity, and corrosion.
Materials, Tools, and Estimated Costs
The section outlines common materials for covering outdoor water pipes—insulation foam, heat tape, rigid foam boxes, and metal or PVC cladding—summarizing key pros and cons for durability, weather resistance, and ease of use.
It then lists tools typically needed for DIY versus professional installation, noting when specialized equipment or permits may be required.
Finally, it provides typical cost ranges and expected lifetimes for each solution to support budgeting and maintenance decisions.
Common materials and their pros/cons
For covering outdoor water pipes, a concise comparison of common materials—foam insulation sleeves, fiberglass wraps, heat tape, and rigid conduit—helps homeowners choose based on climate, durability, and budget. Each offers tradeoffs: foam is inexpensive but less durable; fiberglass resists heat but can absorb moisture; conduit provides protection but costs more.
| Material | Benefit | Drawback |
|---|---|---|
| Foam | Cheap | Less durable |
| Fiberglass | Heat resistant | Moisture risk |
| Conduit | Protective | Higher cost |
Tools required for DIY vs. professional installation
Gathering the right materials and tools determines whether a homeowner can reasonably DIY pipe covering or should hire a professional.
Basic DIY requires pipe insulation, foam or PVC covers, weatherproof tape, utility knife, measuring tape, silicone sealant, and a heat gun or hair dryer.
Professional jobs add scaffold, powered cutters, specialty adhesives, and diagnostic tools.
Protective gloves, goggles, and disposal bags are recommended.
Typical cost range and lifetime for each solution
Cost estimates and service lifespans vary by material and installation method:
Simple foam pipe insulation typically costs $0.50–$3 per foot and lasts 3–5 years outdoors;
Pre-formed PVC covers run about $5–$20 per foot with a 10–20 year life when sealed and UV-protected;
Insulated aluminum or fiberglass clamshells cost $8–$30 per foot and can last 15–25 years;
Professional weatherproofing packages (including labor, scaffolding, and specialty adhesives) commonly range from $500–$3,000 depending on scope and can extend service life to 20+ years.
How to Choose the Right Solution for Your Situation
Selecting the appropriate covering begins with evaluating the pipe’s material, diameter, and degree of exposure to determine insulation and protection needs.
The choice should then be matched to local climate zone and freeze risk to prioritize heat tracing, thicker insulation, or temporary winter wraps.
Finally, aesthetic preferences, required access for maintenance, and durability expectations must inform whether to use permanent cladding, removable covers, or simple insulating sleeves.
Assessing pipe material, diameter, and exposure
To choose the right protection for outdoor water pipes, first identify the pipe material, diameter, and how much of it is exposed to weather and physical hazards.
Record whether pipes are copper, PVC, PEX, or steel; measure outer diameter; note length and sections above ground, near soil, or adjacent to walls.
Assess abrasion, sunlight, and impact risks before selecting coverings.
Matching solutions to climate zones and freeze risk
Climate and freeze risk determine which protective measures are appropriate: mild, temperate regions may need only UV-resistant sleeves and abrasion guards, while areas with regular freezes require insulated wraps, heat tape, or buried rerouting to prevent bursting.
High-humidity coastal zones benefit from corrosion-resistant coatings and breathable covers.
Alpine or polar climates call for multi-layer insulation, thermostat-controlled heat tracing, and deeper burial to maintain water flow.
Considerations for aesthetic, access, and maintenance
When choosing a protection strategy, homeowners should balance appearance, ease of access, and long-term upkeep to guarantee the solution fits the property and the user’s habits.
Practical choices hide pipes without blocking valves, permit quick winter checks, and use materials that resist UV, pests, and moisture.
Prefer modular covers for repairs, neutral finishes to match exteriors, and clear maintenance schedules to extend service life.
Common Mistakes and What to Avoid
Common errors include using indoor insulation outdoors without adequate weatherproofing, which can degrade materials and trap moisture.
Leaving gaps, failing to properly seal joints, or creating moisture traps undermines protection and promotes corrosion or freezing.
Incorrect heat-trace installation or improper wattage can cause overheating and damage to pipe coatings or surrounding materials.
Using indoor insulation outdoors without weatherproofing
Many homeowners mistakenly assume that indoor pipe insulation will perform outdoors without modification, but exposure to moisture, UV light, and temperature swings quickly degrades standard foam or fiberglass wraps.
Using indoor materials outside leads to compression, mold, and thermal loss. Proper outdoor-rated jackets, UV-stable cladding, and sealed seams prevent failures.
Avoid temporary fixes that accelerate deterioration and require frequent replacement.
Leaving gaps, improperly sealing joints, and moisture traps
Gaps, poorly sealed joints, and trapped moisture are primary causes of outdoor pipe insulation failure because they allow heat loss, corrosion, and ice formation to begin at weak points.
Left unchecked, gaps expose pipe sections to wind and cold; loose seams let rain and condensation enter insulating layers; and moisture pockets promote rust and mold.
Properly fitting, sealed, and ventilated coverings prevent these failures.
Overheating from improper heat-trace installation
Installers risk damaging pipes and insulation when heat-trace cables are run without regard for spacing, compatibility, or control, since improper layout and lack of temperature regulation can cause localized overheating.
Consequences include melted insulation, pipe weakening, and fire hazards.
Avoid overlapping cables, use manufacturer-recommended attachment methods, match cable type to pipe material, install thermostats and sensors, and verify electrical protection and proper grounding.
Maintenance, Inspection, and Troubleshooting
A seasonal inspection checklist helps guarantee coverings remain secure and effective before freeze and after thaw. Observable signs of failing insulation or enclosure—such as dampness, sagging, or exposed pipe—should prompt action.
Typical repairs include patching rips, re-securing detached fasteners, and removing water intrusion before reapplying protective materials.
Seasonal inspection checklist
When seasons change, a concise seasonal inspection checklist guarantees outdoor water pipes remain protected against freeze, corrosion, and physical damage.
Inspectors should verify insulation integrity, check for visible leaks or bulging, confirm that valves and hose bibs operate smoothly, and assess surrounding drainage and vegetation that could impact pipe health.
Record measurements, tighten fastenings, clear debris, test pressure, and schedule repairs or upgrades as needed.
Signs of failing insulation or enclosure
After completing the seasonal inspection checklist, attention should shift to recognizing signs that insulation or enclosures are failing.
Look for compressed, flattened or brittle foam, visible gaps or exposed pipe, persistent dampness or mold, torn or detached weatherproofing, and frost buildup where none should occur.
Discoloration, musty odors, and increased condensation indicate loss of protective performance and warrant prompt evaluation.
Repair steps for common issues (rips, detachment, water intrusion)
Begin by evaluating the extent and cause of the damage—identify rips, detached sections, and sources of water intrusion so repairs target the root problem rather than just the symptom.
Trim and dry affected areas, remove compromised insulation, and apply UV-rated tape or adhesive-backed patches for small tears.
Refasten or replace straps and seals.
For persistent leaks, install new waterproof cladding and test for watertightness.
When to Hire a Professional
When piping is part of a complex system, located near gas lines, or involves electrical heat trace, a professional should be engaged to guarantee safety and proper function.
Professionals also handle permits, code compliance, and issues that affect warranties.
Homeowners should vet contractors by checking licenses, insurance, references, and asking about experience with similar jobs, required permits, and written guarantees.
Complex piping systems, gas line proximity, and electrical heat trace
Certain situations—complex multi-run piping, pipes next to gas lines, or systems that use electrical heat trace—warrant professional assessment and installation.
Trained contractors evaluate routing, thermal load, electrical connections, and bonding to prevent hazards. They select compatible insulation, enclosures, and heat-trace controllers, guarantee safe clearances from combustible lines, and perform testing.
DIY attempts risk improper installation, code conflicts, and safety hazards.
Permits, code compliance, and warranty considerations
Many projects involving exterior pipe work require permits and must meet local building and plumbing codes, so homeowners should verify requirements before starting.
Professionals guarantee code-compliant materials, clearances, and frost protection.
Permits can affect inspections, liability, and insurance coverage.
Manufacturer warranties may be voided by improper installation; documented, licensed work preserves warranty and provides recourse if failures occur.
When uncertain, hire licensed contractors.
How to vet contractors and questions to ask
Who is qualified to handle exterior pipe work, and how should a homeowner evaluate them? A licensed plumber or licensed general contractor with exterior plumbing experience should be preferred.
Verify licenses, insurance, local references, and written estimates. Ask about material choices, insulation R‑value, freeze protection, timeline, warranties, permits, and cleanup.
Compare bids, check online reviews, and confirm a clear written contract before hiring.
Durable Solutions Comparison Chart
A concise comparison helps readers weigh effectiveness, durability, cost, ease of installation, and climate-specific recommendations for pipe coverings. The table below summarizes key options for quick reference.
| Feature | Summary |
|---|---|
| Effectiveness & durability | Rigid insulation and heat-traced wraps score highest in cold climates |
| Cost & ease of installation | Foam sleeves are low-cost and easy to install; professional heat trace is more expensive |
Side-by-side: effectiveness, durability, cost, ease of installation
Compare common exterior pipe-protection options across four practical criteria—effectiveness at preventing freezing and physical damage, long-term durability, upfront and lifecycle cost, and ease of installation—to help homeowners choose the best fit for their climate, budget, and skill level.
Rigid foam with jacketing rates high for durability and insulation but costs more; foam sleeves are cheap and easy.
Heat tape excels at freeze prevention but uses power.
Insulated boxes balance protection and expense.
Recommended options by climate zone
Across varying climate zones, recommended exterior pipe-protection strategies prioritize different trade-offs between insulation, mechanical shielding, and active heat.
In cold regions, rigid foam plus heat tape and weatherproof jacketing are advised.
Temperate zones favor closed-cell foam with UV-resistant wraps.
Hot, arid areas require reflective barriers and vented covers to reduce thermal load.
Coastal sites need corrosion-resistant cladding and sealed joints.
Quick Tips for Long-Lasting Protection
Practical measures for long-lasting pipe protection include proper sealing and UV-resistant coatings to prevent weathering and leaks.
Covers and wraps should be fitted to allow easy access to valves and accommodate routine winter maintenance.
A concise seasonal checklist — inspection, re-sealing, insulation replacement, and clearing debris — helps guarantee reliable performance year after year.
Sealing and UV protection best practices
Sealants and UV barriers protect outdoor water pipes from moisture intrusion, corrosion, and sun damage, extending service life and reducing maintenance.
Use weatherproof silicone or polyurethane sealants at joints and penetrations, and apply UV-resistant paint or wrap over insulation.
Verify surfaces are clean and dry, follow manufacturer cure times, and inspect annually for cracks, lifting, or degradation to prompt timely reapplication.
Allowing access for valves and winter maintenance
How can outdoor water pipe coverings balance protection with necessary access?
Covers should include removable panels, zippered or Velcro closures, and clear access ports aligned to valves and spigots.
Label shutoffs and keep a small insulated flap for winter servicing.
Design fasteners for gloved hands and avoid permanent seals over controls so routine maintenance, emergency shutoff, and valve replacement remain quick and safe.
Seasonal prep checklist
After ensuring covers provide easy access to valves and spigots, attention turns to a compact seasonal prep checklist that keeps outdoor pipes protected year-round.
Inspect insulation for gaps, replace damaged foam or tape, secure covers against wind, clear debris and vegetation, drain exposed lines before freeze, test spigots for leaks, and schedule timely repairs.
Document dates and actions for future reference.
Resources and Product Recommendations
The article lists trusted brands and common model types for pipe insulation and electric heat-trace to help readers choose reliable products.
It also points to manufacturer guides and installation manuals for specifications, compatibility, and safety instructions.
Links to official resources are provided so users can confirm details and follow recommended installation procedures.
Trusted brands and model types for insulation and heat-trace
When selecting insulation and heat-trace products for outdoor pipes, professionals typically favor brands with proven performance in cold climates and clear specifications for pipe size, temperature rating, and UV/weather resistance.
Common choices include Armaflex and Thermax for foam insulation, and TraceTek, Heat-Line, and Raychem (nVent) for self-regulating heat-trace.
Select models sized to pipe diameter and rated for outdoor exposure and continuous operation.
Links to manufacturer guides and installation manuals
Several manufacturers and suppliers provide concise installation guides and specification sheets that directly address outdoor pipe insulation and heat-trace selection, sizing, and weatherproofing.
These resources offer model-specific wiring diagrams, mounting details, material specs, and maintenance instructions. Users should consult OEM manuals before installation and download PDFs for reference.
- Manufacturer install guides
- Heat-trace wiring diagrams
- Insulation specification sheets
- Maintenance and safety manuals
Conclusion
Covering outdoor water pipes is essential to prevent freezing and damage; studies show that freeze-related pipe bursts in cold climates can increase repair costs by up to 40%. Homeowners who insulate and weatherproof pipes reduce breakage risk and extend system lifespan. Choosing durable materials, following proper installation steps, and performing seasonal inspections greatly lowers maintenance needs. For complex runs or recurring issues, consulting a licensed plumber guarantees reliable, long-term protection and peace of mind.