
How to Stop Sweating Pipes in the Basement Quickly and Permanently
To stop sweating pipes in your basement quickly and permanently, first reduce humidity using a dehumidifier and increase airflow with fans. For a temporary solution, wrap the pipes with foam tape. For a lasting fix, insulate the pipes with closed-cell or rubber insulation, seal any joints, consider rerouting the pipes into a conditioned space, and keep the basement humidity below 50%. For more detailed guidance, look into insulation methods, ventilation improvements, and when to consult a professional.
Why Basement Pipes Sweat and Why It Matters
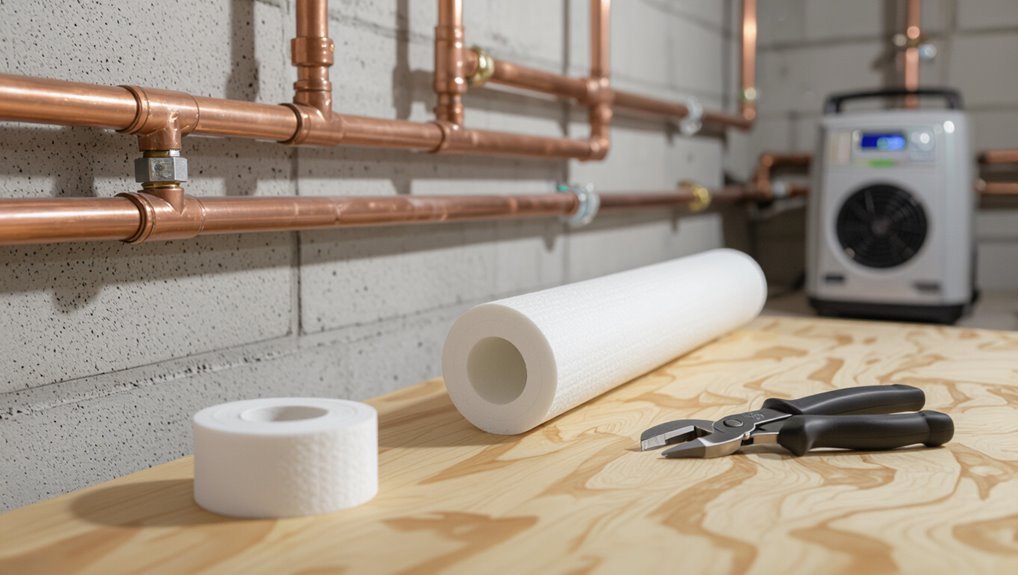
Sweating pipes occur when warm, humid basement air contacts cooler pipe surfaces, producing condensation rather than indicating a leak.
The effect depends on humidity levels, temperature differences, and pipe material, with metal pipes typically more prone to forming beads of water.
If left unaddressed, persistent sweating can promote mold growth, cause water damage, and degrade insulation.
What sweating pipes means (condensation vs. leaks)
Moisture collecting on basement pipes is usually condensation, not a plumbing leak: warm, humid air contacts the cooler pipe surface and releases water.
Distinguishing condensation from leaks matters for repair choices. Condensation appears as uniform beading or dampness that stops when air conditions change, while leaks produce persistent drips, corrosion, or pooled water.
Understanding this guides how to stop sweating pipes in the basement effectively.
How humidity, temperature, and pipe material cause condensation
Because basement air is often warmer and more humid than the cold surface of water-carrying pipes, condensation forms when that air cools upon contact with the metal or plastic.
Relative humidity, air temperature, and pipe surface temperature set the dew point threshold.
Conductive materials like copper chill faster; insulated or nonmetallic pipes reduce surface cooling.
Faster airflow and higher humidity increase condensation rates.
Risks of persistent pipe sweating (mold, water damage, insulation loss)
When warm, humid basement air condenses on cold pipes, the resulting persistent wetness creates several hazards that extend beyond temporary dripping.
Continuous moisture fosters mold and mildew growth, risking health and structural decay.
Water accumulation damages finishes, framing, and stored items.
Insulation degrades, reducing thermal efficiency and increasing condensation.
Left unaddressed, corrosion and freeze-related failures become more likely, raising repair costs.
Quick, Immediate Actions to Stop Pipe Sweating Now
A few quick steps can curb pipe sweating immediately while longer-term solutions are arranged.
Temporary insulation wraps or foam tape can be applied in minutes to reduce condensation on cold pipes.
Increasing airflow with a fan or ventilating the area and running a dehumidifier provides fast, effective relief.
Short-term fixes you can do in minutes
Start by targeting the most immediate causes: reduce surface condensation by lowering humidity, raising pipe temperature slightly, or adding a quick barrier between metal and moist air.
Wipe pipes dry, run a dehumidifier or fan, increase nearby air circulation, and tape a strip of plastic or cloth loosely around wet spots to block moisture temporarily.
Monitor frequently and retard reformation.
Using temporary insulation wraps and foam tape
Apply temporary insulation wraps or foam tape directly to chilled pipes to halt condensation quickly. The materials adhere fast, cut to length, and cover joints and bends.
They reduce surface temperature, prevent water droplets, and protect against minor abrasions. For best immediate results, overlap seams tightly and secure ends with waterproof tape.
Inspect regularly and replace with permanent insulation when feasible.
Increasing air circulation and ventilation temporarily
Increase airflow around chilled pipes to quickly reduce surface humidity and stop condensation.
Position open windows and basement vents when outdoor air is drier, and open closet or crawlspace doors to promote crossflow.
Use existing ceiling or in-line fans to move air past pipes.
Clear obstructions around plumbing runs and route duct booster fans temporarily to dilute humid pockets and aid evaporation.
Running a dehumidifier or portable fan for emergency relief
When short-term airflow isn’t enough to stop condensation immediately, running a dehumidifier or a portable fan provides rapid relief by lowering ambient moisture or moving air across cold pipe surfaces.
A dehumidifier reduces relative humidity to prevent further sweating; a fan accelerates evaporation.
Position equipment near affected pipes, empty or drain units as needed, and monitor humidity to avoid overuse or freezing.
Permanent Solutions to Prevent Pipe Condensation
This section outlines permanent strategies to prevent pipe condensation, including selecting appropriate insulation materials and replacing pipe types that attract moisture.
It also covers long-term humidity control, improved basement ventilation and air circulation, and the option of relocating or rerouting pipes to reduce exposure to cold surfaces.
Each approach is evaluated for effectiveness, cost, and suitability to different basement conditions.
Proper pipe insulation options and materials
The article compares closed-cell foam, fiberglass, and rubber insulation for resisting moisture and preventing condensation on basement pipes.
It also outlines recommended thicknesses and R-values for typical basement conditions to guarantee adequate thermal barrier and dew point control.
Practical trade-offs in durability, ease of installation, and cost are highlighted to guide selection.
Closed-cell foam vs. fiberglass vs. rubber insulation
Although all three materials serve to reduce pipe condensation, closed-cell foam, fiberglass, and rubber differ in moisture resistance, thermal performance, and installation ease.
Closed-cell foam resists water, provides good thermal barrier, and is simple to cut and fit.
Fiberglass is inexpensive and effective when covered with a vapor barrier.
Rubber offers flexibility, durability, and superior cold-temperature performance for tight spaces.
Thickness and R-value recommendations for basements
Appropriate insulation thickness and R-value depend on pipe temperature, basement humidity, and local climate; selecting the correct combination prevents condensation by keeping pipe surfaces above the dew point.
For most basements, 1⁄2–1 inch closed-cell or rubber with R‑3–R‑6 suffices for cold water lines; colder climates or high humidity may require 1–2 inches or foam board with higher R-values and vapor barriers for permanent protection.
Improving basement humidity control long-term
A comparison of whole-basement dehumidifiers and portable units highlights differences in capacity, coverage, and maintenance that affect long-term humidity control.
Attention to HVAC integration—such as connecting dehumidification to the existing ductwork or using a condensate drain—determines system efficiency and service requirements.
Proper planning for drainage, electrical supply, and routine servicing is essential to prevent recurring pipe condensation.
Whole-basement dehumidifiers vs. portable units
Choosing between a whole-basement dehumidifier and portable units hinges on factors like basement size, humidity load, installation constraints, and maintenance willingness.
Whole-basement systems deliver consistent, lower RH for large or multi-zone basements with quieter operation and centralized drainage; portable units suit smaller areas, lower budgets, or targeted hotspots but require frequent emptying, noise tolerance, and strategic placement to prevent uneven humidity and persistent pipe condensation.
HVAC integration and drain considerations
Integrating dehumidification with the HVAC system and establishing proper condensate drainage are essential steps for a permanent solution to basement pipe sweating.
A whole-house dehumidifier tied into ductwork stabilizes relative humidity, reducing condensation risk.
Guarantee condensate lines slope correctly, use trapless or trapped drains per code, install a secondary safety drain or pump where gravity drainage fails, and schedule HVAC maintenance for reliability.
Increasing basement air circulation and ventilation permanently
Improving basement air circulation and ventilation permanently reduces humidity levels around cold pipes, cutting condensation risk by replacing moist, stagnant air with drier, moving air.
Strategies include installing continuous exhaust or supply vents, adding inline fans to duct runs, and creating cross-ventilation paths.
Combine with sealed windows, dedicated dehumidifier ducting, and passive vents to maintain steady air exchange and lower surface dew points.
Relocating or rerouting pipes as a permanent fix
Move cold water lines away from humid areas or reroute them through conditioned spaces to eliminate the temperature differential that causes condensation.
Relocating pipes into insulated walls, ceilings, or mechanical rooms reduces exposure to moist basement air.
Replanning water and drain runs to minimize length in unconditioned zones, sealing penetrations and providing access panels guarantees durability and eases future maintenance while preventing recurring sweating.
Replacing pipe materials prone to condensation
Replace plumbing materials that attract condensation with alternatives that reduce thermal conductivity and surface cooling.
Copper and uninsulated steel encourage sweating; substituting PVC, PEX, or insulated stainless steel minimizes cold transfer.
Select materials compatible with water type and local code.
Combine replacement with proper fittings and vapor-retardant drywall or barrier coatings.
Professional installation guarantees seal integrity, preventing future condensation and corrosion.
Step-by-Step Guide to Insulate Basement Pipes Correctly
The guide begins by identifying pipe materials, surface temperature, and how severe the condensation problem is to determine the appropriate insulation approach.
It then lists required tools and materials, explains how to clean and dry pipes before work, and describes fitting foam sleeve insulation.
Finally, it covers techniques for sealing joints, elbows, and valves to guarantee a continuous moisture barrier.
Assessing pipe type, temperature, and condensation severity
Understanding begins with a clear assessment of the pipes’ material, surface temperature, and the degree of condensation present.
Inspect whether pipes are copper, PVC, or galvanized; note cold-water versus hot-water lines. Measure surface temperature with an infrared thermometer or touch test (carefully).
Document frequency and size of droplets, peak humidity times, and nearby airflow or insulation gaps to prioritize interventions.
Tools and materials checklist
With pipe materials, surface temperatures, and condensation patterns documented, attention shifts to gathering the right tools and materials for insulation.
Essential items include suitable pipe insulation, vapor barrier tape, measuring tools, and safety gear. Select materials rated for pipe diameter and temperature.
Acquire:
- Foam or rubber pipe insulation
- Vapor barrier tape
- Tape measure and utility knife
- Gloves and eye protection
Preparing pipes: cleaning and drying
Begin by removing debris and surface contaminants so insulation will adhere and perform properly.
Wipe pipes with a clean cloth and mild detergent, rinse, then dry thoroughly with lint-free towels.
Use a hair dryer or heat gun on low to eliminate residual moisture, avoiding overheating.
Inspect for corrosion, leaks, or flaking paint; repair and allow full cure before proceeding to insulation.
How to install foam sleeve insulation
Install foam sleeve insulation by selecting the correct diameter and thickness for each pipe, cutting lengths to fit, and securing seams to create a continuous vapor and thermal barrier; guarantee all fittings, valves, and bends are covered with pre-slit sleeves or tailored pieces to prevent condensation and heat loss.
Slide sleeves over pipes, align seams upward, trim ends flush with wall or fixture, and fasten with tape or straps.
How to seal joints, elbows, and valves properly
Seal joints, elbows, and valves carefully to maintain a continuous thermal and vapor barrier that prevents condensation and heat loss.
Inspect fittings, cut insulation to fit tight, and use preformed elbow pieces where needed.
Secure seams with weatherproof foil tape or recommended adhesive.
Wrap valves with removable insulated covers for access.
Confirm no gaps or exposed metal remain; compressions and overlaps must be snug.
When to add vapor barrier or cladding
When should the vapor barrier or cladding go on relative to the insulation? It should follow installation of insulation, wrapped tightly over seams and joints to prevent moisture entry.
For foam sleeves, apply factory vapor jacket or wrap with approved tape; for fiberglass, install a continuous vapor barrier before adding outer cladding.
Secure edges and maintain access to valves while ensuring an uninterrupted moisture seal.
Cost, Time, and DIY vs Professional Help
Typical material costs for a do-it-yourself pipe insulation project and ballpark fees for professional installation are outlined to help plan a budget.
Estimated timeframes for common tasks—from wrapping short runs to insulating a whole basement—and guidance on when to call a plumber, insulation contractor, or HVAC pro are provided.
A checklist of key questions to ask a contractor (licenses, references, warranty, and scope) prepares the homeowner for hiring decisions.
Typical cost ranges for DIY materials and pro installation
Budget considerations for stopping basement pipe sweating vary widely depending on materials chosen and whether the homeowner tackles the work or hires a professional. Typical DIY supplies (insulation, sealant, tape) range $20–$150; pro installation typically runs $200–$1,200 depending on extent. Homeowners should weigh cost versus longevity and warranty when choosing between DIY and licensed contractors.
| Item | DIY Cost | Pro Cost |
|---|---|---|
| Foam tubing | $10–$40 | $30–$100 |
| Pipe wrap | $5–$30 | $20–$80 |
| Sealants | $5–$20 | $10–$50 |
| Labor/fees | — | $150–$900 |
| Misc/overhead | $0–$60 | $20–$200 |
Time estimates for common projects
After outlining material and professional cost ranges, the guide turns to how long common anti-sweat pipe projects take and which are practical for a homeowner versus a contractor.
Simple tasks—wrap insulation, apply pipe sleeve, seal nearby surfaces—often require 1–3 hours.
More involved work—installing vapor barrier, rerouting ducts, or replacing insulation across multiple runs—can take a day or more and may justify hiring help.
When to hire a professional (plumbing, insulation, HVAC)
When should a homeowner call in a professional versus tackling anti-sweat pipe work personally?
Simple repairs—insulation wrap, sealing small leaks, and improving ventilation—suit DIYers with basic skills.
Hire a plumber or HVAC technician for recurrent condensation, inaccessible piping, refrigerant systems, complex ductwork, or when permits, code compliance, or electrical interplay are involved.
Professional costs balance speed, warranty, and risk mitigation.
Questions to ask a contractor before hiring
How much will the job actually cost, and how long will it take—questions that determine whether a homeowner should tackle pipe sweating as a DIY project or hire a contractor—should be clarified up front.
Ask for itemized estimates, timelines, permits, warranties, and references. Confirm insurance, experience with basement condensation, and proposed materials.
Compare bids, evaluate risks, and decide based on budget, skill, and long-term effectiveness.
Common Mistakes and How to Avoid Them
Common mistakes that lead to continued pipe sweating include using improper insulation types or insufficient thickness and leaving gaps at joints and fittings.
Neglecting basement humidity and ventilation problems or overlooking hidden wet areas can undermine even well-installed insulation.
Identifying and correcting these errors early prevents recurring condensation and mold growth.
Using the wrong insulation type or thickness
Many homeowners choose pipe insulation without matching material and thickness to the basement conditions, which often leaves pipes prone to condensation or creates trapped moisture problems.
Selecting materials rated for high humidity and the correct thickness for pipe diameter is essential to prevent sweating and mold.
Choosing closed-cell foam or vapor-retardant foil-faced products and following manufacturer thickness charts guarantees effective thermal resistance and long-term performance.
Leaving gaps at joints and fittings
Leave gaps at joints and fittings and the insulation system loses its thermal continuity, creating cold spots where condensation forms and mold can take hold.
Install fitted sections, use properly sized sleeves, seal seams with compatible tape or mastic, and insulate elbow and valve areas with preformed pieces or flexible wrap.
Regularly inspect and repair breaks to maintain continuous coverage and prevent recurring sweating.
Ignoring surrounding humidity or ventilation issues
Although properly wrapped pipes can block direct condensation, neglecting ambient humidity and poor ventilation still allows moisture to accumulate on and around them, leading to persistent sweating and mold growth.
Basement occupants should measure relative humidity, install or repair exhaust and circulation fans, and use dehumidifiers sized for the space.
Addressing air movement prevents recurring condensation despite correct insulation.
Overlooking hidden wet areas and mold growth
Inspect hidden cavities and behind finishes promptly, since sweating pipes often create moisture pockets out of sight that foster mold before surface signs appear.
Regularly check insulation voids, wall cavities, under flooring, and ductwork. Use moisture meters and borescopes when needed.
Remediate damp spots immediately, replace affected materials, and address the root cause—insulation, condensation control, and ventilation—to prevent recurrence and health risks.
Monitoring and Maintenance After Fixing Pipe Sweating
After repairs, regular checks guarantee condensation has not returned and that insulation remains intact.
A simple inspection checklist—looking for wet spots, dripping, surface temperature differences, and insulation gaps—helps catch problems early.
Seasonal adjustments to humidity control and scheduled long-term maintenance preserve effectiveness and prevent recurrence.
How to check for recurring condensation
One simple routine for checking recurring condensation is to perform a weekly visual and tactile inspection of insulated and uninsulated pipes, looking for fresh moisture, water stains, or damp insulation.
Note temperature differentials, musty odors, or beads of water. Record findings, date, and location.
If recurrence appears, verify insulation integrity, air leaks, and dehumidifier function; schedule repairs promptly.
Routine inspection checklist
A concise routine inspection checklist helps guarantee pipe sweating does not return: it lists specific items to check, frequencies, acceptable conditions, and actions to take when problems are found.
- Inspect insulation integrity and seams monthly.
- Measure ambient humidity and record readings.
- Check for new drips, stains, or corrosion.
- Verify HVAC and ventilation operation; note deviations and corrective steps.
Seasonal adjustments and long-term maintenance tips
With the routine checklist established, seasonal adjustments and long-term maintenance focus on predictable environmental shifts and component aging that affect condensation risk.
Adjust insulation thickness, secure vapor barriers before humid months, and calibrate dehumidifiers seasonally.
Inspect for wear, reseal joints, replace compromised insulation, and monitor humidity and surface temperatures.
Record findings and schedule preventive actions annually to sustain permanent condensation control.
Real-World Examples and Case Scenarios
The section presents three concise case scenarios to illustrate common causes and solutions.
One example covers a small DIY project where a homeowner insulated a few exposed cold-water lines with foam sleeves.
Another contrasts a thorough approach combining basement humidity control and an insulation overhaul, while a final case shows condensation acting as a symptom of a larger moisture or ventilation problem.
Small DIY project: insulating a few exposed pipes
Homeowners tackling a small DIY project to insulate a few exposed basement pipes typically measure lengths, select appropriate foam or rubber insulation sleeves, and cut them to fit before securing seams with tape or adhesive.
They check for fittings, wrap elbows with pre-formed pieces, and seal gaps at joints. The work reduces condensation quickly, requires minimal tools, and can be completed in an afternoon.
Comprehensive solution: basement humidity control and insulation overhaul
A systematic approach combines dehumidification, full pipe insulation, and improved airflow to eliminate recurring condensation in basements.
This paragraph introduces case studies where thorough humidity control and insulation overhauls resolved persistent sweating pipes, mold risk, and energy waste.
One example: a homeowner installed a dedicated dehumidifier, insulated all supply and drain lines, sealed vents, and reduced relative humidity below 50%, stopping condensation.
When condensation indicated a bigger problem (case study)
After the homeowner’s humidity and insulation overhaul stopped typical pipe sweating, persistent damp patches still appeared near a basement wall—an indicator that moisture was coming from damage rather than surface condensation.
Inspection revealed a hairline foundation crack channeling groundwater.
Repair included epoxy injection, exterior grading correction, and a perimeter drain.
Post-repair dryness confirmed condensation was a symptom, not the root cause.
Additional Resources and Product Recommendations
The article lists trusted brands and insulation types suitable for preventing pipe sweating, emphasizing material, R-value, and ease of installation.
It also outlines recommended basement dehumidifiers by capacity to match room size and moisture load.
Finally, it points readers to reputable online guides and reminds them to verify local building codes and permit requirements.
Trusted brands and product types for pipe insulation
Several reputable manufacturers offer pipe insulation specifically formulated to prevent condensation and resist mold, including foam sleeves, rubber tubes, and fiberglass wrap with vapor barriers.
- Elastomeric rubber: flexible, durable, good for cold water lines.
- Closed-cell foam: affordable, easy to install.
- Fiberglass with vapor jacket: for hot and irregular pipes.
- Pre-slit polyethylene: simple DIY option for basic insulation.
Recommended dehumidifiers for basements by capacity
When selecting a basement dehumidifier, capacity should match the space and moisture load: small units (20–30 pints/day) suit finished, lightly damp basements under 1,000 sq ft; medium units (40–50 pints/day) work for typical unfinished basements up to 1,500 sq ft or moderate dampness; and large or whole-basement models (60+ pints/day) are recommended for very damp, flooded, or larger spaces.
Recommended models: 20–30 pint compact, 40–50 pint portable with pump, 60+ pint commercial/whole-house units with condensate drain and built‑in humidistat.
Useful online guides and local code considerations
Choosing the right dehumidifier is only part of preventing pipe condensation; reliable guidance and awareness of local codes help guarantee installations are safe and compliant.
Useful resources include manufacturer manuals, building department pages, and plumbing trade sites. Recommendations and product links should align with code.
- Manufacturer installation guides
- Local building codes
- Plumbing association resources
- Community forums and reviews
Conclusion
In basement spaces where pipes sweat like a chilled glass in summer, addressing condensation swiftly and permanently protects structure and health. A blend of immediate fixes (drying, ventilation), proper insulation, and humidity control forms the backbone of lasting prevention. Choosing the right materials, following correct installation steps, and scheduling modest maintenance keeps problems from returning. With thoughtful assessment and timely action, the effort pays off in a dry, durable basement and calmer homeowner.
