How to Connect Plastic Culvert Pipe: Step-by-Step Guide for a Leak-Free Fit
To connect plastic culvert pipe for a leak-free fit, ensure you start with clean, square-cut ends and proper alignment. Use compatible gaskets or couplers and install the pipe on a stable, compacted granular bedding. Dry-fit the sections, lubricate the seals according to the manufacturer’s instructions, then fully seat the connections and evenly torque any clamps or fasteners. After installation, inspect for gaps and test with low-pressure water. Backfill in controlled lifts to prevent deformation, and conduct routine inspections to identify issues caused by settlement or freeze/thaw cycles. For more detailed steps on tools, sealing options, testing, and repairs, continue reading.
What a leak-free plastic culvert connection looks like
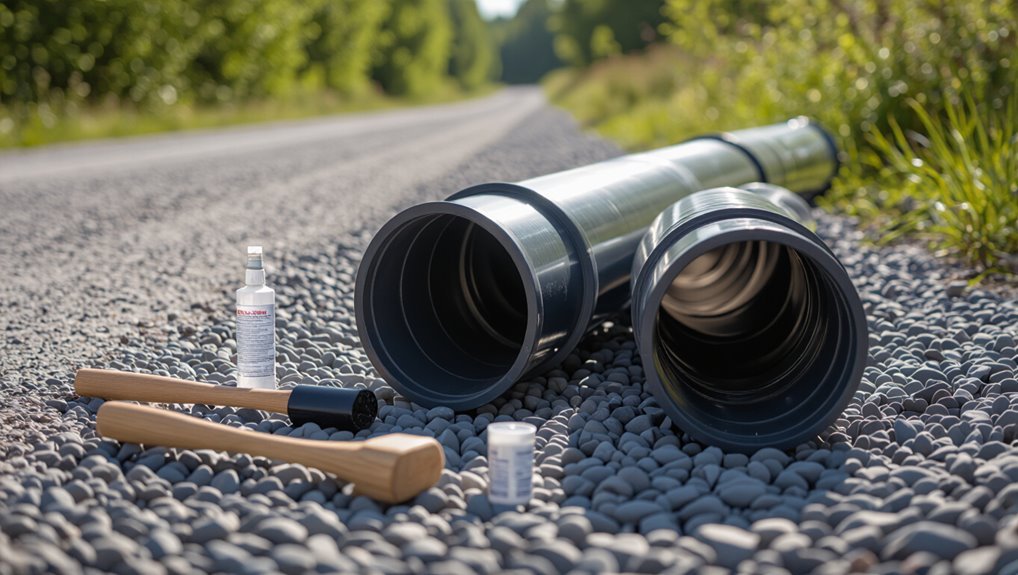
A proper leak-free plastic culvert connection should show correct structural alignment, reliable water tightness, and materials selected for long-term durability.
Typical components include the pipe sections themselves plus couplers, seals or gaskets, and adhesive or compatible solvent when required.
Clear mating faces, fully seated gaskets, and no visible gaps or distortion indicate a successful joint.
Key goals of a proper connection (structural alignment, water tightness, durability)
Properly aligned, watertight, and durable connections guarantee a culvert functions as designed: pipes must sit on a stable grade with collars or bell-and-spigot joints flush and concentric, seals compressed evenly to prevent seepage, and materials and assembly techniques chosen to resist soil movement, UV, and chemical exposure so the joint remains leak-free over time.
The guide emphasizes how to connect plastic culvert pipe with precise alignment, consistent compression, and longevity-focused installation.
Common materials and part names you’ll see (pipes, couplers, seals, gaskets, adhesive)
Having established the performance goals for culvert joints, attention turns to the specific components used to achieve them: pipe sections (typically corrugated HDPE or smooth-wall PVC), couplers and bell-and-spigot ends, elastomeric gaskets or compression seals, rigid locking rings or snap-fit clamps, and bedding-compatible adhesives or solvent welds where specified.
Additional items include changeover fittings, end sections, backfill-compatible bedding, corrosion-resistant fasteners, and inspection ports.
Tools and materials required for connecting plastic culvert pipe
Before beginning work, the installer assembles the right tools, pipe types, seals, and safety gear to guarantee durable, watertight connections.
Key considerations include measuring and cutting tools, the correct pipe and fittings, and compatible sealants or gaskets for the selected system.
Important items to verify on site are:
- Cutting and finishing tools (saw, deburring tool), measuring/leveling tools;
- Pipe choices and fittings (corrugated vs. smooth-wall, couplers, adapters);
- Sealants/gaskets/adhesives plus personal protective equipment and site-prep supplies.
Essential tools (saws, deburring tools, measuring tape, level)
Gathering the right tools assures clean cuts, accurate fits, and a watertight connection when working with plastic culvert pipe.
Essential items include a fine-tooth handsaw or reciprocating saw for straight cuts, a deburring tool or file to remove burrs, a measuring tape and marker for precise lengths, and a level to guarantee proper slope.
Safety gloves and eye protection complete the kit.
Pipe materials and fittings to choose (corrugated vs smooth-wall, couplers, adapters)
Choosing the right pipe material and fittings depends on flow requirements, soil conditions, and the connection types available: corrugated culvert pipe offers flexibility and strength for load-bearing or uneven trenches, while smooth-wall pipe provides higher flow efficiency and is easier to clear.
Couplers and band clamps suit same-type joins, whereas adapters and junction fittings are needed to connect corrugated to smooth-wall or to accommodate different diameters.
Select rigid fittings for permanent runs and flexible bands for slight misalignment.
Sealants, gaskets, adhesives, and recommended alternatives
Select sealants, gaskets, and adhesives that match the pipe material, joint type, and exposure conditions.
Use EPDM or neoprene gaskets for corrugated and smooth-wall joints; polyurethane or silicone sealants for flexible gaps; solvent cements for compatible PVC systems.
Consider butyl tape or compression rings as alternatives where movement occurs.
Verify UV, chemical, and temperature ratings and follow manufacturer cure times for durable, watertight connections.
Safety gear and site-preparation supplies
After confirming compatible sealants and gaskets for the planned joints, attention turns to the personal protective equipment and site-preparation supplies required to install plastic culvert pipe safely and effectively.
Required PPE includes gloves, safety glasses, hard hat, high-visibility vest, and steel-toe boots.
Site supplies: shovels, compactors, leveling tools, erosion control fabric, stakes, tape measure, and spill kits for solvents or fuels.
Preparing the site and pipe ends for a secure fit
Before joining, the installer inspects pipes and fittings for cracks, deformation, or soil and oil contamination that could compromise seals.
Exact measurements and markings are made to guarantee the required overlap or engagement, then cuts are executed and ends are deburred and beveled to suit corrugated or smooth-wall profiles.
Finally, the trench and bedding are prepared and compacted to provide uniform support and correct pipe alignment.
Inspecting pipes and fittings for defects or contamination
Inspectors should carefully examine each pipe and fitting for cracks, warping, gouges, or flash from molding that could compromise a seal or joint.
They should also check sockets, beads, and spigot ends for dirt, oil, or grit, removing contaminants with a clean cloth and appropriate cleaner.
Any damaged components must be rejected or repaired before assembly to guarantee reliable, leak-free connections.
Measuring and marking cuts for proper overlap or engagement
Measure each pipe run and mark cut lines precisely to guarantee the required overlap or socket engagement for a watertight joint.
Confirm manufacturer-specified insertion depth, account for soil settlement and bedding, and mark both spigot and socket components.
Use a straightedge and visible contrasting marker, transfer measurements to the field after final alignment, and recheck marks before cutting to avoid assembly errors.
Cutting, deburring, and beveling pipe ends for corrugated and smooth-wall types
With cut lines confirmed and final alignment set, attention shifts to producing clean, properly profiled pipe ends for both corrugated and smooth-wall culverts.
Use a saw appropriate to material, cutting squarely. Deburr inner and outer edges with a file or deburring tool.
Bevel smooth-wall ends slightly to ease push-fit; trim corrugation peaks flush for even engagement.
Clean debris before joining.
Bedding and trench preparation to support the pipe
Prepare a uniform, stable trench and bedding layer to prevent movement, settlement, or point loads on the culvert.
The installer excavates to design depth, removes organics, and compacts subgrade.
Place 4–6 inches of granular bedding, grade to support pipe invert, and embed pipe evenly.
Backfill in controlled lifts with approved material, compacting around haunches to avoid voids and deformation.
Step-by-step guide to joining plastic culvert pipe
The procedure for joining plastic culvert pipe proceeds in a logical sequence to guarantee alignment, watertightness, and stability.
Key actions include:
- Dry-fit and align sections; install couplers or bell-and-spigot joints; apply gaskets, lubricant, or adhesive as specified.
- Secure with mechanical fasteners or clamps when required; follow prescribed backfilling and compaction steps to prevent movement.
A brief, step-by-step walkthrough follows to show proper technique and order.
Step 1 Dry-fit and align sections before sealing
Before applying any sealant, each culvert pipe section should be dry-fitted and aligned to verify fit and grade.
Workers check joint gaps, rotation, and axial alignment, ensuring ends seat uniformly and slope matches plan.
Temporary supports or shims hold sections while adjustments are made.
Confirming alignment minimizes stress, prevents mis-sealing, and identifies damaged or mismatched pieces before permanent sealing.
Step 2 Installing internal and external couplers or bell-and-spigot joints
With sections properly dry-fitted and alignment confirmed, crews proceed to joining using either internal/external couplers or bell-and-spigot connections.
For couplers, insert barrels into pipe ends, seat evenly, and secure with clamps or integrated ribs.
For bell-and-spigot, insert spigot fully into bell, ensuring correct depth and rotation.
Verify axial alignment and gap tolerances before final sealing preparations.
Step 3 Applying gaskets, lubrication, or adhesive correctly
Apply gaskets, lubrication, or adhesive methodically to guarantee a durable, watertight joint: select the correct gasket type and size for the pipe material and joint style, inspect mating surfaces for debris or damage, apply a thin, even film of approved lubricant to the gasket or spigot as specified by the manufacturer, and spread adhesive only where indicated—avoiding excess that can squeeze into the bore—while maintaining recommended cure times and ambient conditions.
Inspect seating depth, align parts, remove trapped air, and verify full gasket compression without twisting.
Step 4 Securing mechanical fasteners or clamps if required
Secure mechanical fasteners or clamps carefully to guarantee joint integrity and prevent movement under load.
The installer aligns pipes, positions clamps over the gasketed joint, then tightens evenly in incremental turns to recommended torque.
Use corrosion-resistant hardware, avoid overcompression of seals, and verify uniform clamping around the circumference.
Inspect for gaps and re-torque after initial settling per manufacturer specifications.
Step 5 Backfilling and compaction sequence to prevent movement
After jointing and fastening, the backfill and compaction sequence must be executed methodically to stabilize the pipe and prevent displacement.
Granular bedding is placed evenly around the haunches in 150–300 mm lifts, compacted uniformly to avoid voids.
Continue with layered fills, testing density with a probe or plate, and maintain gentle compaction near joints to prevent deformation while achieving specified cover and support.
Sealing methods and when to use each
Sealing choices depend on pipe type, joint configuration, and whether a repair is temporary or permanent.
For corrugated culverts, compression gaskets and snap-fit seals are common, while smooth-wall PVC typically uses solvent welding or adhesive bonding.
Mechanical couplers, band clamps, and stainless hardware suit many junctions and heavy-duty connections.
Expanding foam or mastic can stop localized leaks quickly but is best used as a temporary fix unless the product and application are specified for long-term service.
Compression gaskets and snap-fit seals for corrugated culverts
Compression gaskets and snap-fit seals provide two common ways to weatherproof joints in corrugated plastic culverts, each suited to different installation conditions and performance needs.
Compression gaskets compress between pipe ribs for flexible, resilient seals ideal where slight movement or misalignment occurs.
Snap-fit seals lock into corrugations for fast assembly and consistent spacing but offer less tolerance for uneven bedding or significant axial movement.
Solvent welding and adhesive bonding for smooth-wall PVC
Corrugated culvert joints often rely on mechanical seals for flexibility, but smooth-wall PVC systems typically use chemical bonds to produce rigid, watertight connections.
Solvent welding fuses mating PVC surfaces for permanent, pressure-resistant joints; use where disassembly is unnecessary.
Construction adhesives or PVC-specific epoxy suit repairs, alterations to dissimilar materials, or where solvents are restricted.
Selection depends on load, exposure, and maintenance needs.
Mechanical couplers, band clamps, and stainless hardware
Choose mechanical couplers, band clamps, and stainless steel hardware when joints must accommodate movement, be disassembled, or resist corrosive environments.
Mechanical couplers provide flexible, watertight joins for misaligned pipes. Band clamps with elastomeric seals offer quick installation and adjustability. Stainless steel bolts and bands prevent corrosion in wet or salty conditions.
Use these where vibration, maintenance access, or variable soil settlement occur.
Using expanding foam or mastic for localized leaks (temporary vs permanent)
When addressing small, localized leaks in plastic culvert pipe, expanding foam and mastic offer distinct trade-offs: foam provides rapid, temporary filling of voids and irregular gaps, while mastic creates a more durable, waterproof seal suited for longer-term repairs.
Foam suits emergency patches and non-pressurized areas; mastic is preferred for structural joints, buried sections, and when longevity and flexibility under soil movement are required.
Special scenarios and adaptations
The guide next addresses special scenarios and necessary adaptations for successful culvert installations.
It covers joining pipes of differing diameters or materials with adapters, managing angled joints, bends, and offsets, and methods for installing under roadways where load support and cover depth matter.
Techniques for repairing damaged sections without full replacement are also outlined.
Connecting pipes of different diameters or materials (adapters and transition fittings)
Multiple common situations require joining plastic culvert pipe to differing diameters or to metal, concrete, or flexible materials, and these changes rely on a handful of adapter types and connection fittings designed to match size, material compatibility, and flow needs. Use reducers, couplers, flanged adapters, and flexible boots with proper seals and clamps for durable, leak-free connections.
| Adapter Type | Typical Use |
|---|---|
| Reducer | Different diameters |
| Coupler | Same material joins |
| Flanged adapter | Concrete/metal interfaces |
| Flexible boot | Irregular or flexible connections |
Handling angled joints, bends, and offsets
Address angled joints, bends, and offsets by selecting fittings and installation techniques that preserve flow and prevent stress at connection points.
Use preformed bends, long-radius elbows, and adjustable-angle couplers to minimize turbulence. Support and align pipes to avoid sagging.
Employ gradual offsets with sweep fittings rather than sharp bends. Seal connections with compatible gaskets and verify alignment before backfilling to prevent joint failure.
Installing under roadways or driveways (load support and cover depth)
When installing plastic culvert pipe beneath roadways or driveways, engineers must guarantee adequate cover depth and load-bearing support to prevent deformation and premature failure.
Specify embedment material, compaction levels, and bedding profile per pipe manufacturer and local codes. Use geotextile separation, surround with granular fill, and verify live load distribution.
Maintain minimum cover and inspect compaction before pavement restoration.
Repairing damaged sections without full replacement
Repairing a damaged section of plastic culvert without full replacement requires evaluating the extent and cause of the damage, selecting an appropriate repair method, and verifying that the repair will restore hydraulic capacity and structural integrity.
Options include removable patch sleeves, resin-injection crack sealing, and short splice couplers with reinforced collars.
Guarantee proper bedding, corrosion-free joints, pressure testing, and documentation of repaired lengths and expected lifespan.
Common causes of leaks and how to avoid them
Leaks in plastic culvert installations commonly stem from misalignment or inadequate bedding, improper sealing or incompatible gaskets, and movement from thermal expansion, frost heave, or seasonal ground shifts.
Attention to proper joint technique, correct gasket selection, and flexible allowances for expected movement minimizes failure risk.
Protective measures at inlets and outlets, such as sacrificial rock lining or erosion aprons, reduce corrosion and abrasion that can initiate leaks.
Misalignment and inadequate bedding
Misalignment and inadequate bedding are two of the most common causes of plastic culvert pipe failures because they prevent proper joint compression and create uneven load distribution along the run.
Poor alignment stresses joints and permits lateral displacement; insufficient or uneven bedding allows differential settlement and point loading.
Ensuring true line and grade, uniform compacted bedding, and correct pipe support eliminates these failure modes and prolongs service life.
Improper sealing technique or wrong gasket type
Beyond alignment and bedding, the integrity of joints depends on correct sealing practice and gasket selection; improper technique or the wrong gasket type is a frequent source of infiltration and exfiltration.
Installers must clean and dry contact surfaces, seat gaskets evenly, apply recommended lubricant, and choose compatible materials for pressure, chemical exposure, and temperature.
Verify compression and test joints before backfilling.
Thermal expansion, frost heave, and seasonal movement
When exposed to temperature swings and freeze–thaw cycles, plastic culvert pipes and their joints undergo dimensional changes and ground movements that can open seals or stress fittings.
To prevent leaks, allow thermal expansion with designed expansion gaps, flexible couplings, and sliding restraints; install proper bedding and backfill to limit frost heave; and schedule inspection after seasonal changes to adjust or repair compromised joints.
Corrosion or abrasion at inlet/outlet and mitigation strategies
Although plastic culvert pipes resist general corrosion, inlet and outlet areas remain vulnerable to localized abrasion and chemical attack from flowing debris, sediment-laden water, de-icing salts, and stray currents.
Protective measures include rock riprap, concrete aprons, sacrificial liners, and geotextile filters; cathodic isolation where stray currents occur; regular inspection and debris removal; and specifying abrasion-resistant materials or thicker wall sections at vulnerable points.
Inspection, testing, and maintenance for long-term leak prevention
Inspection and testing begin with simple pressure or water tests applied to each joint to confirm watertight seals before backfilling.
A routine inspection checklist — including visual checks for misalignment, gasket damage, sediment buildup, and scheduled intervals after installation and seasonal events — helps catch issues early.
Minor leaks can often be repaired with sealant or gasket replacement, while repeated failures, extensive deformation, or corrosion of mating surfaces indicate the need to replace the joint or the full pipe section.
How to pressure-test or water-test culvert joints
Begin by isolating the culvert section and ensuring joints and fittings are clean and accessible before conducting any pressure or water tests; this preparation minimizes false readings and helps pinpoint true leakage.
Use low-pressure air or hydrostatic tests per pipe rating, monitor gauges and visible seams for bubbles or seepage, hold test for specified duration, document results, and repair or retest any failing joints promptly.
Routine inspection checklist and schedule
After pressure or water tests confirm joint integrity, a routine inspection checklist and schedule help sustain leak-free performance over the culvert’s service life.
Inspect joints, seals, and bedding for displacement, erosion, cracks, or intrusion every six months and after major storms.
Check for sediment buildup, vegetation, and rodent damage.
Record findings, measure leak indicators, and schedule corrective maintenance within defined response times.
Small repairs vs when to replace a joint or full section
Evaluating whether to perform a small repair or replace a joint or full culvert section depends on defect severity, frequency, and impact on hydraulic performance and structural integrity.
Minor cracks, isolated gasket failures, or shallow erosion merit spot repairs, sealing, or targeted component replacement.
Replace when deformation, repeated leaks, extensive corrosion, undermining, or compromised flow capacity threaten safety or require frequent interventions to maintain function.
Cost, time estimates, and material selection guidance
Typical material costs vary by pipe type and diameter, ranging from inexpensive corrugated polyethylene for small diameters to higher-priced smooth-walled HDPE or PVC for larger sizes.
Installation time differs markedly: a competent DIYer may complete a straightforward run in a day or two, while complex sites or hired contractors can take several days and add labor costs.
Buyers are advised to compare warranties, ASTM/EN ratings, and reputable suppliers to guarantee proper fit, longevity, and replacement part availability.
Typical cost range by pipe type and diameter
Cost estimates for plastic culvert pipe vary mainly by material (HDPE, PVC, corrugated polypropylene), diameter, and wall thickness, with unit prices rising considerably for larger diameters and heavier class ratings.
Small 4–6 inch PVC or corrugated polypropylene drains commonly run low per linear foot.
8–15 inch lines occupy a midrange, and 18 inches and above—especially HDPE with smooth interior or higher SDR—command the highest per-foot costs.
Typical ranges:
4–6″ $0.50–3/ft,
8–15″ $3–15/ft,
18″+ $15–60+/ft,
with fittings and connectors adding modest premiums.
Time estimates for DIY vs professional installation
When comparing DIY and professional installation of plastic culvert pipe, time commitments hinge on project scale, site conditions, and installer experience.
Small runs with straightforward trenching often take a competent DIYer a day or weekend; larger diameters, longer runs, or complex grading extend to several days.
Professionals complete similar jobs faster, typically in hours to a couple of days, depending on crew size and equipment.
Buying tips: warranties, ratings, and sourcing quality parts
After estimating time and labor needs, attention turns to selecting and sourcing pipe and fittings that will perform over the long term.
Buyers should prioritize verified ratings, clear warranty terms, and compatible materials. Compare suppliers for availability and lead time.
Consider:
- Manufacturer warranty length and coverage
- UV, crush, and pressure ratings
- Certified matching couplers and seals
Troubleshooting quick-reference guide
A concise troubleshooting quick-reference helps field crews and homeowners address common connection problems quickly.
Refer to these primary issues and actions when evaluating a failed or underperforming joint:
- Leak at joint after backfill — immediate actions
- Joint separation after freeze/thaw — corrective fixes
- Poor flow or clogging at connection — clearing and prevention methods
Leak at joint after backfill immediate actions
Inspect the joint immediately for visible gaps, misalignment, or displaced gasket material. Document leak location, mark orientation, and stop additional backfill.
Temporarily expose the joint, clear soil, and test by drying surfaces and applying a low-pressure water probe to confirm source.
If gasket is intact but seating poor, reposition pipe; if damaged, replace gasket or use a compatible seal sleeve before reseating and compacting.
Joint separation after freeze/thaw corrective fixes
Addressing joint separation caused by freeze/thaw cycles requires rapid assessment and targeted corrective actions to restore seal integrity and alignment.
Inspect for displaced bell/spigot, cracked gasket, or soil loss.
Realign sections, replace damaged gaskets, and use appropriate couplers or adhesive-rated repairs.
Recompact thaw-stable bedding and add insulation or drainage to prevent recurrence.
Verify watertightness before final backfill.
Poor flow or clogging at connection clearing and prevention methods
Clear blockages and restore capacity by first identifying the clog location, type, and likely source—debris buildup at the bell, silt and roots within the barrel, or intrusion from upstream structures each require different responses.
Use mechanical removal (rodding, jetting), targeted root cutting, and downstream flushing.
Inspect and repair misaligned joints, add grates or trash racks, and schedule routine inspections to prevent recurrence.
Visual aids and dimensions to verify fit

Photographs, scaled sketches, and simple templates help confirm that pipe sections, fittings, and couplers match before assembly.
Measurements—outer diameter, inner diameter, wall thickness, and coupling depth—are documented and compared to manufacturer specs.
Mark alignment points and insertion depths on the pipe.
Use calipers, tape measure, and transparent templates to verify tolerances and avoid misalignment, ensuring a snug, leak-free connection.
Conclusion
In practice, a leak-free culvert joins method and care—cleaned ends, proper gasket, correct sealant—into reliable performance. One contractor likened fitting pipe to tuning a violin: a perfectly seated joint sang through a heavy storm where a nearby older culvert failed. That single installation reduced washouts by 90% that season, illustrating how precise technique and routine inspection turn simple components into durable infrastructure, saving time, cost, and future headaches.