How to Repair Concrete Storm Drain Pipe: Step-by-Step Fixes for Cracks, Leaks, and Collapses
To repair a concrete storm drain pipe, begin with a thorough inspection to identify cracks, leaks, or structural issues. For small surface cracks, use polymer mortar to route, bond, and patch the affected areas. Address active leaks with temporary plugs or epoxy injections, followed by pressure testing. In cases of partial collapses, you may need to replace sections or utilize trenchless methods like CIPP or sliplining to restore structural integrity. Your choice of repair method will depend on costs, time, and soil conditions. Continue reading for detailed procedures, necessary tools, and estimated costs.
Overview of Concrete Storm Drain Pipe Damage and Repairs
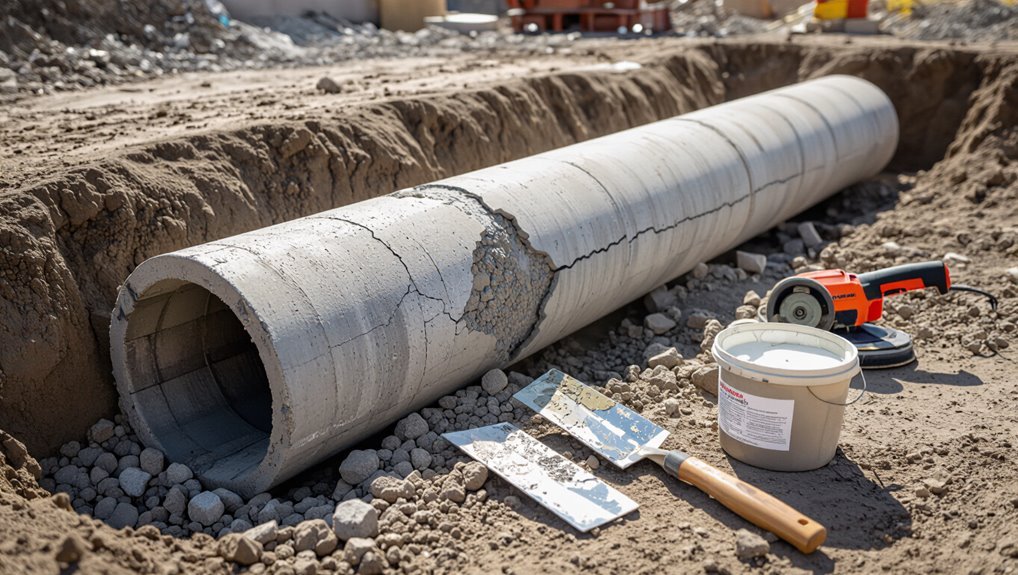
Concrete storm drain pipes commonly develop cracks, leaks, and occasional collapses from factors such as ground movement, corrosion of reinforcement, abrasion, and improper installation.
Decision to repair or replace hinges on extent of structural damage, pipe age, service life remaining, and cost-effectiveness.
Safety protocols, traffic control, confined-space procedures, and local permitting requirements must be addressed before any work begins.
Common causes of cracks, leaks, and collapses in storm drain pipes
Many factors contribute to cracks, leaks, and collapses in storm drain pipes, including soil movement, corrosion, hydraulic overload, and construction damage.
Ageing concrete, freeze-thaw cycles, root intrusion, and chemical attack weaken structures.
Poor initial installation and heavy traffic loads exacerbate defects.
Identifying these causes guides prioritization in how to repair concrete storm drain pipe and select appropriate patching or structural methods.
When to repair vs when to replace a storm drain pipe
Evaluating whether to repair or replace a storm drain pipe hinges on the extent, location, and cause of damage as well as long-term performance requirements.
Minor surface cracks, isolated leaks, and shallow spalling often suit targeted repairs (patching, epoxy, or liners).
Extensive structural failure, multiple joint separations, severe corrosion, or repeated failures typically mandate replacement to restore capacity and guarantee longevity.
Safety considerations and required permits
Evaluating safety and permit requirements is essential before any storm drain pipe repair work begins, as compliance and hazard mitigation protect workers, the public, and infrastructure.
Project scope dictates confined-space procedures, traffic control, shoring, PPE, and environmental protections for water quality and utilities.
Permits from local public works, environmental agencies, and utility owners are often required; documentation and inspections guarantee lawful, safe restoration.
Diagnosing the Problem: How to Inspect a Storm Drain Pipe
A thorough inspection begins with a visual surface survey to note cracks, spalling, joint gaps, and surface staining.
Internal camera or CCTV inspection then documents pipe condition, blockages, and defects while soil, groundwater and loading conditions are evaluated to assess external stresses.
Active leaks and infiltration points are located using flow monitoring, dye testing or smoke testing and confirmed on-camera.
Visual surface inspection steps
Surface inspection focuses on identifying visible signs of damage, blockage, or misalignment along accessible sections of the storm drain pipe and its immediate surroundings.
Document cracks, spalling, exposed rebar, joint separations, displaced segments, erosion at inlets/outlets, sediment or debris accumulation, and surface water infiltration.
Record locations, dimensions, and severity with photos and notes to guide repair prioritization and safety measures.
Using CCTV and internal camera inspection
Several key advantages make CCTV and internal camera inspection the preferred method for diagnosing subsurface issues within storm drain pipes.
Inspectors deploy waterproof CCTV units to record continuous footage, mapping defects, joint separations, intrusions, sediment buildup, and root ingress.
Real-time viewing and recorded playback enable precise defect location, severity grading, and measurement, informing targeted repairs while minimizing excavation and surface disruption.
Soil, groundwater and load assessment
Following CCTV findings, inspectors expand the assessment to surrounding soils, groundwater conditions, and imposed loads to determine why a pipe failed or is deteriorating.
They evaluate soil type, compaction, and erosion potential; monitor groundwater level, flow direction, and seasonal fluctuations; and quantify surface and traffic loads, surcharge events, and nearby structures.
Correlating these factors identifies external drivers of damage and informs remediation design.
How to locate active leaks and infiltration points
How can inspectors pinpoint active leaks and infiltration points efficiently within a storm drain network? Inspectors combine visual CCTV surveys, dye or smoke testing, and flow monitoring to detect anomalies.
Manhole inspections, ultrasonic or acoustic leak detectors, and thermal imaging help locate seepage. Pressure or tracer tests confirm active inflow.
Documented coordinates and photographs guide targeted repairs and risk prioritization.
Tools, Materials, and Equipment Needed
The section lists the specific hand and power tools commonly used for pipe repair and the range of repair materials, including concrete patch, epoxy, polymer mortars, liners, grout, and sealants.
It also outlines temporary shoring, diversion, and dewatering equipment needed to work safely in and around the drain.
Guidance is provided on when to call in professional equipment such as excavators, CCTV inspection rigs, and pressure grouting units.
Hand and power tools checklist
A concise inventory of hand and power tools streamlines the repair of a concrete storm drain pipe by ensuring technicians have the right equipment on site—basic hand tools (hammers, chisels, cold chisels, wire brushes, pry bars), measuring tools (tape measure, level, straightedge), cutting and grinding equipment (angle grinder with diamond blades, wet saw or core drill), drilling and fastening tools (rotary hammer or SDS drill, masonry bits, impact driver), mixing and finishing tools (mixing paddle, mortar hoe, trowels, float), and safety gear (respirator, eye and ear protection, gloves, knee pads) alongside specialized items like concrete patch pumps, shoring jacks, and inspection cameras as needed.
- Inspect and checklist tools before mobilizing.
- Prioritize power-tool maintenance and spare bits.
- Pack PPE and fall-protection items.
- Include small consumables: anchors, washers, mixing buckets.
Repair materials: concrete patch, epoxy, polymer mortars, liners, grout, sealants
Following equipment preparation and PPE checks, material selection determines durability and compatibility for a concrete storm drain repair.
Choices include concrete patch for spalls, epoxy for injection cracks, polymer mortars for rapid structural repairs, and cured-in-place liners for extensive damage.
Grouts fill voids; sealants prevent seepage. Matching material properties to substrate and exposure guarantees long-term performance.
- Concrete patch
- Epoxy injection
- Polymer mortar
- Liner/grout/sealant
Temporary shoring, diversion, and dewatering equipment
One set of temporary shoring, diversion, and dewatering equipment establishes a safe, dry work area for concrete storm drain repairs by stabilizing trenches, redirecting flow, and lowering groundwater as needed.
Equipment selection depends on site size, flow, and soil. Common items include:
- Steel trench boxes or adjustable shores
- Inflatable or dam panels for flow diversion
- Submersible pumps with hoses
- Sump pans and dewatering wells
When to hire professional equipment (excavator, CCTV, pressure grouting rigs)
Judgment about when to hire professional equipment hinges on risk, scale, and technical need: projects involving deep excavation, high-flow systems, significant structural deficiency, or subsurface inspection beyond visual reach typically require an excavator, CCTV inspection rig, or pressure-grouting unit.
Hire pros when safety, access, or permit constraints exceed DIY capacity, when diagnostics demand CCTV, or when pressure grouting guarantees durable leak sealing.
Step-by-Step Repair for Small Surface Cracks
The procedure begins with preparing the area by thoroughly cleaning and drying the crack to remove debris and moisture.
Next, the crack is routed and widened as needed, a bonding agent is applied, and an appropriate patching compound is worked into the opening for proper adhesion.
Finally, the repair is finished, cured according to product instructions, and monitored for performance.
Preparing the area: cleaning and drying
Begin by removing loose debris, dirt, algae, and efflorescence from the crack and surrounding surface using a stiff brush or wire brush; this guarantees repair materials bond to sound concrete rather than to contaminants.
Rinse thoroughly with clean water, then allow the area to air-dry or use low-pressure air to remove moisture.
Confirm dryness before applying any patching compound or primer.
Routing and widening cracks for proper bonding
Carefully route and widen cracks to create a uniform V- or U-shaped groove that exposes sound concrete and increases surface area for bonding.
Use a handheld grinder or masonry chisel to remove loose material, feather edges, and achieve consistent depth and width.
Remove dust and debris with a brush or compressed air.
Inspect for hidden voids or hairline extensions before proceeding.
Applying bonding agent and patching compound
Mix a compatible bonding agent according to manufacturer instructions and apply it evenly to the routed groove and surrounding sound concrete to guarantee adhesion.
After tack time, pack a premixed or field-mixed cementitious patching compound into the groove, pressing firmly to eliminate voids.
Strike flush with surrounding surface, tool edges for cohesion, and remove excess.
Use only materials rated for submerged or wet conditions.
Finishing, curing, and monitoring
Once the patching compound has been struck flush and edges tooled, attention turns to finishing, curing, and monitoring to guarantee durable adhesion and performance.
This phase includes final surface shaping, protective curing, and scheduled inspections for developing issues.
Finish smoothing with appropriate tools, apply curing membrane or damp burlap for recommended duration, document repair condition, and schedule follow-up inspections to detect shrinkage, bond failure, or new cracks.
Step-by-Step Repair for Active Leaks and Holes
When an active leak or hole is encountered, the first priority is to stop or divert flowing water using temporary plugs or bypassing flow to create a dry work area.
Once flow is controlled, injectable epoxy or polyurethane is used for sealing active leaks while larger voids are repaired with form-and-pour techniques or preformed patch systems.
After repairs cure, the work is pressure- or water-tested to confirm watertightness before restoring normal service.
Stopping water flow: temporary plugs and flow diversion
Stop the flow quickly to create a dry, safe workspace before attempting permanent repairs; temporary plugs and flow diversion techniques are essential for controlling active leaks and holes in concrete storm drain pipes.
Workers select inflatable or mechanical pipe plugs sized to the breach, install upstream bypass pumps or cofferdams, and secure temporary seals.
Monitor for movement, test stability, and maintain worker safety until permanent repair begins.
Injecting epoxy or polyurethane for active leaks
With flow controlled and temporary seals in place, crews can proceed to inject epoxy or polyurethane to arrest active leaks and fill voids in the concrete storm drain pipe.
Technicians choose material based on leak size and water chemistry, install injection ports, pump at low pressure to fill cracks, monitor for material emergence, allow cure per manufacturer, then remove ports and test for remaining leakage.
Patching larger holes with form-and-pour or preformed patches
Begin by preparing the damaged area for a patch: remove loose concrete and debris, chase the hole edges to sound material, and dry or dewater the surface as required by the chosen method.
For form-and-pour, build a tight form, install reinforcement if needed, and cast shrinkage-controlled repair mortar.
For preformed patches, seat and seal the unit, backfill with compatible grout, and cure per manufacturer instructions.
Post-repair testing for watertightness
After repairs are completed and curing requirements have been met, a systematic watertightness test verifies the integrity of the patch and surrounding concrete.
The inspector isolates the repair, fills the pipe section to specified head, and monitors for pressure loss or visible seepage over a defined period.
Any leakage triggers targeted rework; documented results confirm compliance with performance criteria and project specifications.
Repairing Structural Cracks and Partial Collapse
Repairing structural cracks and partial collapse begins with a thorough assessment of the pipe’s integrity and load-bearing requirements to determine whether localized repair or full replacement is necessary.
The damaged section must be excavated and exposed safely, with temporary supports and shoring installed before any concrete removal.
Options for restoration range from full‑depth concrete replacement with reinforcement to trenchless alternatives such as CIPP or sliplining when appropriate.
Assessing structural integrity and load-bearing requirements
Evaluate the pipe’s remaining structural capacity by documenting crack patterns, measuring section loss, and determining whether load paths have been compromised.
Inspect for spalling, corrosion of reinforcement, misalignment, and deflection.
Calculate residual capacity versus imposed loads (soil, traffic, hydrostatic).
Identify zones requiring reinforcement, temporary shoring, or full replacement.
Report findings with measurements, sketches, and recommended safety margins for design decisions.
Excavation and exposing the damaged section safely
Begin excavation only after establishing a safe work zone, verifying underground utilities, and implementing shoring and dewatering measures appropriate to the site’s soil, water table, and traffic conditions.
Excavate methodically to expose the damaged section, preserving undisturbed soil near undamaged pipe. Remove backfill to provide full access, document damage, and protect adjacent structures and surfaces from vibration, falling debris, and contamination during subsequent repairs.
Installing temporary supports and shoring
With the damaged section exposed and utilities secured, installers set up temporary supports and shoring to stabilize the pipe and surrounding soil before any structural repairs proceed.
They place adjustable steel props, timber walers, and trench boxes as required, anchor shoring to firm ground, and verify alignment and load capacity.
Continuous monitoring for settlement or movement informs adjustments until permanent repairs begin.
Full-depth concrete replacement and reinforcement techniques
Repair crews proceed to remove all unsound concrete through controlled demolition until intact, load-bearing material is reached, exposing reinforcing steel for assessment.
Corroded rebar is cleaned or replaced, new formwork installed, and high-strength, shrinkage-compensated concrete or grout is placed in lifts.
Mechanical anchors, additional dowels, and fiber or steel reinforcement restore continuity.
Curing, joint reinstatement, and final inspection confirm structural integrity.
Alternative: in-situ lining (CIPP) or sliplining for structural restoration
When full-depth replacement is impractical due to access, cost, or traffic constraints, crews may opt for in-situ lining methods such as cured-in-place pipe (CIPP) or sliplining to restore structural capacity and seal cracks or partial collapses.
These techniques minimize excavation, provide continuous corrosion-resistant liners, and accommodate varying diameters.
Evaluation includes CCTV inspection, structural calculations, host-pipe condition assessment, and planning for bypass flow during installation.
Trenchless and Non-Destructive Repair Options
Trenchless and non-destructive techniques offer alternatives to open excavation for rehabilitating concrete storm drain pipes.
Options include cured-in-place pipe (CIPP) lining with its durability and installation constraints, sliplining or pipe bursting depending on diameter loss and alignment, sprayed mortar or robotic patching for targeted repairs, and chemical grouting to fill voids and stabilize surrounding soil.
Selection depends on defect type, access, hydraulic requirements, and long-term maintenance considerations.
Cured-in-place pipe (CIPP) lining process, pros and cons
Although installed without extensive excavation, cured-in-place pipe (CIPP) lining creates a new, seamless structural pipe inside an existing concrete storm drain by inserting a resin-saturated felt tube, inflating it to conform to the host pipe, and curing the resin with heat or UV light; this method minimizes surface disruption, reduces infiltration and exfiltration, and can extend service life by decades.
| Advantage | Limitation |
|---|---|
| Minimal excavation | Limited diameter reduction |
| Long lifespan | Requires access points |
| Fast installation | Resin sensitivity to conditions |
| Structural restoration | Inspection needed before use |
Sliplining and pipe bursting overview and when to use each
Following CIPP as a point-repair option, sliplining and pipe bursting present alternative trenchless methods for rehabilitating damaged concrete storm drain pipes by either inserting a new carrier pipe inside the host (sliplining) or fracturing and replacing the original pipe with a larger one (pipe bursting).
Sliplining suits minor diameter reduction and structurally sound hosts; pipe bursting addresses severe deformity, collapse, or capacity increases. Both reduce surface disturbance.
Sprayed mortar (shotcrete) and robotic repair options
Sprayed mortar (shotcrete) and robotic repair systems offer targeted, low-impact alternatives for restoring concrete storm drain pipes without full excavation.
Shotcrete applies cementitious overlay to seal cracks, rebuild section loss, and restore structural capacity.
Remotely operated robots can clean, inspect, and accurately place patches or thin linings in confined runs, reducing traffic disruption and worker entry while enabling rapid, durable repairs.
Chemical grouting for voids and soil stabilization
Chemical grouting injects reactive resins or cementitious slurries into surrounding soils and voids to stop water ingress, fill cavities, and stabilize pipe foundations without excavation.
Technicians pressure-inject tailored polymers or microcements through grout ports or probes, targeting voids beneath bellies and joints.
Curing consolidates soils, restores bearing capacity, and seals leaks.
Suitable for confined sites, it complements lining or localized concrete repairs.
Addressing Soil Voids and Groundwater Issues
Addressing soil voids and groundwater begins with targeted pressure grouting to fill cavities beneath and around the pipe, restoring support and reducing settlement risk.
Proper backfill selection and compaction techniques are then applied to stabilize the surrounding soil and prevent future movement.
Finally, improving site drainage—through surface grading, subdrains, or upgraded outlet structures—reduces groundwater pressure and prevents undermining of the repaired pipe.
Pressure grouting methods to fill voids
Begin by selecting an appropriate pressure grouting technique to fill soil voids and control groundwater around damaged storm drain pipe sections. The chosen method should match site conditions, void size, soil permeability, and groundwater presence.
Typical options include cementitious grouts for larger voids, low-viscosity chemical grouts for fine soils, and polyurethane for water control.
Injection patterns, pressures, and monitoring prevent overpressurization and guarantee void fill.
Stabilizing backfill and compaction best practices
When soil voids and groundwater have been mitigated through grouting or drainage, the next critical step is to place and compact backfill in a controlled sequence to restore trench stability and prevent future settlement.
Use well-graded engineered fill, place in uniform lifts (150–300 mm), moisture-condition each lift, and compact to specified density with appropriate equipment.
Verify compaction with testing and protect completed zones from erosion.
Improving drainage to prevent future undermining
Improving drainage around a repaired storm drain pipe is essential to prevent future soil voids and undermining by directing surface and subsurface water away from vulnerable zones.
Implementing graded slopes, perimeter drains, and geotextile-wrapped French drains reduces infiltration. Install outlet protection, catch basins, and diversion swales.
Regular inspection of groundwater levels and maintenance of vegetation guarantees long-term stability and prevents recurrence of erosion.
Quality Assurance, Testing, and Post-Repair Monitoring
The repair team implements standardized leak testing methods with clear acceptance criteria to verify hydraulic integrity before reinstatement.
CCTV inspection is conducted after repairs to confirm structural continuity and identify any residual defects.
Post-repair monitoring tracks settlement and surface performance over time to guarantee long-term stability and to trigger remedial action if degradation is detected.
Leak testing methods and acceptance criteria
Several standardized leak testing methods—visual inspection, hydrostatic and pneumatic testing, and tracer dye or smoke tests—are employed to verify the integrity of repaired concrete storm drain pipes and establish acceptance criteria based on allowable leakage rates, pressure retention, and absence of visible defects.
Test procedures specify test duration, target pressure, maximum leakage volume per unit length, and remedial actions if criteria are not met.
CCTV inspection after repair
Deploys a CCTV inspection immediately after repair to verify workmanship, document defect resolution, and establish a visual baseline for future monitoring.
The camera run records joint integrity, patch adhesion, and any residual leakage or debris.
Annotated video and stills are archived with time stamps, defect codes, and repair references.
Findings inform acceptance, punch lists, and any immediate corrective actions before site demobilization.
Monitoring settlement and surface performance over time
Monitor settlement and surface performance over a defined period to confirm repair durability and detect emerging issues.
Inspect crowns, joints, and surround surface monthly for the first six months, then quarterly for two years.
Record depressions, cracks, rutting, and water pooling; measure settlement using survey benchmarks or laser levels.
Correlate findings with CCTV and flow data, triggering remediation if thresholds exceeded.
Cost Estimates, Timeframes, and Decision Criteria
Typical cost ranges for repairs—patching, relining, section replacement, or full reconstruction—are presented alongside expected project timelines and levels of disruption to traffic and drainage.
Timeframes vary from a day for localized patches to weeks for relining and months for full replacement, with disruption scaled accordingly.
Decision criteria include pipe condition, service life remaining, access constraints, regulatory requirements, and available budget, all of which directly influence method selection and final cost.
Typical cost ranges by repair type
When selecting a repair method for a concrete storm drain pipe, cost estimates, expected timelines, and site conditions together determine the most appropriate option; simple patching and sealing typically runs lowest in both price and duration, cured-in-place lining and sectional replacement occupy midranges, and full open-trench replacement is the most costly and time-consuming. Typical cost ranges by repair type:
| Repair Type | Typical Cost Range | Notes |
|---|---|---|
| Patching/Sealing | $200–$2,000 | Small, local fixes |
| CIPP Lining | $1,000–$10,000 | Trenchless, longer life |
| Sectional Replacement | $2,000–$20,000 | Moderate excavation |
| Open-Trench Replacement | $10,000–$100,000+ | Complete rebuild |
Expected project timelines and disruption levels
A clear timeline and an assessment of site disruption are central to choosing a repair approach, as each method carries distinct duration, access needs, and community impacts.
Small patching projects often finish in hours to a few days with minimal traffic or utility interruptions.
CIPP lining generally requires one to several days plus curing time and limited access to manholes.
Sectional replacement can take several days to weeks with localized excavation and phased traffic controls.
Open-trench replacement commonly extends from weeks to months with major excavations, detours, and potential utility relocations.
Project scheduling should include permitting, inspections, contingency for weather, and stakeholder notifications to minimize unexpected delays and community impact.
Factors that influence repair choice and budget
Choose repair methods based on a balance of condition severity, site constraints, budget, and schedule: cost estimates hinge on material and labor needs, access and traffic control requirements, and any necessary utility relocations, while timeframes depend on method-specific steps (inspection, preparation, installation, curing) and permitting.
Decision criteria should weigh lifecycle costs, service interruption, risk of recurrence, available funding, and stakeholder tolerance for disruption.
Contractors compare options, risk, warranties, and maintenance needs to recommend cost-effective, durable solutions aligned with operational constraints.
Maintenance and Prevention to Extend Service Life
A consistent maintenance program begins with a routine inspection schedule that notes pipe condition, joint integrity, flow obstruction, and any observed measurements or photos for trend tracking.
Regular removal of debris and control of nearby vegetation prevents blockages and root intrusion that accelerate deterioration.
Where failures recur, targeted design adjustments and load-management strategies—such as improved bedding, additional reinforcement, or surface drainage changes—are recommended to reduce future damage.
Routine inspection schedule and what to record
Regular inspections should be scheduled at predictable intervals—typically quarterly for drainage systems in moderate climates and monthly during high-flow seasons—to promptly detect deterioration, blockages, or shifts that could compromise performance.
- Record date, inspector, weather, and flow conditions.
- Note crack locations, dimensions, and progression.
- Photograph defects, joints, and any misalignment.
- Log repairs, materials used, and recommended follow-up.
Debris management and vegetation control
Inspection records often reveal recurring sources of blockage and root intrusion, which inform targeted debris management and vegetation control strategies to preserve storm drain performance.
Crews remove sediment, litter, and invasive plants; schedule seasonal cleanouts; trim nearby trees and replace aggressive species with low-rooting groundcover.
Use noninvasive herbicides sparingly, install root barriers where permitted, and document actions to track effectiveness and adjust maintenance intervals.
Design changes and load-management to reduce recurrence
Design modifications and targeted load-management strategies reduce recurrence by addressing root causes rather than symptoms.
Engineers assess hydraulic capacity, slope, and inlet sizing; upgrade liners, joints, and bedding to improve stress distribution.
Load limits, traffic rerouting, and reinforcement at known weak points mitigate external stresses.
Scheduled inspections verify performance, and adaptive maintenance adjusts designs based on observed deterioration trends to extend service life.
Signs That Require Immediate Professional Intervention
Visible structural collapse, large sinkholes, sudden section sagging, or exposed reinforcement signal imminent failure and immediate professional action to protect public safety.
Rapidly worsening leaks or severe undermining near roads and sidewalks should prompt emergency response and traffic controls.
Additionally, signs that could trigger legal or regulatory consequences—such as discharge of contaminated water, damage to public property, or failure to meet permit conditions—require notification of authorities and qualified contractors.
Indicators of imminent collapse or public safety risk
Any sudden or severe changes in a drain pipe’s condition demand immediate attention because they often indicate an imminent collapse or an active public safety hazard.
Visible sagging, large open fractures, exposed reinforcing steel, soil subsidence or sinkholes nearby, sudden upstream/backflow, strong sewage odors, or sudden loss of flow capacity are clear indicators.
Evacuate area and notify professionals immediately.
Legal and regulatory issues for storm drain failures
When must authorities be notified and professionals engaged? Local regulations often mandate reporting significant structural failure, sewage discharge, roadway undermining, or public hazard.
Immediate professional engagement is required for collapse risk, contamination, and permit-triggering repairs.
Failure to comply can incur fines, liability, and emergency remediation orders.
Documentation, chain-of-custody for samples, and coordination with municipal stormwater authorities guarantee legal compliance and risk mitigation.
Case Examples and Repair Scenarios
The section presents concise case examples showing how common failures are addressed.
It summarizes steps for repairing a small crack with epoxy injection, replacing a collapsed segment using CIPP lining, and compares cost and time between trenchless and open-cut methods.
Each example highlights key actions, timelines, and typical budget ranges for informed decision-making.
Small crack repaired with epoxy injection step summary
Begin by isolating the crack and ensuring the pipe is clean and dry to allow proper epoxy penetration.
This step summary outlines the sequence used in typical small-crack epoxy-injection repairs, from surface preparation and port placement through pressure injection, curing, and verification.
Install injection ports along the crack, seal surface, inject epoxy under controlled pressure, allow cure per manufacturer, remove ports, restore surface, and inspect for leaks.
Collapsed segment replaced with CIPP lining step summary
Having covered epoxy injection for hairline cracks, the focus moves to replacing a collapsed storm drain segment using cured-in-place pipe (CIPP) lining.
Technicians assess extent, clean and CCTV-inspect the run, invert resin-saturated liner, inflate and cure in place, then reinspect.
Result restores structural integrity and flow with minimal excavation.
Post-installation checks guarantee joint continuity and serviceability.
Cost-and-time comparison of trenchless vs open-cut solutions
Compare trenchless and open-cut repairs using clear metrics of cost, duration, and disruption to determine the most appropriate approach for a given storm drain failure. Trenchless often lowers restoration cost and traffic impact, with shorter site time for long runs. Open-cut may be cheaper for very shallow, short segments but increases restoration and closure time.
| Method | Cost | Typical Duration |
|---|---|---|
| Trenchless | Moderate–High upfront, lower restoration | Days–weeks |
| Open-cut | Low–Moderate upfront, high restoration | Weeks–months |
Conclusion
Concrete storm drain pipe repairs, when timely addressed, restore functionality and prevent wider infrastructure failure. Studies show localized repairs can extend service life by up to 40%, making early intervention cost-effective. Inspectors should prioritize sealing small surface cracks, plugging active leaks, and shoring collapsed sections while weighing cost and safety. Routine maintenance and prompt professional assessment for major damage minimize disruptions and long-term expenses, preserving drainage performance and public safety.