How to Clean Up Sewage in Yard Safely: Step-by-Step Cleanup & Disinfection Guide
To safely clean up sewage in your yard, follow these essential steps: First, assess the area from a safe distance, blocking runoff and ensuring people and pets stay away. Equip yourself with waterproof gloves, boots, eye protection, and a mask. Begin by removing solid waste using scoops, then contain liquids with absorbent materials. Clean surfaces with approved cleaners, applying disinfectant at the required concentration and ensuring it remains for the necessary contact time. Rinse surfaces afterward and reapply disinfectant if needed. Dispose of contaminated materials in heavy-duty bags according to local regulations. For extensive spills or deep soil contamination, seek professional assistance. Detailed steps can be found below.
How to Respond Immediately After Sewage Is in Your Yard
Upon discovering sewage in the yard, one should first assess risks from a safe distance, noting source, flow, and nearby people or pets.
If contamination is extensive, smells strong, or systems are compromised, evacuate the area and contact trained professionals immediately.
While awaiting help, take quick containment measures such as blocking runoff paths and keeping others away to limit spread.
Assessing the situation safely before taking action
Before any cleanup begins, the responder should pause to evaluate hazards, extent of contamination, and access routes to prevent injury and further spread.
They note sewage source, volume, nearby water, wind direction, and vulnerable people or animals.
Using that assessment, they plan safe tools, PPE, containment, and disposal steps for how to clean up sewage in yard, minimizing cross-contamination before action.
When to evacuate and call professionals
If sewage is flowing freely, smells strongly of chemicals or methane, or has reached living spaces, occupants should evacuate immediately and keep others and pets away; professionals and emergency services must be contacted.
Evacuation is also warranted for visible gas leaks, electrical hazards, or large contaminant volumes.
Licensed remediation, plumbers, or environmental health authorities should assess risks, secure the site, and manage removal and testing before reentry.
Quick containment steps to prevent spread
Several immediate actions can limit sewage spread and exposure: cordon off the affected area, block storm drains and low spots with sandbags or soil, and divert runoff away from buildings using temporary berms or trenches.
Personnel should wear PPE, prevent foot traffic, mark hazards, and isolate contaminated materials.
Secure pets, document conditions, and notify neighbors and authorities to coordinate containment and cleanup.
Personal Safety and Protective Equipment
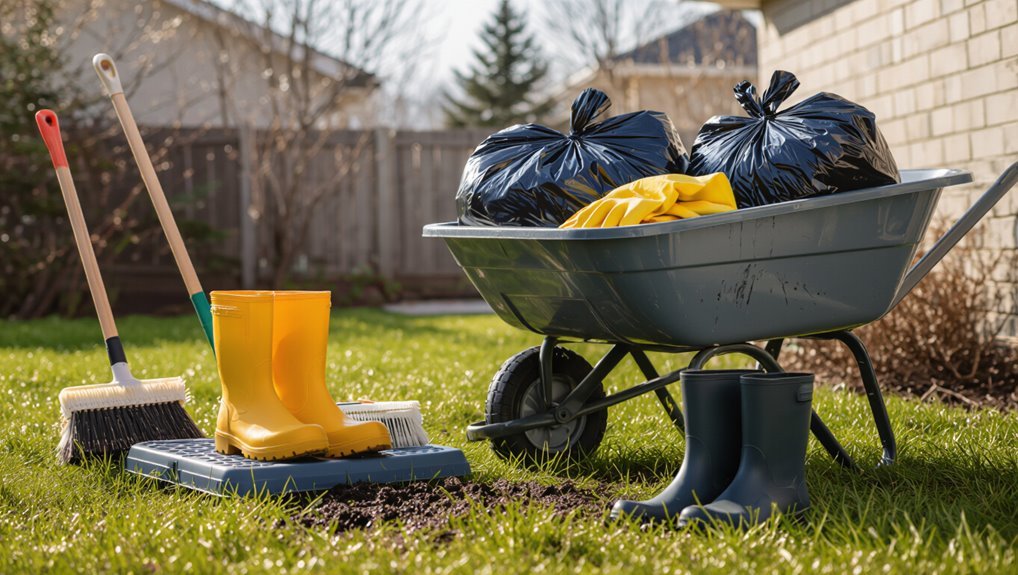
Before beginning cleanup, the individual should use essential PPE—waterproof gloves, rubber boots, a fitted mask, and eye protection—to reduce exposure to pathogens and contaminants.
Clear instructions for correctly donning and doffing each item help prevent self-contamination during removal.
Vulnerable people, children, and pets should be kept away from the affected area and handed off to a healthy caregiver until the site is secured and sanitized.
Essential PPE checklist (gloves, boots, masks, eye protection)
Personal protective equipment forms the first and most essential barrier between workers and hazardous sewage contaminants.
The checklist includes chemical-resistant gloves, knee-high waterproof boots with slip-resistant soles, N95 or higher respirators for aerosol protection, and sealed eye protection or face shields.
Disposable coveralls and waterproof aprons are recommended.
All PPE must be intact, appropriately sized, and compatible with cleaning chemicals.
Proper donning and doffing of PPE
With the PPE checklist established, attention turns to proper donning and doffing procedures to prevent contamination and guarantee effectiveness.
Personnel should don PPE in sequence: gown, mask or respirator, eye protection, then gloves overlapping cuffs.
After work, remove contaminated items carefully: gloves, eye protection, gown, mask last, avoiding contact with exposed surfaces.
Dispose or decontaminate properly and perform hand hygiene immediately.
Handling vulnerable people, pets, and children
When caring for vulnerable individuals, children, or animals during yard sewage cleanup, caregivers should minimize exposure by keeping them well away from the affected area and assigning one trained person to supervise any necessary interactions.
That supervisor must wear appropriate PPE, limit contact, decontaminate hands and clothing after interaction, and transfer care to medical professionals if exposure, illness, or contamination is suspected.
Tools and Supplies You’ll Need
The section outlines essential cleaning tools and waste-removal supplies, such as shovels, heavy-duty trash bags, and leakproof containers, needed to contain and remove contaminated material.
It then specifies appropriate disinfectants with basic dosing guidelines to guarantee effective sanitization without overuse.
Finally, it describes optional rental equipment — like wet/dry vacuums or pressure washers — and clear criteria for when their use is warranted.
Cleaning tools and waste removal supplies
Gather essential personal protective equipment, disinfection products, and durable waste-removal tools before beginning any yard sewage cleanup.
Appropriate tools minimize exposure and guarantee proper collection, transport, and disposal of contaminated materials.
Include puncture-resistant bags, rigid scoops, and secure containers.
Follow local disposal rules and label waste clearly to protect handlers and downstream processing facilities.
- PPE and gloves
- Rigid scoops/shovels
- Puncture-resistant bags
Disinfectants and dosing guidelines
After collecting contaminated materials and securing them for removal, attention shifts to selecting disinfectants and determining proper doses to inactivate pathogens effectively.
Common choices: bleach (sodium hypochlorite), hydrogen peroxide, and EPA-registered disinfectants.
Follow label dilution and contact-time instructions; adjust for organic load. Use measured containers, PPE, and never mix chemicals.
- Bleach: 1:10 for heavy contamination
- Peroxide: manufacturer dose
- EPA product: label guidance
Optional rental equipment and when to use it
Heavy-duty tools can speed cleanup and reduce risk when sewage contamination is extensive or the yard terrain complicates manual work.
Recommended rentals include trash pumps for standing sewage, high-capacity wet/dry vacuums, pressure washers with heated units for stubborn residues, and portable generators for power.
Use industrial dehumidifiers and air scrubbers for prolonged moisture issues or indoor-adjacent contamination to prevent mold and airborne pathogens.
Step-by-Step Sewage Cleanup Process
The cleanup begins with preparing the area and establishing a safe perimeter to prevent exposure and cross-contamination.
Next, solid waste and contaminated debris are removed, liquid sewage is contained and collected, and affected surfaces and soil are washed with approved cleaning solutions.
Finally, disinfectants are applied with attention to required contact times to guarantee effective pathogen inactivation.
Preparing the area and establishing a safe perimeter
One clear step is to cordon off the affected area to protect people and pets while evaluating access points and potential runoff paths.
The responder should post visible barriers and warning signs, keep bystanders at a safe distance, and identify safe routes for equipment.
Drainage should be blocked to prevent spread.
Personal protective gear staging and decontamination zones are established before cleanup begins.
Removing solid waste and contaminated debris
Begin by carefully collecting and containing all visible solid waste and debris using appropriate tools (shovels, scoops, puncture‑resistant bags) while wearing full PPE.
Segregate hazardous items (sharp objects, medical waste) into labeled, sealed containers.
Remove soaked porous materials that cannot be disinfected.
Double‑bag solids, decontaminate reusable tools, and transport waste to approved disposal sites per local regulations, minimizing soil disturbance.
Containing and collecting liquid sewage
Secure a perimeter around affected areas and stop further spread of contaminated liquid by erecting temporary barriers such as sandbags, absorbent socks, or plastic sheeting weighted at the edges.
Pump or siphon pooled sewage into sealed containers using dedicated, labeled equipment.
Place saturated absorbents into heavy-duty biohazard bags.
Minimize tracking by limiting foot traffic and disinfecting tools before removal for proper disposal.
Washing surfaces and soil with appropriate solutions
After containing and removing bulk waste, surfaces and affected soil should be washed using targeted disinfectant solutions to reduce pathogens and odors.
Personnel wearing appropriate PPE scrub hard surfaces, paved areas, and tools with stiff brushes and low-pressure rinses.
For soil, remove heavily contaminated topsoil when feasible; otherwise, wash gently to avoid runoff.
Collect and dispose of wash water per local regulations.
Applying disinfectants and contact time requirements
Apply disinfectants methodically, ensuring the chosen product is appropriate for sewage pathogens and compatible with the surface and local disposal rules.
Apply evenly to affected areas, saturating organic matter and porous surfaces. Observe manufacturer-specified contact times to inactivate viruses, bacteria, and parasites.
Reapply if drying occurs before the full contact period. Record products used, concentrations, start and end times for compliance and safety.
Final rinse and drying procedures
Once disinfectants have been allowed their full contact time and any reapplications completed, attention shifts to removing residual solutions and promoting thorough drying.
Surfaces are rinsed with clean water using low-pressure hoses to avoid aerosolization. Excess water is squeegeed or blotted with disposable absorbents.
Natural ventilation and sunlight accelerate drying; mechanical fans or dehumidifiers may be used. Dispose of rinsates and materials per local regulations.
Soil and Lawn Remediation
Next, the article shifts focus to soil and lawn remediation, beginning with assessment of contamination depth and extent to determine risks and required actions.
It then outlines treatment options—surface disinfection, soil removal, and aeration or bioremediation—and explains criteria for choosing each.
Finally, guidance is provided on when complete replacement of soil or turf is warranted versus when restoration measures are sufficient.
Assessing contamination depth and extent
Before any remediation begins, determine how far and how deep sewage contamination has spread by combining visual inspection, records review, and targeted sampling; this establishes the scope of work and informs safety measures, excavation limits, and disposal plans.
Assessors map visible staining, odors, and wet zones, review plumbing and flood histories, and collect soil cores at graded intervals to delineate lateral and vertical contamination boundaries.
Options for treating contaminated soil (surface treatment, removal, aeration)
Evaluate the range of remediation methods available—surface disinfection, targeted soil removal, and in-situ aeration—to select an approach that matches contamination severity, site constraints, and end-use goals.
Surface disinfection treats shallow contamination; removal excises highly contaminated zones for offsite disposal. Aeration and tilling promote microbial degradation and volatile loss for moderate contamination.
Choose methods based on risk, access, and restoration expectations.
When to replace soil or turf
After selecting a remediation strategy—surface disinfection, targeted removal, or aeration—the decision to replace soil or turf depends on contaminant depth and concentration, residual pathogen risk, and desired future use of the area.
Replace when contamination persists below-treated depth, pathogen tests exceed safe limits, odor or staining remain, or proposed use includes food crops or play areas.
Professional assessment guides timing and depth of replacement.
Waste Disposal and Legal Considerations
Guidance should cover proper disposal methods for sewage-contaminated materials, including containment, bagging, and disposal at approved facilities.
The discussion must note local regulations and reporting requirements that govern sewage waste and potential public health notifications.
It should also specify circumstances that require hiring licensed hazardous waste handlers for transport and disposal.
Proper disposal methods for sewage-contaminated materials
Dispose sewage-contaminated materials following strict containment and local regulations to minimize health risks and environmental harm.
Contain waste in heavy-duty, leakproof bags or lined containers; double-bag porous items.
Segregate recyclable, non-recyclable, and hazardous debris.
Label containers and secure transport to approved facilities or licensed haulers.
Do not compost or discard in storm drains.
Maintain disposal records and receipts for accountability.
Local regulations and reporting requirements
When sewage-contaminated material is removed from a yard, property owners and contractors must follow local waste disposal regulations and reporting requirements that govern transport, treatment, and recordkeeping.
Authorities may require notification, manifests, or disposal at approved facilities; failure to comply can incur fines.
Documentation of actions, dates, and disposal destinations protects health and legal interests and supports any required inspections or follow-up remediation.
When to hire licensed hazardous waste handlers
After documenting removal and complying with local disposal rules, property owners should evaluate whether sewage-contaminated materials meet criteria requiring licensed hazardous waste handlers. Engage professionals when contamination is extensive, materials are classified hazardous, local law mandates, or disposal logistics exceed capability. Licensed handlers guarantee safe transport, proper manifests, and legal compliance to minimize liability and environmental harm.
| Trigger | Action | Rationale |
|---|---|---|
| Extensive area | Hire | Health risk |
| Classified waste | Hire | Legal |
| Complex disposal | Hire | Logistics |
| Permits required | Hire | Compliance |
| Liability concern | Hire | Protection |
Health Risks and When to Seek Medical Help
Sewage can harbor bacteria, viruses, and parasites that cause gastrointestinal, skin, and respiratory symptoms; persons should be aware of fever, vomiting, diarrhea, abdominal pain, rashes, or breathing difficulty.
Immediate first aid for exposure includes rinsing affected skin or eyes with clean water, seeking medical attention after ingestion, and avoiding further contact until decontaminated.
Any exposure should be documented—time, route, symptoms, and photos—so medical providers and public health authorities have accurate information.
Common pathogens in sewage and symptoms to watch for
Contaminated yard water can carry bacteria, viruses, and parasites that cause gastrointestinal, skin, respiratory, and systemic infections.
Recognizing common pathogens and their typical symptoms helps determine when professional medical care is needed.
Salmonella, E. coli, Campylobacter cause diarrhea, cramps, fever; norovirus causes vomiting, nausea; Giardia causes prolonged diarrhea and weight loss.
Staphylococcus, Pseudomonas cause wound infections.
Legionella and hepatitis A risk respiratory and hepatic signs.
First aid for exposure or ingestion
If a person is exposed to sewage or accidentally ingests contaminated water, prompt basic first aid can reduce immediate risks and guide whether medical evaluation is needed. Rinse skin with clean water, remove contaminated clothing, flush eyes, and avoid inducing vomiting. Seek care for fever, severe diarrhea, vomiting, or bleeding.
| Action | Timing | When to escalate |
|---|---|---|
| Skin rinse | Immediately | Persistent rash |
| Eye flush | 10–15 min | Vision change |
| Drink water | Small sips | Ingestion with symptoms |
| Do not induce vomiting | Always | If unconscious |
| Seek medical care | If symptoms | Fever, severe GI |
Documenting exposure for medical providers
After immediate first aid, detailed documentation of exposure helps medical providers assess risks and guide testing or treatment.
Record date, time, location, duration of contact, symptoms, known wounds, and substances involved.
Note PPE used, amounts ingested or splashed, and any home remedies given.
Bring photos, labels, and contact information for others exposed to facilitate accurate evaluation and follow-up care.
Preventing Future Sewage Problems
The text now shifts to preventing future yard sewage problems by outlining common causes such as blockages, tree root intrusion, and pipe damage.
It then highlights routine maintenance checks for sewer lines and drains to catch issues early.
Finally, it covers how landscaping and grading adjustments can redirect runoff and reduce backflow risk.
Identifying common causes of yard sewage backups
Recognizing the root causes of yard sewage backups helps homeowners prioritize repairs and preventive measures; common contributors include clogged sewer lines from accumulated grease, root intrusion that fractures pipes, inadequate grading or storm drainage that overwhelms systems, aging or collapsed infrastructure, and improper disposal of non-flushable items that obstruct flow.
Secondary factors include high groundwater, shared lateral failures, heavy rainfall events, and nearby construction damage.
Maintenance checks for sewer lines and drains
Schedule routine inspections and basic maintenance to keep sewer lines and yard drains functioning and to catch issues before they escalate.
Technicians or homeowners should check cleanouts, test sewer caps, inspect visible piping for cracks or corrosion, and clear grit, roots, and debris.
Use camera inspections annually if issues recur.
Promptly repair damaged joints and replace failing sections to prevent backups and contamination.
Landscaping and grading changes to reduce risk
Beyond routine inspections and repairs, adjusting landscaping and grading can greatly lower the likelihood of yard sewage issues by directing surface water away from sewer lines and vulnerable fixtures.
Implement gentle slopes away from foundations, install swales or French drains, and use permeable surfaces and rain gardens to reduce runoff.
Maintain vegetation to stabilize soil and prevent erosion that can expose or damage pipes, lowering future contamination risk.
When to Call Professional Cleanup Services
Signs that sewage cleanup exceeds homeowner capability—extensive contamination, sewage inside structures, offensive odors, standing water, or health incidents—warrant professional intervention.
A qualified remediation service will assess hazards, contain and remove waste, disinfect affected areas, and document the work for insurance.
Homeowners should ask about certifications, insurance, remediation methods, timeline, guarantees, and request references or proof of credentials before hiring.
Criteria that indicate professional intervention is needed
When contamination covers a large area, involves deep or standing sewage, or includes hazardous materials such as chemical waste or medical refuse, professional cleanup services should be contacted promptly; similarly, persistent odors, recurring backups, structural damage, or exposure of vulnerable individuals (children, elderly, immunocompromised) indicate the need for trained remediation specialists.
| Indicator | Action |
|---|---|
| Large area | Call pros |
| Standing sewage | Immediate response |
| Hazardous waste | Specialized handling |
| Vulnerable people | Prioritize professional care |
What to expect from a professional sewage remediation service
After recognizing circumstances that require expert help—extensive contamination, standing sewage, hazardous materials, structural damage, or exposure of vulnerable individuals—homeowners should understand what professional sewage remediation services will provide.
Professionals assess hazards, contain and remove waste, and restore affected areas to safety standards.
Typical service components include:
- Hazard assessment and containment
- Waste extraction and disposal
- Decontamination, drying, and odor control
Questions to ask contractors and verifying credentials
How should a homeowner evaluate a remediation contractor before hiring?
A homeowner should ask about licensing, insurance (general liability and pollution), certifications (IICRC or equivalent), experience with sewage remediation, references, scope and timeline, testing and disposal methods, and warranty terms.
Verify credentials via state licensing boards, insurance certificates, written estimates, and direct reference checks before authorizing work.
Practical Tips and Common Mistakes to Avoid
The section offers concise, practical guidance for safely managing sewage cleanup in a yard while highlighting frequent errors to avoid.
It focuses on correct personal protective measures, effective containment and disinfection steps, and clear signs that professional help is required.
Emphasis is placed on methods that minimize health risks and prevent accidental spread of contamination.
Do-not list: actions that increase risk
Avoid actions that escalate exposure or spread contamination when addressing sewage in a yard.
Do not enter without proper PPE, avoid using household vacuums, never hose down contaminated areas into storm drains, and don’t ignore visible wastewater pooling.
Refrain from landscaping or burying waste, skip DIY chemical mixes, and avoid delaying professional assessment for structural or health concerns.
Cost-saving tips without compromising safety
Several practical measures can reduce cleanup expenses without compromising safety, such as renting commercial-grade PPE and equipment instead of buying, choosing EPA-registered disinfectants in concentrated form for proper dilution, and scheduling work during daylight to limit labor time.
Consolidate tasks to minimize repeat setup, use washable protective garments, verify rental provider maintenance, and avoid DIY shortcuts that increase contamination risk or require costly remediation.
Seasonal considerations and long-term monitoring
Because seasonal conditions affect pathogen survival, cleanup timing and techniques should be adjusted to account for temperature, precipitation, and ground freeze-thaw cycles.
Colder temperatures slow microbial die-off and can preserve contaminants in frozen soil, while warm, wet conditions promote bacterial growth and faster migration into groundwater.
Inspect after storms, delay deep excavation in frozen ground, schedule follow-up testing across seasons, and document changes for long-term remediation decisions.
Quick Reference Checklists
The article provides three concise checklists to guide responders through each phase: an immediate-action checklist for safety and containment, a cleanup and disinfection checklist for proper soil and surface treatment, and a post-cleanup inspection checklist to confirm hazards have been addressed.
Each checklist lists essential steps, required supplies, and decision points for when to seek professional help. Readers are encouraged to use these as quick references during an incident.
Immediate-action checklist
When sewage is discovered in a yard, an immediate-action checklist helps prioritize life-safety steps, limit contamination spread, and guide initial cleanup decisions.
It outlines urgent notifications, exclusion zones, and personal protection until professionals or detailed cleanup guidance is available.
- Evacuate people and pets; secure the area.
- Notify utility and health authorities.
- Don basic PPE and prevent runoff.
Cleanup and disinfection checklist
Begin cleanup only after hazards are controlled and authorized personnel permit reentry. Personnel wear PPE, contain and remove gross contamination, and segregate waste for proper disposal.
Surface cleaning precedes disinfection with EPA-registered products at labeled contact times. Document materials used and quantities.
- Remove solids, scrub surfaces, rinse.
- Apply disinfectant, maintain contact time.
- Bag waste, label, and arrange authorized disposal.
Post-cleanup inspection checklist
After cleanup and disinfection are complete and reentry has been authorized, a concise post-cleanup inspection verifies that hazards have been removed, surfaces meet cleanliness criteria, and waste has been properly contained.
The inspector confirms odor absence, surface dryness, and intact barriers. Document findings, photo-record affected areas, and note any follow-up.
- Verify decontamination efficacy
- Confirm waste containment/disposal
- Record and report results
Conclusion
Sewage in a yard demands prompt, cautious action to protect health and property. Studies show untreated sewage can raise gastrointestinal illness risk by up to 300% in exposed populations, underscoring the need for proper PPE, disinfection, and possible soil removal. Following structured cleanup steps, monitoring lawn recovery, and addressing infrastructure faults reduces repeat events. If contamination seems extensive or persistent, professional remediation guarantees thorough decontamination and long-term safety.