How to Clean Toilet Tank: Step-by-Step Guide to Remove Mold, Mineral Buildup & Odors
To clean your toilet tank effectively, follow these steps: First, shut off the water supply and drain the tank. Inspect the components and take photos for reference. Remove any loose debris, then apply a vinegar or diluted bleach solution to the surfaces. Allow it to sit for a while, then scrub away mineral buildup and biofilm with a soft brush. Rinse everything thoroughly, reassemble the parts, and check for leaks and proper sealing. For additional tips on tackling tougher stains and repairs, continue reading.
What a Clean Toilet Tank Looks Like and Why It Matters
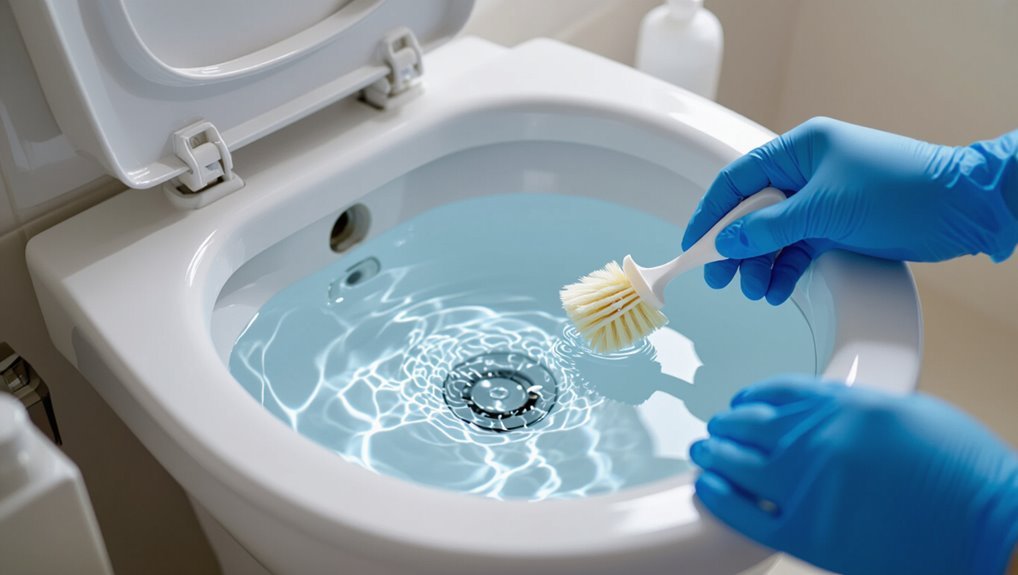
A clean toilet tank is free of visible mold, mineral rings, and staining, with clear water and unblemished surfaces.
Hidden issues from a neglected tank—persistent odors, weakened flush performance, and accelerated corrosion of components—often go unnoticed until parts fail.
Regular tank cleaning prevents these problems and supports both household hygiene and longer-lasting plumbing.
Visible signs of a dirty toilet tank (mold, mineral stains, discoloration)
Dark streaks, fuzzy patches, or chalky crusts inside the toilet tank signal more than cosmetic neglect.
Discolored water lines, black or green mold colonies, and white mineral rings indicate buildup requiring attention.
Visual cues guide decisions about frequency and methods in how to clean toilet tank routines, helping prioritize scrubbing, descaling, or component inspection to restore appearance and sanitary conditions.
Hidden problems caused by a dirty tank (odors, reduced flush performance, part corrosion)
Neglected toilet tanks can harbor invisible issues that go beyond unsightly stains. Accumulated biofilm and mineral deposits produce persistent odors, impair valve and flapper sealing, and restrict water flow.
Reduced flush performance leads to repeated flushes and higher water use. Corrosion and grit shorten component life, causing leaks or failures that require costly replacement rather than simple cleaning.
Health and maintenance benefits of regular tank cleaning
Moving from the hidden problems of a dirty tank, regular cleaning produces clear, observable benefits for both health and plumbing longevity.
Reduced mold and bacteria lower respiratory and infection risks, improving household hygiene.
Cleaner components resist mineral buildup and corrosion, maintaining efficient flush performance and reducing repair frequency.
Routine maintenance extends fixture lifespan, saves on parts replacement, and supports consistent water quality and odor control.
Quick Safety and Preparation Checklist
Before starting, gather basic tools and materials such as rubber gloves, eye protection, a scrub brush, white vinegar or a mild cleaner, and towels.
Guarantee good ventilation, wear protective gear, and never mix cleaning chemicals to avoid dangerous reactions.
Consider calling a professional if corrosion, persistent leaks, or complex internal damage are suspected.
Tools and materials needed
A few basic tools and safety items make toilet tank cleaning efficient and safe: rubber gloves, eye protection, a stiff brush or sponge designated for the tank, a bucket, adjustable wrench or pliers, scrub brush or old toothbrush for small parts, mild cleaner or vinegar, and rags or paper towels.
Useful extras streamline the job and prevent damage:
- Replacement flapper or fill valve
- Small bowl or syringe for concentrated rinsing
- Waterproof tray for removed parts
Safety precautions (ventilation, gloves, eye protection, avoiding mixed chemicals)
Wear protective gear and guarantee good ventilation when cleaning a toilet tank to minimize exposure to chemical fumes and contaminated water.
Use chemical-resistant gloves and splash goggles. Open windows or run an exhaust fan.
Never mix cleaners (especially bleach and acids) to avoid toxic gases. Rinse tools and hands thoroughly after work.
Keep children and pets away until surfaces are dry.
When to call a professional
If hazards, stubborn buildup, or malfunctioning components are encountered despite proper ventilation and protective gear, professional assistance should be considered.
A plumber or mold remediation specialist is recommended when corrosion, persistent black mold, cracked or warped parts, recurring leaks, or unclear internal damage exist.
Professionals offer safe removal, replacement, and diagnosis, preventing further damage, health risks, or ineffective DIY repairs.
Step-by-Step Guide to Cleaning a Toilet Tank
The procedure begins by shutting off the water supply and flushing to empty the tank.
The person should inspect and photograph internal parts before removing loose debris and rinsing.
Next, a suitable cleaning solution (vinegar, baking soda, or a commercial product at recommended concentration and contact time) is applied, followed by targeted scrubbing of stains, mineral deposits, and mold with appropriate brushes and tools.
Step 1 Turn off water and drain the tank
Shut off the water supply to the toilet by turning the valve at the base clockwise until it stops; this prevents refilling while cleaning.
Flush once to empty most water, then hold the handle to drain remaining liquid.
Use a sponge or towel to remove residual moisture.
Place towels around the base to catch spills.
Confirm the tank stays empty before proceeding.
Step 2 Inspect interior components and take photos for reassembly
Open the tank lid carefully and set it aside on a towel; then visually inspect the fill valve, flush valve, flapper, chain, and float for cracks, mineral buildup, or misalignment.
Photograph each component from multiple angles, noting connections and orientations. Record any worn parts or irregularities for replacement.
Label images if needed to guarantee accurate reassembly after cleaning.
Step 3 Remove loose debris and rinse
Begin by removing any loose debris—such as sediment, rust flakes, or insect remains—using a small cup, sponge, or soft brush, taking care not to disturb the fill or flapper mechanisms.
Scoop and blot deposits, then tilt the cup to pour cloudy water into a bucket. Rinse remaining residues with fresh water from a cup, repeating until runoff is visibly clearer and particles are gone.
Step 4 Apply cleaning solution (vinegar, baking soda, commercial cleaners) with concentrations and contact times
Mix a cleaning solution appropriate for the tank’s condition—plain white vinegar for mild mineral buildup, a vinegar-and-baking-soda combination for moderate deposits, or a toilet-tank commercial cleaner for heavy scale or stubborn stains—using concentrations and contact times recommended below to avoid damage:
typically 1–2 cups (240–480 ml) of undiluted vinegar with 1–2 hours dwell, or 1 cup (240 ml) vinegar followed by a sprinkling of baking soda and 15–30 minutes of fizzing action; for commercial products follow the label, usually 10–30 minutes, and never combine bleach-based cleaners with acids.
Apply solution evenly to interior surfaces, allow specified dwell time, then drain and rinse thoroughly before reassembling.
Step 5 Scrub stains, mineral buildup, and mold with brushes and tools
Using a stiff nylon brush and a selection of small tools, the cleaner tackles stains, mineral deposits, and mold with targeted scrubbing to avoid damaging tank components.
Agitation loosens scale along waterline, corners, and around bolts.
Soft-bristled brushes, plastic scrapers, and bottle brushes reach crevices.
Rinse debris, repeat spot treatment as needed, and inspect surfaces for remaining residue before draining and proceeding.
Step 6 Clean or replace small parts (flapper, fill valve, flush valve seat)
Inspect and service the tank’s small components—flapper, fill valve, and flush valve seat—to guarantee a watertight seal and reliable operation.
Remove mineral deposits, trim or replace deteriorated flappers, and clean valve seats with a soft brush or vinegar.
Check fill valve for debris or worn seals; replace if leaking or noisy.
Use compatible replacement parts and brief manufacturer instructions.
Step 7 Rinse thoroughly and refill; test flush and check for leaks
Flush the tank valve once or twice to wash away loosened debris, then close the shutoff and allow the tank to refill slowly so seals and float operation can be observed.
Open the shutoff fully, confirm correct water level, and cycle multiple test flushes.
Inspect for drips around connections, the flapper seat, and supply line.
Tighten fittings or replace components if leaks persist.
Best Cleaning Solutions and How to Use Them
The section compares effective cleaning options and explains proper application for safe, thorough tank maintenance.
It outlines vinegar-and-baking-soda ratios and sequence, recommended bleach dilutions and contact times, criteria for choosing commercial descalers and mold removers, and suitable eco-friendly substitutes.
Guidance emphasizes matching the solution to the problem and following safety and manufacturer instructions.
Vinegar and baking soda method (ratios and procedure)
Combine white vinegar and baking soda for an effective, chemical-free way to dissolve mineral deposits and light grime inside a toilet tank.
Pour about 2 cups vinegar into the tank, then add 1/2 cup baking soda; allow fizzing.
Let sit 1–2 hours, scrub with a toilet brush or soft scrub pad, flush to rinse.
Repeat for stubborn buildup.
Bleach use: safe dilution and contact time
Although effective at disinfecting and removing stubborn stains, bleach requires careful dilution and limited contact time to protect tank components and indoor air quality.
Use 1 part household bleach (5–6% sodium hypochlorite) to 10 parts water, apply briefly, and let sit 5–10 minutes.
Rinse thoroughly, ventilate the bathroom, and avoid mixing with acids or ammonia to prevent toxic gas formation.
Commercial descalers and mold removers (selection guide)
After addressing safe bleach use, attention turns to purpose-made commercial descalers and mold removers, which offer formulations targeted at mineral buildup, hard-water stains, and persistent biological growth in toilet tanks.
Choose products labeled for toilets, containing acidic descalers (muriatic-free), or enzymatic/mold-specific agents.
Follow manufacturer dilution, contact time, ventilation, and protective gear recommendations; rinse thoroughly to protect seals and plumbing.
Eco-friendly alternatives and when they’re appropriate
When minimizing chemical exposure or protecting septic systems, eco-friendly cleaners—such as vinegar, baking soda, citric acid, and enzyme-based formulations—provide effective, lower-toxicity options for routine toilet-tank maintenance.
They work best on light mineral deposits, organic sludge, and general odors but may require longer contact times or repeated applications compared with stronger commercial descalers.
They suit regular upkeep, sensitive plumbing, and preventive care; stubborn scale needs stronger agents or mechanical scrubbing.
Removing Specific Problems
Specific treatments are required to address black mold and mildew, calcium and lime deposits, persistent odors, and rust or corrosion in the toilet tank.
Each issue responds best to targeted cleaners and techniques—bleach or mold removers for stains, acidic solutions for mineral buildup, odor neutralizers for smells, and rust removers or part replacement for corrosion.
The following sections outline safe, effective options and step-by-step precautions for each problem.
Eliminating black mold and mildew stains
Tackle black mold and mildew in the toilet tank by identifying affected areas and using targeted cleaners that break down spores without damaging tank components.
Scrub stains with a soft brush, rinse thoroughly, and dry exposed surfaces.
Replace degraded rubber or foam parts.
Maintain good ventilation and run the flush periodically to prevent recurrence.
Repeat treatment until discoloration stops appearing.
Dissolving calcium, lime, and hard-water deposits
Address stubborn calcium, lime, and hard-water deposits by applying acidic cleaners that dissolve mineral buildup without harming tank components.
Use vinegar, diluted muriatic alternatives, or commercial descalers; apply, soak, and scrub with a nonabrasive brush.
Rinse thoroughly, inspect rubber and plastic parts for damage, and repeat localized treatments as needed.
Regular preventive descaling minimizes recurrence and preserves flushing efficiency.
Neutralizing persistent odors
Neutralize persistent odors in the toilet tank by identifying their source—stagnant water, bacterial growth, or trapped debris—and selecting appropriate treatments.
Remove debris and flush tank, scrub with a mild bleach solution or hydrogen peroxide to kill bacteria, rinse thoroughly, and replace contaminated rubber parts if needed.
Guarantee proper refill, improve ventilation, and perform periodic maintenance to prevent recurrence.
Dealing with rusty stains and corrosion
Rusty stains and corrosion in a toilet tank stem from mineral-laden water and metal degradation; identifying whether discoloration is surface rust, pitting, or corrosion of fittings determines the remedy.
Surface rust responds to scrubbing with vinegar or citric acid; deep pitting or sacrificed anodes require part replacement.
Clean connections, replace corroded bolts, and consider water softening to prevent recurrence.
Maintenance Plan to Prevent Future Buildup
A clear maintenance plan helps prevent recurring deposits and keeps tank components functioning.
Recommendations should vary by water hardness and household use, with more frequent attention for hard water or high-usage homes.
Simple weekly or monthly checks plus consideration of water-softening or filtration options can substantially reduce mineral buildup.
Recommended cleaning frequency by water type and household usage
Because mineral content and household habits directly influence buildup rates, cleaning frequency should be adjusted according to water type (soft, hard, or well) and toilet use (single occupancy, family, or high-traffic).
Soft water: inspect quarterly, clean biannually.
Hard water: clean every 4–6 weeks.
Well water: monitor monthly, treat and clean as needed.
Single occupancy less frequent; families monthly; high-traffic weekly.
Simple weekly or monthly maintenance steps
Several small, regular actions can keep a toilet tank free of mineral and biological buildup: a quick visual check and wipe of accessible surfaces, a monthly flush with a gentle descaler or vinegar, and inspection of the fill and flush components for deposits or wear.
- Wipe down lid, hinges, and tank rim weekly.
- Run a vinegar rinse monthly and scrub visible stains.
- Replace or clean worn flapper, fill valve, or seals promptly.
Water-softening and filtration options to reduce mineral buildup
Moving from routine scrubbing and part checks to addressing water quality can greatly reduce recurring mineral deposits in the tank.
Installing a whole-house water softener or a point-of-entry system lowers hardness-causing calcium and magnesium.
Point-of-use filters or inline sediment and scale inhibitors protect the toilet tank.
Regular monitoring and appropriate system maintenance guarantee long-term reduction of mineral buildup and fewer cleaning cycles.
When to Repair or Replace Tank Components
Visible wear, persistent leaking, irregular flushing, or a constantly running toilet signal that the flapper, fill valve, or flush assembly may need replacement.
Selecting compatible parts requires matching the tank type, measurements, and connection styles rather than relying on universal claims.
Simple replacement steps—shutting off water, draining the tank, removing the old part, and installing and testing the new component—allow most homeowners to complete common repairs quickly.
Signs the flapper, fill valve, or flush assembly needs replacement
A few clear symptoms indicate when a toilet’s flapper, fill valve, or flush assembly requires replacement rather than adjustment.
Persistent running despite flapper adjustments, slow or incomplete tank refills, hissing or continuous water flow, visible cracks or warped rubber, repeated hard-water deposits causing malfunction, and frequent manual resets all signal component failure.
Replacement prevents water waste and recurring problems.
How to choose compatible replacement parts
Noting those failure signs, the next step is selecting replacement parts that match the toilet’s design and specifications.
Verify model and flush type, tank mounting dimensions, inlet size, and flushing mechanism compatibility.
Prefer OEM or high-quality universal kits labeled for the toilet style.
Check materials for corrosion resistance and confirm adjustable features to fine-tune fit before purchase.
Quick replacement steps for common parts
Begin by shutting off the water supply and flushing to empty the tank; this prevents spills and clarifies inspection.
Inspect fill valve, flapper, flush valve, and overflow tube for wear.
Replace corroded or warped parts with compatible units, following manufacturer torque and seal guidelines.
Reconnect water, check for leaks, adjust float height, and perform multiple test flushes to confirm proper operation.
Cost, Time, and Effort Estimates
Typical cleaning of a toilet tank usually takes 30–60 minutes, while deep descaling can require one to several hours depending on buildup.
DIY supply costs are generally low — common cleaners, brushes, and a replacement flapper or fill valve typically run $10–50.
Hiring a professional often raises the total to $100–250, so readers should weigh time and skill against that expense.
Typical time required for cleaning versus deep descaling
A straightforward quick clean of a toilet tank—rinsing, wiping, and flushing out loose debris—usually takes 15–30 minutes and requires minimal supplies and basic effort.
In contrast, a deep descale to remove hard-water buildup and mineral deposits often demands 1–3 hours, stronger cleaners or vinegar, scrapers or brushes, and more physical work plus possible drying and reassembly time.
Expect variable durations based on severity.
Estimated cost for DIY supplies and common replacement parts
Many homeowners can expect modest outlays when tackling toilet-tank cleaning and minor repairs themselves: basic cleaning supplies (vinegar, baking soda, a scrub brush, and rubber gloves) generally total $5–$15, while specialty descaling agents or replacement parts raise costs.
Replacement flappers, fill valves, and flush levers typically range from $8–$25 each, and a full tank-kit may run $25–$50.
Additional items like hoses, gaskets, or sealant commonly add $3–$12.
Cost comparison for DIY cleaning vs. hiring a pro
Several factors determine whether DIY toilet-tank cleaning or hiring a professional is more economical: direct costs of supplies and parts, labor time invested, and the value of avoided risks or guarantees. DIY often costs less in money but more time; pros cost more but add warranty and efficiency. Consider skill level, urgency, and potential part replacements when deciding.
| Option | Typical Cost | Time |
|---|---|---|
| DIY basic | $5–$30 | 30–90 min |
| DIY with parts | $20–$75 | 45–120 min |
| Professional | $80–$250 | 30–60 min |
Common Mistakes to Avoid
The section highlights common mistakes that can turn a routine tank cleaning into a safety or repair issue.
It warns against mixing incompatible chemicals, which can produce toxic fumes, and over-scrubbing that can crack or wear plastic components.
It also emphasizes the importance of following inspection and disassembly steps to prevent reassembly errors and leaks.
Dangerous chemical mixes and why to avoid them
Why mix cleaners that deliberately react with each other when doing toilet tank maintenance?
Combining bleach with acids, ammonia, or vinegar can release toxic chlorine or chloramine gases. Mixing different products risks harmful fumes, corrosion of metal components, and respiratory irritation.
Use one compatible cleaner at a time, ventilate the area, and follow label instructions to prevent dangerous reactions and injury.
Over-scrubbing and damaging plastic parts
After addressing chemical hazards, attention should shift to mechanical damage from over-scrubbing.
Excessive force or abrasive tools can wear, crack, or deform plastic fill valves, flappers, and seals. Recommend gentle brushes, nonabrasive pads, and light pressure.
Inspect parts during cleaning; replace brittle or scored components rather than forcing stubborn residue removal that risks leaks or malfunction.
Skipping inspection steps that cause reassembly problems
How often do skipped checks during cleaning lead to frustrating reassembly problems?
Failure to inspect component orientation, worn seals, or loose fasteners often causes leaks, misaligned flush mechanisms, or parts that won’t seat.
Documenting positions, noting removed parts, and testing moving pieces before final assembly prevents repeated disassembly.
A brief inspection checklist saves time and avoids damage or repeated service calls.
Troubleshooting After Cleaning
After cleaning, remaining issues should be checked systematically.
Persistent odors warrant rinsing, inspecting for trapped residue or mold, and repeating targeted cleaning if needed.
If leaks, continuous running, or weak flushes occur after reassembly, follow a simple diagnosis checklist and adjust the fill valve and float settings to restore proper performance.
Persistent odors after cleaning: next steps
If odors persist despite routine cleaning, the next steps focus on pinpointing hidden sources and addressing them with targeted treatments.
Inspect overflow tube, siphon jet, and trap for biofilm or mineral deposits.
Flush with enzyme cleaner or diluted bleach, scrub inaccessible crevices, and replace degraded rubber parts or gaskets.
Ventilation and a thorough tank rinse help eliminate lingering smells.
Leaks or running toilet after reassembly: diagnosis checklist
Begin by confirming the symptom: determine whether the toilet is leaking externally, running continuously, or cycling intermittently.
Inspect tank-to-bowl and tank-to-floor seals, bolts, and gasket for visible water.
Check flapper seating and chain length, and examine fill valve for slow drip or overflow into the overflow tube.
Verify flush handle position and that refill tube is correctly routed.
Tighten or replace faulty parts.
Reduced flush performance: tuning the fill and float settings
One key adjustment for restoring flush power is proper tuning of the fill valve and float to guarantee the tank refills to the correct level and shuts off reliably.
Inspect float height, adjust per manufacturer or bend arm for ball floats; move clip on cup floats.
Set water level about one inch below the overflow tube.
Test multiple flushes, fine-tune until consistent full-volume flushes occur.
Quick Reference Checklists
A concise set of checklists helps guarantee consistent results when cleaning a toilet tank.
One checklist covers a one-time deep clean with steps for draining, scrubbing, and inspecting components.
A monthly maintenance checklist lists quick tasks like checking for leaks, clearing sediment, and testing the flush mechanism.
One-time deep-clean checklist
Tackle stubborn buildup with a single, focused deep-clean that restores function and prevents future problems. A one-time checklist outlines safety, targeted cleaners, and component inspection to remove mold, mineral deposits, and odors effectively.
- Drain tank, disconnect water, and wear gloves and eye protection.
- Apply descaler or bleach solution; scrub valves, flapper, and corners.
- Rinse, reassemble, test flush, and adjust fill/float for proper operation.
Monthly maintenance checklist
When scheduled each month, this quick maintenance checklist prevents minor issues from becoming costly repairs by ensuring the tank’s components remain clean and functional.
It guides routine inspections, light cleaning, and small adjustments to maintain performance and prevent odors.
- Check and tighten fittings; inspect for leaks.
- Wipe down interior surfaces; remove light deposits.
- Test flush mechanism; adjust fill/float as needed.
Conclusion
Like a neglected attic that finally reveals a lost photograph, a clean toilet tank uncovers reliable flushes and fresher air. One homeowner, after finding a penny from childhood beneath mineral crust, reported flushed-away noises dropping 40% and odors vanishing. Regular tank care—simple scrubs and occasional descaling—keeps mechanisms working and saves water and costly repairs. Treat the tank as routine maintenance, and small efforts will deliver steady, worry-free performance.