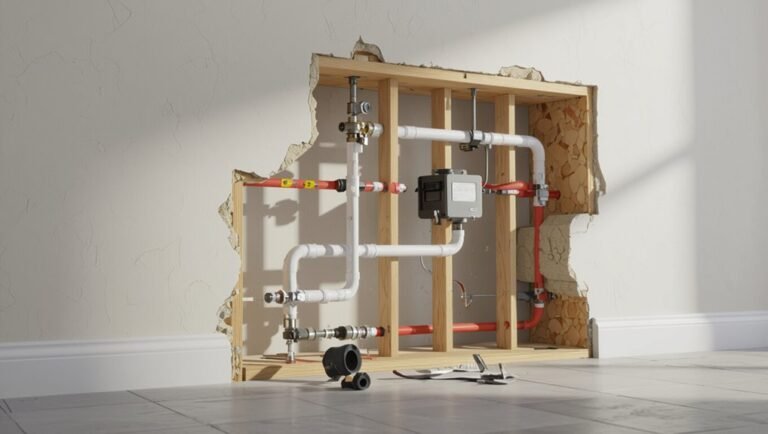
How to Strap a Water Heater Securely: Step-by-Step Guide for Earthquake Safety
To securely strap a water heater for earthquake safety, you need two seismic straps anchored to structural framing. This prevents tipping, gas leaks, and flooding during quakes. First, turn off utilities and measure the tank height. Install one strap in the lower third and another in the upper third, fastening them to studs or appropriate anchors with corrosion-resistant hardware. Ensure the straps are snug but not deformed, verify clearances, reconnect utilities, and inspect for leaks. For detailed steps and advanced tips, continue reading.
Why Strapping Your Water Heater Matters for Earthquake Safety
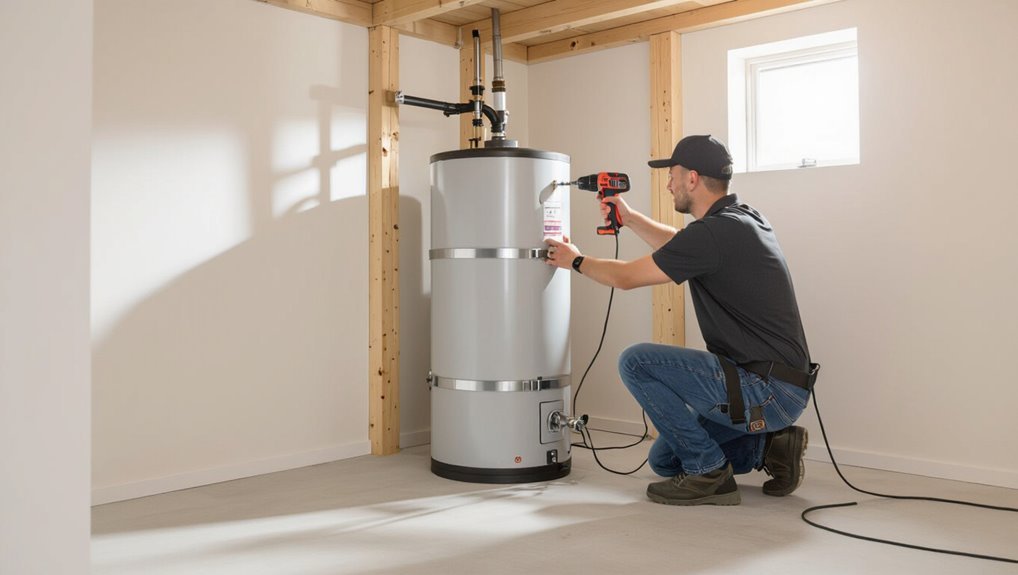
An unstrapped water heater can topple, rupture gas or water lines, and cause fires, flooding, or structural damage during an earthquake.
Proper strapping reduces these risks, supports occupant safety, may satisfy insurance requirements, and helps guarantee compliance with building codes.
Local building codes and earthquake-retrofit rules often specify strap placement and hardware, so homeowners should verify and follow applicable requirements.
Risks of an unstrapped water heater during earthquakes
When severe shaking occurs, an unstrapped water heater can topple, rupture gas lines, and sever plumbing connections, creating immediate hazards such as fires, flooding, and gas leaks.
Unsecured units also threaten structural damage, obstruct exits, and complicate emergency response.
Knowing how to strap a water heater reduces risk of catastrophic failures, secondary hazards, and costly repairs by preventing displacement and containment breaches.
Benefits of proper strapping (safety, insurance, code compliance)
Beyond the immediate hazards of tipping and ruptured connections, proper strapping of a water heater delivers multiple concrete benefits: it enhances occupant safety by keeping gas and water lines intact during quakes, supports compliance with building codes and local ordinances that mandate seismic restraints, and can affect insurance claims and premiums by demonstrating reasonable mitigation measures.
Additionally, secure strapping reduces property damage, downtime, and repair costs after seismic events.
Overview of local building code and earthquake retrofit requirements
Because seismic activity varies by region, local building codes and retrofit ordinances specify when and how water heaters must be anchored to reduce earthquake risk.
Codes define strap type, placement, clearance from fittings, and required professional permits. Compliance guarantees occupant safety, insurance eligibility, and code inspections.
Homeowners should consult municipal requirements, state seismic retrofit programs, and licensed contractors before retrofitting or replacing units.
Tools, Materials, and Safety Precautions Needed
A concise inventory of required tools and materials frames the preparation for securing a water heater, including straps, anchors, fasteners, a drill, and basic hand tools.
Guidance on selecting appropriately rated straps, compatible anchors for the wall type, and corrosion-resistant hardware guarantees a reliable attachment.
Clear safety precautions cover disconnecting power, shutting off the water supply, and using personal protective equipment while anchoring the unit.
Required tools and materials
Several basic tools and specific materials are required to strap a water heater securely: a tape measure, adjustable wrench, drill with bits, screwdriver, hacksaw or reciprocating saw (for any metal straps), metal strapping or seismic straps with brackets, appropriate lag bolts or masonry anchors, vibration-resistant washers, and corrosion-resistant fasteners.
- Protective gloves and eye protection
- Level and marker for accurate placement
- Sealant or threadlocker for moisture-prone areas
How to choose the right straps, anchors, and hardware
Which straps and anchors will reliably hold a water heater in place depends on the heater’s size, installation surface, and local seismic or building codes.
Select heavy-gauge stainless or galvanized steel straps rated for seismic use; use rated lag bolts, concrete anchors, or toggle bolts matched to wall material.
Include corrosion-resistant hardware, vibration-resistant washers, and manufacturer-recommended strap width and spacing for adequate restraint.
Personal safety and power/water shutoff precautions
Before beginning work, the installer must isolate energy and water sources and don appropriate personal protective equipment to prevent electric shock, scalding, and eye or skin injuries.
Turn off power at the breaker or gas supply, close the water shutoff valve, and drain pressure if needed.
Use insulated tools, gloves, safety glasses, and sturdy footwear.
Verify zero power and no hot water before proceeding.
Assessing Your Water Heater and Installation Site
Before beginning, the installer identifies the heater type—tank or tankless—since weight, mounting height, and anchoring requirements differ.
They then locate studs, nearby pipes, and any obstructions to plan secure strap anchor points.
Finally, precise measurements and clear markings are made for strap placement to guarantee straps cross the center of mass and avoid utilities.
Types of water heaters and how they affect strapping (tank vs. tankless)
When evaluating a water heater for strapping, the primary distinction to take into account is whether the unit is a conventional storage tank or a tankless (on-demand) model.
This is important because their size, weight distribution, mounting, and connection points determine strap placement and required support.
Storage tanks need multiple wide straps near upper and lower thirds and anchored to framing.
Tankless units require lighter, wall-mounted brackets and minimal strapping focused on vibration and connection support.
Locating studs, pipes, and obstruction mapping
Having determined whether the unit is a storage tank or tankless, the next step is to map the installation area by locating wall studs, existing pipe runs, and any obstructions that could affect strap placement or anchoring.
Use a stud finder and visual inspection to mark stud centers, trace hot/cold gas and vent lines, note electrical conduit, nearby valves, and clearance limits to plan safe, unobstructed strap routes.
Measuring and marking strap placement
A careful measurement of strap placement begins with documenting the water heater’s overall height, diameter (or footprint for tankless units), and the locations of inlet/outlet connections so straps clear plumbing and controls while securing the unit near structurally sound points.
Mark two horizontal strap lines—one in the upper third and one in the lower third of the tank body for storage heaters, or follow manufacturer recommendations for tankless mounting heights.
Then transfer stud centerlines and obstruction marks to the wall so strap anchors align with framing and avoid pipes, vents, and electrical conduit.
Measure from floor to each strap line, note clearances, and pencil-mark anchor centers at stud locations.
Step-by-Step Guide to Strapping a Water Heater Securely
Before beginning, power or gas should be shut off and the water supply closed to guarantee safety.
A small drain may be opened to reduce the tank’s weight when needed, after which the lower strap is positioned at the recommended height and fastened to studs.
Finally, the upper strap is secured to structural framing, straps are tightened, and clearances for vents and controls are verified.
Step 1 Turn off power/gas and shut off water supply
Shut off the water supply and cut power or gas to the water heater to eliminate immediate hazards before any strapping work begins.
Next, verify electrical disconnection at the breaker or switch; for gas units, turn the supply valve off and relight only after inspection.
Confirm no flow by opening a nearby hot faucet briefly.
Document settings and safety checks before proceeding.
Step 2 Drain a small amount of water to reduce weight (when necessary)
With power, gas, and water confirmed off, the technician may reduce the tank’s weight by draining a small amount of water when the unit is full or difficult to maneuver.
They attach a hose to the drain valve, direct discharge to a safe location, open a hot-water faucet to allow air in, then slowly open the drain valve until the desired reduction is achieved.
Step 3 Position lower strap at recommended height and attach to studs
Measure and mark the lower strap location at the height recommended by local code—typically 4 to 12 inches above the gas control valve or as specified for the jurisdiction—ensuring the strap will clear any piping or fittings.
Align the strap horizontally, transfer stud locations, predrill pilot holes into framing, and fasten with specified lag screws or bolts.
Verify snugness without deforming the tank.
Step 4 Position upper strap and secure to structural framing
Install the upper strap at the code-specified height—commonly 4 to 6 inches below the tank shoulder or as required locally—so it secures the upper third of the water heater without contacting piping or valves.
Align strap around the tank, mark framing points, and use appropriate fasteners into studs or blocking. Confirm the strap sits flat, is centered, and provides firm anchor to structural framing.
Step 5 Tighten straps and verify clearances for vents and controls
Begin by snugging each strap evenly until it firmly contacts the tank but does not deform the shell; tension should prevent movement without compressing insulation or bending metal.
Then alternate tightening to equalize pressure, verify straps sit flush and hardware is secure.
Confirm vents, relief valve, thermostat and gas controls maintain required clearances and remain accessible; adjust strap positions if any interference is detected.
Step 6 Reconnect utilities and check for leaks or issues
With the straps properly seated and clearances confirmed, reconnecting the water heater’s utilities can proceed methodically.
A qualified person restores water, gas, and electrical connections per manufacturer instructions, using new fittings or approved sealant where required.
They pressurize the system, inspect all joints and valves for leaks, test controls and pilot light, and monitor for unusual noises or odors before declaring the installation complete.
Alternative Methods and Upgrades
The section compares alternative fastening systems, contrasting factory seismic cable kits with traditional metal straps and noting where each is most appropriate.
It outlines anchorage techniques for masonry, concrete, and drywall, emphasizing required hardware and load considerations.
It also summarizes supplemental seismic upgrades such as flexible water connectors and base restraints that reduce stress and movement during shaking.
Installing a seismic safety cable kit vs. metal straps
Homeowners weighing seismic safety options must decide between factory-style seismic cable kits and traditional metal straps, each offering distinct installation methods, costs, and performance under lateral loads. Cables are flexible, corrosion-resistant, and easier on uneven surfaces; straps are stiff, inexpensive, and distribute force. Choice depends on tank type, budget, and installer skill.
| Feature | Cable Kit | Metal Strap |
|---|---|---|
| Flexibility | High | Low |
| Cost | Medium | Low |
| Ease of Install | Easy | Moderate |
Anchorage options for masonry, concrete, and drywall surfaces
After choosing between cable kits and metal straps, attention shifts to selecting appropriate anchors that match the wall material—masonry, poured concrete, or drywall—because anchor type and installation directly affect hold strength and long-term performance.
Use masonry anchors or sleeve anchors for brick/block, wedge or concrete screws for poured concrete, and heavy-duty toggle or molly anchors for drywall over studs.
Verify correct size, embedment, and torque.
Additional seismic retrofits (flexible connectors, base restraints)
Consider adding flexible water connections and base restraints to complement strapping, as they address different seismic risks: flexible connectors reduce stress on plumbing lines and the heater inlet/outlet during movement, while base restraints limit sliding or tipping at the tank feet.
Install approved braided stainless hoses, use earthquake-rated fittings, and secure a bolt-on or welded base restraint to prevent lateral movement; follow manufacturer and local code.
Common Mistakes and How to Avoid Them
Common errors when strapping a water heater include choosing the wrong anchors or using too few fasteners, which compromises hold.
Straps placed too near pipes or control panels can cause damage or hinder access.
Both over-tightening and leaving straps too loose create safety and stability risks that should be corrected.
Incorrect anchor selection and insufficient fasteners
Choosing the wrong anchors or using too few fasteners undermines even a well-planned water heater strapping job, leaving the appliance vulnerable during earthquakes or shifting foundations.
Proper anchors must match wall material and load: masonry, studs, or engineered connectors. Use recommended fastener counts, spacing, and corrosion-resistant hardware.
Verify pull-out ratings and follow manufacturer or code specifications to guarantee secure, lasting attachment.
Placing straps too close to pipes or controls
Placing straps too close to pipes or control valves risks damaging plumbing, restricting access for maintenance, and creating heat transfer that can weaken straps or fittings.
Install straps with clearances to avoid contact with fittings, shutoff handles, pressure relief valves, and insulation.
Use padded spacers where necessary, and route straps to preserve service access.
Verify placement before final fastening to prevent future interference or accidental damage.
Over-tightening or leaving straps too loose
After ensuring straps are clear of pipes, valves and access points, attention must shift to strap tension: both over-tightening and leaving straps too loose create hazards.
Over-tightening can deform the tank, damage fittings, or stress seams; overly loose straps allow excessive movement during quakes.
Proper tension is firm but not constricting; use a torque-limited tool or follow manufacturer torque specs and recheck after settling.
Verification, Maintenance, and Inspection Checklist
The article outlines simple methods to test strap stability and anchorage strength, including manual tension checks and load simulations.
It then recommends a routine inspection schedule and common signs of wear to watch for, such as corrosion or loosened fasteners.
Finally, it specifies clear criteria for when to call a professional for repair or replacement.
How to test strap stability and anchorage strength
A simple, systematic inspection verifies that straps remain secure and anchors retain their rated strength.
Inspect connections, tightening hardware to specified torque.
Apply firm manual pull to straps and wiggle anchors to detect movement or looseness.
Check for corrosion, deformed metal, or sheared fasteners.
Record test results and replace any component failing to hold firm or showing material compromise before reuse.
Routine inspection schedule and signs of wear
Following the hands‑on checks of strap tension and anchor integrity, establish a routine inspection schedule that specifies frequencies, responsibilities, and pass/fail criteria.
Inspections should document strap corrosion, fastening looseness, and structural movement. Record findings, corrective actions, and dates. Weekly visual checks and annual detailed reviews balance safety with effort.
- Corrosion, fraying, discoloration
- Fastener looseness or pull‑out
- Tank shifts or new gaps
When to call a professional
Contact a licensed professional when inspection findings exceed routine maintenance or suggest compromised safety: visible strap corrosion beyond surface rust, fasteners that pull out or strip, significant tank movement or new gaps, evidence of leaks, or suspected seismic retrofitting deficiencies.
A technician verifies structural anchoring, replaces damaged straps and hardware, assesses foundation or framing issues, tests for leaks, and documents repairs to guarantee code compliance and occupant safety.
Cost, Time, and DIY vs. Professional Considerations
Typical DIY strapping projects generally require a few hours and modest material costs, while more complex installations can increase both time and expense.
A licensed contractor is recommended for structural anchoring, seismic retrofits, or when local codes and permit requirements are unclear.
Homeowners should also verify insurance implications and obtain any required permits before proceeding.
Typical cost and time estimates for DIY installation
A homeowner can expect a DIY water heater strapping project to take roughly 1–3 hours and cost between $20 and $100 in materials, depending on the heater size and local hardware prices.
Typical items include metal straps, screws/anchors, a drill, and brackets.
Complexity rises for elevated platforms or retrofit framing, which increases time and parts but remains manageable for moderately skilled DIYers.
When hiring a licensed contractor is recommended
Many homeowners should consider hiring a licensed contractor when the strapping project involves complex anchoring, structural modifications, electrical or gas-line proximity, or local code inspections.
A professional reduces risk, guarantees correct fasteners and seismic anchoring, and typically completes work faster.
Higher labor cost may be offset by quality, warranty, and avoidance of retrofit mistakes; DIY suits simple, accessible installs only.
Insurance and permit considerations
When should homeowners factor insurance and permit implications into a water-heater strapping project? Homeowners should check insurer requirements, local building codes, and permit thresholds before starting.
Costs, inspection timelines, and potential policy impacts dictate whether DIY is allowed or a licensed contractor is advisable.
Documenting compliance preserves coverage and resale value; failure to permit can void claims and incur fines.
Real-World Examples and Case Scenarios
The section presents representative installations in wood-frame homes, highlighting common strap locations and attachment methods.
It then examines retrofit scenarios for older houses and apartments, noting challenges such as limited clearance and masonry walls.
Finally, it outlines approaches to troubleshoot unusual configurations and when to adapt standard techniques or call a professional.
Typical installations in wood-frame homes
Although wood-frame homes vary in layout and seismic exposure, typical water-heater installations in these buildings share common anchoring patterns: tanks often sit in basements, garages, or utility closets adjacent to exterior walls.
Straps are mounted to studs or blocking, with top and mid-height straps and a secure floor restraint.
Flexible connectors and clearances for maintenance are standard to balance seismic restraint with serviceability.
Retrofit scenarios for older homes and apartments
Several common retrofit scenarios arise in older homes and apartment buildings where original water-heater installations lack modern seismic straps, clearances, or accessible anchorage points.
Examples include masonry or concrete walls with no studs, shallow crawlspaces, stacked apartment closets, and units located on wood platforms above garages.
Contractors assess anchorage options, use masonry anchors or freestanding bracing, guarantee strap clearances, and plan minimal invasive solutions respecting building codes.
Troubleshooting unusual configurations
How should technicians approach atypical water‑heater layouts where standard strapping won’t fit or anchor points are absent?
Technicians assess clearances, structural members, and piping; document constraints.
They adapt with custom bracing, reinforced plywood backing, toggle or masonry anchors, and flexible straps or seismic cables.
Consultation with engineers and local code officials guarantees approved solutions.
Field-tested mockups and photos verify secure, serviceable installations.
Quick Reference: Step-by-Step Cheat Sheet
Begin by gathering required tools and materials: two seismic straps or metal bands, mounting brackets or lag screws, a drill, a wrench, a tape measure, and safety gear.
Then follow concise steps to secure the heater: position straps, fasten to studs, tighten to prevent tipping. Keep clearances, check connections, and test stability. Maintain records of installation date.
- Position straps at upper and lower third
- Anchor into studs
- Tighten and inspect
Conclusion
Securing a water heater greatly reduces earthquake risk to households; studies show properly strapping and bracing can cut fire and flood incidents from toppled heaters by up to 60%. After inspecting, measuring, and using approved straps and anchors, follow the step-by-step installation and periodic checks to guarantee continued safety. For many homeowners, a yearly inspection and prompt repairs or upgrades offer the best balance of cost and protection against seismic damage.