How to Bleed a Hot Water Tank Safely: Step-by-Step Guide for Beginners
To safely bleed a hot water tank and ensure optimal performance, follow these steps: First, power off the unit and shut the cold-water inlet. Next, attach a hose to the drain valve, open a hot faucet to relieve pressure, and then slowly open both the drain and pressure-relief valve to release trapped air and flush sediment. After the flushing is complete, close the valves, refill the tank slowly, restore power, and check for any leaks and proper water flow. For further guidance, continue reading for detailed safety tips and troubleshooting advice.
What “bleeding” a hot water tank means and when it’s necessary
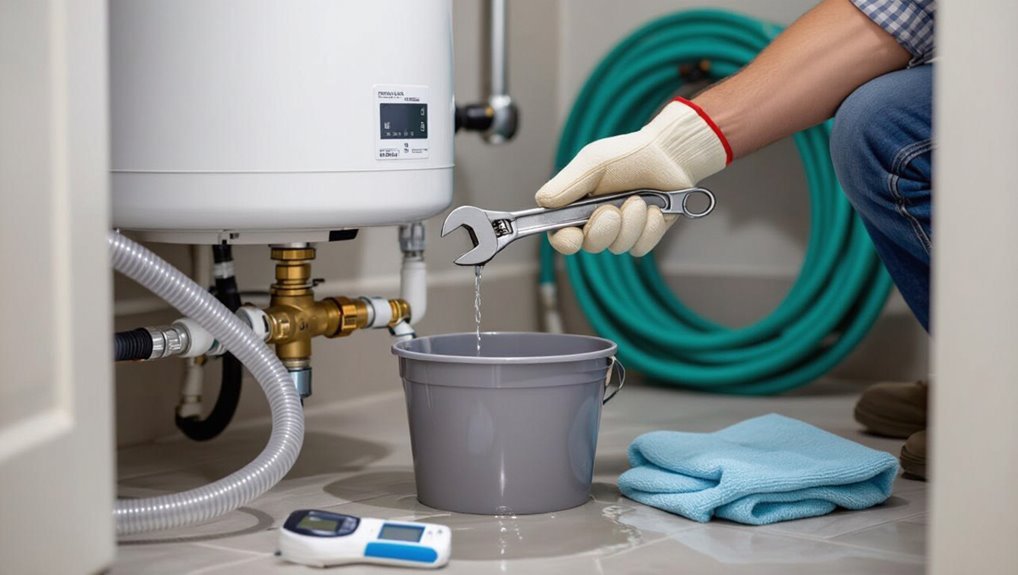
Bleeding a hot water tank refers to releasing trapped air or flushing out sediment so the system can circulate and heat water efficiently.
Air pockets and mineral buildup reduce flow, cause sputtering taps, banging pipes, uneven heating, or reduced capacity—common signs that bleeding or flushing is needed.
This applies to various systems including conventional tanks, combi boilers, indirect heaters, and both electric and gas units, though procedures differ by type.
Why air or sediment build-up affects hot water systems
Air and sediment accumulation in a hot water tank disrupts normal operation by creating pockets that reduce heating efficiency and block water flow.
Sediment settles, insulating the burner and causing uneven temperatures, corrosion, and valve wear.
Trapped air leads to sputtering taps and pressure fluctuations.
Understanding how to bleed a hot water tank removes these obstructions, restores flow, and prolongs system lifespan.
Common signs you need to bleed the tank
Recognizing when to bleed a hot water tank follows naturally from understanding how air and sediment compromise performance: the process means releasing trapped air and flushing out settled debris through the drain valve and taps to restore proper flow and heating.
Common signs include sputtering or uneven flow, banging or gurgling noises, intermittent cold spots, reduced hot water volume, slow recovery, and visible rusty or cloudy water.
Types of hot water systems covered (tank, combi, indirect, electric, gas)
Different types of domestic hot water systems—storage tank heaters, combi boilers, indirect-fired tanks, electric tank heaters, and gas-fired units—can all develop trapped air or sediment that impairs performance.
Bleeding here means releasing air and flushing loose sediment to restore flow, reduce noise, and improve heat transfer.
Procedures vary: tanks require drain/venting, combis and indirect systems need system-specific venting and isolation, and electric/gas models follow manufacturer safety steps.
Safety precautions before you begin
Before beginning, the reader should gather personal protective equipment and run through a concise safety checklist.
Power and fuel must be shut off correctly—switching off the electric breaker for electric heaters or securing the gas pilot/thermostat for gas units—then the water supply should be closed and system pressure relieved.
Finally, the user must identify hot components and take steps to avoid scalding while working.
Personal protective equipment and safety checklist
One clear safety step is to assemble appropriate personal protective equipment and run through a concise pre-checklist to reduce burn, scald, and slip risks. Wear gloves, eye protection, non-slip shoes; have towels and a bucket ready. Verify area ventilation and stable footing. Use the table below for quick PPE and checklist reminders.
| Item | Purpose | Action |
|---|---|---|
| Gloves | Heat protection | Wear |
| Goggles | Eye safety | Wear |
| Shoes | Traction | Wear |
| Towels | Contain spills | Place nearby |
Turning off power and fuel safely (electric breaker vs gas pilot/thermostat)
With PPE in place and the work area pre-checked, power and fuel sources must be made safe to prevent electrical shock or accidental ignition while bleeding the tank.
For electric units, switch off the dedicated breaker and verify with a noncontact tester.
For gas units, turn off the gas valve or extinguish the pilot and set the thermostat to “off.”
Lockout/tagout if available.
Shutting off water supply and relieving pressure
Shut the cold-water supply to the tank and relieve system pressure to prevent scalding and water damage.
Close the inlet valve, open a nearby hot faucet to vent pressure, and attach a hose to the drain valve if draining.
Slowly open the drain valve to release trapped pressure; never force valves.
Confirm pressure gauge reads zero or faucets run without sputtering before proceeding.
Identifying hot components and avoiding scalds
How hot are the tank and nearby pipes, and where is heat most likely to be concentrated?
The person should assume surfaces, valves, and unions are hot. Inspect insulation, feel from a safe distance, and note steam vents.
Wear heat-resistant gloves and eye protection, avoid bare skin contact, and keep others clear.
Allow cooling time after shutdown before opening fittings.
Tools and materials you’ll need
A concise set of tools and a few optional extras will cover most bleeding jobs and help identify trouble that requires a pro.
Basic items like a wrench, screwdriver, hose and bucket are usually sufficient for routine bleeding.
If pressure issues or stuck valves appear, a pressure gauge, radiator key or replacement valves may be needed, and a professional should be contacted for complex or unsafe situations.
- Wrench, screwdriver, hose, bucket
- Pressure gauge, radiator key, replacement valves
- Call a professional for complex, high-pressure, or unsafe conditions
Recommended basic toolset (wrench, screwdriver, hose, bucket)
Gather basic tools before starting: an adjustable wrench or pliers, a flathead or Phillips screwdriver, a garden hose long enough to reach a suitable drain, and a sturdy bucket to catch residual water.
These essentials allow valve access, bleeding, and safe drainage. Confirm hose fittings match the drain, the bucket is leak-free, and tools are within reach to avoid interruptions during the procedure.
Optional items for difficult jobs (pressure gauge, radiator key, replacement valves)
When basic hand tools and a hose prove insufficient for stubborn airlocks or recurring leaks, additional items can make the job manageable.
A pressure gauge verifies system pressure before and after bleeding. A radiator key or spanner reaches tight bleed valves on radiators.
Spare replacement valves and appropriate PTFE tape allow quick swaps for leaking or seized valves, minimizing downtime and preventing water damage.
When to call a professional instead
How should one decide to call a professional instead of proceeding alone?
If leaks, corroded valves, unfamiliar shutoff systems, inadequate tools, or persistent pressure issues appear, professional service is recommended.
Similarly, those uncomfortable with gas or electric components, uncertain about boiler isolation, or without insurance coverage for mistakes should stop and consult a licensed plumber or heating technician to avoid damage or safety hazards.
Step-by-step procedure to bleed a conventional hot water tank
The procedure begins with safety checks and preparation: clear the area and confirm the heater’s power or fuel supply is shut off.
Next, the cold-water inlet is closed and the tank isolated before a hose is attached to the drain valve and routed to a safe discharge point.
Finally, venting is established by opening the pressure-relief or bleed valve and the drain valve is opened partially to flush sediment and expel trapped air.
Step 1 Prepare the area and verify power/fuel are off
Begin by clearing a workable area around the water heater and confirming that its power or fuel source is fully shut off.
Verify electrical breakers are off or the gas supply valve is closed.
Remove combustible items, place a drain pan and towels, and position a hose to a safe drain.
Put on gloves and eye protection before proceeding.
Step 2 Turn off the cold water inlet and isolate the tank
Shut off the cold-water supply valve feeding the tank to stop incoming water and prevent refilling while bleeding. Then close any isolation valves on connected lines to fully isolate the tank. Confirm no pressure change at faucets. Drainage requires attention to safety and surroundings; make certain children/pets are away and floor protection is in place.
| Concern | Feeling |
|---|---|
| Leak risk | Anxiety |
| Noise | Unease |
| Wet floor | Frustration |
| Tools ready | Relief |
| Isolation done | Confidence |
Step 3 Attach hose to drain valve and route to safe discharge
Connect a garden hose to the tank’s drain valve and direct the other end to a safe discharge point—such as a floor drain, outside away from foundations, or a container rated for hot water—ensuring the hose is firmly seated and the discharge path will not cause flooding or scalding.
Secure clamps or thread tightness, slope the hose downward, avoid kinks, and keep bystanders clear.
Step 4 Open pressure relief valve or bleed valve to vent air
Open the temperature-and-pressure (T&P) relief valve or the tank’s dedicated bleed valve to allow air to escape and to normalize pressure before draining or refilling.
With cold-water supply still off, slowly lift or turn the valve just enough to let a steady hiss or small stream vent.
Monitor pressure and stop if leaks or unusual noises occur; reseat valve when venting completes.
Step 5 Open drain valve partially to flush sediment and expel air
Partially turning the tank’s drain valve allows trapped air and loose sediment to be flushed without fully emptying the tank.
The valve should be opened slowly until a steady flow begins; watch the discharge for grit and air bubbles.
Use a short hose to direct water to a drain.
If flow stops or sputters, adjust valve slightly to maintain consistent flushing.
Step 6 Refill the tank slowly and close bleed/drain valves
With the drain closed and the cold-water supply valve still off, the refill begins by slowly restoring mains pressure to the tank to prevent turbulence and reintroduction of sediment.
The operator opens the cold inlet gradually, watches for steady water flow at a nearby hot faucet to confirm air evacuation, listens for consistent tank filling, then fully closes the drain and any bleed valves once bubbling stops and flow is solid.
Step 7 Restore power or fuel and check for normal operation
Restore electrical power or relight the pilot following the manufacturer’s instructions, then observe the system for normal operation.
The technician verifies thermostat settings, guarantees burners or heating elements engage, and listens for unusual noises.
Watch pressure and temperature gauges for stable readings.
Confirm the water heater cycles normally without error indicators.
If abnormalities persist, shut down and consult a qualified technician.
Step 8 Test hot water taps and inspect for leaks
Once power and fuel are confirmed stable, the technician opens each hot water tap in turn to verify flow, temperature, and to reveal any leaks at fittings or the drain valve.
They observe pressure, listen for unusual sounds, and check beneath sinks and around the tank for drips.
Any leak is marked, photographed, and documented for repair; tests conclude when all fixtures perform normally.
Bleeding specific system variations
Different tank types and system configurations require tailored bleeding approaches to protect components and guarantee safety.
Electric tanks, gas-fired units and boilers, combi and sealed radiator systems, and indirect tanks with recirculation loops each have unique valves, controls, and procedures that should be addressed.
The following sections outline key precautions and step-by-step techniques for those variations.
Electric hot water tanks special considerations
Although electric hot water tanks lack combustion components, they have distinct features that affect bleeding procedures: multiple anode rods, thermostats, and immersion heating elements change access points and pressure-relief behavior.
Power must be shut off at the breaker before opening valves.
Drain and vent slowly to avoid element exposure or thermal shock.
Replace gaskets and test the pressure-relief valve after refilling.
Gas-fired tanks and boilers pilot and burner cautions
Electric systems require power isolation and careful handling of immersion elements; gas-fired tanks and boilers introduce a separate set of safety and operational concerns related to pilots, burners, and fuel supply.
Technicians should shut gas, extinguish pilots if required, wait for cool down, follow manufacturer relighting procedures, and guarantee adequate ventilation.
Never block controls or attempt burner repairs without qualified training and tools.
Combi boilers and sealed systems using radiator keys and automatic vents
When working on combi boilers and sealed heating systems, technicians should recognize that bleeding procedures differ from open systems because of pressurization, integrated pumps, and built-in venting devices.
Use radiator keys at low-flow points, isolate and depressurize per manufacturer instructions, and open automatic air vents slowly.
Monitor system pressure, top up if needed, and confirm pump operation and absence of persistent airlocks before returning to service.
Indirect tanks and systems with recirculation loops
Having covered combi boilers and sealed systems, attention now turns to indirect hot water tanks and systems with recirculation loops, which present different bleeding challenges due to tank heat exchangers and continuous-flow piping.
Technicians isolate the loop pump and close check valves, vent heat-exchanger ports and tank top vents, purge air via dedicated purge valves or a hose at lowest return, then restart pump and recheck for noise and steady flow.
Troubleshooting common problems during bleeding
When bleeding a hot water tank, common problems can arise that require methodical checks. These include no water or low flow when refilling, persistent gurgling or banging noises after bleeding, continued air in the system or recurring loss of pressure, and leaks from valves or fittings after service.
Each issue should be isolated and addressed with targeted corrective steps to restore proper operation.
No water or low flow when refilling
Check the supply valves and inlet lines first to confirm water is available and the shutoff is fully open; most low-flow or no-flow issues during tank refill stem from closed or partially closed valves, kinked hoses, or tripped pressure-reducing devices. Inspect filters, clear debris, verify hose alignment, and reopen any closed valves. If pressure device persists, contact a plumber.
| Checkpoint | Action |
|---|---|
| Valve position | Open fully |
| Hoses | Unkink/replace |
| Filter/screen | Clean |
| Pressure device | Reset/inspect |
| Supply line | Verify flow |
Persistent gurgling or banging noises after bleeding
After confirming supply valves, hoses, and filters are clear, persistent gurgling or banging noises may indicate trapped air pockets, sediment buildup, or water hammer in the system rather than a simple refill issue.
Inspect and flush the tank to remove sediment, open nearby fixtures to purge trapped air, and check pipe supports and a pressure-reducing valve for water hammer.
If noises persist, consult a professional.
Continued air in system or recurring loss of pressure
Repeat bleeding procedures can indicate deeper issues when air continually enters the system or pressure repeatedly drops.
The technician should inspect automatic air vents, check expansion tank charge, and verify that backflow preventers or non-return valves aren’t trapping air.
If pressure loss persists, test for hidden leaks in radiators, piping, or boiler connections and consult a qualified plumber for diagnostic pressure testing and repairs.
Leaks from valves or fittings after service
While investigating persistent air or pressure loss, attention should also turn to the integrity of valves and fittings, since loose packing nuts, worn seals, or improperly seated compression fittings can begin to leak once the system is re-pressurized.
Inspect joints, tighten nuts to spec, replace degraded washers or sealant, and reseat compression ferrules.
After repairs, pressurize slowly and recheck for drips and pressure stability.
Preventive maintenance to reduce future bleeding
Preventive maintenance can minimize the need to bleed a hot water tank by addressing sediment buildup, valve wear, and water quality.
Establishing a regular flushing schedule and managing sediment reduces corrosion and clogs.
Inspecting and replacing faulty valves and adding appropriate filtration or water treatments further lowers the risk of future bleeding.
Regular flushing schedule and sediment management
Because sediment accumulation is the primary driver of frequent bleeding, a scheduled flushing routine considerably reduces mineral and debris buildup and extends tank life.
Monthly light flushes and annual deep flushes remove grit and prevent cold spots.
Use manufacturer-recommended drain procedures, low-flow hoses, and a shutoff before refilling.
Record dates, observations, and sediment volume to tailor future intervals and detect worsening buildup.
Inspecting and replacing faulty valves and fittings
Inspect valves and fittings at each service interval to catch leaks, corrosion, and wear before they force extra bleeding cycles.
Technicians should check pressure relief, drain, inlet/outlet, and union connections for drips, mineral buildup, or stiff operation.
Replace faulty shutoffs, leaky unions, or corroded nipples promptly with compatible parts, tighten connections, and test under pressure to confirm integrity and prevent recurring bleeding.
Water quality treatments and filtration options
Addressing valves and fittings often exposes water quality issues—sediment, mineral scale, and dissolved solids—that accelerate corrosion and clogging, leading to more frequent bleeding.
Recommend installing sediment filters, water softeners, or cartridge systems to reduce particulates and hardness.
Consider whole-house filtration, point-of-use filters, and periodic chemical descaling.
Regular testing and maintenance of treatment equipment prevents buildup, extends tank life, and reduces bleeding frequency.
How to tell when to hire a professional and expected costs
When signs of leaks, corrosion, or unusual noises appear, a homeowner should consider calling a professional to avoid safety risks and costly mistakes.
A licensed plumber will typically inspect the tank, flush and bleed the system properly, check valves and fittings, and recommend repairs or replacement if needed.
Expected costs vary by region and job complexity but often range from a basic service call to several hundred dollars for repairs, with factors like tank type, accessibility, and parts affecting the final price.
- Safety or complexity red flags
- Typical service tasks a plumber will perform
- Ballpark cost ranges and factors affecting price
Safety or complexity red flags
Some situations clearly require a professional: persistent leaks, corroded or damaged valves, sediment so compacted that draining fails, visible rust on the tank, or any signs of gas or electrical issues.
Other red flags include unusually high pressure, repeated pilot light failure, strange noises indicating internal damage, and uncertainty about shutoff procedures.
Expect inspection and repair quotes; prioritize safety over DIY.
Typical service tasks a plumber will perform
If a homeowner lacks the tools, confidence, or clear shutoff access, a licensed plumber will handle tasks such as full tank flushing, valve replacement (pressure relief and drain valves), sediment removal, inspection and replacement of anode rods, testing and adjusting pressure settings, and diagnosing leaks or heating element/gas control issues; typical service calls for these jobs range from a basic diagnostic/flush visit at $100–$250 to more involved repairs costing $300–$1,200 or more depending on parts and labor, with emergency or gas-related work often billed at higher rates.
| Task | Purpose |
|---|---|
| Full tank flush | Remove sediment |
| Valve replacement | Restore safe relief/drain |
| Anode rod service | Prevent corrosion |
| Pressure testing | Guarantee safe operation |
| Leak/element diagnosis | Identify faults |
Ballpark cost ranges and factors affecting price
Estimate costs by grouping jobs into simple maintenance, moderate repairs, and major replacements:
Routine tasks such as bleeding a tank, small flushes, or drain valve tightening typically run $75–$200;
Moderate work—full tank flushes, pressure-relief or drain valve replacement, and anode rod service—generally costs $200–$600;
While extensive repairs or replacements (major leak repairs, hot water tank replacement, or gas control work) commonly range from $600–$2,000+ depending on parts, labor, and emergency call premiums.
Decide to hire if safety, gas connections, unknown leaks, or lack of tools/experience increase risk; get multiple estimates.
Quick-reference checklist for bleeding a hot water tank
A concise checklist helps guarantee safe, efficient bleeding of a hot water tank; it lists required tools, preparatory safety steps, the bleed procedure, and post-bleed checks in clear order so tasks are not missed.
The checklist enables quick verification and reduces risk.
- Tools & PPE: wrench, bucket, hose, gloves, eye protection.
- Prep: power/gas off, cooling period, shut water supply.
- Bleed & verify: open valve, drain, close, restore supply, check for leaks.
Conclusion
Bleeding a hot water tank restores steady flow and prevents noisy, inefficient operation, and the guide empowers homeowners to act confidently. With proper precautions and the right tools, air is released methodically until water runs clear and steady—an outcome described as a lifesaving fix for a sputtering system. If problems persist, a qualified technician should intervene. Regular maintenance minimizes recurrence, ensuring long-term performance and averting catastrophic surprises.