How to Clean the Burners on a Gas Stove: Step-by-Step Guide for Sparkling Results
Cleaning gas stove burners is essential for maintaining even flames, reducing soot, and enhancing safety. To achieve sparkling results, first, ensure the gas and power are turned off. Remove the grates, caps, and heads, then soak these components in warm soapy water or a baking soda solution for 15–30 minutes. After soaking, gently scrub with a soft brush and clear any ports using a needle or compressed air. Rinse thoroughly and ensure all parts are completely dry before reassembling. Remember to wear gloves and keep the area well-ventilated throughout the process. For a complete guide on safe techniques, troubleshooting tips, and when to replace parts, refer to the full instructions.
What You’ll Achieve by Cleaning Gas Stove Burners
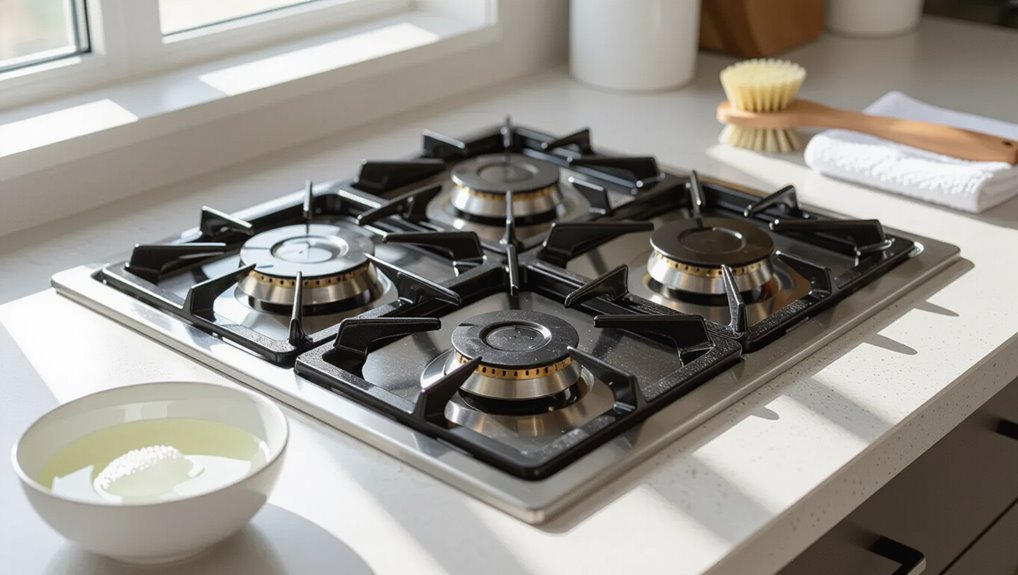
Cleaning gas stove burners restores even flame distribution, reduces clog-related ignition problems, and improves overall safety and fuel efficiency.
Visible buildup, uneven flames, delayed ignition, or abnormal odors indicate it is time to clean.
The following guidance explains the specific benefits and the visual and performance cues that signal maintenance is needed.
Benefits of clean burners (performance, safety, efficiency)
A few routine minutes spent on the burners yields clearer benefits: more consistent flame control, reduced risk of gas buildup and flare-ups, and improved fuel efficiency that lowers cooking time and costs.
Clean burners enhance cooking predictability, minimize soot and odors, and extend appliance lifespan.
For homeowners wondering how to clean the burners on a gas stove, maintenance directly improves safety, savings, and performance.
When to clean burners (visual cues and performance signs)
Several clear signs indicate it’s time to clean gas stove burners: uneven or yellow flames, delayed ignition, persistent soot, and visible debris or grease buildup around ports.
Additionally, frequent flame extinction, unusual odors during use, longer cooking times, or difficulty adjusting heat signal clogged or corroded ports.
Timely cleaning restores efficient combustion, reduces carbon monoxide risk, improves safety, and prolongs burner lifespan.
Safety Precautions Before You Start
Before cleaning, guarantee the gas supply and any electrical connections are turned off to prevent leaks or sparks.
The area should be well ventilated and the cleaner should wear gloves and eye protection.
Fragile or sealed components must be handled gently or left to a professional to avoid damage.
Turning off gas and electricity
Shut off the gas supply and electrical power to the stove to eliminate ignition and shock risks while cleaning.
Confirm the gas valve is fully closed and unplug the appliance or switch off its circuit breaker.
Verify no gas smell remains before proceeding.
Keep control knobs in the off position and avoid operating any igniters or switches until cleaning is complete and connections are safely restored.
Ventilation and protective gear
While cleaning, guarantee the area is well-ventilated and wear appropriate protective gear to minimize exposure to fumes, dust, and cleaning agents.
Use an exhaust fan or open windows to create airflow.
Don nitrile gloves to protect skin, safety glasses to shield eyes, and a mask if using strong cleaners.
Remove bystanders, especially children and pets, until surfaces are dry and odor dissipates.
Handling fragile or sealed components
When approaching fragile or sealed components, treat each piece as potentially delicate and avoid forcing or prying; inspect for visible screws, clips, or tabs and consult the stove’s manual to identify parts that must not be disassembled.
Use soft tools, non-abrasive cloths, and minimal moisture. If unsure, stop and contact the manufacturer or a qualified technician to prevent damage or gas/leak risks.
Tools and Supplies You’ll Need
The next step lists the basic supplies and tools needed to clean gas stove burners safely and effectively.
Common household cleaners, a few handheld tools for scrubbing and unclogging, and optional specialty products or replacement parts cover most situations. Gather these items before beginning to streamline the process and avoid interruptions.
- Baking soda, white vinegar, and dish soap for degreasing and soaking
- Stiff toothbrush, scrub pad, and nylon brush for scrubbing
- Needle, toothpick, or safety pin for clearing burner ports and pilot holes
- Optional: commercial stove cleaner, replacement gaskets or igniter parts
Common household items (baking soda, vinegar, dish soap)
Gather common household cleaners—baking soda, white vinegar, and dish soap—before beginning burner maintenance.
Baking soda acts as a mild abrasive for removing grime; white vinegar dissolves mineral deposits and grease when diluted; a degreasing dish soap cuts through oil and residue.
Together they provide an inexpensive, effective cleaning trio safe for most removable burner components when used with proper rinsing and drying.
Tools (toothbrush, needle, scrub pad, toothbrush, toothpick)
After assembling the cleaning trio, attention turns to the small tools that handle stubborn debris and tight spaces.
A firm-bristled toothbrush scrubs grime from burner surfaces and ports. A needle or toothpick clears clogged holes carefully. A nonabrasive scrub pad lifts baked-on residue without scratching.
These tools complement basic cleaners, reaching crevices and restoring proper gas flow and ignition.
Optional cleaners and replacement parts
Consider keeping a few specialty cleaners and spare parts on hand to tackle tough buildup and restore proper burner function.
A nonabrasive degreaser, oven cleaner for heavy carbon, and a toothbrush-safe paste clean stubborn deposits. Spare gaskets, burner caps, and igniter electrodes allow quick replacements.
Small tubing brushes and compressed air assist precision cleaning. Store items labeled and accessible for routine maintenance.
Identifying Burner Types and Components
The section distinguishes removable burners, which separate into caps and bases, from sealed units that conceal components beneath the cooktop.
It identifies key parts—burner caps, bases, ignition ports, and gas ports—and notes how each contributes to flame performance.
Signs of clogging or damage, such as uneven flames, yellow tips, or weak ignition, indicate the need for cleaning or replacement.
Removable vs. sealed burners
Burners on gas stoves fall into two main categories—removable and sealed—each defined by how parts like caps, heads, and igniters are arranged and accessed.
Removable burners feature separate, lift-off components that expose the cooktop for cleaning, while sealed burners have a fixed assembly with a rim or drip pan that hides gaps and channels beneath.
Removable types allow deeper access; sealed types limit exposure but contain spills.
Burner caps, bases, ignition ports, gas ports
Identify each component before cleaning to avoid damage and guarantee proper reassembly.
Burner caps sit atop bases, providing an even flame spread. Bases house gas delivery channels and support caps.
Ignition ports (spark electrodes) create the spark; avoid soaking or scraping them.
Gas ports (small holes in the base) meter fuel to the burner.
Photograph layout for correct reassembly.
How to tell if burners are clogged or damaged
How can one tell if a gas stove burner is clogged or damaged?
Observations include uneven or yellow flames, weak flame height, sizzling or odor, delayed ignition, or burners that won’t light.
Physical signs are warped caps, corrosion, debris-filled ports, or loose fittings.
Testing each burner individually and inspecting ports with a flashlight confirms clogs or visible damage requiring cleaning or replacement.
Step-by-Step Cleaning Process for Removable Burners
The cleaning process for removable burners proceeds through a few clear, safe steps to restore function and appearance.
First, parts are removed and soaked to loosen grime, then scrubbed and ports cleared with nonmetal tools. Finally, all components are rinsed, dried completely, and reassembled to guarantee proper operation.
- Remove grates and burner caps safely.
- Soak parts in warm soapy water or a baking-soda solution.
- Scrub caps and bases gently and clear ignition and gas ports with safe tools.
- Rinse, dry completely, then reassemble.
Step 1: Remove grates and burner caps safely
Begin by ensuring the stove is completely cool and the gas supply is turned off before handling any parts.
Wearing gloves, lift grates straight up to avoid scraping enamel.
Remove burner caps and crowns gently, noting their orientation for reassembly.
Inspect ports for visible debris and check igniter area for damage.
Place removed parts on a clean surface while preparing for the next cleaning step.
Step 2: Soak parts in warm soapy water or baking-soda solution
After removing grates and burner caps, place them in a sink or large basin filled with warm water mixed with a few drops of dish soap or, for tougher grime, a paste of baking soda and water to pre-soak; this loosens grease and carbon without harsh scrubbing.
Let parts soak 15–30 minutes, periodically agitating to dislodge debris, then drain and prepare for subsequent cleaning steps.
Step 3: Scrub caps and bases without damaging finish
Lift each cap and base from the soak and inspect for remaining residue before scrubbing.
Use a soft-bristled brush or nonabrasive sponge with mild detergent to remove grime, targeting crevices gently.
For stubborn spots, apply a paste of baking soda and water briefly, then rinse.
Dry thoroughly with a lint-free cloth to preserve finishes and prevent water spots or corrosion.
Step 4: Clear ignition and gas ports with safe tools
With caps and bases clean and fully dried, attention turns to the ignition and gas ports to restore reliable lighting.
Using a soft-bristle brush, compressed air (short bursts), and a straightened paperclip or pin, remove soot and debris from port holes and the ignition electrode area.
Avoid harsh probes, excessive force, or liquids near electrodes.
Verify clear passages before reassembly.
Step 5: Rinse, dry completely, and reassemble
Carefully rinse each burner cap and base under warm running water to remove loosened residue and any remaining cleaning solution.
Pat parts thoroughly with a lint-free towel, then air-dry completely to prevent moisture in gas ports.
Inspect for cleanliness and dry spots.
Reassemble components in correct order, ensuring secure fit.
Test ignition and flame pattern before regular use.
Cleaning Sealed or Integrated Burners
Sealed or integrated burners require a different approach because internal components should not be removed.
Surface cleaning with a damp cloth, mild detergent, and nonabrasive pads is recommended, taking care to avoid excess moisture near seals and igniters.
If grease or malfunction suggests internal access is needed, a qualified technician should be contacted.
When to avoid removing parts
When burners are integrated into the cooktop or enclosed beneath a fixed surface, they should not be disassembled by the homeowner.
Attempting removal can damage seals, sensors, gas lines, or electrical components and may void warranties. Instead, consult the manufacturer’s manual or a qualified technician.
Professional service guarantees safe access, correct replacement parts, and compliance with gas-safety standards to prevent leaks or malfunction.
Surface cleaning method for sealed units
If burners are integrated or sealed and disassembly is prohibited, cleaning is limited to surface methods that preserve seals and sensors.
Use a soft cloth dampened with mild detergent to wipe cooktop surfaces, avoiding pooled water near igniters.
Gently remove debris with a soft brush or toothpick from vents and crevices.
Dry thoroughly and test ignition, repeating light cleaning as needed.
When to call a professional
Why seek professional help?
A technician should be contacted when burners are sealed or integrated, if cleaning requires disassembly, or when gas odors, irregular flames, ignition failures, or visible damage occur.
Professionals prevent gas leaks, electrical hazards, and voiding warranties.
For complex models or persistent problems, certified service guarantees safe, correct repairs and restores stove function without homeowner risk.
Deep Cleaning for Stubborn Grease and Carbon Buildup
For persistent grease and carbon, a baking soda paste followed by a light vinegar mist can lift heavy stains without harsh abrasives.
Components may require several hours of soaking in warm, soapy water or a recommended safe solvent, observing manufacturer guidance to protect seals and coatings.
Rust and discoloration are best treated with gentle scrubbing, a rust remover formulated for cookware, or replacement parts if surface integrity is compromised.
Using baking soda paste and vinegar for heavy stains
Tackle stubborn grease and carbon by combining baking soda paste with vinegar: the abrasive paste loosens baked-on residue while the acidic vinegar helps dissolve it, creating a foam that lifts grime from burner surfaces and ports.
Apply paste, spray vinegar until foaming, agitate gently with a soft brush or cloth, then wipe away loosened deposits.
Rinse parts thoroughly and dry before reassembly.
Soaking times and safe solvents
After loosening surface grime with a baking soda paste and vinegar foam, attention turns to soaking and selecting safe solvents for deeper grease and carbon removal.
Porcelain or brass burners soak 15–30 minutes in warm, soapy water; cast iron accepts shorter soaks to protect seasoning.
For stubborn carbon, apply a diluted degreaser or isopropyl alcohol, rinsing thoroughly and drying before reassembly.
Removing rust and discoloration safely
Remove stubborn rust and unsightly discoloration using methods that restore appearance without damaging burner materials.
The guide recommends gentle abrasives (baking soda paste, fine steel wool sparingly) and rust converters for severe corrosion.
Treat enamel and brass differently: avoid harsh scrubbing on enamel; use mild acid (vinegar) briefly on brass, then neutralize and rinse.
Dry thoroughly and apply heat-resistant protectant to prevent recurrence.
Troubleshooting Common Problems After Cleaning
After cleaning, common issues can include a burner that won’t ignite or produces a weak flame, flames that burn unevenly or show yellow/orange tips, and lingering odors or the smell of gas.
The guide will explain basic checks such as clogged ports, misaligned components, and proper reassembly to restore correct flame appearance and strength.
It will also outline immediate safety steps to take if a persistent gas odor is detected.
Burner won’t ignite or low flame issues
Diagnose ignition and low-flame problems systematically: when a burner fails to light or burns weakly following cleaning, the issue is most often lingering debris, misaligned parts, or moisture in the ignition system rather than a major mechanical fault.
Inspect and clear ports with a soft brush or pin, realign the burner cap, dry ignition electrodes thoroughly, and confirm gas valve is fully open; test ignition safely.
Uneven flame or yellow/orange flame color
If ignition and low-flame troubleshooting didn’t restore a steady, blue flame, uneven flames or yellow/orange tips often indicate partial blockage, improper air-gas mixture, or remaining soot on burners.
Inspect and clean ports, caps, and crowns; clear debris with a soft brush and toothpick.
Verify burner caps seat correctly.
If discoloration persists, adjust air shutter or consult a technician for calibration.
Persistent odors or gas smell emergency steps
One clear sign of a serious problem is a persistent odor of gas after cleaning, which requires immediate, measured action to guarantee safety.
The area should be ventilated, all burners and gas knobs kept off, and occupants evacuated if smell is strong.
Do not operate electrical switches or flames.
Contact the gas utility or emergency services and avoid reusing the stove until a qualified technician confirms safety.
Maintenance Schedule and Quick Daily Cleaning Tips
A simple maintenance schedule keeps burners safe and performing well while preventing buildup.
It outlines a quick daily wipe-down routine, a focused weekly spot-clean checklist for grates and ports, and a monthly deep-clean checklist for disassembly and soak. Following a predictable cadence reduces the need for intensive restorations.
- Daily: wipe spills, dry surfaces, and check burner ignition.
- Weekly: remove grates, clear clogged ports, and clean drip trays.
- Monthly: disassemble caps and heads, soak parts, and inspect seals.
- As-needed: address stubborn stains, replace damaged components, and test gas flow.
Daily wipe-down routine
Maintain a brief daily wipe-down to prevent grease buildup and keep burners functioning efficiently.
After cooling, remove grates and wipe surfaces with a microfiber cloth dampened with mild detergent solution.
Clean burner caps and crowns with a soft sponge, drying thoroughly to prevent corrosion.
Inspect ports for obvious debris and clear with a soft brush.
Replace components and run a quick flame test to confirm proper operation.
Weekly spot-cleaning checklist
Several times a week, a focused weekly spot-cleaning checklist helps prevent grease buildup from becoming stubborn and guarantees burners stay reliable.
Check burner caps and heads for splatters, lift and scrub grates, wipe control knobs and porcelain surfaces with a mild degreaser, clear clogged ports with a soft brush or pin, and dry components thoroughly before reassembly to maintain performance and safety.
Monthly deep-clean checklist
After the weekly spot-cleaning keeps immediate grime in check, a monthly deep-clean checklist addresses buildup that short sessions miss and preserves long-term performance.
Remove grates, burner caps, and heads; soak in warm, soapy water with baking soda. Scrub ports with a soft brush and unclog with a toothpick. Rinse, dry thoroughly, inspect igniters, and reassemble.
Test flames and adjust as needed.
When to Replace Burners or Parts
When burners or related parts show uneven flames, persistent clogs, or visible damage, replacement should be considered to restore safe, efficient operation. Typical lifespans, frequent replacement items, and cost/compatibility factors guide the decision and planning. Refer to the table below for a concise overview.
| Sign to Watch | Typical Lifespan | Cost/Compatibility |
|---|---|---|
| Uneven flame, corrosion, or cracked components | Burners: 5–15 years; igniters: 1–5 years | OEM parts guarantee fit; aftermarket can save money but verify model |
| Persistent ignition failure despite cleaning | Caps and grates: lifetime varies; sensors: 2–7 years | Compare part numbers and connectors before purchase |
Signs a burner or component needs replacement
How can a cook tell if a gas stove burner or its parts need replacing?
Visible cracks, warping, or corrosion on burner heads, caps, or grates; persistent uneven flame, yellow or lifting flames after cleaning; ignition failures or continuous clicking; gas smell despite ignition attempts; recurring clogged ports that cleaning cannot clear.
These signs indicate components no longer function safely or efficiently and warrant replacement.
Estimated lifespan and common replacement parts
Noting those failure signs, a cook can next consider typical service life and which parts most commonly need replacement: burner caps and heads often last 3–10 years depending on use and cleaning, igniters and switches about 2–7 years, valves and regulators 5–15 years, and grates or drip pans may need replacement sooner if warped or heavily corroded.
Frequent problems usually involve clogged burner ports, cracked or pitted burner heads, failing spark igniters, and worn control knobs or valves, so prioritizing those parts when planning maintenance or ordering replacements is practical.
Cost considerations and compatibility tips
Because replacement decisions hinge on both upfront cost and long-term compatibility, evaluating price alongside fit and function is essential.
Assess OEM versus aftermarket parts, warranty coverage, and material quality. Verify model numbers, burner type, and connector compatibility to avoid returns.
Balance labor costs for professional installation against DIY feasibility.
Prioritize replacement when performance, safety, or repair cost exceed reasonable value.
Eco-Friendly and Safe Cleaning Product Recommendations
A concise review of eco-friendly and safe cleaning options helps users maintain burners without exposing themselves or the environment to harmful chemicals.
It briefly contrasts simple homemade recipes and exact proportions with vetted store-bought non-toxic products and flags specific ingredients to avoid and the reasons why.
The following points outline practical recipes, preferred brands, and hazardous chemicals to skip.
- Exact homemade cleaner recipes and proportions (e.g., baking soda paste 3:1 with water, vinegar soak 1:1 with water).
- Recommended store-bought non-toxic options and certifications to look for (EPA Safer Choice, Green Seal).
- Chemicals and ingredients to avoid and reasons (ammonia, oven cleaners with lye — corrosive and respiratory irritants).
- Usage and safety tips for application, rinsing, and ventilation to minimize exposure.
Homemade cleaner recipes and proportions
Many effective homemade cleaners combine simple, non-toxic ingredients in precise ratios to tackle grease, burnt-on food, and stains without harsh fumes.
Recommended mixes:
- equal parts white vinegar and water for light degreasing;
- paste of baking soda with a few drops of water for abrasive scrubbing;
- one tablespoon dish soap per cup warm water for oily residue;
- lemon juice added to vinegar for extra cutting power.
Store-bought non-toxic options to prefer
Several reliable store-bought cleaners provide non-toxic, eco-friendly performance for gas stove burners without sacrificing grease-cutting power.
Look for plant-based degreasers, biodegradable formulas, and products certified by recognized ecolabels.
Gentle oven and stovetop sprays, enzyme cleaners, and concentrated citrus-based solutions remove grime without harsh fumes.
Choose fragrances-free or low-VOC options and follow manufacturer instructions to protect burner components and seals.
Chemicals to avoid and why
Numerous common cleaning chemicals pose risks to health, cookware, and the environment and should be avoided when selecting eco-friendly stove cleaners.
Avoid ammonia, bleach, oven cleaners with lye, phosphates, and strong acids—these corrode metal, damage enamel, release toxic fumes, and harm aquatic life.
Choose mild surfactants, baking soda, vinegar alternatives, or plant-based cleaners with clear ingredient lists for safety and effectiveness.
Quick Reference: One-Minute Burner Cleaning Steps
A concise one-minute checklist helps maintain burner performance between deep cleans.
The guidance focuses on quick, safe actions that remove surface grime and restore ignition reliability. Readers are encouraged to perform these steps regularly for best results.
- Wipe loose debris and crumbs with a damp cloth.
- Remove and rinse burner caps and heads.
- Clear clogged ports with a toothpick or soft brush.
- Dry parts thoroughly and reassemble before testing ignition.
Condensed checklist for fast touch-ups
One clean, concise checklist helps restore burner function and appearance in under a minute: turn off and cool the stove, remove grates and caps, wipe visible residue with a damp cloth or sponge, clear burner ports with a toothpick or compressed air, dry parts thoroughly, and replace components.
For quick touch-ups, follow steps sequentially, prioritize safety, inspect ignition, and address stubborn grime later with deeper cleaning.
Visual Aids and Diagrams
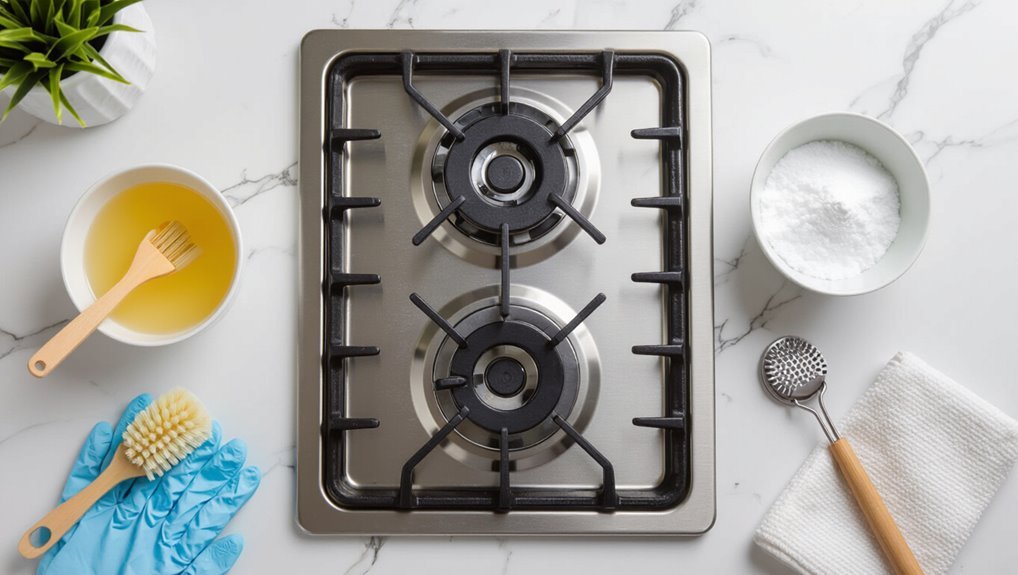
A labeled diagram shows burner components and pinpoints typical clog locations for quick identification.
Side-by-side before-and-after photos illustrate expected results and proper cleaning outcomes.
These visuals help users match their stove to the guide and confirm successful cleaning.
Diagram of burner parts and common clogs
An exploded-view diagram labels each burner component—cap, crown (or burner head), base, ignition port, and gas orifice—making it easier to pinpoint where food debris, grease, or mineral deposits collect.
Callouts identify common clog sites: cap vents, burner ports, ignition tip crevices, and the orifice inlet.
Simple arrows and color coding clarify inspection points and safe disassembly sequence for targeted cleaning.
Before-and-after cleaning photos
Before-and-after photos show the exact improvements that thorough cleaning produces, highlighting clogged ports, greasy caps, and mineral-stained bases that are obscured in pre-clean images and restored in post-clean shots.
Side-by-side comparisons document technique effectiveness, reveal small remaining issues, and guide future maintenance.
Captions note methods, cleaners used, and time elapsed so readers can replicate results confidently and efficiently.
Conclusion
With routine care, gas stove burners regain gleaming, efficient performance and markedly extend appliance life. Following safety steps, correct disassembly, and gentle yet thorough cleaning prevents clogs, uneven flames, and wasted energy. Replace damaged parts when corrosion or warping appears. Using eco-friendly cleaners minimizes fumes and harm to cookware. A minute of weekly upkeep keeps grime from ever staging a hostile takeover of the kitchen—maintenance that pays off in comfort, safety, and sparkle.