How to Check AC Coolant: A Step-by-Step Guide for Home and Car Air Conditioners
How to Check AC Coolant: A Step-by-Step Guide
To check AC coolant in both home and car systems, start by identifying symptoms such as weak airflow, ice buildup on coils, hissing noises, or longer cooling cycles. Ensure safety by wearing appropriate gear and disconnecting power before proceeding.
For car air conditioners, connect manifold gauges to the high and low pressure ports, noting both static and operating pressures. Utilize leak detectors or UV dye to identify any leaks.
For home systems, measure pressures, temperature differences, superheat, and subcooling, and inspect fittings for leaks. Proper interpretation of these measurements is essential, and knowing when to call a technician can save you time and effort. Subsequent sections provide detailed tests, potential fixes, and additional guidance on professional assistance.
How to Tell If Your Air Conditioner Is Low on Coolant
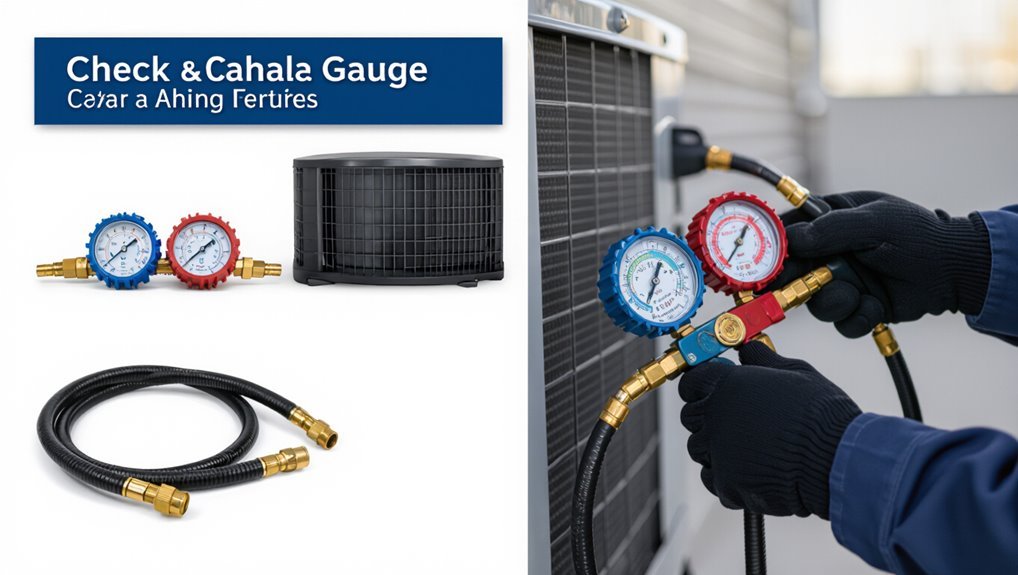
Signs of low coolant differ by application but share common indicators that warrant inspection.
In cars, drivers may notice weak cooling, warm air from vents, or hissing sounds, while home systems often show reduced cooling, longer run times, and ice buildup on coils.
Distinguishing low refrigerant from issues like clogged filters or compressor faults requires checking symptom patterns and, ultimately, professional testing.
Common symptoms in car air conditioners
When an automotive air-conditioning system begins losing refrigerant, several distinct performance changes typically appear that indicate low coolant levels.
Drivers notice weak or warm airflow, longer cooling cycles, hissing from under the hood, or visible oil stains on AC components.
Compressor cycling increases and dashboard humidity or fogging can rise.
For troubleshooting, owners consult guides on how to check ac coolant and seek professional testing.
Common symptoms in home (HVAC/split/window) air conditioners
How can homeowners tell if a home air conditioner is low on refrigerant? Signs include weak cooling despite running, longer run cycles, warm spots in rooms, ice forming on evaporator coils or refrigerant lines, hissing at service ports, and unusually high energy bills.
Indoor humidity may rise.
Routine filter cleanliness and airflow checks should precede refrigerant troubleshooting.
Contact a licensed HVAC technician for diagnosis and recharge.
Differences between low refrigerant and other AC issues
Distinguishing low refrigerant levels from other common air-conditioning problems requires comparing specific symptoms and system readings rather than relying on any single sign.
Low refrigerant typically causes reduced cooling, icy evaporator coils, and higher suction pressure readings.
Electrical or mechanical faults produce inconsistent cycling, warm compressor sounds, or blown fuses without coil icing.
Proper diagnosis combines visual inspection, thermostat checks, and pressure gauge measurements.
Quick Safety and Legal Considerations Before Checking Coolant
Before inspecting AC coolant, readers should note essential safety steps for automotive systems—wearing gloves and eye protection, avoiding pressurized lines, and working with the engine off and cooled.
Home HVAC and window units require similar precautions: power disconnected, fan blades secured, and refrigerant-containing components handled carefully.
It is also important to follow legal and environmental rules on refrigerant recovery, certified technician requirements, and proper disposal to avoid fines and ecological harm.
Safety precautions for working with car AC systems
When preparing to check a car’s AC coolant, one must prioritize safety and legal compliance by recognizing the risks of high-pressure refrigerant, chemical exposure, and regulated handling requirements.
Proper personal protective equipment, verified depressurization procedures, and adherence to local refrigerant regulations reduce the chance of injury, environmental harm, or fines.
Use gloves, goggles, and long sleeves; work outdoors or in ventilated areas; never puncture lines; follow EPA/local licensing and disposal rules.
Safety precautions for home HVAC and window units
Home cooling systems in residences and portable window units pose different hazards and legal considerations than automotive ACs, so users should adjust precautions accordingly.
Verify power is fully isolated at breaker and unplugged; avoid water contact with electrical components.
Wear gloves and eye protection when accessing coils or lines.
Use a non-conductive ladder for rooftop units and guarantee adequate ventilation when opening cabinets or service panels.
Legal and environmental rules about refrigerant handling and disposal
Although handling refrigerants is routine for technicians, strict federal, state, and local regulations govern their use, recovery, and disposal to protect health and the environment.
Only certified professionals may purchase and reclaim regulated refrigerants; accidental release can incur fines and criminal penalties.
Proper containment, leak repair, recordkeeping, and approved disposal or recycling methods are mandatory to prevent ozone depletion and greenhouse gas emissions.
Tools and Materials You’ll Need
A concise list of tools and materials differs by system: automotive checks typically require a manifold gauge set, a temperature probe, and safety gloves, while residential HVAC checks use manifold gauges, leak detectors, and refrigerant scale.
Proper personal protective equipment and correct refrigerant type are emphasized for both.
If diagnostics go beyond basic pressure and temperature checks or if a sealed-system repair is needed, a licensed HVAC technician should be called.
Tools for checking car AC coolant
Proper preparation begins with assembling the right tools and materials for checking a car’s AC coolant.
Essential items include a manifold gauge set compatible with the vehicle’s refrigerant type, a vacuum pump for system evacuation, a refrigerant identifier or scale, safety goggles and gloves, service port adapters, and a thermometer or infrared gun to verify temperatures.
Optional: leak detector and replacement O-rings.
Tools for checking home AC refrigerant
Several specific tools and safety items are required to check a home’s AC refrigerant correctly: a manifold gauge set matched to the system’s refrigerant, a vacuum pump for evacuation and leak testing, refrigerant scale or charging hoses with gauges, an electronic leak detector, safety goggles and nitrile gloves, service port adapters if needed, and a thermometer or infrared gun to verify temperature differentials.
Additional useful items include refrigerant recovery equipment, pipe wrenches, thread sealant, pressure-safe hoses, and a flashlight.
When to call a licensed HVAC technician
When routine checks indicate low pressures, visible leaks, or repetitive cycling, homeowners should contact a licensed HVAC technician equipped with the specialized tools and materials required for safe refrigerant handling and system repair.
A professional assesses leaks, measures accurate pressures, verifies compressor and valve function, and performs certified refrigerant recovery or recharge.
Call for persistent performance issues, unusual noises, or electrical concerns beyond basic maintenance.
Step-by-Step: Checking Coolant in a Car Air Conditioner
A technician begins by performing basic pre-checks and a visual inspection of hoses, fittings, and the compressor for obvious damage or leaks.
Next, manifold gauges are attached to measure high-side and low-side pressures, which are then compared to standard ranges for the current ambient temperature to assess system charge and performance.
If pressures or appearance suggest a leak, an electronic refrigerant detector and/or a dye injection with UV inspection are used to pinpoint leakage.
Pre-checks and system visual inspection
Before any hands-on work begins, the vehicle should be parked on level ground with the engine off and cooled to ambient temperature; this guarantees accurate visual inspection and safe access to the AC components.
The inspector checks hoses, fittings, compressor, condenser, and evaporator for oil stains, corrosion, dents, or loose brackets. Electrical connectors and belt tension are also examined for wear or damage.
Measuring pressures using manifold gauges
Attach the manifold gauge set to the service ports to obtain static and operating pressures for the AC system.
The technician records readings with engine off, then running and compressor engaged. Observe both low and high side gauges, note steady or fluctuating values, and compare to specifications.
- Verify correct hose connections.
- Purge air from hoses.
- Monitor pressures over minutes.
- Log readings precisely.
Interpreting high-side and low-side pressures at different ambient temperatures
Having recorded static and operating pressures with the manifold gauges, the technician next interprets those low-side and high-side readings in relation to ambient temperature to determine system charge and component function. Typical ranges vary; low-side too low suggests undercharge or restriction, too high suggests overcharge or loss of airflow. High-side extremes indicate condenser issues or compressor problems.
| Ambient (°F) | Low-side psi | High-side psi |
|---|---|---|
| 75 | 30–40 | 200–250 |
| 95 | 40–55 | 250–300 |
Using an electronic refrigerant leak detector
Activate the detector and sweep it slowly around service ports, hose connections, compressor fittings, and along condenser and evaporator seams to locate escaping refrigerant.
Observe indicator lights or audible tones, moving at a consistent pace. Pay attention to connectors, O‑rings and schrader valves.
Confirm suspicious spots by pausing briefly. Record leak locations, estimated severity, and ambient conditions for repair planning or technician handoff.
Performing a dye test and UV inspection
To perform a dye test and UV inspection, introduce a manufacturer‑approved fluorescent dye into the A/C system. Run the compressor to circulate the dye, then use a UV lamp and safety glasses to scan suspected leak points; bright fluorescence will reveal leaks at hose connections, seals, evaporator cores, condensers, and fittings.
After locating fluorescence, clean the area, document the leak, and plan proper repair or replacement.
When a pressure reading indicates a leak vs. other faults
Interpret pressure readings by comparing gauge values to expected ranges and system conditions. Low or fluctuating pressure can signal a refrigerant leak but may also result from a faulty pressure sensor, a stuck or cycling compressor clutch, blockages, or thermal effects.
Correlate with smell, oil traces, UV dye, and leak detectors. Verify sensor function and compressor cycling before attributing readings solely to refrigerant loss.
Step-by-Step: Checking Refrigerant in a Home Air Conditioner
A technician begins by visually inspecting the outdoor unit and indoor evaporator coil for obvious damage, debris, or oil stains that indicate leaks.
They then connect pressure gauges to read system high and low sides, measure temperature splits, and calculate superheat and subcooling to assess charge for common refrigerants.
Accessible fittings are checked for leaks with electronic detectors or soap-bubble tests to confirm integrity before any refrigerant is added or recovered.
Visual inspection of outdoor unit and indoor evaporator coil
Several key visual checks of the outdoor condenser and indoor evaporator coil can quickly reveal signs of refrigerant issues.
Inspect the condenser fins for bent or blocked areas, oil stains, or frost.
Inside, examine the evaporator coil for ice accumulation, excessive dirt, or corrosion.
Note unusual debris, damaged fins, or persistent moisture, and document findings before further diagnostics or professional service.
Using gauges to read system pressures
Connect the pressure gauges to the service ports to obtain objective readings of the system’s operating pressures. The technician records stable high‑ and low‑side values, notes ambient and line conditions, and confirms gauge integrity before concluding.
Steps:
- Attach hoses securely.
- Open service valves briefly.
- Read stabilized pressures.
- Close valves and remove gauges safely.
Interpreting pressure and temperature split for common refrigerants
With stabilized high- and low-side readings in hand, the technician moves on to compare pressures and corresponding temperatures to determine refrigerant condition and charge. He references expected pressure-temperature pairs for the refrigerant, checks subcooling and superheat, and notes deviations indicating overcharge, undercharge, or restriction.
| Refrigerant | Typical PT split |
|---|---|
| R-22 | 40–55 psi |
| R-410A | 120–150 psi |
Using leak detectors and soap-bubble tests on accessible fittings
Before opening valves or disturbing lines, the technician inspects accessible fittings and joints for visible oil stains or residue.
Electronic leak detectors are swept slowly along connections, listening for audible or visual indicators.
For confirmation, a mild soap solution is applied to suspect areas; persistent bubbles reveal leaks.
Detected leaks are marked, photographed, and logged for repair before any refrigerant charging is attempted.
Checking refrigerant charge via superheat and subcooling measurements
After confirming and documenting any leaks, the technician proceeds to verify the system’s refrigerant charge by measuring superheat and subcooling.
Using pressure gauges and temperature probes, they obtain suction and liquid line readings, calculate superheat at the evaporator and subcooling at the condenser, compare values to manufacturer specifications, and adjust refrigerant accordingly to guarantee peak performance and prevent compressor damage.
How to Read and Interpret Diagnostic Data
The technician reviews pressure and temperature charts for R‑134a, R‑410A, and R‑22 to establish expected operating ranges.
Calculations of superheat and subcooling are then used to confirm charge condition and heat transfer performance.
Typical pressure/temperature ranges for R-134a, R-410A, and R-22
Typical pressure and temperature ranges for R-134a, R-410A, and R-22 provide essential reference points for diagnosing system performance; technicians compare measured suction and discharge readings to these expected values to identify undercharge, overcharge, restriction, or compressor problems. Reference ranges vary by load and ambient conditions:
| Refrigerant | Suction psi | Discharge psi |
|---|---|---|
| R-134a | 25–45 | 150–300 |
| R-410A | 100–140 | 400–600 |
Calculating superheat and subcooling
Calculating superheat and subcooling gives technicians precise, measurable indicators of an air conditioning system’s charge and heat transfer efficiency. Superheat quantifies how much the refrigerant vapor rises above its saturation temperature in the evaporator, while subcooling measures how far the liquid refrigerant falls below its saturation temperature in the condenser.
Technicians obtain pressures and temperatures, convert to saturation points, then subtract to derive superheat or subcooling for diagnosis.
Differentiating undercharge from airflow or compressor issues
Moving from superheat and subcooling measurements to fault isolation requires comparing those values with other system indicators to distinguish low refrigerant charge from airflow or compressor performance problems.
Low subcooling and high superheat with normal airflow suggests undercharge.
Normal charge but high superheat with low airflow points to restricted airflow or evaporator issues.
Low suction pressure with normal superheat implies compressor or metering device malfunction.
Common Causes of Refrigerant Loss and How to Find Leaks
Refrigerant loss commonly originates at component interfaces and wear points: in cars this includes compressor seals, hose fittings, condenser and evaporator cores, while in homes the condenser coil, service valves, and line set connections are frequent culprits.
Technicians locate leaks using pressure testing and observation for obvious oil stains, then apply targeted methods for hidden leaks. When visual signs are absent, evacuation with a vacuum, UV-dye tracing, and electronic refrigerant sniffers are standard detection techniques.
Typical leak points in car AC systems
When a vehicle’s air conditioning loses cooling power, leaks in the sealed system are the most common cause; pinpointing them requires knowing where seals, joints, and components are most vulnerable.
Common leak points include compressor shaft seals, condenser and evaporator fins, rubber O‑rings at service ports and hose connections, crimped hose fittings, and corroded lines.
UV dye or electronic detectors locate breaches efficiently.
Typical leak points in home AC systems
Because home air‑conditioning systems run under pressure and cycle through temperature changes, seals and joints are the most common points of refrigerant loss; leaks typically occur at brazed or threaded connections, service ports, compressor shaft seals, condenser and evaporator coil fittings, and corroded or mechanically damaged tubing.
Additional common sources include failing access panels, valve cores, poorly soldered joints, and vibration‑induced fractures near mounting brackets and flanges.
Hidden leak detection techniques (evacuation, UV dye, electronic sniffers)
Surface inspections and pressure checks often locate the obvious faults, but some leaks hide beyond visual reach and require specialized methods to detect.
Technicians may evacuate systems to observe vacuum decay, introduce UV dye and scan with blacklight for traces, or employ electronic refrigerant sniffers to pinpoint escaping gas.
Each method targets subtle breaches inaccessible to simple inspection, confirming locations for repair.
Temporary Fixes vs. Permanent Repairs
Technicians weigh temporary remedies against lasting repairs when addressing refrigerant loss.
Stop‑leak products may be used for minor, inaccessible leaks as a short‑term measure, while recharging is only appropriate if the system is otherwise sound and the leak is addressed.
Permanent fixes—such as seal replacement, brazing, or swapping faulty components—are recommended to restore reliability and prevent repeat loss.
Stop-leak products and when they might be used
When a small leak is suspected and immediate cooling is required, stop-leak products offer a temporary, low-cost option to seal minor breaches in the AC system.
However, they are not a substitute for proper diagnosis or mechanical repair. Use them only as a short-term measure to restore function until a technician inspects the system.
They can clog components and complicate future professional repairs.
When a recharge is appropriate and when it’s not
After considering stop‑leak products as a short‑term measure, the next question is whether a refrigerant recharge is an appropriate remedy or merely another temporary fix.
A recharge suits systems with verified minor leaks and intact components, restoring performance quickly.
It is inappropriate for unknown leak sources, recurring loss, or mechanical faults; in those cases, diagnosis and permanent repair are required before adding refrigerant.
Repair options: seal replacement, brazing, component swaps
Assess repair options by matching the leak source and severity to the appropriate fix: seal replacement for accessible O‑rings and gaskets, brazing for pinhole leaks in metal lines or condensers, and component swaps when valves, compressors, or evaporators are compromised.
Temporary fixes such as stop‑leak or sealants may buy time but risk clogging.
Permanent repairs restore system integrity; professional diagnosis guarantees correct method, safety, and refrigerant handling.
How to Recharge an AC System Safely (Overview)
Recharging an AC system requires attention to legal limits and proper refrigerant type, which in many jurisdictions restricts full-service recharges to certified professionals.
For experienced DIYers, car AC recharges typically involve locating service ports, recovering or adding refrigerant while monitoring pressures, and verifying system performance; home or commercial systems require technician-level equipment and procedures including recovery, evacuation, and precise charging by weight.
Overcharging or using the wrong refrigerant can damage components, reduce efficiency, and create safety or regulatory violations.
Legal limits and why professionals often must perform recharges
Understand that strict legal limits govern who may handle and add refrigerant to vehicle air conditioning systems, and these rules are a primary reason recharges are often left to certified technicians.
Regulations restrict refrigerant purchase and require certification to prevent environmental harm and improper service.
Liability, warranty concerns, specialized equipment, and leak detection expertise further motivate reliance on trained professionals for safe, compliant recharges.
Basic steps for a car AC recharge (for experienced DIYers)
Begin by confirming that local laws permit the DIY addition of refrigerant and that the individual holds any required certification or access to legally purchased refrigerant; then gather proper safety gear (gloves, eye protection), a calibrated manifold gauge set, a compatible refrigerant can and hose with a self-sealing valve, a vacuum pump if evacuating, and a reliable leak-detection method.
Follow service manual charge specs, evacuate if needed, test for leaks, and add refrigerant slowly while monitoring pressures and system temperatures to avoid overcharging.
Basic steps for a home AC recharge (technician-level overview)
For a residential HVAC unit, the technician follows a methodical sequence similar to automotive procedures but adapted to larger refrigerant charges, fixed piping, and different access points:
Diagnose system pressures and temperatures, verify component integrity, recover remaining refrigerant, evacuate and leak-test the system, pull a deep vacuum, charge with specified refrigerant using scales and manifold gauges, then monitor operating parameters and document work.
Risks of overcharging and improper refrigerant type
Overcharging or using the wrong refrigerant can quickly compromise performance and safety. Excess refrigerant raises pressure, stresses components, reduces cooling efficiency, and risks compressor failure.
Incorrect refrigerant chemistry damages seals, lubricants, and sensors, causing leaks and system incompatibility. Both errors create fire, toxicity, and environmental hazards.
Proper identification, manufacturer specifications, and certified technicians minimize these risks and guarantee reliable operation.
Cost Estimates and When to Hire a Professional
Estimating repair costs helps determine whether a DIY recharge is appropriate or professional service is needed.
Typical fees include diagnostic charges, leak repair costs, and refrigerant recharge for vehicles, and separate pricing structures for residential HVAC systems.
Before hiring, one should ask about diagnostic fees, warranty on repairs and parts, the type and amount of refrigerant to be used, and whether permits or disposal fees apply.
Typical costs for diagnostics, leak repair, and recharge for cars
When an air-conditioning system shows low coolant or performance issues, owners face a range of potential costs depending on diagnostics, leak repair, and recharge needs.
Typical diagnostics run $50–$150.
Simple recharge without leaks costs $100–$250.
Minor leak repairs (hoses, O-rings) add $150–$400; compressor or condenser repairs can exceed $500–$1,200.
Labor rates and refrigerant type influence final totals.
Typical costs for home HVAC leak repair and refrigerant recharge
For homeowners, costs for diagnosing and repairing a leaking central HVAC system and recharging refrigerant differ from automotive services because of system size, regulations, and labor complexity.
Typical diagnostics range $100–300.
Minor leak repairs plus recharge often cost $300–800; major repairs or coil replacements can exceed $1,000–3,000.
Licensed HVAC technicians are required for refrigerant handling and warranty compliance.
Questions to ask a technician before hiring
How much will the job actually cost, and what circumstances could change that estimate?
The technician should provide a written estimate breaking labor, parts, refrigerant, and diagnostic fees.
Ask about warranties, certification, refrigerant type, and disposal fees.
Inquire when a full replacement is recommended versus repair, typical timelines, emergency visit charges, and required permits to avoid unexpected expenses.
Maintenance Tips to Prevent Refrigerant Problems
A concise maintenance approach helps prevent refrigerant issues in both vehicles and home systems.
For cars, a regular inspection checklist should include hose and connection checks, compressor operation, and visible leak indicators.
For homes, an HVAC checklist should cover filter replacement, coil cleanliness, and proper airflow.
Between service visits, monitoring for weak cooling, unusual noises, or sudden pressure changes can catch problems early.
Regular inspection checklist for cars
Regular inspections of a vehicle’s air conditioning system help prevent refrigerant loss and costly repairs by catching wear, leaks, and component issues early.
A concise checklist focuses on observable items and basic tests:
- Inspect hoses and fittings for oil residue or cracks.
- Check compressor operation and belt tension.
- Verify condenser and evaporator for debris or damage.
- Test system pressure and cabin cooling performance.
Regular HVAC maintenance checklist for homes
Routine vigilance keeps home HVAC systems efficient and minimizes refrigerant-related failures.
Recommended checklist focuses on preventative tasks and professional scheduling:
- Replace or clean filters monthly during heavy use.
- Keep outdoor unit clear of debris and vegetation.
- Inspect duct seals and insulation annually.
- Schedule professional refrigerant pressure and leak testing yearly to verify proper levels and system integrity.
Signs to monitor between service visits
Several clear indicators can warn homeowners of refrigerant issues between professional visits, allowing timely intervention before failures escalate.
Watch for reduced cooling performance, longer run cycles, ice formation on coils or lines, hissing or bubbling noises, and unexplained energy spikes.
Also note higher indoor humidity, frequent compressor short-cycling, or visible oil stains near connections.
Promptly document and report these signs.
Troubleshooting Flowchart for Common Scenarios
The troubleshooting flowchart guides users through typical AC faults, starting with vehicles where the compressor engages but no cold air is produced or cooling is intermittent.
It then addresses home systems that run without effectively lowering temperature and distinguishes water leaks from refrigerant-related leaks.
Each branch points to targeted checks—pressure, airflow, and leak indicators—to identify whether coolant levels or other issues are responsible.
No cold air from car AC but compressor engages
When the air conditioning compressor engages but the cabin air remains warm, a systematic troubleshooting flowchart helps isolate the cause quickly.
Technicians first verify airflow and temperature at vents, then confirm compressor operation and refrigerant level, and finally inspect related components such as expansion valve/orifice tube, condenser, and blend doors to pinpoint the fault.
Common causes include low refrigerant, compressor slipping, blocked condenser, metering device failure, or blend door misalignment.
Car AC blows cold intermittently
Diagnose intermittent cold from a car AC by following a focused flowchart that separates electrical, refrigerant, and mechanical causes.
Inspect fuses, relays, wiring, and clutch cycling for intermittent electrical faults.
Check refrigerant level and pressure fluctuations, and look for slow leaks or blockages.
Evaluate compressor performance, expansion valve or orifice tube operation, and intermittent airflow issues like blend door or blower motor faults.
Home AC runs but doesn’t cool effectively
Start by confirming that the system is running—compressor and fans operate—but indoor temperatures fail to reach the thermostat setpoint.
Check thermostat settings, air filter condition, and supply/return vents for obstruction.
Inspect outdoor unit for debris, guarantee proper airflow, and confirm condenser fan rotation.
Evaluate refrigerant level indirectly via evaporator coil frost or unusually warm suction line; schedule professional service if abnormalities persist.
Home AC leaking water vs. refrigerant-related issues
How can one distinguish between a home air conditioner leaking water and one losing refrigerant?
Observe leak location: condensation near drain pan, drain line, or evaporator indicates water overflow or clog.
Oil stains, hissing sounds, ice on coils, or steadily warm air suggest refrigerant loss.
Check airflow, temperature drop across evaporator, and system pressure readings; contact a licensed technician if refrigerant issues appear.
Glossary of Key Terms and Units
A concise glossary clarifies terms and units used when checking AC coolant, including refrigerant, PSI, superheat, subcooling, compressor, and expansion device.
It also lists common refrigerant types and notes current phase-out status where relevant.
Clear definitions help technicians and owners interpret measurements and follow safe service practices.
Definitions: refrigerant, PSI, superheat, subcooling, compressor, expansion device
Understanding the key terms used when checking AC coolant is essential for accurate diagnosis and safe servicing.
Refrigerant: fluid transferring heat.
PSI: pounds per square inch, pressure unit.
Superheat: vapor temperature above its boiling point at given pressure.
Subcooling: liquid temperature below its condensing point.
Compressor: raises refrigerant pressure and circulates system.
Expansion device: throttles flow, causing evaporation and cooling.
Common refrigerant types and phase-out status
Refrigerant types have evolved considerably over decades, driven by efficiency gains and environmental regulations that phase out substances with high ozone depletion potential (ODP) or global warming potential (GWP).
Early CFCs like R-12 were replaced by HCFCs (R-22) then by HFCs (R-134a, R-410A).
Current shifts favor low-GWP blends and hydrocarbons (R-290) with regulatory phase-outs and retrofit considerations.
Appendices and Reference Resources
The appendices provide sample readings and case examples to illustrate common pressure and temperature patterns encountered during coolant checks.
Included are links to EPA guidance and applicable local regulations on refrigerant handling and disposal.
A concise list of recommended tools and manufacturers for gauges and leak detectors rounds out the reference resources.
Sample readings and case examples
Several concise sample readings and case examples are provided to illustrate common AC coolant scenarios, including normal operating pressures, signs of undercharge or overcharge, and responses to ambient temperature changes. Data-driven summaries follow, enabling quick troubleshooting and comparison for technicians and homeowners.
| Scenario | Reading |
|---|---|
| Normal | 75/250 psi |
| Undercharge | 60/180 psi |
| Overcharge | 90/300 psi |
| High ambient | 85/320 psi |
Links to EPA and local regulations on refrigerant handling
Where can technicians and homeowners find authoritative guidance on safe refrigerant handling and disposal?
Official EPA pages outline federal regulations, certification requirements (e.g., 608), and approved recovery/recycling practices.
State and local environmental agencies provide region-specific rules, permit links, and disposal facilities.
Manufacturer safety data sheets and certified trade associations supplement regulatory texts.
Links to these sources are essential for compliant, safe refrigerant work.
Recommended tools and manufacturers for gauges and detectors
After reviewing federal and local refrigerant regulations and manufacturer safety data, attention turns to the specific tools technicians and informed homeowners should rely on for accurate pressure measurement and leak detection.
- Yellow Jacket manifold gauges — durable, accurate.
- Fieldpiece digital manifold — wireless, realtime data.
- Testo clamp thermometers and probes — precise temperature differentials.
- Robinair electronic leak detectors — sensitivity for HFCs and hydrocarbons.
Conclusion
Clear signs of low coolant signal a problem; careful checks prevent hazards. Heed safety rules, gather proper tools, follow steps for cars and homes; call professionals when tests fail. Maintain systems with timely inspections, leak repairs, and clean components; document service records and monitor performance. Learn key terms, use reference resources, and consult certified technicians—preserve comfort, protect equipment, and prevent costlier repairs by acting early, consistently, and responsibly.