How to Remove a Gas Water Heater Safely: Step-by-Step DIY Guide
To safely remove a gas water heater, follow these essential steps: shut off the gas and water supply, relieve pressure, drain the tank, and disconnect the gas, venting, and plumbing. Use proper tools and safety gear, and enlist a second person to help lift the unit. Additionally, protect your floors and cap or plug lines as required by local codes. Verify there are no gas leaks, document the conditions, and adhere to any permit requirements. Finally, responsibly recycle or dispose of the unit while planning for a replacement. For detailed procedures and precautions, continue reading.
What Removing a Gas Water Heater Entails and Who Should Attempt It
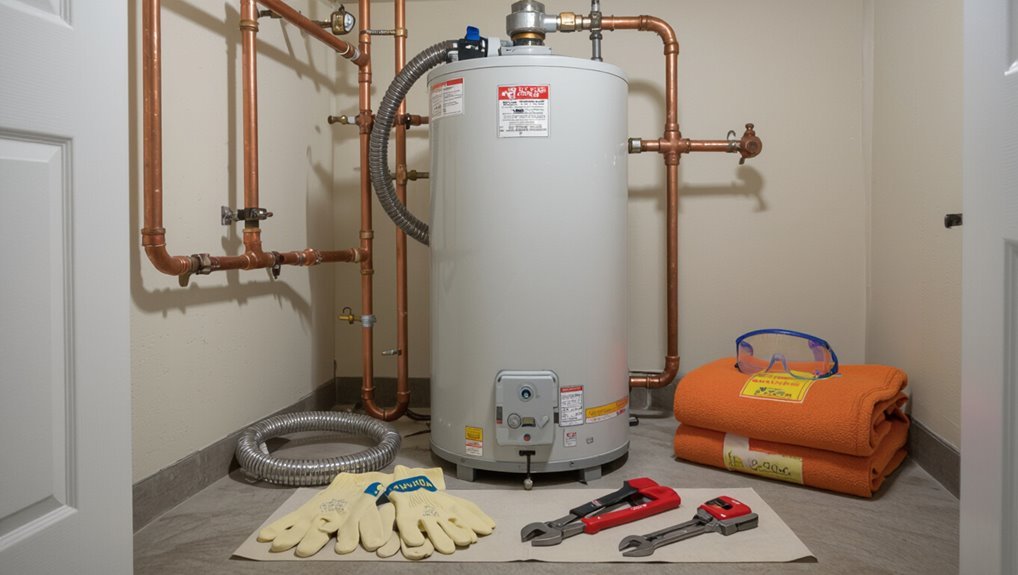
Removing a gas water heater typically involves shutting off gas and water supplies, draining the tank, disconnecting gas, vent and plumbing connections, and safely transporting the unit for disposal.
Before starting, one must confirm local codes and permits, verify proper ventilation and gas shutoff procedures, and use appropriate personal protective equipment.
Homeowners uncomfortable with gas line work, complex venting, or code compliance should hire a licensed professional.
Overview of the removal process in plain terms
A gas water heater removal involves disconnecting gas and water lines, draining the tank, detaching venting and electrical connections if present, and safely extracting and disposing of the unit.
The process outlines stepwise tasks showing how to remove a gas water heater for competent DIYers or professionals.
It clarifies required tools, physical effort, and when hiring a licensed technician is advisable.
Safety and legal considerations before you begin
Before starting any work, the risks, regulations, and skill requirements must be clearly understood: gas lines, pressurized water, and combustion vents present hazards that can cause fire, explosion, carbon monoxide poisoning, or property damage if mishandled.
Many jurisdictions require licensed professionals for gas line disconnection and appliance disposal. The task demands mechanical aptitude, proper tools, permits where applicable, and adherence to local codes; informed consent is essential.
When to hire a licensed professional instead
When should a licensed professional be called in?
Complex tasks—gas line modifications, pilot assembly repairs, significant corrosion, or structural venting issues—require licensed plumbers or HVAC technicians.
If permits are mandated, if the installer lacks tools or experience, or if local code compliance and liability concerns exist, hiring a professional guarantees safety, proper inspections, and warranty preservation.
DIY is only for simple, low-risk removals.
Tools, Materials, and Preparations You’ll Need
Before beginning removal, the necessary tools and personal protective equipment should be identified and staged.
Materials for cap-offs, replacement fittings, or a new unit must be selected based on the existing plumbing and venting conditions.
Relevant documentation, permits, and local code requirements should be verified to guarantee the work is compliant.
Required tools and safety gear
A concise list of tools and safety gear guarantees the removal proceeds efficiently and without avoidable risk.
Necessary items focus on securing utility shutoffs, safe handling, and basic plumbing disassembly.
Recommended equipment includes:
- Adjustable wrench, pipe wrench, screwdriver set, pliers, bucket, hose.
- Fire extinguisher, carbon monoxide detector, flashlight, work light.
- Heavy-duty gloves, safety goggles, steel-toe boots, respirator.
Materials and replacement/repair considerations
Several key materials and decisions determine whether removal leads to a straightforward replacement or requires additional repairs.
Assess pipe fittings, venting components, and gas shutoff compatibility first. Gather replacement parts and new water heater specifications, plus sealants and leak detectors.
- Inspect and match pipe sizes, fittings, vent type.
- Verify gas line capacity and shutoff condition.
- Prepare seals, Teflon, and a pressure relief valve.
Documentation, permits, and local code checks
When local codes and permit requirements are overlooked, removal can stall or incur fines.
So the homeowner or contractor should confirm jurisdictional rules, required inspections, and filing timelines before work begins.
Verify permit needs, confirm gas and plumbing inspection procedures, document appliance serial numbers and disposal receipts, and retain copies of permits and inspection reports.
Consult the municipality for specific code references.
Pre-Shutdown Safety Checks
Before shutting off a gas water heater, the technician conducts focused safety checks to identify gas lines, vents, and any electrical connections.
They assess the appliance’s age and physical condition to gauge corrosion, leaks, or other risks.
The surrounding area is cleared and floors are protected to prevent damage and guarantee safe access during removal.
Identifying gas lines, vents, and electrical connections
Locate and map the water heater’s service connections—gas supply, venting, and any electrical feeds—so each can be addressed safely during shutdown.
Inspect the gas line from the meter to the shutoff valve, note flexible connectors and unions.
Trace ventpipe routing, joints, and roof or sidewall terminations.
Identify electrical power source, conduit, and any thermostatic or ignition wiring for proper isolation.
Verifying appliance age, condition, and risks
Having mapped gas lines, vents, and electrical feeds, the next step is to verify the water heater’s age, overall condition, and specific risk factors to determine safe shutdown procedures.
Inspect the manufacturer’s label for install date and model, note corrosion, leaks, or damaged fittings, and assess the pilot assembly and T&P valve.
Document findings to inform required tools, replacement parts, and professional referral if hazards exist.
Preparing the surrounding area and protecting flooring
A clear work zone should be established around the water heater, removing furniture, rugs, and loose items from a minimum two-foot radius to prevent damage and allow unobstructed access.
Flooring should be shielded with waterproof mats or thick plywood to catch spills and distribute weight. Nearby drains must be clear, combustible materials relocated, and adequate lighting provided.
Tools and containment supplies stay organized and accessible.
Step-by-Step: How to Turn Off and Disconnect the Gas Supply
The procedure begins with locating and shutting off the main gas valve at the meter or service entry, ensuring the supply is fully stopped.
Next, any residual gas in the line should be bled and the system tested with a gas detector or soapy water to confirm there are no leaks.
If the user is unsure, smells gas, or encounters a problem, the gas company should be contacted immediately to secure the line and provide guidance.
How to locate and shut off the main gas valve
Before attempting any disconnection, locate and shut off the main gas valve to eliminate the risk of a gas leak; this step is essential and must be performed deliberately and confidently.
Identify the meter and incoming supply line, follow the pipe to the shutoff (often a lever or gas cock), turn the valve perpendicular to the pipe, and notify occupants.
Verify valve position visually.
Bleeding residual gas and confirming no leak
With the main gas valve shut and its position visually confirmed, attention shifts to removing any remaining gas from the downstream lines and ensuring no leaks are present.
- Open a downstream appliance valve or use a capped hose to vent pressure until no hissing occurs.
- Apply approved soap solution to fittings; watch for bubbles.
- Reinspect after several minutes; if bubbles appear, tighten or isolate and retest.
When and how to contact the gas company
Contact the gas company whenever a homeowner suspects a leak, lacks the proper tools or certification to shut off service safely, plans an extended disconnection, or requires an inspection or reconnection permit.
Utility technicians can remotely or on-site verify complete isolation, purge remaining gas, and issue official clearance needed for work to proceed.
Provide address, meter number, and describe symptoms; follow dispatcher instructions, schedule technician visit, obtain written clearance before continuing.
Step-by-Step: How to Turn Off and Drain the Water Supply
The next step covers shutting off the cold-water supply to the heater, ensuring no new water enters the tank.
It then explains how to drain the tank safely, handle or dispose of the hot water, and flush sediment.
Finally, procedures for bypassing and isolating other plumbing fixtures to prevent backflow or accidental refilling are summarized.
Shutting off the cold-water supply to the heater
Locate and close the cold-water shutoff valve feeding the water heater to stop incoming water before any draining or disconnection begins.
Confirm the valve is fully perpendicular (or clockwise) to the pipe for ball valves, or fully closed for gate valves.
Verify no new water flows by opening a nearby hot faucet briefly.
Note pipe material and valve condition for later disconnection.
Draining the tank safely and disposing of hot water
Begin by relieving pressure and removing hot water: open a nearby hot faucet to vent the system, then attach a garden hose to the water heater’s drain valve and route the hose to a safe drain or outdoors where hot water can flow without causing damage.
Open the drain valve slowly, monitor flow and temperature, and flush sediment with brief cold-water pulses.
Close the valve when empty; cap the hose.
Bypassing and isolating other plumbing fixtures
Before shutting off the water heater supply, any connected fixtures should be isolated or bypassed to prevent backflow and keep lines pressurized where needed. This involves closing individual fixture shutoffs, installing temporary bypass lines where fixtures must remain in service, and labeling valves to avoid confusion during reassembly.
Then confirm isolation by opening downstream taps, relieving trapped pressure, and securing hoses or caps to prevent leaks.
Step-by-Step: Disconnecting Fuel, Venting, and Electrical Connections
The next stage addresses safe separation of the heater from its fuel, venting, and electrical systems.
It covers disconnecting and capping the flexible gas connector, removing vent and flue components without disturbing seals, and properly handling pilot assemblies, thermocouples, and any wiring.
Each action emphasizes securing fuel lines, preserving vent integrity, and labeling or isolating electrical and control parts for reinstallation or disposal.
Disconnecting the flexible gas connector and cap/plug procedures
Loosen the flexible gas connector at the appliance union and cap or plug the open gas line to prevent leaks and contamination.
After shutting off the gas supply and verifying zero pressure with a manometer or soapy-water test, disconnect the connector using two wrenches.
Install an approved cap or plug on the stub, apply thread sealant rated for gas, and secure with a tamper-evident tag.
Removing venting and flue pipe safely
With the gas line secured and capped, attention shifts to the venting and flue assembly to prevent combustion gases from entering the workspace during removal.
Inspect connections, loosen sheet‑metal screws or nuts at the draft hood, and support the flue to avoid sudden drops.
Carefully separate sections, remove any sealant or tape, and cap or temporarily cover the chimney opening to block drafts and debris.
Handling pilot assemblies, thermocouples, and electrical wiring
Begin by locating the pilot assembly, thermocouple, and any electrical connections and visually confirming their routing and fastenings before touching components.
Turn gas valve to OFF and shut electrical breaker. Label and photograph wires.
Disconnect thermocouple nut and pilot tubing using correct wrench. Cap or plug gas lines per code.
Remove ignition leads, keeping terminal screws and connectors organized for reinstallation.
Step-by-Step: Removing the Water Heater from Site
The installer prepares the tank for removal by securing loose components, draining and confirming it is empty, and stabilizing the unit.
Two-person lifting techniques, appliance dollies, and rated straps are used to lift, move, and transport the heater safely.
Protective mats, corner guards, and floor runners are placed to prevent damage to floors and walls during the removal.
Preparing the unit for removal (secure, empty, and stable)
Before removal, the technician secures the gas and water connections, drains the tank, and stabilizes the unit to prevent tipping or leaks during handling.
Valves are locked, flexible lines capped, and the gas supply shut at the appliance and meter.
The tank is fully drained and flushed, pressure relieved, and straps or blocks applied to immobilize the heater until disconnection and transport commence.
Lifting, moving, and transporting the tank safely
Carefully lift and clear a path to the exit, ensuring at least two people handle the tank and that each step, threshold, and turn is measured for clearance.
Straps, a dolly rated for the heater’s weight, and protective gloves should be used to control balance and prevent contact with sharp edges or hot surfaces.
- Use a rated appliance dolly, secure with straps.
- Tilt slowly, communicate each movement.
- Load upright, stabilize in vehicle and tie down.
Protecting floors and walls during removal
After the tank is moved clear of tight corners and set on a dolly, attention shifts to protecting floors and walls along the removal path.
Lay thick moving blankets or cardboard, secure with painter’s tape.
Fit corner protectors and foam on doorframes.
Use a plywood sheet over soft surfaces.
Inspect and adjust coverings as the heater passes to prevent scratches, gouges, or paint damage.
Post-Removal Procedures and Site Cleanup
After the heater is removed, the technician guarantees the gas line is properly capped or reconfigured to meet local code requirements.
Plumbing connections are restored and pressure-tested for leaks before service is concluded.
The venting and combustion air openings are inspected and cleared of debris to confirm safe operation conditions.
Capping or reconfiguring gas lines per code
Disconnecting the appliance leaves a live gas service that must be addressed to prevent leaks or code violations. Certified personnel should cap or reconfigure the gas line in accordance with local codes and utility requirements.
A licensed plumber or gas technician should assess existing piping, install approved caps or valves, update labeling and documentation, and obtain required inspections or permits to guarantee compliance and safe future service.
Restoring plumbing connections and testing for leaks
Begin by isolating and drying the open water lines, then restore or properly terminate the plumbing to prevent contamination and future leaks.
Reinstall shutoff valves, install threaded caps or blank flanges where required, and secure fittings with appropriate materials (PTFE tape, solder, or compression fittings).
Pressurize the system gradually, inspect joints for drips, and rectify any weeps until the system holds steady at normal pressure.
Vent and combustion air inspection and cleanup
Inspect the venting and combustion-air openings for blockages, damage, and debris that could impair draft or introduce carbon monoxide hazards.
Remove bird nests, dust, insulation, and construction residue; clear flues and caps.
Repair or replace damaged vent sections, seals, and screens.
Verify clearances meet code and reinstall termination caps.
Document findings and schedule professional evaluation if corrosion, sagging, or unusual odors persist.
Disposal, Recycling, and Replacement Options
After removal, homeowners should locate environmentally responsible disposal or recycling centers that accept tanks and gas components.
They should also investigate trade-in, rebate, and manufacturer take-back programs that can offset costs.
When selecting a replacement, capacity, efficiency, fuel type, and installation requirements should be compared to match household needs and code compliance.
Environmentally responsible disposal and recycling centers
Many homeowners can minimize environmental impact by choosing certified recycling centers or municipal hazardous-waste programs that accept gas water heaters.
These facilities safely recover steel, copper, and insulation while managing residual fuel and hazardous components. Certified centers verify drainage and vent removal, issue disposal receipts, and prevent illegal dumping.
Contact local authorities for approved sites and transport requirements.
- Verify certification and services
- Ask about hazardous handling
- Obtain disposal documentation
Trade-in, rebate, and manufacturer take-back programs
Trade-in, rebate, and manufacturer take-back programs can reduce disposal costs and simplify replacement by offering credits, pickups, or certified recycling when a homeowner purchases a new unit.
Homeowners should verify eligibility, required documentation, and program timelines. Some utilities or retailers provide instant rebates; manufacturers may arrange pickup of the old heater for recycling.
Confirm certification standards and any fees before committing.
Considerations for selecting a replacement water heater
Several practical factors should guide the choice of a replacement water heater, with disposal and recycling options integrated into the decision alongside performance, fuel type, capacity, and installation constraints.
Consider energy efficiency, local codes, available venting and gas connections, and footprint.
Verify recyclable materials, manufacturer take-back or rebate eligibility, and proper disposal fees.
Factor long-term operating costs and maintenance accessibility.
Common Problems, Risks, and How to Avoid Them
Removal of a gas water heater carries several common pitfalls that can be largely prevented with proper planning and basic precautions.
Key concerns include accidental gas leaks and carbon monoxide exposure—recognizable by the smell of gas, hissing sounds, or symptoms like headache and nausea—and require immediate evacuation, shutting off the gas supply, and contacting emergency services.
Additionally, improper disconnection can damage plumbing or venting, so careful labeling, securing of fittings, and prompt repair by a qualified plumber or HVAC technician are recommended.
Typical mistakes made during removal and how to prevent them
Mistakes during a gas water heater removal can create safety hazards, costly damage, and project delays if not anticipated and avoided.
- Disconnecting utilities improperly — always shut gas and water at main valves and verify with a tester.
- Neglecting proper draining — use hoses and open pressure relief valve to avoid scalding and water damage.
- Poor venting/disconnection handling — cap lines and support piping to prevent debris and structural stress.
Signs of gas leaks, carbon monoxide risk, and emergency steps
After addressing utility shutoffs, drainage, and vent handling, attention turns to recognizing and responding to gas leaks and carbon monoxide (CO) hazards—two of the most dangerous risks when removing a gas water heater.
Look for rotten-egg odor, hissing, dead vegetation, or headache/dizziness symptoms.
Evacuate immediately, call emergency services and the gas company from a safe location, and avoid using electrical switches or open flames.
Damage to plumbing or vents and remedial actions
Inspect plumbing and vent components carefully before and during water heater removal, since bent pipes, cracked fittings, crushed vents, and displaced seals are common and can cause leaks, backdrafting, or ventilation failures.
Document damage, cap or isolate lines, and replace deteriorated fittings.
Realign and seal vents per code, use proper connectors and support, pressure-test plumbing, and consult a licensed plumber or HVAC technician for compromised systems.
Time Estimates, Cost Factors, and When to Hire Help
Typical DIY removal timelines break tasks into draining and disconnecting (1–2 hours), unbolting and hauling (30–60 minutes), and cleanup and disposal (30–90 minutes).
Costs vary with unit size, permits, disposal fees, and unexpected repairs, so homeowners should budget for hidden expenses like corroded fittings or gas line work.
Professional contractors or licensed plumbers are recommended for gas-line modifications, permit-required work, complicated venting, or when structural or safety concerns arise.
Typical DIY time breakdown by task
A clear task-by-task time breakdown helps a DIYer plan the removal and anticipate costs and risks; most homeowners can complete straightforward water heater removal in 2–4 hours, while more complex jobs involving corroded fittings, tight spaces, or required permit work can take half a day to a full day.
Drain and cool: 30–60 min.
Disconnect gas/water: 30–60 min.
Remove unit: 15–45 min.
Cleanup and inspection: 15–30 min.
Cost variables and hidden expenses
After estimating the time each step will take, attention turns to the costs that can inflate a straightforward removal. Variable expenses include disposal fees, permit charges, rental tools, minor plumbing parts, and unexpected repairs. Labor substitution or hiring short-term help increases totals. Budget contingencies of 10–25% are prudent.
| Item | Typical Range | Notes |
|---|---|---|
| Disposal | $20–$150 | Local fees vary |
| Rentals | $10–$80/day | Pump, dolly |
| Parts | $5–$100 | Valves, fittings |
Tasks that warrant a professional contractor or plumber
Recognize jobs that exceed DIY scope—complex gas line work, major plumbing modifications, electrical hookups, structural changes, and situations with corrosion or active leaks require licensed professionals.
Contractors estimate 2–8 hours for removal and reinstallation; plumbers charge hourly or flat rates. Expect higher costs for permits, inspections, and unexpected repairs.
Hire a pro when safety, code compliance, or warranty preservation is at stake.
Practical Safety Tips and Checklist Before You Finish
Before concluding the removal, a concise final safety checklist should confirm gas and water lines are sealed, the area is ventilated, and no tools or debris remain.
All nearby appliances and systems must be tested to verify proper operation and absence of leaks or odor.
Clear documentation of shutoffs, tests, and disposal should be kept for future inspections and warranty or code compliance.
Final safety checklist to confirm safe completion
When the removal is complete, a concise final safety checklist verifies the work area is left secure and compliant with codes:
- Confirm gas supply is locked at the meter, cap or plug applied, and no odor of gas remains; ventilation cleared.
- Ascertain all plumbing caps are tight, drains clear, and no water leaks persist.
- Remove debris, restore electrical breakers as appropriate, and document work for inspection.
Testing appliances and systems after removal
After completing the final safety checklist, attention turns to verifying that nearby appliances and building systems were not affected by the removal.
Inspect gas lines for leaks with a gas sniffer or soapy water. Restore power and test electrical circuits. Run hot and cold taps to check water supply and drainage.
Operate ventilation and combustion air paths, and confirm no unusual odors, sounds, or pressure changes remain.
Documentation and records to keep for future inspections
Although the physical removal is complete, maintaining clear documentation guarantees future inspections can verify compliance and trace any subsequent issues.
Records should include the shutoff and disconnection dates, photographs of the site before and after removal, serial numbers and condition notes of the removed unit, receipts for disposal or recycling, and any permits or contractor reports.
Maintain organized, dated files—digital backups recommended—and note inspector communications.
Conclusion
Removing a gas water heater demands respect for safety and basic plumbing and gas skills; it’s not for the faint of heart. Follow the checklist, use proper tools, and shut off gas and water before draining to avoid surprises. If unsure, call a pro—don’t cut corners. With care, disposal options, and patience, the job can go smoothly; after all, better safe than sorry when dealing with gas and hot water.