How to Change a Thermocouple on a Gas Fireplace: Step-by-Step DIY Guide
To change a thermocouple on a gas fireplace, follow these steps for a safe and effective replacement. A thermocouple is essential as it senses the pilot flame and shuts off the gas supply if the flame goes out, ensuring safe operation. Start by shutting off the gas supply, then remove the access panels to reach the thermocouple. Check the specifications of the new thermocouple to ensure compatibility. Disconnect the old unit from the gas valve and pilot assembly, then install the new thermocouple with the correct length and threading. After reattaching the panels, slowly reopen the gas supply and light the pilot, checking for a steady flame and any leaks using soapy water. For detailed instructions and troubleshooting tips, continue reading.
What a Thermocouple Does in a Gas Fireplace and Why Replacement May Be Needed
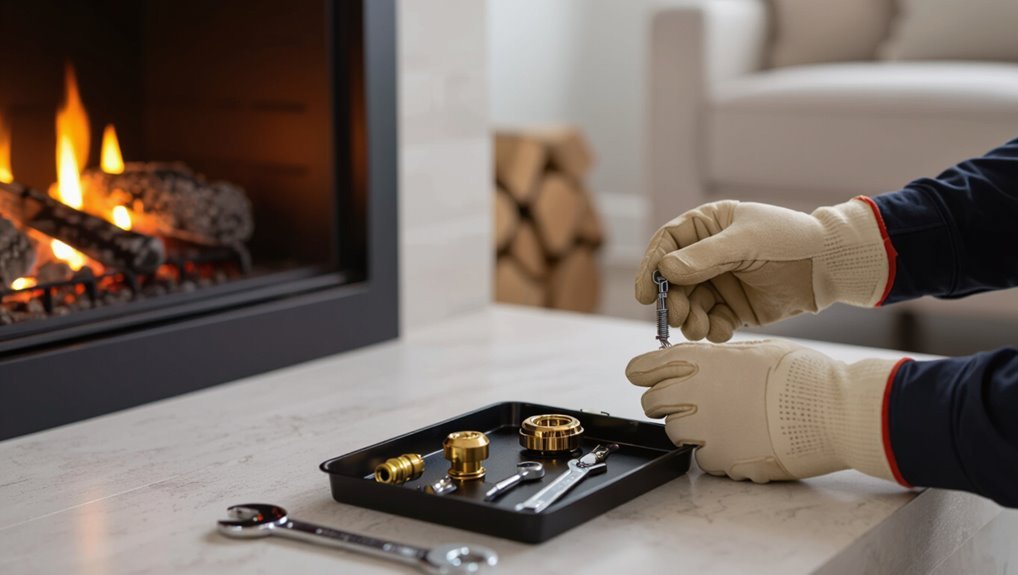
The thermocouple senses the pilot flame and signals the gas valve to stay open, serving as a primary safety device.
Common signs of a failing thermocouple include a pilot that won’t stay lit, intermittent shutoffs, or visible corrosion and soot buildup.
Minor issues can sometimes be resolved by cleaning or adjusting the thermocouple, but persistent faults or physical damage warrant replacement.
Role of the thermocouple in pilot safety and gas valve operation
Because it senses heat from the pilot flame, a thermocouple serves as a safety sensor that tells the gas valve when it is safe to stay open.
If the pilot goes out, the cooled thermocouple stops generating the millivoltage needed to hold the valve open, cutting gas flow to prevent leaks or ignition hazards.
Understanding this function informs how to change thermocouple on gas fireplace safely.
Common signs a thermocouple is failing
Several clear symptoms indicate a failing thermocouple: a pilot light that won’t stay lit, intermittent flame outages, or difficulty relighting the pilot despite adequate gas supply.
Additional signs include a weak or yellow pilot flame, delayed valve response when the pilot is lit, and occasional shutdowns after brief operation.
These symptoms commonly point to sensor degradation, poor thermocouple positioning, or corrosion.
When to replace vs. when to clean or adjust
Although a thermocouple often endures years of steady heat, its function—as a safety sensor that signals the gas valve to stay open only while the pilot flame is present—can be compromised by fouling, misalignment, or wear.
Deciding between cleaning/adjusting or full replacement hinges on the nature and severity of those issues. Clean or realign if soot, corrosion, or loose positioning cause intermittent failure; replace if physical damage, significant degradation, or persistent faults remain after adjustment.
Tools, Parts, and Safety Preparations You’ll Need
The section lists the necessary tools and materials, including wrenches, needle-nose pliers, replacement thermocouple, and thread sealant.
It explains how to identify the correct replacement by matching thermocouple length, thread size, and compatibility with the pilot assembly or brand.
It also outlines safety steps to take before starting: shut off the gas, ventilate the area, and wear gloves and eye protection.
Required tools and materials
A compact set of tools and a few replacement parts are required before starting to change a thermocouple on a gas fireplace: a screwdriver (usually flathead or Phillips), an adjustable wrench or small crescent wrench, needle-nose pliers, a multimeter for continuity checks, and a replacement thermocouple matched to the fireplace’s model; additionally, have a rag, flashlight, and safety gloves and eye protection on hand.
- Hand tools and multimeter
- Replacement thermocouple and basic consumables
- Personal protective equipment
How to identify the correct replacement thermocouple (length, thread, brand compatibility)
When replacing a thermocouple, confirm three key specifications—length, thread size, and compatibility with the pilot assembly—to guarantee proper fit and function.
Measure exposed sensor length from bend to tip, note connector thread (usually 1/4″ or 3/8″ NPT), and check pilot bracket/mount style.
Verify OEM part numbers or compatible aftermarket brands, matching voltage/current ratings and terminal type.
Safety precautions before starting (gas shutoff, ventilation, protective gear)
Before any work begins, make sure gas supply is fully shut off at the appliance valve and at the house shutoff.
Establish good ventilation to avoid buildup of combustion gases, and put on safety gear—gloves, eye protection, and a long-sleeve shirt—while keeping a carbon monoxide detector nearby.
Verify absence of leaks with a soapy water test, avoid open flames, keep a fire extinguisher accessible, and work in daylight.
Step-by-Step Guide to Replacing a Thermocouple on a Gas Fireplace
The procedure begins with shutting off the gas supply and allowing the fireplace to cool before any work begins.
After removing the access panel and protective covers, the pilot assembly and thermocouple connection are identified.
The thermocouple is then disconnected from the gas valve and the old unit removed from the pilot assembly.
Step 1 Turn off the gas supply and cool down the fireplace
Shut off the gas supply at the appliance or main valve and allow the fireplace to cool fully before touching any components.
Confirm the pilot is extinguished and wait at least 30–60 minutes for metal and burners to cool.
Verify no lingering gas odor; if detected, ventilate and do not proceed.
Use a flashlight to inspect from a safe distance before beginning disassembly.
Step 2 Remove the fireplace access panel and protective covers
Locate and remove the fireplace’s access panel and any protective covers to expose the burner assembly and pilot area.
Using appropriate tools, loosen screws or fasteners, then set panels and hardware aside on a clean surface.
Wear gloves to avoid cuts and protect ceramic logs or decorative elements.
Keep track of components for reassembly and inspect the exposed area for soot, debris, or damage before proceeding.
Step 3 Locate the pilot assembly and thermocouple connection
With the access panel removed and the burner area visible, attention shifts to the pilot assembly near the rear or side of the burner box.
The pilot includes a small burner, pilot tube, and the thermocouple—a thin metal rod positioned in the pilot flame and routed to the gas valve.
Identify the thermocouple’s path, mounting bracket, and connection point for removal.
Step 4 Disconnect the thermocouple from the gas valve
Begin by ensuring the gas supply is fully off and any pilot flame is extinguished before touching components.
Using an appropriate wrench, loosen the nut securing the thermocouple to the gas valve. Support the thermocouple to prevent twisting the tubing.
Once the nut is free, gently pull the thermocouple straight out from the valve fitting and set it aside for removal.
Step 5 Remove the old thermocouple from the pilot assembly
After the thermocouple nut has been loosened and the tubing freed from the gas valve, attention turns to detaching the sensor head from the pilot assembly.
The technician gently unwinds or unclips the securing bracket, noting screw or clip locations.
The thermocouple shaft is withdrawn straight out to avoid bending, exposing the pilot orifice.
Collected fasteners are set aside for reassembly.
Step 6 Install the new thermocouple and position tip correctly
Install the new thermocouple by sliding its shaft into the pilot assembly socket until the sensor tip aligns with the pilot flame location; secure the mounting bracket or clip and hand-tighten the compression nut at the valve, taking care not to kink the tubing.
Adjust the tip so it sits just within the pilot flame envelope, centered and stable. Verify no contact with burner parts.
Step 7 Reconnect the thermocouple to the gas valve and secure fittings
Reconnect the thermocouple by sliding its threaded end into the gas valve fitting and hand-tightening the compression nut until snug.
Using an adjustable wrench, turn the nut a quarter to half turn beyond hand-tight to seal without over‑torquing.
Verify the thermocouple’s bend aligns with the pilot assembly, check for secure seating, and confirm there is no strain on the connection before proceeding.
Step 8 Reassemble panels, turn gas back on, and relight pilot
With the thermocouple securely fitted and checked for proper alignment, the next step is to reassemble the fireplace panels, restore the gas supply, and relight the pilot.
Replace panels and fasteners, ensuring seals and gaskets sit correctly. Open the gas valve slowly to its original position.
Follow manufacturer pilot lighting procedure, hold the pilot button until the flame is stable, then release and verify continuous burn.
Step 9 Test operation and check for leaks (soap test and visual checks)
Begin by observing the pilot and main burner flames for steady, blue-centered combustion and by listening for any unusual hissing.
Then apply a soap solution to fittings, joints, and the valve; watch for bubbles indicating leaks.
Recheck the thermocouple response by cycling the pilot; verify the flame stays lit and gas flow stops when off.
Address any leak or flame irregularity immediately.
Troubleshooting After Replacement
After replacing the thermocouple, the technician should run a focused checklist to determine why the pilot will not stay lit, including fittings, wiring, and thermocouple alignment.
If the pilot flame is weak or operates intermittently, adjustments to flame height and pilot orifice cleaning should be inspected and corrected.
Any audible gas odor or evidence of a leak requires immediate shutdown, ventilation, sensor checks, and following emergency leak-response procedures before further troubleshooting.
Pilot won’t stay lit after new thermocouple installed diagnostic checklist
If the pilot won’t stay lit after installing a new thermocouple, a focused diagnostic checklist helps isolate the issue quickly.
Verify thermocouple seating and alignment, confirm clean pilot orifice and flame contact, check gas supply and valve seating, test thermocouple voltage or continuity, inspect pilot tubing for leaks or kinks, and guarantee correct thermocouple type and length.
Replace faulty components as indicated.
Intermittent operation or weak pilot flame adjustment steps
Inspect the pilot assembly and controls systematically when a newly replaced thermocouple results in intermittent operation or a weak pilot flame.
Verify thermocouple seating and alignment, clean the pilot jet and orifice of debris, and confirm correct pilot flame shape against the thermocouple tip.
Check gas valve adjustment, tight fittings, and wiring continuity.
Test operation after each small adjustment, documenting changes.
Audible gas smell or leak detection steps and emergency actions
Detecting the smell of gas or hearing a hissing sound after a thermocouple replacement requires immediate, decisive action to protect occupants and property.
Evacuate everyone, avoid sparks or flames, and shut off the gas supply at the appliance or meter if safe.
Call the gas company and emergency services from a safe location.
Do not re-enter until professionals declare the area safe.
Maintenance Tips to Extend Thermocouple Life
A regular maintenance routine of gentle cleaning and visual inspection helps prevent soot buildup and early wear on the thermocouple.
Proper pilot flame size and alignment should be checked to guarantee consistent contact and correct blue coloration, which preserves sensor performance.
If signs of corrosion, persistent malfunction, or uncertainty about adjustments appear, a qualified technician should be consulted rather than attempting advanced repairs.
Periodic cleaning and inspection routine
Regularly scheduled cleaning and inspection preserve thermocouple function and prevent premature failure. A basic routine includes visual checks, gentle cleaning, and verifying secure fittings.
Frequency depends on usage and environment; typically inspect seasonally.
- Wipe filth with a soft cloth and mild solvent if needed.
- Check for corrosion, kinks, or insulation damage.
- Tighten fittings and secure mounting without over-torquing.
Optimal pilot flame characteristics and positioning
Good pilot flame shape and placement directly reduce stress on the thermocouple and promote reliable operation.
The flame should envelop the thermocouple tip with a steady, blue inner cone about 1/4–1/2 inch long, centered and not blowing sideways. Avoid large yellow tips or sputtering.
Proper alignment and consistent gas pressure minimize corrosion, overheating, and premature failure.
When to call a professional vs. DIY limitations
When should a homeowner attempt thermocouple service, and when is a professional warranted?
A homeowner may handle visual inspection, basic cleaning, and simple replacement if comfortable with tools and gas shutoff.
Call a professional for persistent ignition failure, gas leaks, complex valve work, pilot assembly misalignment, or if local codes require certified service.
Safety and liability concerns favor professionals when in doubt.
Cost, Warranty, and Buying Considerations
Typical replacement costs vary from a few dollars for a basic thermocouple purchased for DIY installation to $100–$200 or more when including professional labor.
Readers should be shown how to read thermocouple specifications and warranty terms—length, temperature rating, and manufacturer coverage—to guarantee compatibility and protection.
Recommended reputable brands and authorized dealers or manufacturer parts stores are suggested to reduce the risk of counterfeit components.
Typical replacement cost range (parts and DIY vs. professional)
Although prices vary by brand and region, most thermocouples for residential gas fireplaces cost between $10 and $60 for the part alone, with universal or generic units at the low end and OEM or high-quality replacements at the high end.
DIY replacement typically adds minimal tools and time costs, while professional service ranges $75–$200 including labor, depending on travel, complexity, and local rates.
How to read thermocouple specs and warranty information
Understanding thermocouple specifications and warranty terms helps buyers balance cost, compatibility, and long-term value. Buyers should check voltage/current ratings, length/connection style, temperature range, and materials; compare limited vs. lifetime warranties and coverage limits. Note proof-of-purchase and installation requirements for claims. Helpful quick reference:
| Spec | What to check |
|---|---|
| Ratings | Voltage, current, temp |
| Warranty | Duration, exclusions, claims process |
Recommended brands and where to buy genuine parts
When selecting a thermocouple, buyers should prioritize reputable manufacturers known for consistent quality, clear warranty terms, and readily available genuine replacement parts. Brands such as Honeywell, Robertshaw, and White-Rodgers frequently appear on parts lists and are widely stocked by HVAC suppliers.
Consider cost, warranty length, and seller reputation when purchasing genuine parts.
- Compare authorized dealers and OEM pricing.
- Verify warranty registration options.
- Prefer certified HVAC distributors or manufacturer storefronts.
Conclusion
Careful completion of this concise course leaves a confident homeowner calm and capable. Replacing a reactive, rusted, or ragged thermocouple restores reliable flame safety and reduces recurrent repairs. With simple supplies, sensible safety steps, and steady, skilled hands, the procedure proves straightforward. Regular routine review, respectful replacement choices, and reasonable readiness prevent problems. Ultimately, practical preparation promotes prolonged performance, peace of mind, and prudent, pocket-friendly protection for the fireplace.