How to Clean Galvanized Pipes Safely: Step-by-Step Guide for Rust, Lime, and Corrosion
To clean galvanized pipes safely and effectively, follow these steps to remove rust, lime, and corrosion while preserving the zinc coating. Start by isolating and draining the affected section, then wear appropriate personal protective equipment (PPE) and protect surrounding areas. For light rust and scale, use a brush and treat with a diluted vinegar solution or low-concentration phosphoric/citric acid. Neutralize with baking soda and rinse thoroughly. If corrosion is severe, consult a professional for descaling or consider pipe replacement. Finish by drying the pipes, applying a protective coating, and conducting a leak test to ensure long-term functionality.
What “cleaning galvanized pipes” means and when it matters
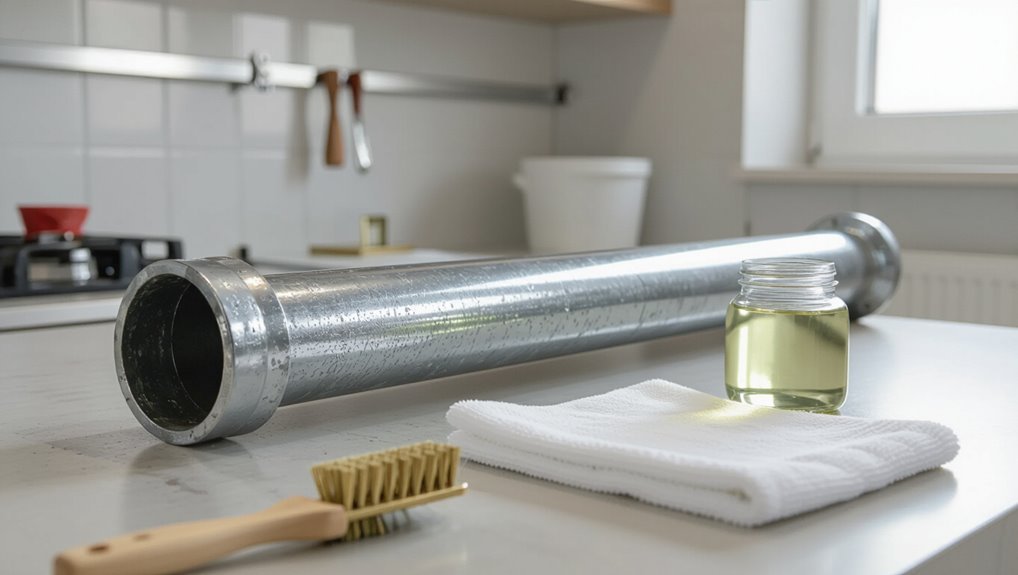
Cleaning galvanized pipes involves removing rust, lime scale, and corrosion that form when the zinc coating wears, water chemistry is aggressive, or aging exposes the steel beneath.
Indicators that pipes need attention include discolored or metallic-tasting water, reduced flow or visible flakes and leaks.
Improper cleaning can worsen coating loss, accelerate corrosion, or create health and plumbing hazards if harsh chemicals or abrasive methods are used.
Why galvanized pipes develop rust, lime scale, and corrosion
Galvanized pipes develop rust, lime scale, and corrosion because their zinc coating degrades over time and reacts with water and dissolved minerals.
When the protective layer becomes compromised, iron beneath is exposed and oxidizes, while calcium and magnesium precipitate as hard scale.
Corrosion accelerates with acidic or oxygenated water and physical damage.
Understanding causes informs how to clean galvanized pipes and when preventive measures are needed.
Signs your galvanized pipes need cleaning or repair
When should a homeowner consider pipe maintenance or replacement?
Visible flaking or rust, brown or metallic-tasting water, low flow from narrowed bore, frequent clogs, pressure fluctuations, leaking joints, or discolored stains indicate internal scaling or corrosion.
Persistent odor, repeated repairs, or inspection-confirmed pitting warrant professional cleaning or replacement.
Timely action prevents failures and preserves water quality and system performance.
Risks of improper cleaning (health, plumbing damage, coating loss)
Any aggressive or improper method for removing scale and rust from galvanized pipe can create hazards for health and the plumbing system.
Harsh acids, wire brushes, or high-pressure tools can strip protective zinc, accelerating corrosion and leaks.
Disturbed rust and biofilm release particulates and lead traces into water, posing ingestion and inhalation risks.
Improper repairs intensify future failure and costly replacements.
Quick recommended approach (direct answer)
A safe, effective method is to remove loose rust and scale with a wire brush. Follow with a mild acidic cleaner (diluted vinegar or commercial rust remover), then rinse thoroughly and dry.
Recommended materials are a wire brush, non-abrasive scouring pad, white vinegar or a low-strength phosphoric-based cleaner, and clean rags.
Required safety gear includes chemical-resistant gloves, eye protection, and a mask or respirator if working in confined or poorly ventilated spaces.
One-sentence safe method overview
Start by rinsing the pipe, then scrub gently with a soft-bristled brush and a mild vinegar solution. Rinse thoroughly and dry to prevent rust and residue buildup.
The worker should proceed slowly, addressing lime and light corrosion spots with repeated gentle passes, avoiding harsh abrasives or acids.
Ensure water flow and ventilation are maintained so protective zinc coating is preserved and contaminants are removed.
Best-cleaning materials and safety gear at a glance
Following the gentle rinsing and scrubbing steps, the worker should equip themselves with specific materials and protective gear to finish cleaning galvanized pipes safely and effectively.
Essential items include simple cleaners, mechanical tools, and PPE to control debris, chemicals, and injury.
- Nitrile gloves and safety goggles
- Soft-bristle brush and brass wire brush
- White vinegar or mild acid cleaner
- Plastic scraper and rags
- Bucket, hose, and drop cloth
Preparation before cleaning galvanized pipes
Before cleaning galvanized pipes, a clear checklist of tools and supplies should be assembled and personal protective equipment selected with attention to ventilation needs.
The water supply must be shut off and affected pipe sections isolated to prevent spills or pressure issues.
Fixtures, finishes, and nearby surfaces should be covered or protected to avoid chemical or mechanical damage.
Tools and supplies checklist
A concise checklist of tools and supplies guarantees the cleaning process proceeds safely and effectively.
The list focuses on items needed to remove rust, lime, and corrosion without damaging galvanized surfaces.
- Wire brush (brass or stainless)
- Nonmetallic scrubbing pads
- Mild acid cleaner or descaler
- Plastic bucket and soft cloths
- Nylon tubing brush for interiors
Personal protective equipment and ventilation requirements
Several essential pieces of personal protective equipment and proper ventilation are required to protect workers from chemical splashes, metal dust, and fumes when preparing to clean galvanized pipes.
Workers should wear chemical-resistant gloves, eye protection (goggles or face shield), long-sleeve clothing, and respiratory protection (N95 or appropriate cartridge respirator).
Verify mechanical or natural ventilation, exhaust fans, and avoid confined spaces without permit-required controls.
Turning off water and isolating pipe sections safely
One clear, controlled shutdown of the water supply and isolation of the target pipe segment is essential to prevent accidental flooding and to allow safe access for cleaning.
Locate and close the nearest shutoff valves, drain remaining water by opening downstream taps, and relieve pressure.
Use isolation fittings or close adjacent valves to create a dry work section.
Verify isolation visually and with a pressure gauge.
How to protect fixtures, finishes, and surrounding surfaces
How should fixtures, finishes, and nearby surfaces be protected before cleaning galvanized pipes?
The technician covers fixtures and valves with plastic and painter’s tape, removes or shields decorative elements, and pads adjacent walls and floors with drop cloths or cardboard.
Sensitive finishes receive solvent-resistant coverings; drains are plugged and nearby hardware bagged.
Labels mark protected areas and cleaning access points remain accessible.
Step-by-step cleaning method for surface rust and lime scale
The cleaning procedure begins with a condition assessment to select the most appropriate method for the severity of rust or lime scale.
Mechanical removal—brushing, scrubbing, or light sanding—should be used where feasible, with chemical treatments reserved for stubborn deposits using specified concentrations and contact times.
After cleaning, surfaces must be thoroughly rinsed and neutralized, dried, then reassembled and pressure-tested for leaks.
Step 1 Assess the pipe condition and choose method
Begin by visually and tactilely inspecting the galvanized pipe to determine the extent of corrosion, scale, and any physical damage.
Note color changes, pitting, flaking zinc, and hardened mineral deposits.
Assess accessibility, pipe age, and system use (potable versus non‑potable).
Decide whether cleaning, spot treatment, or professional replacement is appropriate, and select compatible chemical or gentler approaches accordingly.
Step 2 Mechanical cleaning: brushing, scrubbing, and sanding techniques
With an assessment complete and a cleaning method selected, proceed to mechanical techniques for removing surface rust and lime scale.
Use nylon or brass brushes for light deposits; stainless-steel wire brushes only on robust areas.
Employ abrasive pads or fine-grit sandpaper for stubborn spots, sanding gently along the pipe’s grain.
Work methodically, remove residue with a dry brush, and inspect for coating damage.
Step 3 Chemical cleaning: safe cleaners, concentrations, and contact time
Chemical treatments remove remaining rust and lime scale after mechanical cleaning, but must be selected and applied precisely to protect the galvanized zinc coating.
Mild acids (phosphoric, citric) or commercial descalers at low concentrations are recommended. Typical mixtures: 5–10% phosphoric or 2–5% citric solution, applied for 5–15 minutes.
Agitation speeds action; avoid overexposure and follow product safety instructions.
Step 4 Rinsing, neutralizing acids, and drying the pipe
After the acid treatment is complete, the pipe must be thoroughly rinsed, neutralized, and dried to halt corrosion and prevent residue buildup.
Flush with copious clean water until runoff tests neutral pH.
Apply a mild alkaline solution (baking soda slurry) to neutralize remaining acid, rinse again, then blow out or towel-dry the interior and exterior.
Verify full drying before coating or reassembly.
Step 5 Reassembly, pressure check, and leak testing
Reassemble the cleaned fittings and sections carefully, ensuring gaskets and threads are seated correctly and sealants or tape are applied where specified.
Tighten connections to manufacturer torque, avoid over‑stress.
Restore water supply gradually, monitor for pressure stability and audible leaks.
Use soapy water or leak detection fluid on joints.
Maintain pressure for recommended duration, repair or retorque any drips, then document completion and safety checks.
Deep-cleaning and corrosion remediation for severe cases
For severe corrosion, the text outlines when mild acids such as vinegar or citric acid suffice and when stronger commercial rust removers are appropriate.
It also introduces electrochemical and professional descaling methods for entrenched deposits.
Finally, clear indicators are given for when cleaning is no longer viable and pipe repair or replacement is necessary.
When to use mild acids (vinegar, citric acid) vs. commercial rust removers
When should mild acids like vinegar or citric acid be chosen over commercial rust removers?
Mild acids suit light surface rust, mineral deposits, and delicate galvanizing because they clean gradually with minimal etching; they’re safer for DIY use and plumbing fixtures.
Commercial rust removers fit heavy corrosion, stubborn iron oxide, or where quicker, stronger chemical action is required, but they demand PPE and careful neutralization.
Electrochemical and professional descaling options
Although mild acids and consumer rust removers handle many jobs, severe scaling and deep galvanic corrosion often require electrochemical or professional descaling methods that remove deposits without further damaging the zinc coating.
Electrochemical cleaning, hydrojetting, and controlled abrasive blasting target heavy encrustation. Professionals assess zinc loss, apply passivation, and test adhesion.
These methods minimize structural harm while restoring flow; they require trained operators and safety controls.
When cleaning is not enough: replacement and repair indicators
After exhausting electrochemical and professional descaling options, some galvanized pipes will still show damage that cleaning cannot rectify.
Indicators for repair or replacement include persistent leaks, deep pitting, structural thinning, widespread sectional corrosion, welded-joint failure, and recurring contamination.
If flow capacity is irreversibly reduced or safety is compromised, professional assessment should recommend targeted repairs or full replacement to prevent system failure.
Protecting galvanized pipes after cleaning
After cleaning, measures to prevent recurrence of corrosion include applying rust inhibitors, passivation treatments, or compatible protective coatings tailored to galvanized steel.
Installing dielectric unions and using fittings matched to galvanic compatibility reduces electrochemical corrosion where dissimilar metals join.
A routine maintenance plan with periodic inspections and system flushing helps sustain protection and detect failures early.
Rust inhibitors, passivation treatments, and compatible coatings
Protecting cleaned galvanized pipes requires applying rust inhibitors, passivation treatments, or compatible coatings to restore and prolong the zinc barrier that resists corrosion.
Use zinc-rich primers, chromate-free passivators, or silane-based sealers approved for galvanizing. Apply per manufacturer instructions after drying and neutralizing cleaners.
Inspect coating adhesion, reapply where worn, and avoid incompatible paints or solvents that disrupt the zinc layer.
Using dielectric unions and compatible fittings to prevent galvanic corrosion
Many installations benefit from dielectric unions and compatible fittings to interrupt electrical contact between dissimilar metals and thus prevent galvanic corrosion.
Properly selected dielectric unions isolate steel, copper, and brass components while maintaining pressure integrity.
Installers must match thread types, sizes, and pressure ratings, verify dielectric elements remain intact, and avoid mixing incompatible alloys.
Correct installation extends service life and reduces leak and corrosion risk.
Routine maintenance schedule and flushing recommendations
A regular maintenance schedule combined with periodic flushing maximizes the longevity of galvanized pipes following cleaning.
Inspections every six months assess leaks, corrosion, and mineral buildup.
Flush lines quarterly with cold water for several minutes; annually perform a hot-water or citric-acid flush to reduce scale.
Document findings, adjust frequency based on water hardness and usage, and promptly address any deterioration to prevent recurrence.
Safe alternatives and eco-friendly cleaning options
The article outlines non-toxic cleaners and simple homemade solutions—such as diluted white vinegar or baking soda paste—along with brief usage notes to prevent overexposure and residue.
It warns against acidic or abrasive products that can strip zinc or generate hazardous byproducts when mixed.
Practical guidance emphasizes choosing gentle cleaners and rinsing thoroughly to protect the galvanization and the environment.
Non-toxic cleaners and homemade solutions with usage notes
Choose mild, non-toxic cleaners to protect both the galvanized coating and indoor air quality when cleaning pipes.
A baking soda paste gently removes light rust; vinegar diluted with water dissolves mineral deposits—rinse thoroughly.
Mild dish soap and warm water handle grime.
Test any homemade solution on an inconspicuous area first, apply with soft brushes or cloths, and dry completely to prevent flash corrosion.
Avoiding products that damage galvanization or create hazardous byproducts
Because harsh acids and abrasive chemicals can strip zinc and leave toxic residues, users should avoid muriatic acid, concentrated hydrochloric cleaners, straight phosphoric acid, and strong alkalis when working on galvanized pipes.
Instead, select mild acidic cleaners (diluted vinegar), biodegradable lime removers, nonionic detergents, or chelating agents formulated for metal.
Rinse thoroughly, neutralize residues, and choose products labeled safe for galvanized steel and the environment.
Common mistakes and how to avoid them
Common mistakes when cleaning galvanized pipes include over-sanding or aggressive abrasion that can remove the protective zinc coating and expose the underlying steel.
Using incompatible chemicals or applying strong acids improperly can pit or strip the galvanization.
Failing to dry and seal treated areas promptly often leads to rapid corrosion recurrence.
Over-sanding or aggressive abrasion that exposes steel
Over-sanding galvanized pipes can remove the protective zinc layer and expose the underlying steel, accelerating rust and compromising the pipe’s longevity.
One should use gentle abrasives, light pressure, and inspect frequently to stop at bright zinc.
When deeper corrosion exists, favor zinc-rich repair products or replacement rather than continued grinding.
Wear PPE and work slowly to preserve the coating and prevent future corrosion.
Mixing incompatible chemicals or using strong acids incorrectly
Mixing cleaners or applying strong acids to galvanized pipes can cause dangerous reactions, damage the zinc coating, and rapidly accelerate corrosion.
Users should never combine bleach with ammonia or acid-based descalers. Always follow product labels, test on a small area, neutralize acids with baking soda solution, rinse thoroughly, and wear PPE.
When uncertain, consult manufacturer guidance or a professional.
Inadequate drying and sealing leading to rapid recurrence
After chemical cleaning, failure to fully dry and properly reseal galvanized pipe surfaces often allows moisture and contaminants to reestablish corrosion rapidly.
Technicians should remove residual moisture with compressed air, heat, or absorbent cloths, then apply an appropriate zinc-rich primer or corrosion-inhibiting sealant.
Inspect seams and threaded joints, torque fittings correctly, and allow cure time per manufacturer instructions to prevent swift recurrence.
Cost, time, and decision guide: clean vs. repair vs. replace
A concise comparison of cleaning, repairing, and replacing galvanized pipes helps weigh typical cost and time commitments against long‑term value. The following table summarizes rough DIY vs. professional vs. replacement estimates and a brief decision checklist to guide the choice. Use these benchmarks to match the option to pipe condition, budget, and desired longevity.
| Item | Estimate / Checklist |
|---|---|
| DIY cleaning cost/time | $0–$150; a few hours; suitable for light scaling and surface rust |
| Professional service cost/time | $150–$800; half day–full day; good for heavy buildup or inaccessible runs |
| Replacement cost/time | $500–$5,000+; 1–3 days or more; chosen for severe corrosion, leaks, or code compliance |
| Decision checklist | Assess leak history, flow loss, pipe age, budget, and future plans |
Typical cost and time estimates for DIY cleaning, professional service, and replacement
Budget and time estimates help determine whether cleaning, hiring a professional, or replacing galvanized pipes is the best course.
DIY cleaning: low material cost ($10–$100), few hours to a day depending on access.
Professional service: $150–$800, same-day to a few days.
Partial replacement: $300–$1,500+.
Full repiping: $1,500–$6,000+, several days to a week.
Time and scope drive costs.
Decision checklist to choose the right option for your situation
When should one clean, repair, or replace galvanized pipes depends on a concise assessment of pipe condition, household needs, and available resources.
Evaluate corrosion extent, leak frequency, water quality, budget, and long-term plans. Decide accordingly:
- Hairline rust, single fixture: try cleaning.
- Moderate pitting: consider targeted repairs.
- Recurring leaks: prioritize replacement.
- Water staining: inspect internally.
- Budget vs. longevity: balance.
Practical examples and step sequences for common scenarios
The section presents concise, step‑by‑step examples for three common situations: an indoor supply line with surface lime scale, an outdoor exposed pipe with localized rust spots, and a hot‑water heater inlet/outlet descaling sequence.
Each example outlines required tools, safety checks, cleaning agents, and a recommended task order. Readers are encouraged to compare the sequences to their own conditions before selecting a method.
Indoor household supply line with surface lime scale
Identify the visible white or gray crust on indoor galvanized supply lines as surface lime scale caused by mineral-rich water; it typically accumulates at joints, bends, and horizontal runs where water evaporates.
For treatment: shut off water, protect surroundings, apply diluted vinegar or commercial descaler, let sit, scrub with nylon brush, rinse thoroughly, dry, and inspect for leaks or underlying corrosion before restoring service.
Outdoor exposed pipe with rust spots
Examine outdoor galvanized pipes showing small rust spots to determine whether corrosion is superficial or has compromised the zinc coating.
Clean loose rust with a wire brush, rinse, and dry.
Apply a rust converter to stabilize pitted areas, then prime and repaint with zinc-rich paint.
Replace sections if scaling reveals deep metal loss.
Reinspect annually and address nearby moisture sources to prevent recurrence.
Hot-water heater inlet/outlet descaling sequence
Begin by shutting off power or gas to the water heater and closing the cold-water supply valve to isolate the unit; this guarantees safe access to the inlet and outlet before any descaling steps commence.
Drain several gallons, attach hoses to inlet and outlet, circulate a mild acid descaler for 30–60 minutes, flush with fresh water, inspect fittings and replace sacrificial anode if corroded, then restore supply and power.
Safety and regulatory considerations
Before beginning work on galvanized pipes, the author recommends checking local plumbing codes and, when appropriate, consulting a licensed plumber to avoid violating regulations or voiding warranties.
Attention must be given to proper handling and disposal of chemical residues and contaminated debris to protect health and comply with hazardous-waste rules.
Failure to follow these precautions can create legal, environmental, and warranty risks.
Local codes, licensed plumber recommendations, and warranty implications
While cleaning galvanized pipes can often be a DIY task, compliance with local plumbing codes and consultation with a licensed plumber are essential to avoid safety hazards, code violations, or voiding warranties.
Homeowners should verify permit requirements, follow material and method restrictions, retain documentation of professional work, and check manufacturer or installer warranty terms before repairs.
Licensed advice prevents costly noncompliance.
Proper disposal of chemical residues and contaminated debris
Dispose of chemical residues and contaminated debris according to local hazardous-waste regulations and product label instructions to prevent environmental harm and health risks.
Materials such as acidic cleaners, flaked zinc or rust, and contaminated rags can require special handling and must not be poured down drains or thrown in regular trash.
Contact municipal hazardous-waste facilities, transport wastes in sealed containers, label contents, and follow disposal receipt records.
Quick troubleshooting guide for post-cleaning problems
After cleaning, common post-service issues should be checked promptly to prevent damage or health risks.
Possible signs to watch for include visual and functional changes such as:
- dark streaks along joints
- white powdery residue on fittings
- small wet spots under elbows
- new drips from seams
- flaky rust reappearing within months
A brief, systematic inspection and targeted corrective steps usually resolve these problems before they worsen.
Persistent discoloration or stains
Persistent discoloration or stubborn stains on galvanized pipes can persist despite proper cleaning and often indicate surface oxidation, embedded mineral deposits, or coating damage.
The guide recommends testing small areas with a mild acid rinse (vinegar or citric), gentle mechanical removal with nonabrasive pads, and evaluating remaining damage.
If stains resist these measures, consult a professional to evaluate re-coating or replacement options.
New leaks appearing after cleaning
Discovering new leaks after cleaning galvanized pipes can signal weakened joints, damaged coatings, or exposed corrosion that became apparent when deposits were removed.
Inspect fittings, soldered joints, and threaded connections for hairline cracks or loose seals.
Temporarily stop leaks with pipe repair tape or epoxy putty. For permanent fixes, replace compromised sections or fittings and retest system pressure; hire a plumber if unsure.
Recurring corrosion within months
New corrosion appearing within months of cleaning often indicates underlying chemical or environmental causes rather than a surface-only problem.
Investigate water chemistry (pH, chloride, sulfate), stray electrical currents, and residual cleaners.
Verify proper rinsing, neutralization, and protective coatings.
Check for galvanic coupling with dissimilar metals and high humidity or ventilation issues.
Replace severely pitted sections and consult water treatment or corrosion specialists.
Conclusion
Ultimately, cleaning galvanized pipes protects water quality and prolongs service life, though some damage demands replacement. With basic tools and safety gear, routine descaling and rust removal restore flow; for deep corrosion, professional remediation or replacement is prudent. The guide’s stepwise choices help weigh cost, time, and risk. Like a Roman aqueduct patched with modern sealant, thoughtful maintenance keeps systems functional—until inspection reveals an irreversible breach requiring full renewal.