How to Change a Roman Tub Faucet: Step-by-Step Guide for a Leak-Free Installation
To change a Roman tub faucet, start by shutting off the supply valves and draining any remaining water. Remove the handles and trim, then detach the valves and spout. Before installing the new faucet, clean the deck thoroughly. Ensure the new assembly matches the valve spacing, route the supply lines, and secure the mounting hardware. Apply plumber’s tape and sealant, reconnect everything, and test for leaks and proper flow. Basic tools and safety gear will help with the installation, but if you encounter persistent issues or complex valves, consider hiring a professional. Follow these steps for a successful and leak-free faucet installation.
What a Roman Tub Faucet Is and When to Replace It
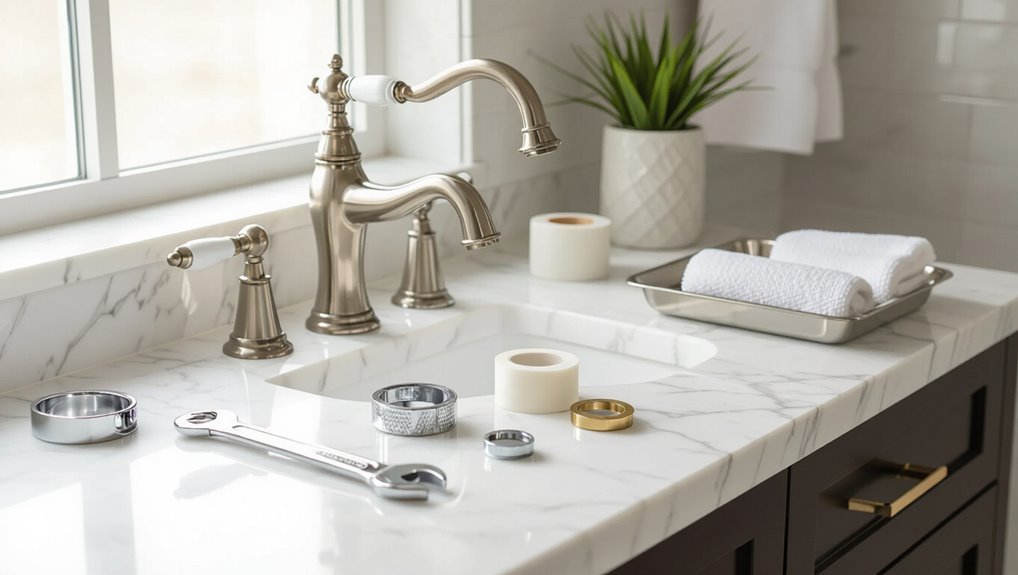
A Roman tub faucet is a deck-mounted fixture, typically separate from the spout and often featuring multiple handles and a wider, low-profile spout suited for freestanding tubs.
Signs that a replacement is needed include persistent leaks, reduced water pressure, visible corrosion, or frequent failures that make repair impractical.
Replacing the unit can restore function and appearance, often proving more cost-effective and reliable long-term than repeated repairs.
Definition and distinguishing features of Roman tub faucets
Roman tub faucets are low-profile fixtures designed specifically for freestanding or deck-mounted bathtubs, characterized by separate spouts and handles spread across the tub deck rather than mounted on a wall.
These fixtures often include widespread configurations, diverters, and deck-mounted handshowers.
Understanding mounting holes, valve types, and reach simplifies planning and informs tools and parts required for how to change roman tub faucet installations.
Common signs you need a replacement (leaks, low pressure, corrosion)
When leaks appear around the base, handles, or connections, or when water flow weakens noticeably, these are clear indicators that the tub faucet may need replacing.
Persistent dripping, uneven temperature control, visible corrosion, mineral buildup, and noisy valves further signal failing components.
Frequent repairs, worsening performance, or water stains on surrounding surfaces confirm the need for an extensive replacement rather than temporary fixes.
Benefits of replacing versus repairing
Consider replacing a failing Roman tub faucet if repairs only mask recurring leaks, reduce functionality, or fail to restore reliable temperature control.
Replacement restores modern reliability, improves water efficiency, and reduces future maintenance. New fixtures often include updated valves and finishes that resist corrosion and wear.
Long-term costs can be lower than repeated repairs, and replacement allows style or feature upgrades for enhanced user experience.
Tools, Materials, and Safety Precautions
The section lists the basic tools—adjustable wrench, basin wrench, screwdrivers, plumber’s tape, and supply-line tools—needed to remove and install a Roman tub faucet.
It explains how to select compatible replacement parts and faucet types (deck-mount, widespread, single-handle) by matching mounting holes, valve spacing, and supply connections.
It also covers safety and preparatory steps: shut off water at valves, disconnect power if applicable, and protect the workspace and tub surface.
Tools required for the job
A small set of specific tools, reliable materials, and basic safety gear guarantees a smooth Roman tub faucet replacement.
Necessary items focus on control, access, sealing, and protection.
- Adjustable wrench and basin wrench
- Phillips and flathead screwdrivers
- Plumber’s tape and silicone sealant
- Utility knife and channel-lock pliers
- Safety glasses and work gloves
Replacement parts and how to choose compatible faucets (deck-mount, widespread, single-handle)
One clear step is to match replacement parts and faucet type—deck-mount, widespread, or single-handle—to the tub’s existing mounting holes, valve configuration, and water supply spacing.
Verify rough-in dimensions, spout reach, and handle clearance.
Select cartridges, escutcheons, and supply lines compatible with valve brand.
Prefer OEM parts or certified aftermarket components to guarantee leak-free seals and proper operation.
Safety and preparatory steps (shutoff valves, power, workspace protection)
Before beginning work, confirm that water and electrical sources are isolated and the workspace is protected to prevent damage or injury.
The technician locates and closes local shutoff valves, drains lines, and verifies no power feeds nearby. Protective coverings shield flooring and fixtures.
Adequate lighting, ventilation, and accessible tools reduce risks. Personal protective equipment—gloves and eye protection—is worn throughout the job.
How to Choose the Right Replacement Faucet
Before purchasing a replacement, measurements of the tub deck and hole spacing should be confirmed to guarantee a proper fit.
The new faucet must match the existing valve type and meet desired flow rate specifications while the finish, style, and durability align with the bathroom’s design.
Finally, budget tiers and recommended brands can guide choices between economical, mid-range, and premium options.
Measuring the tub deck and hole spacing
Measuring the tub deck and hole spacing starts with noting the total width of the deck and the center-to-center distance between existing faucet holes, since these dimensions determine compatibility with replacement models.
Measure depth from deck surface to underside clearance, check hole diameters for stem and escutcheon fit, and record any offset from the tub edge.
Photograph and note measurements for reference.
Matching valve type and flow rate specifications
Choosing a replacement Roman tub faucet requires matching the valve type and flow-rate specifications to confirm proper operation and compliance with local codes.
The technician verifies whether the existing valve is single- or multi-handle, pressure-balanced or thermostatic, and checks rough-in dimensions.
Flow-rate limits (GPM) and anti-scald requirements guide selection to guarantee compatible performance, safe temperature control, and efficient water use.
Finish, style, and durability considerations
A faucet’s finish, style, and construction strongly influence both the bathroom’s appearance and the fixture’s longevity.
So the technician evaluates finish compatibility with existing hardware, selects a design that complements the tub and surrounding décor, and prioritizes durable materials and coatings that resist corrosion, scratching, and mineral buildup.
They assess finish maintenance, choose timeless profiles over fleeting trends, and favor solid metals and robust plating.
Budget tiers and recommended brands
With finish, style, and construction settled, attention turns to budget tiers and recommended brands to match performance expectations and long‑term value.
- Economy: functional, basic warranties (e.g., Glacier Bay)
- Mid‑range: better materials, reliable valves (e.g., Kohler, Delta)
- Premium: solid brass, extended warranties (e.g., Moen, Grohe)
- Specialty: designer finishes, bespoke options
- Accessories: diverters, handshowers, OEM replacements
Step-by-Step Removal of the Old Roman Tub Faucet
Before beginning work, the technician shuts off the water supply and opens a nearby faucet to relieve residual pressure.
Next, water lines are disconnected and the area is prepared for removal by clearing tools and protecting surfaces.
Finally, handles, escutcheons, and trim are removed, valves are detached, and the old faucet assembly is lifted out for replacement.
Turning off water supply and relieving pressure
Shut off the water at the appropriate valves and confirm all lines are closed to prevent leaks during removal.
Next, open nearby faucets and the tub spout to drain residual water and release system pressure.
If present, close the main shutoff after draining.
Use a towel or bucket to catch remaining drips.
Verify no water flows before proceeding to disconnect fittings.
Disconnecting water lines and preparing for removal
Disconnecting the water lines begins by confirming the shutoff valves remained closed and the fixtures tested dry; any remaining moisture should be caught with a towel or bucket.
The installer then places a catch pan, loosens supply nuts with the correct wrench, and gently detaches flexible lines.
Marking line positions and photographing connections guarantees accurate reassembly.
Caps or tape exposed ends to prevent contamination.
Removing handles, escutcheons, and trim
Begin by removing visible decorative caps and set screws from each handle using a small flathead or hex key, taking care not to scratch the finish.
Pry off handles, lift escutcheons, and loosen retaining nuts or screws beneath trim plates.
Label components and fasteners, place them in a tray, and photograph orientation for reassembly.
Clean exposed surfaces before proceeding to valve removal.
Detaching valves and lifting out the old faucet assembly
With water supply confirmed off and the area dry, the technician loosens the valve packing nuts and supply-line connections to relieve any residual pressure.
They unbolt mounting brackets, disconnect remaining lines, and gently lift valve bodies from their deck holes.
Corrosion or sealant is pried free with care.
All removed components are inspected for damage and disposed of or labeled for reuse before surface cleaning.
Preparing the Tub Deck and New Faucet Components
The tub deck and underside are cleaned and inspected for cracks, corrosion, or mineral buildup that could compromise the new faucet.
Damaged gaskets are replaced and appropriate sealant—plumber’s putty or silicone—is applied where required.
New parts are laid out, verified against the instructions, and dry-fitted to confirm alignment before final installation.
Cleaning and inspecting deck holes and underside for damage
Before installing the new faucet, clean and inspect each deck hole and the tub’s underside to confirm a secure, leak-free fit.
Remove mineral deposits, old sealant residue, and debris with nonabrasive cleaners and a soft brush.
Visually and tactilely check for cracks, corrosion, warped metal, or water stains.
Note any damage, measure hole diameters, and verify mounting surfaces are flat and sound.
Replacing gaskets, plumber’s putty, or silicone as needed
Prepare replacement gaskets, plumber’s putty, or silicone sealant that match the faucet manufacturer’s recommendations and the tub deck materials.
Remove old sealant and damaged gaskets, clean surfaces thoroughly, and guarantee dry, grease-free areas.
Cut gaskets to fit, apply putty or a continuous silicone bead where specified, seat components evenly, and wipe excess immediately to prevent curing on visible surfaces.
Verifying new components and dry-fitting before final install
Confirm that all replacement parts match the original specifications and fit the tub deck mounting holes before committing to sealant or final connections.
Dry-fit the valve bodies, escutcheons, and spouts to verify alignment, thread engagement, and clearance.
Check supply line connections for correct orientation and threads.
Mark positions, note required shims or adapters, then disassemble for final sealing and torqueing during permanent installation.
Step-by-Step Installation of the New Roman Tub Faucet
The installer begins by positioning the faucet on the deck and routing the water lines through their respective holes.
Next, valves are secured, mounting hardware tightened to the manufacturer’s torque specifications, and supply lines connected.
Finally, handles, spout, and trim are installed, sealant applied where needed, and all connections checked for proper fit and leaks.
Positioning the faucet and routing water lines
With the new Roman tub faucet unboxed and the mounting area cleared, the installer marks the precise centerlines for the spout and handles, checks clearances to the deck and nearby walls, and dry-fits the fixture to verify alignment.
Next, routing of the hot and cold supply lines is planned to minimize bends, avoid interference with the tub flange, and maintain accessible shutoff connections.
The installer measures, trims, and positions flexible supply hoses so runs are smooth, using gentle curves, proper supports, and insulated sections where needed to prevent vibration, kinking, or heat transfer to nearby finishes.
Securing valves and tightening mounting hardware
Begin by setting each valve assembly into its respective hole so the bodies sit flush against the deck and the cartridge stems align with their handle openings.
Secure under-deck with supplied mounting nuts or brackets, hand-tighten, then use a wrench for a firm, even finish.
Check that valves remain square and deck seals compress evenly.
Re-torque nuts if necessary after initial test.
Connecting supply lines and ensuring correct torque
Connect the supply lines to their corresponding valve outlets, matching hot to hot and cold to cold, and hand-thread fittings to avoid cross-threading.
Using a wrench, snug connections until finger-tight plus a quarter turn; avoid over-torquing. Apply thread sealant or tape where specified.
After tightening, pressurize the system, inspect for leaks, and re-torque slightly if minor seepage appears, then finalize torque per manufacturer specs.
Installing handles, spout, and trim pieces
Install the handles, spout, and trim pieces carefully, following the manufacturer’s sequence and orientation to guarantee proper alignment and sealing.
Position cartridges or stems, secure escutcheons and trim plates with specified fasteners, then attach handles and spout, confirming smooth operation and correct rotation.
Check for interference with deck or other components and tighten mounting nuts to manufacturer torque specifications without overloading.
Applying sealant and finishing touches
Once the mechanical components are in place and tested for proper operation, the installer applies sealant and completes final adjustments to guarantee a watertight, professional finish.
A bead of silicone is run around bases and trim, excess wiped smooth, and joints inspected. Aerator and diverter checked, water pressure verified, and surrounding deck cleaned.
Final torque and aesthetic alignment confirm completion.
Testing and Adjusting for a Leak-Free Operation
After installation, the water supply is slowly restored while the assembly is monitored for any drips or visible leaks.
The valves are flushed to remove air and sediment, handles are aligned and flow/temperature stops are set, and a prolonged leak test is conducted.
A final inspection checklist confirms all connections, trim, and performance meet specifications.
Slowly restoring water supply and checking for leaks
Begin by slowly restoring the water supply to the roman tub, opening the shutoff valves a quarter turn and watching pressure build gradually to avoid sudden surges.
Observe all visible joints, escutcheons, and connections for drips.
Run hot and cold separately, cycling handles slowly.
Tighten any leaking fittings incrementally and recheck.
Note minor weeps for further adjustment before full operation.
Flushing valves and removing air from lines
Flush the valves and purge trapped air by opening each faucet handle slowly—first hot, then cold—allowing water to run until the flow is steady and any sputtering stops.
Inspect for irregular streams, noise, or pressure drops. Check beneath the tub for drips during flushing.
Repeat several cycles, close handles, and verify valves seat properly; document observations for final leak testing.
Adjusting handle alignment and flow/temperature limits
With the valves cycled and air cleared, attention shifts to aligning the handles and setting flow and temperature limits to guarantee predictable, leak-free operation.
The technician centers handle orientations, verifies stops engage smoothly, and adjusts internal limit screws or cartridges to cap maximum hot temperature.
Flow restrictors or washers are set to desired rates.
Final handle motion is tested for smooth, repeatable operation without binding.
Long-term leak test and final inspection checklist
Start a long-term leak test by restoring water supply and running the faucet through hot, cold, and mixed settings while observing all joints, escutcheons, and under-sink connections for weeps and drips.
A final inspection verifies seal integrity, proper operation, and cosmetics.
Checklist includes:
- Inspect all visible fittings for steady leaks
- Monitor drip tray or paper towels for dampness
- Check handle operation and stops
- Verify flow/temperature limits
- Confirm drain and overflow seals
Troubleshooting Common Problems
The section addresses frequent issues homeowners may face after installing a Roman tub faucet, including persistent leaks at connections or the spout.
It also covers causes and fixes for low or uneven water flow from multiple outlets and remedies for stiff handles or cartridge malfunctions.
Guidance is provided for handling corroded or hard-to-reach components and when to call a professional.
Persistent leaks at connections or spout
Persistent leaks at the connections or spout indicate either degraded seals, loose fittings, or internal corrosion that compromises watertight joints.
Inspect supply lines, mounting nuts, and spout O-rings for damage, tighten fittings to proper torque, and replace worn seals or corroded components.
Use plumber’s tape or thread sealant where applicable, then pressure-test the assembly to confirm the leak is resolved.
Low water pressure or uneven flow from multiple outlets
Addressing leaks often exposes other performance issues, such as low water pressure or uneven flow from multiple outlets. These issues can stem from clogged aerators, debris in cartridge passages, or partial valve obstruction.
Inspect and clean aerators and outlet screens, flush lines to dislodge sediment, and remove visible debris from diverter channels.
Verify supply shutoffs fully open and check for kinked hoses or restricted flexible lines.
Handle stiffness or cartridge issues
Diagnose handle stiffness by checking for mineral buildup, worn seals, or a failing cartridge, since these are the most common causes of heavy or sticky operation.
Remove handle and escutcheon, inspect and clean mineral deposits with vinegar or a descaling solution, replace deteriorated O-rings and seals, and test operation.
If stiffness persists, replace the cartridge with the manufacturer’s specified part.
What to do if you encounter corroded or inaccessible parts
When corroded or hard-to-reach components are discovered during a Roman tub faucet repair, assess the extent of damage and accessibility before proceeding. Minor surface corrosion can often be cleaned with penetrative cleaners and soft brushes, but significant rust, seized fasteners, or deeply pitted parts usually require replacement.
Use penetrating oil, heat, or impact tools for stubborn fasteners. Consider flexible extensions, basin wrenches, or professional help.
Preventive Maintenance to Extend Faucet Life
Routine preventive maintenance helps preserve a Roman tub faucet’s finish and function, including gentle cleaning methods and appropriate polish or seal care.
Periodic inspections for leaking cartridges, worn seals, and loose fittings indicate when parts should be serviced or replaced.
In areas with hard water, installing a softening or point-of-use filter and using descaling treatments can prevent mineral buildup that shortens component life.
Regular cleaning and finish care recommendations
Maintain the faucet’s finish with gentle, consistent care to prevent corrosion, mineral buildup, and premature wear. Recommended routine care includes mild cleaners, soft cloths, and prompt drying.
Avoid abrasive pads or harsh chemicals. Protective wax can reduce spotting. Inspect finish during cleaning and address deposits promptly.
- Use mild soap and water
- Dry after each use
- Remove mineral deposits gently
- Avoid abrasives
- Apply nonabrasive wax periodically
Periodic checks and when to replace cartridges or seals
Because small leaks and stiffness often signal internal wear, periodic inspections of cartridges and seals are essential to prevent larger failures.
Inspect every six months: check for drips, handle resistance, mineral buildup, and visible seal flattening or cracking.
Replace cartridges or O-rings when leakage persists after cleaning, when movement is gritty or stiff, or when rubber components show age-related deterioration.
Hard water solutions and filter recommendations
Hard water deposits can greatly shorten a roman tub faucet’s service life by accelerating seal wear and impeding cartridge movement, so addressing mineral buildup is a key preventive step.
Install a whole-house water softener or point-of-use cartridge filter to reduce hardness.
Periodic vinegar soaks, aerator cleaning, and using silicone grease on seals help.
Choose NSF-certified filters and follow manufacturer maintenance schedules for best results.
Cost, Time Estimates, and When to Call a Professional
Typical DIY replacement of a Roman tub faucet often takes 1–3 hours and costs between $50 and $300 for parts and basic tools.
Complications such as corroded fittings, hidden valve damage, or unclear water shutoffs indicate the need for a licensed plumber.
When hiring a contractor, homeowners should ask about licensing, estimated timelines, itemized pricing, and warranty coverage for both labor and parts.
Typical DIY time and cost breakdown
A basic DIY replacement of a Roman tub faucet generally takes one to three hours for someone with moderate plumbing experience, while more complex installs or unexpected complications can turn it into a half‑day or longer project. Typical material and tool costs vary by finish and valve complexity.
| Item | Estimated Cost |
|---|---|
| Faucet kit | $75–$400 |
| Tools/parts | $10–$60 |
| Miscellaneous | $5–$50 |
Signs the job requires a licensed plumber
Recognize when a Roman tub faucet replacement exceeds DIY scope: persistent leaks from the valve body, corroded or inaccessible plumbing, multiple failed repair attempts, visible water damage or mold, or code‑regulated installations (such as on multi‑unit buildings) all warrant a licensed plumber.
Expect higher labor rates but faster resolution; complex valve replacements can take 2–6 hours, costs rising with parts, permits, or drywall/finish repairs.
Questions to ask a contractor and warranty considerations
How much will it cost, and what will be guaranteed? The homeowner should request detailed estimates: itemized parts, labor, permits, and contingency fees.
Ask for start/end dates, milestones, and cleanup responsibilities. Confirm contractor licensing, insurance, and warranties on parts and workmanship, including duration and claim process.
When unsure or encountering structural/plumbing complexity, call a licensed professional before proceeding.
Additional Resources and Replacement Part References
The section outlines how to decode model numbers to locate OEM replacement parts and compatible alternatives.
It also points readers to useful exploded diagrams, manufacturer manuals, and step-by-step video tutorials for visual guidance.
Finally, it lists reputable parts suppliers and common sources for purchasing cartridges, escutcheons, and trim.
How to read model numbers and find OEM parts
Where can a homeowner find the exact replacement for a stubborn Roman tub component?
Identify model numbers stamped on valves, escutcheons, or mounting plates; note brand logos and part codes.
Consult manufacturer parts lists or OEM catalogs online, matching serial and revision codes.
When ambiguous, contact manufacturer support with photos and measurements to verify genuine OEM replacements for proper fit and warranty compliance.
Useful diagrams, manuals, and video tutorials
After identifying model numbers and contacting manufacturers for exact parts, homeowners will find diagrams, manuals, and video tutorials invaluable for correct installation and troubleshooting.
Concise resources reduce errors, clarify mounting, valve alignment, and cartridge orientation, and show common leak fixes.
- Exploded parts diagrams
- OEM installation manuals
- Step-by-step video tutorials
- Cartridge removal guides
- Torque and sealing recommendations
Parts suppliers and where to buy replacements
Several reliable sources supply replacement parts for Roman tub faucets, ranging from manufacturer-authorized dealers to specialty plumbing distributors and online marketplaces.
Parts buyers should verify model numbers, warranties, and return policies before purchase to guarantee compatibility and avoid delays.
- Manufacturer parts departments
- Authorized dealers and showrooms
- Specialty plumbing wholesalers
- Large online marketplaces (with seller ratings)
- Local plumbing supply stores
Conclusion
A homeowner once measured patience in drip counts until a stubborn Roman tub faucet finally yielded; like counting 1,440 drops per day, small leaks accumulate into a tidal bill. Replacing the faucet transforms that slow erosion into a precise, waterwise operation. With proper tools, parts, and a methodical approach, the project repays effort with leak-free function and calmer mornings—unless complications arise, in which case a pro closes the story.