How to Make a Water Pump at Home: Step-by-Step DIY Guide
DIY Water Pump Guide: Step-by-Step Instructions
This guide provides clear, step-by-step instructions for building a water pump at home. You’ll learn about the principles of pressure and explore various designs, including hand-operated suction pumps, simple diaphragm pumps, and small centrifugal units. Essential tools and materials are listed, along with safety and sealing tips. Detailed assembly instructions, installation advice, troubleshooting techniques, and maintenance schedules are included. For a complete build, continue reading for diagrams, parts lists, and cost estimates to ensure your water pump operates reliably.
How a Homemade Water Pump Works
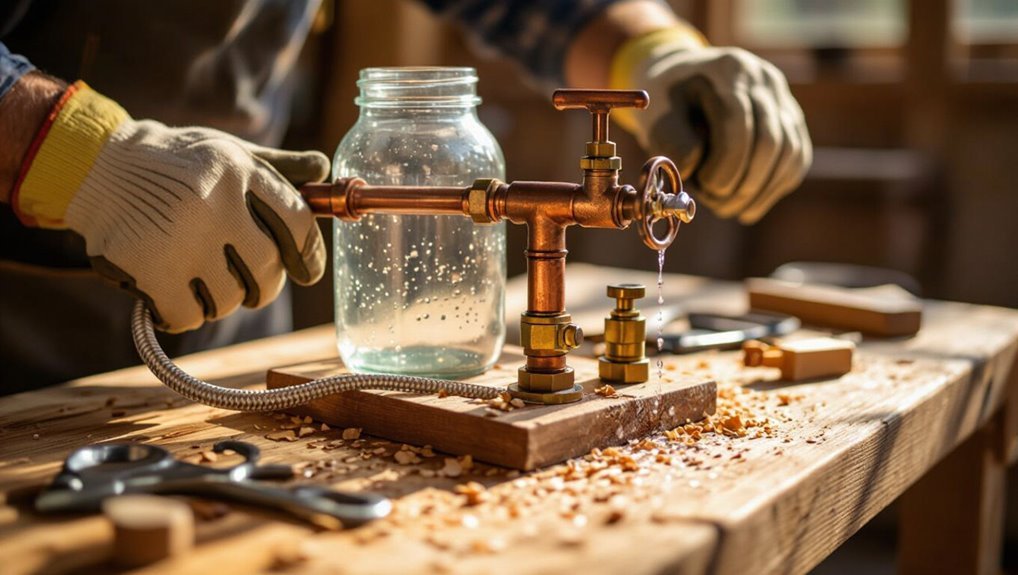
The section outlines the basic principles of fluid movement and pressure that govern how pumps move water.
It then summarizes common DIY pump types—suction, diaphragm, piston, and centrifugal—highlighting how each generates flow.
Finally, it notes safety concerns and practical limitations to evaluate when building and operating homemade pumps.
Basic principles of fluid movement and pressure
Understanding how a homemade water pump moves liquid begins with basic fluid principles: pressure, flow, and continuity.
The guide explains how to make water pump systems that create pressure differentials to move fluid, conserve mass via continuity, and balance energy between potential and kinetic forms.
Readers learn how pressure gradients drive flow, how resistance and elevation affect output, and why sealing and valve timing matter.
Common types of DIY pumps explained (suction, diaphragm, piston, centrifugal)
Several common DIY pump types—suction, diaphragm, piston, and centrifugal—offer distinct ways to convert mechanical motion into directed fluid flow.
Suction pumps lift fluid by creating low pressure at the inlet.
Diaphragm pumps use flexible membranes for positive displacement.
Piston pumps deliver higher pressure via reciprocating pistons.
Centrifugal pumps impart kinetic energy with a rotating impeller for continuous flow.
Safety and limitations of homemade pumps
Many homemade water pumps can perform basic fluid transfer effectively but carry specific safety risks and practical limits that must be acknowledged.
Users should consider electrical hazards, pump failure, leaks, contamination, and inadequate materials. Flow, pressure, and durability usually fall short of commercial units.
Appropriate shielding, grounding, check valves, non-toxic materials, routine inspection, and realistic expectations reduce risk but do not eliminate it.
Required Materials and Tools
The next section lists the specific components needed for two basic builds: a hand-operated suction pump and an electric pump powered by a small motor.
It then summarizes the common tools and personal protective equipment required for safe assembly.
Readers will be presented with concise parts lists and a brief safety checklist to prepare before starting.
List of materials for a simple hand-operated suction pump
Gathered below is a concise inventory of materials and tools required to build a simple hand-operated suction pump, listed to guarantee compatibility, safety, and ease of assembly.
- PVC pipe (25–40 mm) and end caps
- Rubber ball or piston with valve
- Flexible hose (food-grade)
- Hose clamps and waterproof sealant
- Hand lever or T-handle with mounting screws
Materials for an electric DIY pump using a motor
A compact list of required parts and tools for an electric DIY pump helps guarantee proper fit, safe operation, and efficient assembly.
- Small sealed electric motor (appropriate RPM/torque)
- Impeller compatible with motor shaft
- Waterproof housing or sealed container
- Flexible inlet/outlet tubing with clamps
- Electrical components: switch, wiring, fuse, and waterproof connector
Tools and safety gear checklist
Essential tools and safety gear assure both efficient assembly and protection during construction. The builder should prepare selected instruments and protective items before starting, confirming readiness and minimizing risks.
- Safety goggles
- Work gloves (cut-resistant)
- Cordless drill with bits
- Adjustable wrench and pliers
- Multimeter and insulated screwdrivers
Proper use and inspection of each item prevents accidents and assures reliable results.
Choosing the Right Pump Design for Your Need
Choosing the right pump design depends on the planned use—garden irrigation, small-scale water transfer, or emergency supply—since each application demands different performance.
Key specifications such as flow rate, head (lift), and power availability must be matched to the task to guarantee adequate delivery and efficiency.
Practical trade-offs between durability, cost, and construction complexity should guide the final selection.
Matching pump type to use case (garden irrigation, small-scale water transfer, emergency)
Selecting the right pump hinges on matching performance characteristics—flow rate, head, power source, and portability—to the designated task.
For garden irrigation, choose models prioritizing steady low-pressure flow and corrosion resistance.
For small-scale transfer, portable centrifugal or diaphragm units work well.
For emergencies, favor manual or battery-powered, rugged, easy-to-maintain pumps with simple fittings and reliable priming.
Flow rate, head (lift), and power considerations
Understanding the relationship between flow rate, head, and power is central to matching a pump design to its planned task.
Flow rate (volume per time) and head (vertical lift plus friction losses) determine required hydraulic power. Selecting motor or manual effort then uses power = ρgQH/efficiency.
Estimate expected Q and H, include safety margin, and verify chosen components can sustain continuous operation.
Comparing durability, cost, and complexity
Although higher durability often raises upfront cost and design complexity, evaluating trade-offs between longevity, price, and build difficulty helps identify the most appropriate pump for a given application. Practical choices balance maintenance frequency, material robustness, and fabrication skill. Simpler recycled-material pumps cost less but wear faster; sealed metal designs last longer but require tools and expense.
| Option | Suitability |
|---|---|
| Recycled PVC | Low cost, low durability |
| Hand-crank | Moderate cost, moderate durability |
| Metal sealed | High cost, high durability |
| DIY diaphragm | Low-moderate cost, moderate complexity |
Step-by-Step: Build a Simple Hand-Operated Suction Pump
To begin, the builder lays out components and clears a safe workspace.
Next, the cylinder and piston are assembled with proper seals, inlet and outlet valves are fitted, and the hose is attached with secure fittings.
Finally, the pump is operated briefly to test function and inspected for leaks.
Prepare components and workspace
Gather all parts and clear a flat, well-lit work surface before beginning assembly.
Lay out cylinder, piston rod, seals, check valve, hose, fasteners, and tools in organized groups.
Inspect each component for defects, measure dimensions against the plan, and remove burrs or plastic flash.
Keep small parts in containers to prevent loss.
Guarantee easy access to adhesives, clamps, and safety gear.
Assemble cylinder and piston with seals
Begin by sliding the piston into the cylinder to confirm a smooth, nearly airtight fit; the piston should move with light resistance but no binding.
Fit one or two seals onto the piston grooves, ensuring edges sit flush.
Apply a thin lubricating film compatible with seals.
Insert piston slowly, rotate slightly to seat seals.
Inspect for gaps or uneven compression before securing end caps.
Attach inlet and outlet valves
Once the piston assembly shows a smooth, nearly airtight fit, the next step is installing the inlet and outlet valves to control flow direction and maintain suction.
The builder fits a one-way valve at the cylinder base for intake and another at the piston or head for discharge.
Check seating, use compatible materials, and guarantee valves move freely without leakage before proceeding.
Install hose and secure fittings
With the valves seated and tested for proper one-way action, the next task is attaching the delivery and suction hoses and securing all fittings to prevent leaks.
Cut hoses to proper length, slide on clamps, and push onto barbed fittings fully.
Tighten clamps evenly, apply thread sealant to threaded joints, and fasten hose supports to prevent strain on connections and tubing movement.
Test operation and check for leaks
Activate the pump mechanism slowly and observe each joint, fitting, and valve for signs of leakage or improper sealing.
Operate several full strokes, watching for air ingress, steady suction, and consistent flow.
Tighten or reseal any leaking connections, replace faulty washers, and recheck clamps.
Confirm pump holds vacuum between strokes and delivers expected output before regular use, noting any persistent faults for repair.
Step-by-Step: Build a Diaphragm Pump from Household Parts
The section outlines how to choose a flexible diaphragm material and a sturdy frame, then assemble a simple reciprocating mechanism to drive it.
It describes where to place one-way valves for proper suction and discharge, and how to seal and mount the components securely.
Finally, it covers basic testing and troubleshooting to confirm reliable, leak-free operation.
Selecting a diaphragm material and frame
One practical consideration in choosing a diaphragm material and frame is balancing flexibility, durability, and compatibility with the pumped fluid. The diaphragm should bend repeatedly without cracking; common choices include rubber, silicone, or neoprene.
The frame must secure the diaphragm, resist corrosion, and match mounting dimensions. Select materials that tolerate temperature, abrasion, and any chemicals present in the water.
Building the reciprocating mechanism
Begin by arranging the drive components so a controlled, back-and-forth motion can be transferred to the diaphragm; this typically involves a crank or cam mounted to a motor or hand crank, a connecting rod, and a rigid support to hold alignment.
Secure joints with bearings or low-friction bushings, set stroke length to match diaphragm travel, and make sure mounts limit lateral play to prevent fatigue.
Valve placement and one-way flow
Proper alignment of valves follows from a correctly set reciprocating mechanism: intake and discharge valves must sit directly in line with the pump chamber ports so that diaphragm travel produces unimpeded one-way flow.
Each valve should be oriented to allow flow toward the discharge, seated to prevent backflow when closed, and sized to match port openings.
Minimal clearance and secure retention guarantee reliable unidirectional movement.
Sealing, mounting, and testing
Seal and secure the assembly before testing to guarantee reliable operation and prevent leaks.
All joints receive plumber’s tape or silicone sealant; fasteners are tightened evenly.
Mount the pump on a stable, vibration-damping base.
Perform a dry-run to check stroke motion, then connect water and run brief pressurized tests while inspecting for leaks and audible issues.
Adjust seals or alignment as needed.
Step-by-Step: Convert a Small Electric Motor into a Water Pump
Selecting an appropriate motor and compatible power source sets the foundation for converting an electric motor into a pump.
The process then addresses creating an impeller or eccentric drive, designing a suitable housing with shaft sealing and bearing support, and making secure electrical connections and mounting.
Final steps include insulation, grounding, and safety checks to guarantee reliable operation.
Choosing a motor and power source
Choose a motor and power source based on required flow rate, head (lift height), and available energy: small DC motors suit low-flow, low-head tasks and are easily powered by batteries or DC adapters, while AC motors handle higher loads but need mains power or an inverter.
Consider motor torque, RPM, waterproofing, duty cycle, and voltage compatibility.
Match controller or switchgear and include appropriate fusing.
Constructing an impeller or eccentric drive
With the motor and power arrangement determined, attention shifts to converting rotary motion into a pumping action by fabricating either an impeller for centrifugal flow or an eccentric drive for diaphragm or piston-style displacement.
For impellers, select balanced blades, cut from plastic or metal, and secure to the shaft.
For eccentric drives, machine or offset-cam a hub to impart reciprocation, ensuring alignment and firm attachment.
Housing, shaft sealing, and bearings
A robust, watertight housing and properly supported shaft are essential for reliable pump operation.
The casing should fit the impeller with minimal clearance, include inlet/outlet ports, and resist corrosion.
Use a mechanical seal or lip seal at the shaft entry and an appropriate gland if needed.
Support the shaft with sealed ball or sleeve bearings, aligned to prevent wobble and premature wear.
Electrical connections, mounting, and safety checks
After verifying the housing is sealed and the shaft runs true, attention turns to wiring, mounting, and final safety checks to ready the converted motor for operation.
The installer secures proper gauge leads, insulated terminals, and a grounded plug or earth connection.
The unit mounts on vibration-damping feet, piping is supported, and insulation, overload protection, leak tests, and a dry-run check confirm safe, reliable function.
Installation, Operation, and Maintenance
Proper installation guarantees reliable continuous use and protects the motor and plumbing from damage.
Before operation, the homemade pump must be correctly primed and adjusted to maintain a steady flow.
A clear routine for inspection, part replacement, and winterizing or storage extends service life and prevents freeze-related failures.
Proper installation tips for continuous use
Several straightforward installation measures greatly extend a homemade water pump’s service life and reliability.
Install on a solid, level base with vibration-damping pads. Confirm tight, supported piping to prevent strain and leaks.
Position electrical components in a dry, ventilated enclosure with proper grounding and overload protection.
Provide accessible shutoff valves and clearances for inspection, cleaning, and routine lubrication to enable continuous, safe operation.
Priming the pump and ensuring steady flow
Once the pump is mounted and all connections secured, attention turns to priming and achieving a steady flow to prevent cavitation and maintain efficiency.
Fill the intake and pump housing with water, close valves, and vent trapped air.
Start slowly, observing pressure and flow, tightening fittings if leaks appear.
Adjust inlet position and throttle until discharge is continuous and streamlines stabilize.
Routine maintenance schedule and part replacement
Establish a regular maintenance schedule that specifies inspection intervals, lubrication points, seal and gasket checks, and parts replacement timelines based on operating hours and environmental conditions.
Record inspections, noting wear, vibration, leaks, and flow changes. Replace worn impellers, bearings, seals, and hoses per manufacturer recommendations or upon deterioration.
Keep spare parts, use correct lubricants, and adjust intervals for dusty, humid, or continuous-use environments.
Winterizing and storage
After completing routine inspections and replacing worn components, attention should turn to winterizing and proper storage to prevent freeze damage and deterioration during idle periods.
Drain all water, remove and dry seals and impellers, and apply corrosion inhibitor to metal parts.
Store pump in a dry, temperature-controlled area on a pallet. Label and cover it to keep dust and pests away.
Troubleshooting Common Problems
Common issues with homemade water pumps include no suction or low flow, leaks, excessive noise or vibration, and overheating that can damage the motor.
The article will identify typical causes for each problem and provide straightforward fixes—such as checking seals and priming, tightening or replacing fittings, balancing and securing components, and adding thermal protection.
Readers are encouraged to follow safety precautions and test repairs incrementally to confirm effectiveness.
No suction or low flow and how to fix it
Troubleshooting low flow or no suction begins by systematically isolating likely causes—air leaks, clogged inlet screens, blocked impellers, or insufficient priming—and checking each with simple visual and hands-on tests.
Tighten fittings, replace damaged seals, clear debris from screens and impeller, guarantee correct pump orientation, and re-prime slowly to expel air.
Verify intake depth and remove any suction obstructions.
Leaks, noisy operation, and vibration solutions
Having addressed suction and flow issues, attention shifts to leaks, excessive noise, and vibration—symptoms that often indicate worn seals, loose fittings, misaligned mounts, or cavitation.
Inspect and replace seals and gaskets, tighten fittings, and realign shaft and impeller.
Add vibration isolators or rubber mounts, balance rotating parts, check for air ingestion, and clear blocked or eroded impellers to restore quiet, stable operation.
Overheating and motor protection measures
Several factors can cause a pump motor to overheat, including prolonged duty cycles, blocked cooling passages, electrical overloads, low supply voltage, or worn bearings that increase friction.
Inspect cooling fins and vents, guarantee proper ventilation, verify supply voltage and correct wiring, replace worn bearings, and clear blockages.
Install thermal overload protection, an appropriate fuse or circuit breaker, and consider a temperature sensor with auto-shutdown.
Safety Precautions and Legal Considerations
Before proceeding, the author emphasizes essential electrical safety and waterproofing measures to prevent shocks and equipment damage.
Attention must be paid to safe handling of pressurized water, installation of backflow prevention, and secure fittings to avoid bursts or contamination.
Finally, adherence to local regulations and restricting the pump to appropriate uses helps guarantee legal compliance and community safety.
Electrical safety and waterproofing best practices
Prioritize electrical safety and thorough waterproofing to prevent shocks, short circuits, and equipment damage when constructing a home water pump.
Use GFCI-protected circuits, appropriate fuses or breakers, and properly rated, insulated wiring.
Seal motor housings with IP-rated enclosures, waterproof cable glands, and corrosion-resistant connectors.
Verify grounding continuity, strain relief on cords, and test for leaks before energizing the system.
Safe handling of pressurized water and backflow prevention
With electrical systems secured and enclosures sealed, attention must shift to managing pressurized water and preventing backflow to protect property and public supplies.
Use pressure relief valves, rated fittings, and pressure gauges to limit bursts.
Install one-way check valves and backflow preventers where systems connect to mains.
Routinely inspect seals, hoses, and joints; replace worn components promptly to avoid contamination or flooding.
Local regulations and appropriate uses
While constructing or operating a homemade water pump, one must comply with local building codes, plumbing regulations, and water-use ordinances to avoid fines, liability, or service interruptions.
The builder should verify permits, permitted water sources, waste discharge rules, and setback or noise limits.
Commercial use, public connections, and irrigation restrictions often require professional installation or inspection to guarantee legal and safe operation.
Cost Estimate and Material Sourcing Tips
Estimated budgets for hand, diaphragm, and electric pumps typically range from a few dollars for improvised hand pumps to a few hundred for motorized units, with clear cost trade-offs by type.
Affordable parts can often be sourced from hardware stores, online marketplaces, salvage yards, and reclaimed materials from discarded appliances.
Guidance is provided on when purchasing a ready-made pump is more economical or safer than building one from scratch.
Typical budget ranges for each pump type
Costs for homemade water pumps vary widely depending on type, materials, and tools: hand piston or diaphragm pumps often cost $10–$50; small electric centrifugal builds range $30–$150; submersible-style DIYs using sealed motors run $50–$200.
Additional specialized parts or pressure systems can raise totals. Budget estimates assume basic tools; professional-grade components increase cost substantially.
Where to find affordable parts and recycled materials
After outlining typical budget ranges for different pump types, attention turns to sourcing affordable parts and recycled materials that can keep build costs low.
Salvage yards, thrift stores, and online marketplaces yield motors, fittings, and hoses. Hardware-store clearance sections, community tool libraries, and appliance recycling centers provide usable components.
Prioritize compatibility, inspect for wear, and negotiate bulk discounts to minimize expenses.
When to buy versus build
When should one buy a ready-made pump instead of building one from scratch? The decision hinges on cost, reliability, and planned use.
If required performance, warranty, regulatory compliance, or long-term efficiency matter, purchasing is wiser.
DIY suits low-budget, experimental, or short-term needs where parts are cheap and skills suffice.
Compare total expenses, time, and failure risk before deciding.
Performance Enhancements and Upgrades
The section addresses practical upgrades to improve pump performance and reliability.
Simple modifications such as refitting impellers or adjusting pipe diameter can raise flow rate and head, while adding check valves, pressure switches, and filters enhances control and protection.
Options for converting manual hand pumps to motorized systems are outlined with attention to mounting, power selection, and safety.
Increasing flow rate and head with simple modifications
Experimentation can yield meaningful gains in a homemade pump’s flow rate and head through a handful of simple, practical modifications.
Increasing impeller diameter or trimming blade pitch improves displacement; smoothing and sealing housings reduces leakage.
Shortening suction lines and using larger discharge piping lowers friction losses.
Balanced, concentric assemblies and tighter clearances boost efficiency.
Test changes incrementally, measuring flow and pressure to confirm improvements.
Adding check valves, pressure switches, and filters
Adding check valves, pressure switches, and filters enhances a homemade pump’s reliability, safety, and water quality by addressing backflow, automated control, and particulate protection.
Install a spring check valve at the outlet to prevent reverse flow, a pressure switch to stop the pump at set PSI, and inline or cartridge filters to remove debris.
Select rated components and secure fittings to avoid leaks.
Converting hand pumps to motorized systems
Moving from installing valves and controls, attention shifts to converting manual hand pumps into motorized systems to improve flow rate, consistency, and ease of use.
The process involves selecting suitable electric or solar motors, coupling mechanisms, speed controllers, and mounting brackets.
Safety measures include proper grounding, waterproofing, and pressure relief.
Testing guarantees correct stroke timing, seal integrity, and reliable automated operation.
Practical Project Examples and Use Cases
Practical applications show how a homemade water pump can solve everyday water needs with simple, targeted builds.
The following examples illustrate common, real-world uses and help readers choose the appropriate design:
- Garden irrigation setup
- Rainwater harvesting transfer
- Emergency water transfer for households
- Filling livestock troughs
- Small-scale greenhouse misting
Garden irrigation setup
Several common garden irrigation setups can be powered by a homemade water pump, each tailored to scale, plant type, and water source.
Drip lines, soaker hoses, and micro-sprinklers distribute measured flows for beds, containers, and raised planters.
Pumps enable timed cycles with simple timers or float switches, maintain low-pressure systems, and support gravity-fed layouts when paired with elevated reservoirs for efficient, targeted watering.
Rainwater harvesting transfer
Harvested rainwater can be transferred efficiently with a homemade pump to fill cisterns, top off rooftop tanks, or feed gravity-fed irrigation systems.
Compact submersible units or simple diaphragm pumps driven by bicycle, hand-crank, or small electric motors suit different scales and energy availability.
Designs should include basic filtration, check valves to prevent backflow, and secure connections.
Sizing matches distance, elevation, and storage capacity.
Emergency water transfer for households
Beyond routine rainwater transfers, households facing power outages, floods, or broken mains can rely on simple homemade pumps to move potable and nonpotable water quickly and safely.
These devices enable rapid extraction from basements, cisterns, or temporary storage, support transfer to safe containers, and assist emergency sanitation.
Emphasis is placed on hygienic materials, manual or battery operation, and quick assembly with common parts.
Additional Resources and Schematics
The article now points readers to printable diagrams and precise measurements for common pump builds to aid accurate construction.
It also lists recommended tutorials and videos that demonstrate step-by-step assembly and troubleshooting.
Finally, vetted parts suppliers are identified for sourcing reliable components.
Printable diagrams and measurements for common builds
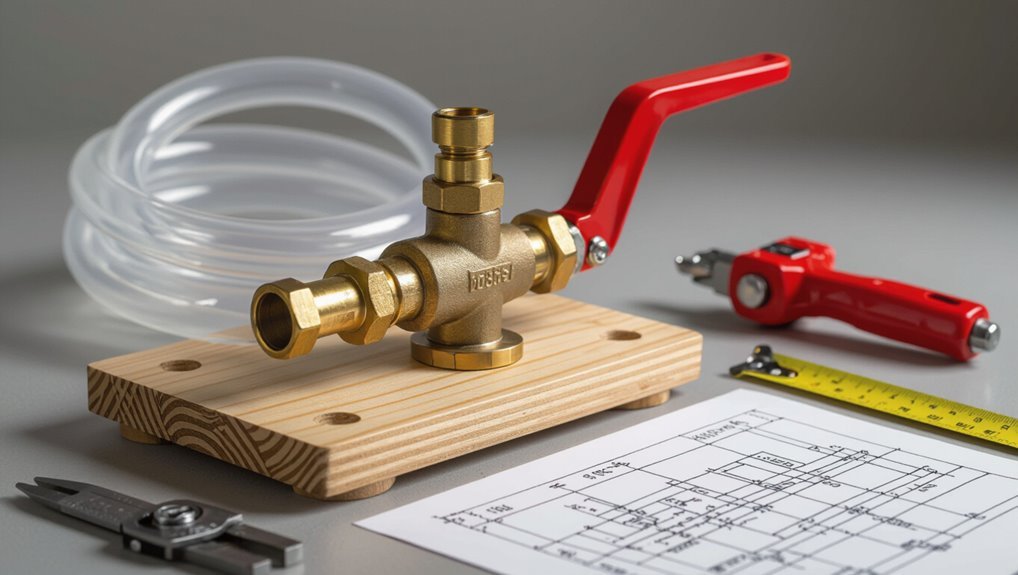
This section provides downloadable, printer-ready diagrams and exact measurements for several common DIY water pump designs, including piston, diaphragm, and centrifugal models.
Each PDF includes labeled parts, material lists, scale drawings, hole sizes, tolerances, and assembly notes. Templates fit standard sheet sizes for direct printing.
Metric and imperial units are provided, with revision dates and version control to guarantee build accuracy.
Recommended tutorials, videos, and parts suppliers
Further guidance is available through a curated selection of tutorials, step‑by‑step videos, and vetted parts suppliers that align with the pump designs presented earlier.
Recommended resources include practical guides, schematic walkthroughs, supplier links, and safety notes.
- Official DIY pump tutorial series
- Detailed video assembly walkthrough
- Printable schematic repository
- Trusted parts suppliers list
- Safety and testing checklist
Conclusion
The article closes by noting that a homemade water pump is more than tinkering; it is a small miracle of applied curiosity. Like a bridge built from household scraps, each pump connects intention to outcome, showing that resourcefulness can turn necessity into invention. Readers are reminded that careful design, proper materials, and safety respect transform simple parts into useful machines, and that learning through making yields skills that flow onward into other projects.