How to Fix a Squeaky Faucet Handle Fast: Step-by-Step Repair Guide
To quickly fix a squeaky faucet handle, follow these simple steps: First, shut off the water supply. Pry off the handle cap and remove the screw to lift the handle, exposing the cartridge or stem. Clean any mineral buildup with vinegar, inspect the O-rings, and apply plumber’s grease to the shafts and new O-rings. Reassemble the faucet, tighten the trim, and test the handle for smooth operation. If you still hear noise or notice leaks, you may need to replace the cartridge or consult for replacement parts.
What Causes a Faucet Handle to Squeak
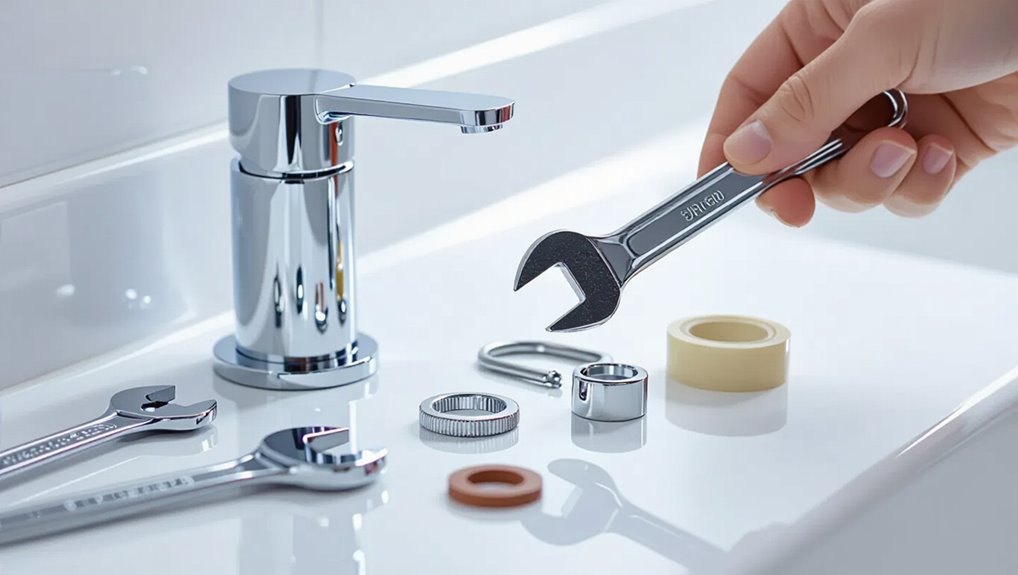
A squeaky faucet handle most often stems from mechanical issues such as worn parts, corrosion, or mineral buildup on moving surfaces.
The specific cause and repair approach vary by faucet type—cartridge, ball, ceramic disc, and compression designs each have distinct internal components that wear differently.
A brief, occasional squeak can often be resolved with cleaning or lubrication, whereas persistent noise, grinding, or loosened parts may indicate the need for cartridge or whole-faucet replacement.
Common mechanical causes (wear, corrosion, mineral buildup)
Identify the mechanical issues first: worn valve stems or seats, corroded cartridge components, and mineral deposits on moving parts are the usual culprits behind a squeaky faucet handle.
Wear roughens contact points, corrosion binds moving parts, and lime scales impede smooth rotation.
Understanding these failure modes clarifies how to fix squeaky faucet handle problems—cleaning, lubricating, or replacing affected components restores smooth operation.
Differences between cartridge, ball, ceramic disc, and compression faucets
When different faucet types—cartridge, ball, ceramic disc, and compression—are compared, their internal designs explain why handles squeak:
Cartridge units use a sliding stem and seals that wear;
ball faucets rely on a moving ball and rubber seats that shift;
ceramic discs rotate against each other causing friction if damaged;
compression faucets use stem threads and washers that produce noise when corroded or dry.
When a squeak indicates a minor issue vs. need for replacement
Distinguishing a minor squeak from one that signals replacement hinges on where the noise originates and how it behaves: fleeting, low-volume chirps tied to dry or loose parts usually respond to lubrication or tightening.
Whereas persistent, grinding, or worsening sounds often reflect worn internal components—like damaged seals, corroded stems, or degraded cartridges—that warrant part replacement or full faucet swap.
Routine inspection isolates source; replace if internal wear.
Quick Assessment: How to Diagnose the Source of the Squeak
A brief visual inspection should note loose screws, worn escutcheon plates, mineral buildup, and visible corrosion.
To isolate the noise, the guide recommends listening while running water, moving only the handle to distinguish handle or cartridge noise from flow or valve-body vibration.
A small toolkit—screwdriver, Allen wrench, adjustable wrench, cloth, and a flashlight—is suggested to perform the assessment safely and efficiently.
Visual inspection checklist
Before any disassembly, inspect the faucet from multiple angles to pinpoint the squeak’s origin: listen while moving the handle slowly, look for visible wear or loose parts, check for mineral buildup around the base and spout, and note whether the noise occurs with hot, cold, or both settings.
Also examine handle mounting screws, decorative caps, O-rings visible at the joint, and any wobble or corrosion.
How to isolate handle noise from water flow or valve body
Several simple tests can quickly determine whether the squeak originates in the handle assembly or from water flow and the valve body.
First, move the handle slowly with water off; persistent noise points to handle or cartridge.
Then run water with the handle static; if noise appears, it’s likely plumbing or valve body.
Isolate by testing hot and cold separately and noting patterns.
Tools and materials to have on hand for diagnosis
Gathering a few basic tools and materials simplifies diagnosing a squeaky faucet handle and prevents unnecessary disassembly.
A Phillips and flat screwdriver, adjustable wrench, Allen keys, and needle‑nose pliers enable quick access.
Lubricant (silicone grease), penetrating oil, clean rags, a small flashlight, and masking tape help identify contact points and mark positions.
A bowl catches small parts and runoff.
Fast Fix: Step-by-Step Repair for a Single-Handle Faucet
Before beginning repairs, the user is advised to shut off the water supply and protect the sink area to prevent spills and damage.
The process then involves removing the decorative cap and handle, inspecting and cleaning internal parts, and applying a suitable lubricant to moving components.
Finally, reassemble the faucet, test for smooth operation, and make any needed adjustments.
Safety and preparation (turn off water, protect sink area)
Shut off the water supply and clear the sink area to prevent leaks and protect surfaces before starting the repair.
Verify both hot and cold shutoff valves are fully closed and test faucet operation.
Place a towel or basin in the sink to catch small parts and water.
Gather required tools nearby and wear safety glasses and gloves to avoid debris and accidental cuts.
Remove decorative cap and handle safely
Loosen the decorative cap and handle with steady, controlled motions to expose the set screw beneath.
Use a flat screwdriver or coin to pry the cap gently, avoiding scratches.
Once exposed, insert the correct Allen or Phillips bit, turn counterclockwise until the handle lifts freely.
Support the handle while removing to prevent dropping, then place hardware in a small container for safekeeping.
Inspect and clean internal components
With the handle and decorative cap removed and set aside, the technician inspects the exposed cartridge, retaining clips, and surrounding seals for mineral buildup, corrosion, or wear.
They remove visible debris and limescale with a soft brush and vinegar solution, rinse components, and dry thoroughly.
Worn rubber seals or damaged clips are noted for replacement, and the assembly area is cleared of residue before reassembly.
Lubricate moving parts with recommended products
Apply a plumber’s grease specifically rated for potable-water faucets to moving parts to restore smooth operation and prevent wear.
A thin, even coat on the cartridge stem, O-rings, and cam plate reduces friction and seals. Avoid petroleum-based lubricants. Use silicone or NSF‑61‑approved greases.
Wipe excess, rotate the handle to distribute lubricant, and replace any damaged seals before reassembly.
Reassemble, test, and final adjustments
Begin reassembling the faucet by reversing the disassembly steps: seat the cartridge or ball assembly into the body, reinstall O-rings and cam components in their original positions, and secure retaining clips or nuts to the manufacturer’s torque specifications.
Reattach handle and trim, restore water supply, then slowly test operation for leaks and smooth motion.
Make minor alignment or tension adjustments until the handle moves quietly and seals properly.
Fast Fix: Step-by-Step Repair for a Two-Handle Faucet
For a two-handle faucet, the repair begins with shutting off the water and clearing the work area to prevent spills.
Each handle is then removed to inspect for worn packing, O-rings, or corroded parts that cause squeaks.
Cleaning the components, applying plumber’s grease or replacing damaged seals, and reassembling the handles followed by a test run completes the fast fix.
Shutoff and preparation
Before touching the faucet, the water supply must be shut off and the work area prepared to prevent leaks and protect finishes.
Close both hot and cold shutoff valves under the sink, then open handles to drain residual water.
Clear the sink, lay down towels and a basin to catch drips, and gather basic tools and a flashlight for inspection.
Removing handles and identifying worn parts
Loosen the faucet handle set screws and lift the handles off to expose the inner stem and escutcheon.
Inspect stems, cartridges, and valve seats for corrosion, mineral buildup, warping, or cracked seals. Note loose or stripped splines and worn threads.
Remove retaining nuts or clips to access cartridges or stems.
Photograph parts for reference and obtain matching replacements before reassembly.
Cleaning, lubricating, and replacing packing or O-rings
Begin by removing any remaining debris from the exposed stem and cartridge area using a soft brush and white vinegar to dissolve mineral deposits.
Inspect packing, O-rings, and seat surfaces; discard cracked or flattened seals.
Apply plumber’s grease sparingly to shafts and new O-rings.
Install correctly sized replacements, ensuring they seat without twisting.
Wipe excess lubricant and verify smooth manual movement before reassembly.
Reassembly and testing
Reinstall the cartridge or stem assembly into the valve body, ensuring alignment with any locating tabs or guides so the part seats fully and the O-rings remain in place.
Replace retaining nut, trim, and handle; tighten screws to manufacturer torque.
Restore water supply, open both handles slowly to purge air, inspect for leaks, and operate handles through full travel to confirm smooth, quiet function.
When to Replace Parts: Cartridges, O-rings, and Stems
Signs that O-rings, seals, or cartridges need replacement include visible cracking, persistent leaks after cleaning, or play in the handle that lubrication does not fix.
Accurate sourcing requires matching model numbers, measuring cartridge length/diameter and O-ring thickness, or photographing the part for retailer confirmation.
For most common cartridge types a straightforward swap—shut off water, remove handle and retaining clip, pull the old cartridge and install the new one—restores smooth operation.
How to tell if O-rings, seals, or cartridges are beyond repair
How can one determine whether O-rings, seals, or cartridges have reached the end of their useful life?
Inspect for visible cracks, flattening, hardening, or missing material on O-rings and seals.
Check cartridges for persistent leaks, rough operation, grinding, or internal corrosion despite cleaning and lubrication.
If performance doesn’t improve after basic maintenance, replacement is warranted to restore reliable, leak-free function.
Sourcing the right replacement parts (model numbers, measurements)
Locate the exact replacement parts by matching the faucet’s model number and measuring critical dimensions: cartridge type, stem length and diameter, and O-ring inner diameter and cross-section.
Consult manufacturer parts diagrams or online OEM catalogs for part numbers. Record measurements with calipers, note material (brass, plastic, rubber), and verify compatibility with mounting flanges and retaining clips before ordering to prevent mismatches.
Quick swap instructions for common cartridge types
Begin by turning off the water supply and removing the handle to expose the cartridge or stem assembly; this prevents leaks and provides clear access for a quick swap.
Identify cartridge type (ball, ceramic, or cartridge) then unclip retaining clips or unscrew bonnet nuts.
Withdraw old cartridge, inspect O-rings, fit new cartridge with correct orientation, replace seals, reassemble, restore water, test for smooth operation.
Recommended Lubricants and Cleaning Agents
For treating a squeaky faucet handle, a clear distinction is made between approved silicone-based greases, which are safe for rubber seals, and petroleum-based products that can degrade O-rings.
Mild acidic descalers formulated for plumbing are recommended to remove mineral buildup without harming metal finishes.
Harsh cleaners (strong acids, bleach, or abrasive powders) and solvent-heavy products that can damage seals and hardware finishes should be avoided.
Approved silicone-based greases vs. petroleum-based products
While both silicone-based greases and petroleum-based products can reduce friction, they differ markedly in compatibility, longevity, and effect on common faucet materials.
Silicone greases resist water, won’t degrade rubber or plastic seals, and last longer.
Petroleum oils can swell or deteriorate elastomers, attract dirt, and wash away more quickly.
Choose NSF/food-grade silicone or plumber-recommended formulations for safe, durable lubrication.
Safe descalers for mineral buildup
Address mineral buildup with descalers that dissolve calcium and lime without harming faucet finishes or internal seals.
Recommended options include diluted white vinegar, citric acid solutions, and commercial acidic descalers labeled safe for plumbing fixtures.
Apply briefly, rinse thoroughly, and test seals before reassembly. Use soft brushes to remove residue.
Follow manufacturer instructions and ventilate the area during treatment.
Products to avoid that damage seals and finishes
Avoid products that contain petroleum solvents, strong alkalies, or undiluted acids, as these can swell, dry, or dissolve rubber seals and strip plated finishes.
Avoid bleach, oven cleaners, acetone, brake cleaner, and concentrated drain openers.
Use only silicone-based faucet grease or NSF-61 approved lubricants and mild, pH-neutral cleaners.
Test on an inconspicuous spot before full use to protect seals and finishes.
Common Mistakes to Avoid During Repair
Common errors during faucet-handle repair include over-tightening screws until threads strip, applying incompatible lubricants or harsh chemicals, and installing mismatched replacement parts.
These mistakes can worsen leaks, damage finishes, or prevent proper operation. Careful selection of tools, products, and parts reduces the risk of causing further harm.
Over-tightening and stripping screws
Over-tightening faucet screws is a frequent cause of damaged threads and stripped heads, turning a simple repair into a time-consuming replacement.
Technicians should use appropriate torque, hand-tighten first, then finish with a short, controlled wrench turn.
Select correct screwdrivers to prevent cam-out. If a head begins to strip, stop immediately to avoid worsening the fastener and consider extraction tools or replacement hardware.
Using the wrong lubricant or cleaning chemical
Using an inappropriate lubricant or cleaning chemical can damage valve seats, seals, and finishes, turning a small maintenance task into a costly repair.
Harsh solvents dissolve rubber O-rings; petroleum-based greases swell neoprene and degrade plastic parts.
Use manufacturer-recommended silicone or plumber’s grease and mild, nonabrasive cleaners.
Test products on an inconspicuous area and rinse thoroughly to prevent residue-related wear.
Failing to match replacement parts
After using the correct lubricant and cleaners, attention must turn to replacement parts; mismatched cartridges, seals, or aerators often cause leaks, poor fit, or premature failure.
Technicians should verify model numbers, measure dimensions, and compare thread types before purchasing.
Using generic parts without confirming compatibility can void warranties and necessitate repeat repairs, increasing cost and downtime.
Preventive Maintenance to Keep Handles Quiet
Preventive maintenance keeps faucet handles operating smoothly and prevents recurring squeaks.
A regular schedule for cleaning and applying lubricant, combined with measures to control water hardness and mineral buildup, reduces wear on moving parts.
Observing signs such as stiffness, visible mineral deposits, or increased noise indicates when maintenance is needed.
Routine cleaning and lubrication schedule
Establish a simple quarterly routine to clean and lubricate faucet handles, which prevents buildup and reduces wear.
- Remove handle, wipe surfaces, and inspect for corrosion or loose parts.
- Clean pivot points and shallow crevices with a soft brush and mild cleaner.
- Apply a silicone-based plumber’s grease sparingly to moving surfaces.
- Reassemble, test for smooth operation, and note next quarter’s date.
Water quality measures to reduce mineral buildup
Keeping faucet handles quiet also depends on controlling the water that flows through them; mineral-laden water accelerates deposits that bind moving parts and wear seals.
Installing a whole-house water softener or targeted faucet-mounted filters reduces hardness.
Periodic flushes and vinegar-soak aerator treatments prevent buildup.
Testing water hardness guides appropriate treatment.
Softened or filtered water extends seal life and reduces squeak-causing friction.
Signs that preventive maintenance is needed
When faucet handles begin to require extra force, make intermittent noises, or respond sluggishly, these changes indicate that maintenance is becoming necessary.
Regular inspection spots early signs: visible mineral deposits, loosened screws, sticky movement, or slight leaks.
Scheduling lubrication, tightening, cartridge replacement, or descaling prevents worsening wear, preserves smooth operation, and reduces emergency repairs.
A brief quarterly check is typically sufficient.
Cost and Time Estimates for Repairs
A basic diagnosis and fix of a squeaky faucet handle typically takes an experienced DIYer 15–45 minutes, while more complex cartridge or valve work can require an hour or more.
Parts and simple tools generally cost $5–$40, with specialty cartridges or seal kits reaching $50–$100 and rental or purchase of higher-end tools adding more.
If the leak is persistent, the setup is unfamiliar, or the repair would exceed a homeowner’s comfort or time budget, a plumber is usually the more cost-effective choice.
Typical DIY time for diagnosis and fix
Although skill level and faucet type affect the outcome, most homeowners can diagnose and repair a common squeaky handle in 15–60 minutes.
Typical timing: 15–30 minutes for simple lubrication or tightening, 30–60 minutes for disassembly, cleaning, and reassembly.
Complex or corroded valves may take longer. Allow extra time for unfamiliar models and workspace setup; efficient preparation shortens the process.
Average cost of parts and tools
Typical expenses for fixing a squeaky faucet handle generally range from $5 to $40 for parts, with tools adding $0 to $50 depending on what is already owned.
Common parts include O-rings, cartridge washers, and lubricant.
Individual item costs:
- O-rings $2–$10
- Cartridges $10–$30
- Plumber’s grease $5–$10.
Total outlay typically stays under $60 for basic repairs.
When to call a plumber vs. DIY
Decide whether to tackle a squeaky faucet handle based on complexity, skill level, and the value of time:
Minor fixes (lubricant, tightening, replacing a cartridge) suit most DIYers, costing under $30 and taking 15–60 minutes.
Call a plumber for persistent leaks, corroded parts, unfamiliar valve types, or limited time—professional repair typically runs $75–200 and may require 1–2 hours.
Troubleshooting Table for Persistent or Recurring Squeaks
A compact troubleshooting table helps identify recurring squeaks by matching symptoms to causes and actions. The table below shows common examples and a quick test to confirm each issue. Users can follow the recommended action to resolve persistent noises efficiently.
| Symptom | Likely cause | Quick test |
|---|---|---|
| Handle squeaks when moved slowly | Dry or worn cartridge O-rings | Remove handle and inspect/lubricate O-rings |
| Squeak only on hot or cold side | Mineral buildup or worn seat | Operate only that side and check flow/restriction |
| Squeak returns after lubrication | Loose mounting or damaged parts | Wiggle handle and check for play |
Symptom, likely cause, quick test, recommended action
Use a concise troubleshooting table to match specific squeak symptoms with their most likely causes, a simple quick test to confirm the diagnosis, and the recommended corrective action. The table below summarizes common scenarios, diagnostic checks, and fixes for persistent faucet-handle noise.
| Symptom | Quick test | Recommended action |
|---|---|---|
| Intermittent squeak | Operate slowly | Lubricate cartridge/stem |
| Constant squeak | Inspect mounting | Tighten/replace bushing |
| Squeak under load | Swap handle | Replace worn valve |
| Click then squeak | Check screw | Secure/replace screw |
Conclusion
Like a well-oiled hinge on an old garden gate, a quiet faucet handle restores calm to the kitchen’s small choreography. With a quick diagnosis, targeted lubrication or part replacement, and mindful maintenance, the squeak fades into the background like distant rain. The homeowner moves through repairs confidently, turning noise into silence and preserving the steady rhythm of daily routines—simple, swift actions that keep water flowing smooth and soundless.