How to Clean a Water Dispenser: Step-by-Step Guide for a Sparkling, Germ-Free Unit
To keep your water dispenser clean and free from bacteria, mold, and mineral buildup, it’s essential to clean it regularly. Here’s a straightforward step-by-step guide to ensure your unit remains sparkling and germ-free.
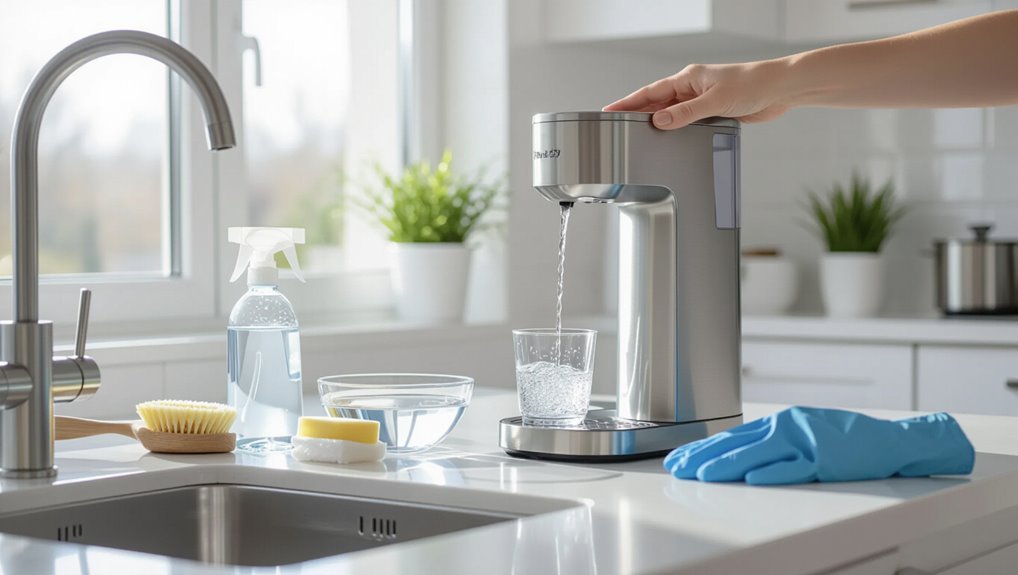
Materials Needed:
- Gloves
- Soft brush
- Towels
- Mild soap
- White vinegar or food-grade sanitizer
- Basin
Cleaning Steps:
- Unplug and Disassemble: Disconnect the unit from the power source and take it apart.
- Wash External Parts: Use mild soap and water to clean the external surfaces and the bottle cap.
- Sanitize Reservoir and Spigots: Use diluted bleach or a food-grade sanitizer to sanitize the reservoir and spigots.
- Rinse Thoroughly: Ensure all soap and sanitizer residues are completely rinsed away.
- Air-Dry: Let all parts air-dry completely before reassembling.
Maintenance Tip: Establish a routine cleaning schedule and refer to the manufacturer’s instructions for specific guidelines to keep your water dispenser in optimal condition.
Why Regularly Cleaning Your Water Dispenser Matters
A neglected water dispenser can harbor bacteria and mold that pose health risks to users.
Mineral and biofilm buildup also alters taste and reduces dispensing efficiency.
Regular cleaning—typically every 1–3 months depending on use—helps prevent contamination and maintains performance.
Health risks of a dirty dispenser
Although water dispensers seem benign, neglecting their maintenance creates conditions that promote microbial growth and chemical contamination.
Unclean units harbor bacteria, mold, and biofilms that can cause gastrointestinal illness, allergic reactions, and respiratory issues.
Leaching from degraded plastics or mineral buildup may introduce contaminants.
Regular how to clean water dispenser routines reduce infection risk and protect vulnerable individuals, including children and immunocompromised users.
How buildup affects taste and performance
Build-up of sediment, mineral scale, and biofilm in a water dispenser degrades taste and reduces performance by altering water chemistry and obstructing flow paths.
Accumulated residues impart off-flavors, odors, and cloudiness while clogging valves, filters, and tubing, lowering flow rate and increasing pump strain.
Reduced efficiency can shorten component lifespan and elevate maintenance costs, making routine removal essential to preserve water quality and device function.
Recommended cleaning frequency
Routine maintenance preserves water quality and extends equipment life.
Experts recommend cleaning external surfaces weekly, drip trays and nozzles biweekly, and full internal sanitization every 3 months.
Homes with heavy use, children, elderly, or immunocompromised occupants should sanitize monthly.
Bottled replacements warrant inspection at each change.
Adhering to this schedule minimizes biofilm, bacterial growth, odors, and mechanical issues.
What You’ll Need Before You Start
Before beginning, assemble the essential tools and materials such as clean cloths, brushes, a basin, and replacement filters.
Choose safe cleaning agents or proven alternatives like mild dish soap, white vinegar, or food-grade sanitizers, and follow manufacturer guidance for concentrations.
If the dispenser shows persistent odors, contamination, or mechanical issues, a professional service should be contacted.
Essential tools and materials
A few basic items and a couple of common household cleaners are sufficient to clean most water dispensers safely and effectively.
A checklist helps guarantee nothing is missed: gloves, soft brush or sponge, clean towels, a basin for rinsing, replacement drip tray if needed, and a sturdy bottle opener for sealed jugs.
- Gloves, sponge, towels
- Basin, brush, bottle opener
- Drip tray, replacement parts
Safe cleaning agents and alternatives
Choose mild, effective cleaners that remove biofilm and mineral deposits without leaving harmful residues: diluted household bleach (50–200 ppm), white vinegar, or unscented liquid dish soap are appropriate options, with commercial dispenser-safe sanitizers as alternatives.
Use measured dilutions, rinse thoroughly with potable water, avoid scented additives, and test surfaces.
For delicate finishes, choose manufacturer-recommended products to prevent damage or residue.
When to call a professional
Recognize situations that require professional assistance: persistent odors, visible mold deep inside the reservoir or tubing, malfunctioning dispensers (leaks, electrical faults, or faulty cooling/heating), repeated contamination after proper cleaning, or complex systems with integrated filtration that void warranties if disassembled.
In such cases, a qualified technician guarantees safe disinfection, repairs electronics, replaces sealed components, and documents work to maintain warranty and water quality.
Quick Safety Precautions and Preparation
Before cleaning begins, the dispenser should be unplugged and switched off to eliminate electrical risks.
The bottle must be removed and any remaining water drained from taps and reservoirs.
Surfaces beneath and around the unit should be protected to catch spills and prevent water from reaching outlets or cords.
Unplugging and turning off the dispenser
Unplug the water dispenser and switch off any integrated power controls to eliminate electrical risk while cleaning; this prevents short circuits and accidental activation of pumps or heating elements.
Verify power is fully disconnected by checking indicator lights and testing switches.
Allow any hot components to cool before proceeding.
Note ground-fault devices and circuit breakers remain part of overall safety checks.
Removing the bottle and draining remaining water
After confirming power is off and components have cooled, the bottle should be removed and any remaining water drained to prevent spills and reduce contamination risk.
Lift straight up to disengage, avoiding jerks that might rupture seals.
Tip remaining water into a sink using the dispenser taps or a container, then inspect the reservoir for sediments or leaks before proceeding with cleaning steps.
Protecting surfaces and avoiding electrical hazards
To protect nearby countertops and flooring, cover surfaces with absorbent towels or a waterproof mat and place a drip tray beneath the dispenser taps; this prevents water damage during cleaning and contains spills.
Unplug the unit and allow it to fully power down before cleaning.
Keep electrical cords dry, avoid leaning liquids near outlets, and use a flashlight for visibility rather than lamps that risk contact.
Step-by-Step Deep Cleaning for Top-Loading Dispensers
A clear, methodical approach guarantees a thorough deep clean of a top-loading dispenser.
First, removable parts are disassembled and the bottle cap and exterior wiped clean.
Next, the reservoir and internal surfaces are sanitized, spigots are cleaned and disinfected, then everything is rinsed thoroughly and reassembled.
Step 1 Disassemble removable parts
Begin by unplugging the dispenser and removing the bottle to eliminate power and water flow risks.
The user disassembles the faucet, drip tray, and reservoir cover, following manufacturer instructions and noting part placement. Small caps, gaskets, and screens are set aside for cleaning. Nonremovable components are left intact.
Collected parts are placed on a clean towel to prevent contamination or loss.
Step 2 Clean bottle cap and exterior areas
Next, attention shifts to the bottle cap and the dispenser’s exterior, areas prone to mineral deposits and grime buildup.
The cap is scrubbed with a soft brush and mild detergent, rinsed thoroughly, and air-dried.
External surfaces receive a nonabrasive cleaner and microfiber cloth, focusing on spouts, drip tray, and control buttons.
Inspect seals and hinges, replacing damaged parts as needed.
Step 3 Sanitize reservoir and internal surfaces
Following the exterior work, attention moves inward to the reservoir and internal surfaces where bacteria and mineral scale accumulate.
Drain remaining water, then mix a sanitizing solution (bleach 1 tablespoon per gallon or food‑grade sanitizer per label).
Scrub reservoir walls and hidden seams with a soft brush, rinse thoroughly until no sanitizer odor remains, and air‑dry fully before reassembly and replacing the bottle.
Step 4 Clean and sanitize spigots/taps
Remove the spigots and any removable tap components and inspect them for buildup or damage before cleaning.
Soak parts in a mild bleach solution or white vinegar diluted per manufacturer guidance for several minutes.
Scrub with a small brush, paying attention to nozzles and seals.
Rinse components thoroughly under running water, then air-dry on a clean surface prior to reassembly.
Step 5 Rinse thoroughly and reassemble
Begin by flushing the system with clean water to remove any residual cleaning solution and loosened debris, directing a steady stream through the reservoir, spigots, and internal channels until the water runs clear.
Dry all accessible components with a clean, lint-free cloth.
Reassemble seals, drip tray and spigots securely, ensuring proper alignment and tight connections to prevent leaks and contamination.
Step 6 Perform a final flush and test
With seals, spigots and the reservoir reassembled and dried, attention turns to a controlled final flush and operational check to confirm cleanliness and function.
Run several liters of water through each spigot until clear and odorless. Inspect for leaks, proper flow and secure fittings.
Taste-test briefly. If issues persist, disassemble suspect parts, repeat cleaning, then retest to guarantee hygienic, reliable dispensing.
Step-by-Step Deep Cleaning for Bottom-Loading and Bottleless Units
Before beginning, the differences between bottom-loading and bottleless units—such as hidden reservoirs, pumps, and in-line filters—should be noted to avoid damage.
The process then moves through careful disassembly of bottom-loading parts, cleaning of cooling and filtration areas, and sanitizing of taps and drip trays.
Finally, thorough rinsing, correct reassembly, and a functionality check guarantee the unit is safe and operating properly.
Differences to note before starting
Although both bottom-loading and bottleless water dispensers serve the same purpose, their internal layouts, access points, and disassembly requirements differ substantially. Recognizing these differences up front prevents damage and shortens cleaning time.
Inspect model-specific panels, valves, and tubing access. Note water source connections, pump locations, and filter placements.
Confirm required tools, replacement seals, and manufacturer guidelines to avoid voiding warranties.
Disassembling bottom-loading components
After noting model-specific access points and valve locations, the technician prepares to disassemble the bottom-loading unit for deep cleaning.
Panels are removed, fasteners stored, and the bottle carriage or reservoir lifted free.
Tubing connections are labeled and detached, drip tray and spout assemblies extracted.
All removable parts are collected for sanitizing; internal pumps and sensors are left intact for the next stage.
Cleaning the cooling/filtration area
Begin by cutting power to the dispenser and closing any inlet valves to isolate the cooling and filtration components; this prevents compressor operation and water flow while work proceeds.
Remove exterior panels per manufacturer instructions.
Vacuum dust from condenser fins, brush coils gently, and wipe accessible surfaces with a mild detergent solution.
Replace or clean filters, inspect seals and tubing, then reassemble and restore power, checking for leaks.
Sanitizing taps and drip trays
For bottom-loading and bottleless dispensers, sanitizing taps and drip trays requires systematic disassembly, cleaning, and rinsing to remove biofilm, mineral deposits, and surface contaminants.
Start by cutting power and closing water supplies. Then remove drip trays and any detachable faucet components following manufacturer guidance so each part can be soaked and scrubbed with an appropriate sanitizer before thorough rinsing and reassembly.
Use soft brushes to reach crevices.
Rinsing, reassembly, and functionality check
Flush the system thoroughly with clean water to remove any residual sanitizer or loosened debris before reassembly.
Rinse until water runs clear, then dry accessible parts.
Reinstall filters, reservoirs, and covers per manufacturer instructions.
Restore power and water supply, then cycle water through taps to purge air.
Verify cold/hot functions, check for leaks, and confirm normal flow and temperature stability.
Quick Clean Between Deep Cleans
A brief maintenance routine keeps a dispenser sanitary between full cleanings.
It should include a daily wipe-down of external surfaces, a weekly spot sanitize of high-use areas like faucets and buttons, and a simple monthly flush through the system.
These steps reduce buildup and extend the interval between deep cleans.
Daily wipe-down routine
Several times a day, a quick wipe-down keeps the dispenser hygienic between deep cleans.
Use a soft cloth dampened with mild detergent or a 1:10 vinegar solution, focusing on visible touchpoints.
Dry thoroughly to prevent residue.
- Top and bottle neck
- Faucet levers and spout
- Drip tray and surrounding surface
Weekly spot sanitize for high-use areas
Following the daily wipe-down, a weekly spot sanitize targets high-use areas that collect more grime and microbes between full cleanings.
Focus on taps, nozzles, drip trays, and push levers. Use a food-safe disinfectant or diluted bleach solution, apply, dwell per label, then rinse thoroughly.
Inspect seals and surrounding surfaces, remove visible buildup, and allow components to air dry before reassembling for safe use.
Monthly simple flush
Perform a monthly simple flush to clear accumulated sediment and reduce microbial buildup between full deep cleans.
The user empties the reservoir, fills with fresh water, runs each spigot until clear, then drains again. If equipped, briefly run the hot tank to cycle and discard.
Wiping accessible surfaces and replacing disposable drip trays completes this quick maintenance, preserving water quality and extending time between deep cleans.
Natural and Chemical Cleaning Options Compared
A comparison of bleach, white vinegar, and commercial sanitizers clarifies appropriate uses, safe dilution ratios, and trade-offs in effectiveness, odor, and material compatibility. The following table summarizes key dilution guidelines and pros/cons for each cleaning option. Readers should choose a method based on safety, surface compatibility, and desired disinfectant strength.
| Method | Dilution & Pros/Cons |
|---|---|
| Bleach | 1 tablespoon (15 ml) household bleach per 1 quart (1 L) water; strong disinfectant, may corrode metals and leaves odor. |
| White vinegar | Undiluted or 1:1 with water for mild cleaning; non-toxic, low odor, less effective against viruses/bacteria. |
| Commercial sanitizers | Follow label (often 1–3 tsp per gallon) and contact time; formulated for safety and efficacy but costlier and chemical-specific. |
Bleach vs. vinegar vs. commercial sanitizers
When choosing a method to sanitize a water dispenser, users weigh effectiveness, safety, cost, and environmental impact; common options include household bleach, white vinegar, and commercially formulated sanitizers.
Bleach offers strong, fast disinfection but requires careful handling and rinsing.
Vinegar is milder, biodegradable, and deodorizes but is less potent against some pathogens.
Commercial products balance efficacy, safety, and labeling for designated use.
How to mix safe dilution ratios
Having compared bleach, vinegar, and commercial sanitizers for effectiveness and safety, attention turns to precise dilution ratios for both natural and chemical options; correct proportions guarantee disinfection without leaving harmful residues or damaging dispenser components.
Recommended dilutions:
1 tablespoon (15 ml) household bleach per gallon (3.8 L) water;
1 part white vinegar to 3 parts water;
follow manufacturer instructions for commercial concentrates and never mix chemicals.
Pros and cons for each method
Compare natural and chemical cleaning options by weighing effectiveness, safety, cost, and material compatibility.
Natural agents (vinegar, baking soda) are safer, inexpensive, and eco-friendly but sometimes less effective against stubborn biofilm.
Chemical disinfectants (bleach, hydrogen peroxide) offer fast, broad-spectrum sanitation yet require dilution, ventilation, and careful rinsing to avoid residues and surface damage.
Choose based on contamination level and dispenser materials.
Troubleshooting Common Problems After Cleaning
After cleaning, common issues may still appear such as persistent odors or off tastes, leaks or dripping taps, and failure to cool or heat properly.
The guide outlines quick checks and simple fixes for each problem to determine whether further maintenance or professional service is needed.
Users should follow the steps systematically to isolate the cause and restore normal operation.
Persistent odors or tastes
Persistent odors or lingering tastes in a water dispenser often indicate microbial buildup, trapped residues, or chemical absorption in seals and plastic components.
The unit should be flushed, sanitized with food-safe bleach or vinegar solution, and thoroughly rinsed.
Replace old bottles, scrub removable parts, and air-dry.
If smell persists, replace rubber gaskets or plastic components and repeat sanitation to guarantee odor-free water.
Leaks and dripping taps
Inspect the dispenser for visible leaks or a continuously dripping tap, as these are common issues after cleaning that can stem from misaligned parts, worn seals, or residual debris.
Tighten loose fittings, reseat or replace faulty gaskets, and clear nozzle blockages.
Test each valve after reassembly.
If leakage persists, consult manufacturer guidance or a technician to prevent water damage and mold growth.
Dispenser not cooling or heating
Check basic power and settings first: verify the dispenser is plugged in, switches for cooling or heating are set correctly, and temperature controls haven’t been accidentally moved during cleaning.
If problems persist, inspect vents for dust, guarantee adequate ventilation, and confirm water bottle alignment.
Reset the unit per manufacturer instructions.
Persistent failure may indicate compressor or thermostat faults; contact qualified service to avoid voiding warranties.
Maintenance Tips to Keep Your Dispenser Germ-Free Longer
Routine habits extend a dispenser’s cleanliness beyond periodic washings. Proper bottle handling and storage, timely replacement of filters and worn parts, and placing the unit in a cool, well-ventilated area each reduce contamination risk.
The following tips outline practical schedules and placement choices to keep the dispenser germ-free longer.
Proper bottle handling and storage
Proper bottle handling and storage reduce contamination risks and extend the dispenser’s cleanliness between deep cleans.
Users should lift bottles by the neck, avoid touching the cap or neck, and wipe rims before installation.
Store spare bottles upright, capped, in a cool, dry, clean area away from chemicals and direct sunlight.
Rotate inventory by date to prevent prolonged storage.
Regular replacement parts and filters schedule
Several key components—filters, seals, and dispensing valves—require scheduled replacement to maintain sanitation and performance.
Replace carbon or sediment filters every 3–6 months, depending on usage and water quality.
Inspect rubber seals and gaskets quarterly, replacing when cracked or compressed.
Service or replace dispensing valves annually or at first sign of leakage or reduced flow to prevent bacterial buildup and mechanical failure.
Best placement and environmental tips
A few simple placement and environmental choices can greatly reduce contamination risks and extend the life of a water dispenser.
Position the unit away from heat, sunlight, and high humidity to prevent bacterial growth and worn seals. Guarantee stable, level surfaces and 4–6 inches clearance for airflow.
Avoid floor placement; use a raised, clean stand. Keep the surrounding area dust- and pest-free.
When to Replace Your Water Dispenser
Signs that a water dispenser needs replacement include persistent leaks, foul odors after cleaning, diminished flow, or rust and internal damage.
When considering a new unit, priority should be given to models with removable, dishwasher-safe reservoirs, sealed dispensing systems, and accessible filters for easier sanitation.
Additional useful features include antimicrobial surfaces, hot/cold temperature controls, and clear service indicators to promote long-term hygiene.
Signs it’s time for replacement
When does a water dispenser cross from serviceable to overdue for replacement?
Persistent leaks, cracked reservoirs, foul or recurring odors after thorough cleaning, altered taste, inconsistent temperature control, frequent breakdowns despite repairs, visible mold in inaccessible areas, and obsolete safety standards all indicate replacement.
If maintenance fails to restore reliable, sanitary operation, replacement is the prudent choice to protect health and convenience.
Choosing a hygienic model and useful features
Though replacement may be necessary, selecting a hygienic water dispenser can prevent many future problems.
Consider durable, easy-to-disassemble designs, certified materials, and self-cleaning features. Prioritize touch-free operation and antimicrobial surfaces to reduce contamination risk.
- Stainless steel or BPA-free plastics for safety and longevity
- Removable reservoirs and wide openings for cleaning
- UV or ozone sanitization and hands-free taps
Quick Reference: Cleaning Checklist and Schedule
A concise checklist and simple schedule guarantee a water dispenser stays sanitary and operating efficiently:
- Weekly: wipe exterior, clean drip tray, sanitize taps with diluted bleach or vinegar solution.
- Monthly: empty and flush reservoir, remove and clean bottle adapter, inspect seals and tubing for buildup.
- Quarterly: deep-clean with manufacturer-approved cleaner, replace filters, document maintenance date and findings.
Conclusion
Like a trusted garden fountain that, if left untended, will cloud and clog, the water dispenser requires small, steady acts of care to stay pure. Regular cleaning is the pruning that preserves flow; sanitizing is the sunlight that discourages moss. Neglect lets algae and bacteria take root, while routine attention keeps refreshment clear and healthful. Treat the machine as a living well—consistent, simple stewardship guarantees a sparkling, reliable source.