How to Adjust Mixing Valve Under Sink: Step-by-Step Guide to Fix Water Temperature
To adjust an under-sink mixing valve for optimal water temperature, start by shutting off the hot and cold water supplies and relieving any pressure. Identify whether your valve is manual or thermostatic, then locate the adjustment screw or temperature dial. Make small incremental adjustments and use a thermometer to test the outlet temperature after each change. Once satisfied with the temperature, secure the setting and check for any leaks. If the adjustments do not yield the desired results, inspect for blockages or worn parts. Following basic maintenance and safety guidelines will help ensure consistent performance. For further assistance, additional troubleshooting tips and parts information are available.
How to Adjust a Mixing Valve Under the Sink to Fix Water Temperature
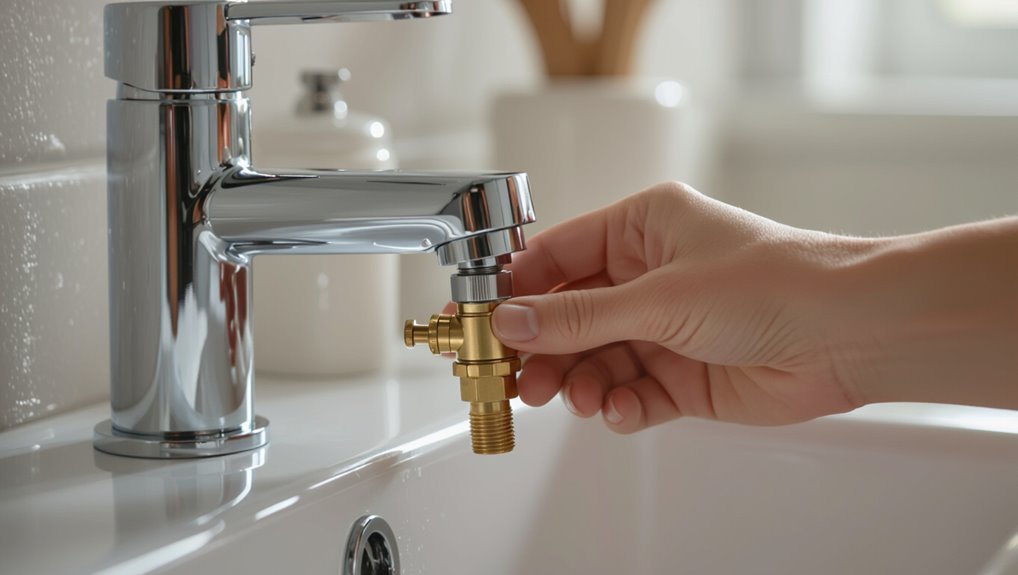
Adjusting the mixing valve alters the proportion of hot and cold water entering the faucet, correcting temperature that is too hot or too cold.
It is recommended when users notice inconsistent temperatures, sudden shifts, or when installing new plumbing fixtures.
Proper adjustment restores comfort and can prevent scalding or excessive cold.
Quick summary what adjusting the mixing valve will do and when to do it
Tuning the mixing valve balances hot and cold water to deliver a stable outlet temperature and can correct water that’s too hot, too cold, or fluctuates when other fixtures are used.
Adjusting how to adjust mixing valve under sink stabilizes comfort, prevents scalding, and reduces wasted water.
Perform adjustments when temperature swings occur, after water heater changes, or following plumbing repairs to restore consistent sink temperature.
How a sink mixing valve works
A sink mixing valve blends hot and cold water to maintain a safe, consistent outlet temperature and prevent scalding.
Common under‑sink types include thermostatic valves that regulate temperature automatically, pressure‑balancing valves that respond to supply pressure changes, and simple manual mixers.
These valves are typically mounted beneath the sink near the supply lines and include inlet ports, an adjustable control mechanism, and an outlet to the faucet.
Purpose of the mixing valve in residential plumbing
Mixing valves blend hot and cold water to deliver a stable, safe outlet temperature at a sink, preventing scalding and thermal shock while compensating for pressure or temperature fluctuations in the supply lines.
They protect occupants, preserve plumbing fixtures, and guarantee predictable tap performance.
Properly set valves reduce energy waste and maintenance by minimizing extreme temperature swings and prolonging valve and fixture lifespan.
Common types of under-sink mixing valves (thermostatic, pressure-balancing, manual)
Having established why consistent outlet temperatures matter, the next consideration is selecting the right valve type for a sink.
Thermostatic valves maintain a set temperature by blending hot and cold automatically.
Pressure-balancing valves react to pressure shifts, preventing sudden scalds during flow changes.
Manual mixing valves require user adjustment and offer no automatic compensation, making them simpler but less protective.
Typical locations and components to identify under a sink
Under the sink, the mixing valve typically sits between the hot and cold supply lines and the faucet tailpiece, often mounted near the back wall or on the cold-water shutoff assembly.
Visible components include the valve body, inlet fittings, outlet to the faucet, and any integrated cartridge or thermostatic element.
Also look for isolation valves, supply hoses, mounting brackets, temperature limit stops, and any pressure-balancing piston or cap.
Safety precautions before you begin
Before adjusting the mixing valve, gather required tools and materials and confirm familiarity with their proper use.
The water supply should be shut off and lines depressurized to prevent leaks or sudden hot-water discharge.
Protect cabinetry with towels or plastic and use heat-resistant gloves to prevent burns while working.
Tools and materials needed
A concise checklist of tools and materials helps guarantee the job proceeds smoothly and safely: adjustable wrench, screwdriver set, slip-joint pliers, plumber’s tape, replacement mixing valve (if required), bucket, towels, and safety glasses.
These items prepare the installer to access, adjust, and replace components while minimizing mess and risk.
- Basic hand tools and tape
- Replacement parts as needed
- Protective gear and cleanup supplies
Turning off water supply and relieving pressure
Shut off the cold and hot supply valves beneath the sink and confirm the mains is closed if individual shutoffs are absent.
Open faucet handles to drain remaining water and run until flow stops.
Place a bucket under the valve and loosen a fitting slightly to relieve trapped pressure.
Verify no dripping before proceeding.
Wear eye protection during depressurization.
Protecting surrounding cabinetry and preventing burns
With water pressure relieved and fittings checked, attention turns to protecting the cabinet and guarding against scalds.
Lay down absorbent towels and a waterproof tray to catch leaks. Shield wood with cardboard or plastic sheeting.
Wear heat-resistant gloves and safety goggles. Test water temperature slowly after adjustments.
Keep children and pets away until the system is stable and surfaces have cooled.
Step-by-step guide to adjust a manual mixing valve under the sink
The technician first locates the valve and identifies the adjustment mechanism. Then, he gains access by removing any panels, flashings, or insulation blocking the area.
Adjustments are made gradually—turning clockwise or counterclockwise in small increments—and the faucet temperature is tested after each change.
Once the desired temperature is reached, the setting is locked and the sink area is reassembled.
Locate and identify the adjustment mechanism
Before adjusting, one must locate the valve and recognize its adjustment mechanism beneath the sink.
The mixing valve typically sits near supply lines, often brass with hot/cold inlets labeled.
Identify a screw, plastic cap, hex or slotted stem, or dial used for temperature control.
Note direction markings, locking nuts, and any retaining clips before proceeding to adjustment steps.
Accessing the valve (removing panels, flashings, or insulation)
Access the valve area by clearing any obstacles under the sink so the adjustment mechanism is fully visible and reachable.
Remove cabinet panels, flashings, or insulation panels carefully, noting fastener types.
Use appropriate tools and support removed pieces to prevent damage.
If insulation is glued, peel gently to preserve material.
Keep removed parts and fasteners organized for reassembly after adjustments are complete.
Making gradual adjustments clockwise vs counterclockwise
With panels removed and the valve mechanism exposed, proceed to adjust the manual mixing valve using small, deliberate turns—clockwise to reduce hot water flow and counterclockwise to increase it.
Make quarter-turn increments, pause between adjustments to let flows stabilize, and note each position.
Avoid forcing the spindle; use steady pressure.
Record final setting for future reference.
Testing temperature at the faucet after each adjustment
Begin by running the faucet at a moderate flow and holding a metal or heat-resistant cup beneath the stream to collect water for measurement; this provides a consistent sample after each valve turn.
Use a calibrated thermometer, immerse it fully, wait until the reading stabilizes, record temperature, then make another small valve adjustment.
Repeat until desired temperature is reached, allowing stabilization between tests.
Locking the setting and reassembling the sink area
Tighten the valve’s locking nut or set screw to secure the adjusted position, then replace any retaining clips or bonnets removed earlier; this prevents accidental drift of the temperature setting.
Reconnect supply lines and tighten fittings with an appropriate wrench.
Restore access panels and tidy tools and debris.
Run water to verify no leaks, then retest temperature at the faucet to confirm final adjustment.
Step-by-step guide to adjust a thermostatic mixing valve (TMV)
The thermostatic mixing valve (TMV) is identified by its temperature scale, protective caps and built-in safety stops that limit maximum hot flow.
To adjust it, the technician removes protective caps, uses the temperature stop to set the maximum hot position, and fine-tunes the control to the calibrated maximum hot temperature.
Final confirmation is made by measuring the mixed outlet with a thermometer and readjusting until the target temperature is achieved.
Recognizing TMV features and safety stops
Identify the thermostatic mixing valve (TMV) by its compact, cylindrical body usually installed beneath the sink or within the vanity, noting inlet and outlet ports labeled or color-coded for hot, cold, and mixed water.
Observe adjustment controls, temperature scale markings, and any locking mechanisms.
Locate safety stops or limit screws designed to prevent scalding and note tamper-resistant features for compliance and user protection.
Removing protective caps and using the temperature stop
After locating the TMV and noting its adjustment controls and safety stops, the technician removes any protective caps covering the temperature stop or limit screw to expose the adjustment mechanism.
Using the correct screwdriver or wrench, the technician inspects the stop, verifies its orientation, and gently backs off or advances it to allow limited rotation during adjustment.
Then, the technician replaces the cap after confirming secure position.
Calibrating the desired max hot temperature
Begin by confirming that water supply valves are fully open and the TMV has reached normal operating temperature, as adjustments made on a cold valve can produce inaccurate results.
Rotate the temperature stop or adjustment screw incrementally toward hotter settings, noting detents. Allow stabilization between changes.
Limit maximum to a safe, code-compliant temperature. Lock the stop and replace protective cap once satisfied.
Verifying mixed outlet temperature with a thermometer
Use a calibrated thermometer to verify the mixed outlet temperature, placing the probe directly under the running tap so it measures the steady stream rather than splashing sides.
Allow flow to stabilize for one to two minutes, record temperature, and compare to the target setpoint.
If readings deviate, adjust the thermostatic mixing valve incrementally, retest after each change until the desired outlet temperature is consistently achieved.
Troubleshooting common problems and what adjustments won’t fix
When adjustments fail to change water temperature, possible causes include blocked cartridge, incorrect installation, or supply-side temperature limits.
Fluctuating temperature or pressure, sudden scalding or persistently cold water after adjustment, and visible leaks or corrosion indicate deeper issues beyond simple tuning.
These symptoms help distinguish problems that can be corrected by recalibration from those requiring repair or valve replacement.
No change in temperature after adjustment possible causes
If adjusting the under-sink mixing valve produces no detectable change in water temperature, several likely causes should be considered before assuming the valve is faulty.
Possible causes include blocked or clogged inlet screens, closed or partially closed stop valves, incorrect hot/cold supply connections, a failing water heater or thermostat, and internal cartridge seizure.
Verify supply flow and heater function before replacing the valve.
Fluctuating temperature or pressure issues
Diagnose fluctuating temperature or pressure by observing patterns and isolating variables: brief spikes or drops that occur only when other fixtures run suggest supply pressure swings or shared hot/cold demand, while random changes at a single outlet point to trapped air, a failing cartridge, or thermostat cycling.
Adjusting the under‑sink mixing valve rarely fixes supply pressure imbalances, blocked pipes, failing water heater components, or municipal fluctuations.
Scalding or overly cold water after adjustment
Check the mixing valve settings and recent adjustments immediately if users report scalding or overly cold water after changing the valve: such symptoms can result from incorrect temperature setpoints, a misaligned cartridge, or conflicting plumbing elsewhere rather than the valve itself.
Verify inlet supply temperatures, confirm hot/cold lines aren’t reversed, re-center the cartridge, and test with consistent flow.
Document findings before further changes.
Signs the valve needs repair or replacement
Recognize persistent performance issues that adjustments cannot fix: frequent loss of temperature control, visible leaks at the valve body or cartridge, hard-to-turn or seized handles, and repeated cycling between hot and cold despite correct inlet temperatures all indicate mechanical failure or internal wear.
Additional signs include sediment-clogged ports, corrosion, or damaged seals. When present, replacement or professional repair is recommended rather than further adjustments.
When to call a professional plumber
If the mixing valve is a complex model or located in a hard-to-reach spot, a professional should be contacted to avoid damage.
Repeated failures after adjustments signal underlying issues that warrant expert diagnosis.
Additionally, local codes may require a licensed plumber to install or replace anti-scald devices, making professional help necessary.
Complex valve types or inaccessible installations
Many homeowners encounter mixing valves that are unusually designed, corroded, or located in cramped cabinets or behind panels. These situations often exceed routine DIY adjustments.
In such cases, a licensed plumber evaluates unfamiliar cartridge types, integrated thermostatic units, or obstructed access requiring panel removal.
Professional service prevents damage, guarantees correct parts, complies with codes, and restores safe, reliable temperature control.
Repeated failures after adjustment
Persistent recurrence of incorrect water temperature after repeated adjustments signals a problem beyond simple calibration.
A professional plumber should be contacted when leaks, internal valve wear, debris-clogged cartridges, or inconsistent supply pressures persist.
Technicians can diagnose hidden issues, replace components, verify proper installation, and guarantee safe operation.
Home attempts risk damage or scalding; timely expert intervention prevents further failures and liability.
Local code requirements for anti-scald devices
When local plumbing codes mandate anti-scald devices—often in homes with young children, elderly residents, or in rental and public properties—a licensed plumber should be consulted to confirm compliance.
A professional guarantees correct device selection, proper installation, and verification of maximum outlet temperatures.
They will document compliance, handle permits or inspections, and reduce liability and recurrence of unsafe temperatures due to improper adjustments.
Preventive maintenance and tips to keep water temperature consistent
A routine inspection schedule helps identify wear or drift in the mixing valve before temperature problems arise.
Periodic tasks such as cleaning aerators, checking supply lines for leaks or kinks, and flushing to remove sediment keep flow and mixing consistent.
Seasonal measures, including winterizing exposed piping and watching for mineral buildup, further protect temperature stability.
Regular inspection schedule
Reliability depends on a predictable inspection schedule: inspecting the under-sink mixing valve every six months, with quicker checks after any plumbing work or temperature fluctuation, helps catch wear, mineral buildup, or loose fittings before they affect performance.
A concise checklist guarantees consistent monitoring and timely adjustments to maintain safe, steady water temperature.
- Verify valve body for leaks or corrosion
- Confirm adjustment locks and temperature stops
- Record readings and any corrective actions
Cleaning aerators and checking supply lines
Clean aerators and inspect supply lines regularly to sustain consistent water temperature and prevent flow restrictions that can skew mixing-valve performance.
Remove and soak aerators to clear mineral deposits, then test flow.
Check flexible hoses and shutoff valves for kinks, corrosion, or leaks; replace worn parts.
Confirm hot and cold feeds deliver balanced pressure before readjusting the mixing valve to guarantee stable temperature.
Winterizing and protecting against sediment buildup
Several simple steps can guard under-sink mixing valves from winter freeze damage and sediment buildup that disrupts temperature consistency.
Insulate exposed pipes and the valve with foam sleeves or heat tape, shut off and drain lines when unused, and install a sediment filter on the cold supply.
Periodically flush the valve and filter, and schedule annual inspections to catch corrosion or debris before they impair performance.
Quick reference charts and measurement tips
A compact chart listing recommended maximum outlet temperatures by use (infant care, bathing, general handwashing) offers quick guidance for safe settings.
Accurate measurement of mixed water temperature requires a calibrated thermometer placed at the tap flow after steady-state flow is reached.
Including both the chart and clear measurement steps helps users set and verify the mixing valve reliably.
Recommended maximum outlet temperatures by use
When setting a mixing valve, reference recommended maximum outlet temperatures by designated use to balance comfort and scald prevention. Typical limits guide settings: bathrooms, kitchens, laundry, and fixtures for vulnerable users differ. Use the chart below as a quick guide and adjust within local code ranges; prioritize lower temperatures where children, elderly, or impaired persons are present.
| Use | Max °F (approx.) |
|---|---|
| Bathroom sink | 120°F |
| Shower (general) | 110°F |
| Laundry/kitchen | 140°F |
| Vulnerable users | 105°F |
How to measure mixed water temperature accurately
How can one verify that a mixing valve delivers the desired outlet temperature? Use a calibrated digital thermometer at the tap, allow steady flow, and record readings.
Compare against target and local safety chart; adjust valve incrementally and retest until within tolerance.
- Place thermometer probe in center of stream, avoid splash
- Wait 30–60 seconds for stabilization
- Note ambient conditions and repeat tests
Parts, replacements, and cost estimates
A brief inventory of common replacement parts—cartridges, O-rings, springs, and temperature limit stops—helps identify what may be needed and whether a specific model requires OEM components.
Compatibility varies by manufacturer and model series, so matching part numbers or consulting the valve diagram is advisable.
Costs range from inexpensive DIY parts (typically $5–$50) to professional service and labor, which can raise total expenses into the $100–$300+ range depending on complexity.
Common replacement parts and model compatibility
Several essential components are commonly replaced in under‑sink mixing valves: cartridges, O‑rings and seals, check valves, temperature limit stops, and retaining clips or screws.
Compatibility depends on valve brand, model number, and mounting type; matching part numbers or OEM cross-references guarantees fit. Third‑party kits may work but require verification.
Typical sources include manufacturer, plumbing supply, or online retailers.
- Verify model-specific cartridges
- Match seal dimensions
- Confirm mounting hardware
Estimated cost ranges for DIY parts vs professional service
One common budgeting scenario separates DIY parts costs from professional service fees: replacement cartridges and O‑rings typically range from $10–$60, check valves and limit stops $5–$30, and full repair kits $20–$120.
Hiring a plumber adds labor and call‑out charges that commonly raise the total to $100–$400 depending on complexity and local rates.
Buyers should compare part prices, tool needs, and hourly labor.
Final checklist before finishing the job
The technician verifies steady hot and cold delivery at the faucet and inspects all joints for leaks before sealing the area.
Once the plumbing is confirmed sound, cabinetry panels are reinstalled and any insulation or under-sink liners replaced.
Finally, tools and debris are cleared and the workspace wiped down to complete the job.
Confirming stable temperature and leak-free connections
Begin by running both hot and cold water through the faucet for several minutes to verify the mixing valve holds a steady temperature and that all visible joints remain dry.
Observe temperature stability and watch for drips; retighten fittings if needed. Confirm no leaks at cartridge seals and supply connections.
- Monitor temperature for 2–5 minutes
- Inspect all fittings closely
- Tighten or reseal as required
Restoring cabinetry and tool cleanup
With temperature stability and leak-free connections confirmed, attention shifts to restoring the cabinet and cleaning tools.
The technician reinstalls insulation, secures panels, and verifies access. Tools are wiped, dried, and returned; waste is disposed responsibly.
A final visual inspection guarantees no drips or loose fittings remain before signing off.
- Replace insulation and fasten panels
- Clean, dry, and store tools
- Dispose of waste and final inspection
Conclusion
A homeowner, having adjusted a stubborn under-sink mixing valve, found the unexpected coincidence of perfect warm water arriving just as a visiting neighbor mentioned a cold shower mishap. The neat fix, done with simple tools and a careful turn of the screw, resolved both problems: steady temperature for dishes and relief for a friend. This small repair quietly proved how ordinary maintenance can align everyday comforts and community goodwill in surprising ways.