How to Install a Heat Pump Water Heater: Step-by-Step Guide for Homeowners
To install a heat pump water heater, start by selecting the appropriate size and location for your new unit. Ensure your electrical system can support it, and check for any necessary permits. Next, prepare the installation site by shutting off power and water, then drain and remove the old water heater. Set and level the new heat pump water heater, connecting the water lines, T&P relief valve, condensate drain, and a dedicated GFCI/AFCI circuit as per the manufacturer’s instructions. Once the unit is filled and powered on, conduct commissioning and leak checks. Additional steps and troubleshooting information can be found below.
What a Heat Pump Water Heater Is and Why Choose One
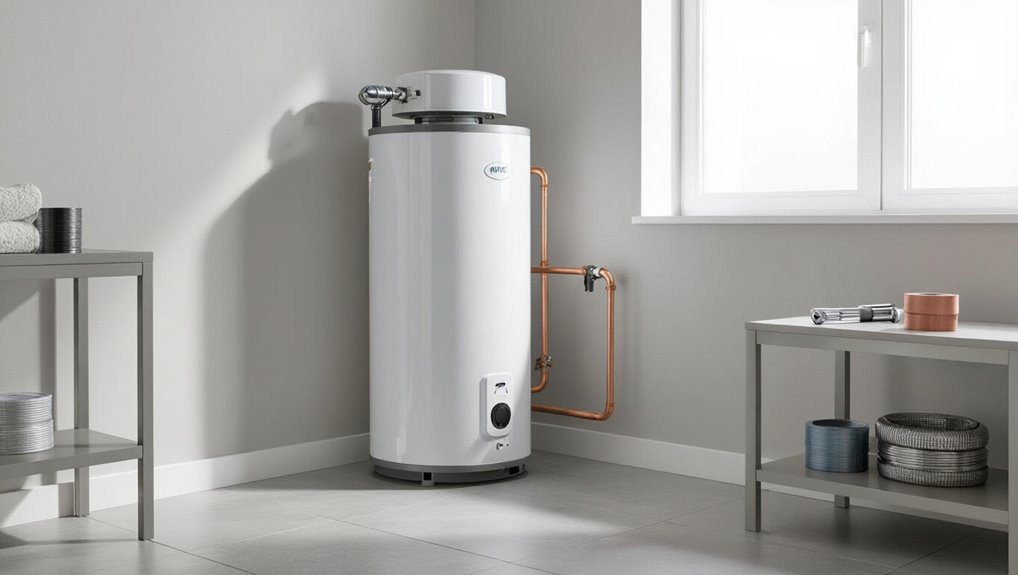
A heat pump water heater extracts heat from surrounding air and moves it into a storage tank, using electricity more efficiently than conventional resistance heaters.
Its higher energy efficiency can yield significant cost savings and lower greenhouse gas emissions, with options including integrated, split, and hybrid units that use electric backup.
Capacity and proper sizing are critical to match household demand and realize those efficiency and cost benefits.
How heat pump water heaters work
Describing a heat pump water heater begins with its core principle: it moves heat from surrounding air into water using a refrigeration cycle, rather than generating heat directly with electric resistance.
A compressor, evaporator, condenser, and expansion valve transfer thermal energy; sensors and controls maintain set temperature.
Understanding this operation helps homeowners follow how to install a heat pump water heater safely and correctly.
Energy efficiency, cost savings, and environmental benefits
With the refrigeration-cycle basics established, the focus shifts to why homeowners choose heat pump water heaters: superior energy efficiency, lower operating costs, and reduced environmental impact.
They typically use two to three times less electricity than conventional electric tanks, cutting utility bills and payback periods.
Reduced greenhouse gas emissions and decreased peak grid demand further justify adoption, especially when paired with renewable electricity sources.
Types and configurations (integrated, split, hybrid electric backup)
Heat pump water heaters come in several configurations—integrated (single-unit), split (separate indoor and outdoor components), and hybrid models with electric-resistance backup—each designed to match different installation constraints, climate conditions, and household hot-water demands.
Integrated units simplify installation. Split systems reduce indoor noise and allow outdoor heat exchange. Hybrids guarantee reliable high-demand performance via supplemental electric heating.
Common capacity and sizing considerations
Choosing the right capacity for a heat pump water heater hinges on household hot-water demand, recovery rate, and available installation space.
Evaluate peak hour usage, fixture counts, and simultaneous draws to select tank size (commonly 50–80 gallons for families).
Factor in recovery time, ambient room temperature for efficiency, and any future household changes.
Consult manufacturer performance curves and local codes.
Assessing Whether Your Home Is Suitable
Before installing a heat pump water heater, the homeowner should verify adequate space, clearances, and ventilation at the chosen location and consider whether the ambient climate and typical room temperatures will allow efficient operation.
Electrical capacity and dedicated circuit requirements must be confirmed, and placement options—utility room, garage, basement, or conditioned space—should be weighed for accessibility and performance.
Finally, local codes, permit needs, and available incentives should be checked to guarantee compliance and potential cost offsets.
Required space, clearance, and ventilation
How much room is available and how well it can ventilate determine whether a heat pump water heater will fit and operate efficiently in a particular home.
Measure floor area and ceiling height, allow manufacturer-specified clearances for service access, and guarantee 1,000–1,500 cubic feet of air exchange per unit or adequate passive/active ventilation.
Account for condensate drainage and noise separation from living spaces.
Climate and ambient temperature considerations
Because heat pump water heaters move heat from surrounding air into water, ambient temperature and local climate directly affect their efficiency and capacity.
Units perform best in spaces maintained between about 40–90°F; colder environments reduce recovery rates and may trigger backup electric heating.
Homes in cold climates need insulated, conditioned installation spaces or models rated for low-temperature operation to guarantee reliable year-round performance.
Electrical capacity and circuit requirements
When evaluating a home’s suitability for a heat pump water heater, the primary electrical considerations are available service capacity, dedicated circuit requirements, and panel space for a new breaker.
The unit typically needs a 240V dedicated circuit, appropriate breaker size, and correct wire gauge.
Verify main service amperage, existing load, and potential need for panel upgrade; consult a licensed electrician for calculations and permits.
Location options: utility room, garage, basement, conditioned space
Selecting the installation location for a heat pump water heater requires balancing space, ventilation, noise, and access considerations.
Utility rooms offer compact placement and existing plumbing; garages tolerate noise but need freeze protection.
Basements provide year-round temperature stability yet require condensate drainage.
Conditioned spaces maximize efficiency but may affect indoor humidity and noise.
Evaluate clearance, airflow, and service access.
Local codes, permits, and incentives to check
After choosing a likely placement, homeowners should confirm local building codes, permit requirements, and available incentives before proceeding.
Verify clearances, ventilation, seismic restraints, electrical and plumbing modifications, and noise limits.
Contact the local building department to obtain permits and inspection criteria.
Check utility rebates, federal/state tax credits, and manufacturer or utility financing.
Document approvals and incentive qualifications prior to purchase and installation.
Tools, Materials, and Safety Preparations
Before beginning the installation, the installer verifies a concise list of required tools and a materials checklist to guarantee all fittings, valves, and electrical components are on hand.
Appropriate personal protective equipment is assembled and clear safety steps are reviewed, including lockout/tagout procedures.
The installer also confirms how to isolate the unit by shutting off electrical power and closing the main water supply and local isolation valves.
Tools list
A clear, organized list of tools, materials, and safety gear is essential for a successful heat pump water heater installation; it guarantees the installer has everything on hand and reduces delays or unsafe improvisation.
Essential tools focus on plumbing, electrical, lifting, and ventilation tasks:
- Adjustable wrenches, pipe cutter, tubing bender
- Multimeter, voltage tester, wire strippers
- Appliance dolly, straps, gloves
- Safety glasses, respirator, hearing protection
Materials and parts checklist
With the necessary tools verified, attention turns to the specific materials and replacement parts that will be used during the heat pump water heater installation.
The checklist guarantees correct sizing and compatibility, minimizing delays and leaks.
- Tank fittings, dielectric unions, and isolation valves
- Appropriate refrigerant lines and insulation
- Dedicated electrical conduit, breakers, and wiring
- Condensate drain components and fittings
Personal protective equipment and safety steps
Don protective gear—safety glasses, insulated gloves, ear protection, and a respirator when cutting or soldering—and confirm that footwear is nonconductive and slip-resistant; these items reduce risks from electrical shock, hot surfaces, refrigerant exposure, and falling objects during heat pump water heater installation.
Inspect tools and hoses for damage, use GFCI-protected extension cords, keep a charged fire extinguisher nearby, and have a first-aid kit accessible.
Turning off power and water: isolation steps
After protective gear is in place and tools inspected, power and water isolation becomes the next step to create a safe work area.
The installer locates and shuts off the circuit breaker feeding the water heater, locks and tags it out if possible, then closes the main water shutoff and the local cold-water valve.
Drain pressure via a drain valve and verify zero power.
Pre-Installation Steps
Before beginning installation, the homeowner should confirm the correct tank capacity and physical dimensions to match household hot water demand and available space.
They must also verify electrical service capacity and plan wiring, prepare a level mounting area with proper floor support, and establish a clear condensate drain and overflow route.
Finally, required permits and inspection schedules should be identified and arranged to guarantee code compliance.
Measuring and selecting the right unit size
Accurate measurements and a clear understanding of household hot water needs are essential when selecting a heat pump water heater; this guarantees the chosen capacity and performance match usage patterns, space constraints, and local climate.
Calculate peak hour demand, daily gallon usage, and first-hour recovery needs. Measure installation footprint and clearance.
Compare tank capacities and coefficient of performance (COP) ratings to align efficiency with expected load.
Verifying electrical service and planning wiring
One essential pre-installation task is verifying the home’s electrical service and planning the wiring to guarantee the heat pump water heater can be powered safely and efficiently.
Inspect panel capacity, circuit breakers, and available amperage; confirm dedicated circuit requirements and local code compliance.
Determine conduit path, wire gauge, and disconnect location.
Consult an electrician for load calculations, permits, and safe integration with existing systems.
Preparing the mounting area and floor leveling
Prepare a clean, stable footprint for the heat pump water heater by clearing debris, removing unstable flooring, and confirming the chosen location meets clearance and ventilation requirements.
Inspect floor level with a spirit level; shim or pour a thin concrete pad where needed to achieve a flat, load-bearing surface.
Guarantee access for service, maintain a solid perimeter, and verify no soft spots remain beneath the unit.
Planning condensate drain and overflow path
Plan the condensate drain and overflow path before positioning the unit to guarantee safe, code-compliant removal of moisture and prevent water damage.
Inspect nearby floor drains, utility sink access, or approved exterior drainage. Size piping for expected condensate, include a trapped, vented route, and slope runs toward drain.
Provide an accessible overflow pan and route its discharge to a visible, permitted termination point.
How to obtain permits and inspections
Why start permit and inspection procedures early? Homeowners should contact local building departments to confirm required permits, codes, and documentation for heat pump water heater installation.
Obtain permits before purchase, schedule inspections for rough and final stages, and prepare site plans and electrical/mechanical details.
Verify licensed contractors are listed if required, pay fees, and keep records to avoid delays or enforcement actions.
Step-by-Step Installation Process
The installation begins with safely removing the existing water heater and preparing the space for the new unit.
Next steps cover positioning and leveling the heat pump water heater, connecting cold and hot water lines, and fitting the temperature and pressure relief valve plus an expansion tank if required.
Finally, condensate drainage and air intake/exhaust connections for split systems are installed and checked for proper routing and sealing.
Removing the old water heater safely
Begin by shutting off power and water to the existing unit: this guarantees a safe workspace before any disconnections.
Drain the tank via the drain valve into a suitable container or hose.
Disconnect electrical and plumbing connections, capping lines to prevent leaks.
Remove venting or flue components if present.
Carefully unbolt and lift the tank free, using help for heavy units and following local disposal regulations.
Positioning and leveling the new heat pump water heater
After the old tank is removed and connections are capped, attention shifts to placing the new heat pump water heater in its final location.
The technician guarantees clearance for airflow and service access, positions the unit on a level, stable surface, and uses adjustable feet or shims to achieve precise leveling.
Vibration pads and a condensate drain route are verified before proceeding.
Installing and connecting the water lines
Plumbing precision is critical when installing and connecting the water lines to a heat pump water heater. The installer shuts off supply, drains lines, and verifies fittings.
Cold and hot inlet/outlet connections are matched, using appropriate adapters, thread sealant, and copper or PEX tubing. Joints are tightened to manufacturer torque, lines supported, and system flushed to remove debris before final pressure testing and leak inspection.
Installing pressure relief valve and expansion tank (if required)
With the water lines secured and pressure-tested, attention turns to the safety devices that protect the tank and house plumbing: the temperature-and-pressure (T&P) relief valve and, where local codes or thermal expansion dictate, a thermal expansion tank.
Install a rated T&P valve into the tank outlet, run the discharge pipe to a safe drain, and fit an expansion tank on the cold supply with a properly adjusted air charge.
Installing condensate drain and air intake/exhaust (for split systems)
Several clear steps guide the installation of the condensate drain and the air intake/exhaust for split-system heat pump water heaters.
Locate a downward-sloping drain line to a safe disposal point or condensate pump; use PVC or PEX with a trap and cleanout access.
Mount intake and exhaust piping per manufacturer clearance, seal penetrations, install screened vents, and slope ducts slightly for drainage and airflow efficiency.
Electrical hookup: wiring, breakers, and grounding
Begin by verifying the home’s electrical service capacity and reviewing the manufacturer’s wiring diagram to determine required breaker size, conductor type, and grounding method.
Install a dedicated circuit with appropriately sized GFCI/AFCI breaker per code.
Route copper conductors in conduit, secure connections in a junction box, and torque terminals to spec.
Bond the unit to the grounding electrode system and label the breaker at the panel.
Filling the tank, venting air, and checking for leaks
After the electrical connections are secured and the breaker is labeled at the panel, attention turns to filling the tank, purging trapped air, and inspecting all fittings for leaks.
Open the cold supply slowly, allow the tank to fill until hot outlets flow, and cycle nearby faucets to expel air.
Visually and tactilely check all joints, valves, and the pressure relief connection; tighten or repair any seepage.
Initial startup, mode selection, and thermostat settings
Power up the unit and observe the startup sequence displayed on the control panel to verify proper operation and readiness.
Select heat pump mode for efficiency or hybrid/boost when rapid recovery is needed.
Set thermostat to 120°F (49°C) unless local codes or household needs dictate otherwise.
Confirm timer, vacation, and temperature lock settings.
Monitor for error codes during initial cycles.
Post-Installation Checks and Commissioning
After installation, the installer performs performance and safety checks to confirm correct operation and compliance with codes.
They verify temperature rise and recovery rates, conduct a leak test and insulate piping as required.
Finally, the installer documents the installation details and test results for warranty and inspection purposes.
Performance and safety checks
Begin commissioning by verifying that the heat pump water heater operates within manufacturer specifications and local code requirements; this guarantees safe, efficient performance and identifies installation errors before handover.
Inspect electrical connections, condensate drainage, refrigerant lines, pressure-relief valve, expansion tank presence, and insulation.
Confirm proper airflow, secure mounting, correct thermostat settings, and functioning safety controls.
Document readings and corrective actions for homeowner records.
Verifying temperature rise and recovery rates
With safety and system integrity confirmed, the technician next measures temperature rise and recovery rate to verify the heater meets performance specifications.
They record inlet and outlet temperatures under steady draw, calculate rise, then apply a standardized draw to time recovery to setpoint.
Results are compared to manufacturer data; deviations prompt diagnostics, refrigerant or thermostat checks, and documented readings for warranty and owner records.
Leak test and insulation of piping
Perform a thorough leak test on all refrigeration and water connections before insulating piping to guarantee system integrity and prevent concealed failures.
Check joints, valves, fittings, and fittings under pressure with appropriate detection methods.
Repair any leaks, re-test, then apply closed-cell insulation to refrigerant and hot/cold water lines.
Seal seams and support insulated runs to prevent condensation and heat loss.
Documenting installation for warranty and inspection
After confirming leak-free connections and properly insulated piping, the installer should compile thorough documentation to support warranty claims and forthcoming inspections.
Include model and serial numbers, installation date, photos of unit, clearances, electrical and refrigerant connections, pipe insulation, and test readings (pressure, temperature, cycle function).
Record installer credentials, applied settings, and owner handover checklist; provide copies to homeowner and manufacturer.
Troubleshooting Common Installation Issues
Common installation problems are flagged quickly during initial operation and require systematic checks to identify the cause.
Typical issues include no power or failure to start, inadequate hot water or slow recovery, excessive noise or vibration, clogged or leaking condensate drains, and leaks or abnormal water pressure.
Each symptom points to specific components or connections that should be inspected and tested methodically.
No power or unit not starting
When a heat pump water heater fails to power up or show any signs of life, the installer should methodically verify the electrical supply, controls, and safety interlocks before assuming a unit fault.
Check breaker, disconnect, and supply voltage; confirm proper grounding and neutral.
Inspect wiring connections, terminal tightness, and control board LEDs.
Test float switches, high-limit thermostats, and external safety devices for open circuits.
Insufficient hot water or long recovery times
If electrical supply and safety devices check out but the tank still fails to deliver adequate hot water or takes excessively long to recover, the installer should systematically assess capacity, heat source performance, and control settings.
Verify tank sizing for demand, inspect refrigerant charge and evaporator airflow, confirm thermostat setpoints and mode (economy/boost), check dip tube integrity and sediment buildup, and test backup element operation.
Excessive noise or vibration
Several sources can produce noticeable noise or vibration in a heat pump water heater installation, and identifying the origin quickly helps prevent damage and user complaints.
Technicians should inspect loose mounting bolts, unbalanced fan blades, compressor mounts, and piping contact with structure.
Tighten fasteners, add vibration isolators or foam padding, guarantee fan alignment, and verify unit level.
Replace worn mounts or damaged components as needed.
Condensate drain clogs or leaks
While addressing mechanical noise and vibration, attention should also turn to the condensate drainage system, a common source of service calls.
Inspect drains, traps, and tubing for blockages, algae buildup, or kinks. Verify slope and secure fittings to prevent leaks.
Flush lines periodically and install a trap primer or accessible cleanout. Replace damaged sections and confirm proper drainage to the designated disposal point.
Leak detection and water pressure problems
Begin by systematically checking joints, valves, and fittings for signs of leakage or pressure irregularities that can compromise heat pump water heater performance.
Isolate sections, observe static and dynamic pressure with a gauge, and inspect the pressure relief valve.
Repair or tighten detected leaks, replace faulty components, and flush sediment that affects pressure.
Verify supply pressure meets manufacturer specifications before concluding diagnostics.
Maintenance and Long-Term Care
A regular maintenance routine extends the life and efficiency of a heat pump water heater.
Recommended tasks include a yearly tank flush and anode rod inspection, periodic cleaning or replacement of air filters and coils, and specific cold-weather preparations or winterizing if the unit is in an unheated space.
The following section outlines a practical schedule and step-by-step guidance for each task.
Recommended maintenance schedule
Establishing a clear maintenance schedule guarantees a heat pump water heater operates efficiently and lasts as expected.
Inspections and simple tasks prevent failures and preserve warranty coverage.
Recommended cadence:
- Monthly: check condensate drain, clear debris.
- Quarterly: inspect air filters, clean as needed.
- Annually: professional system check, refrigerant and electrical inspection.
- Every 3–5 years: replace consumables and verify controls.
Flushing the tank and checking anode rod
With routine inspections in place, attention turns to the tank itself: flushing accumulated sediment and inspecting the anode rod are key to preserving capacity and preventing corrosion.
Periodic tank draining removes deposits that reduce efficiency; flushing yearly is typical.
The sacrificial anode should be checked every 1–3 years and replaced when heavily corroded to prolong tank life and prevent rust.
Cleaning or replacing air filters and coils
Regularly cleaning or replacing air filters and keeping coils free of dust is essential to maintain heat pump water heater efficiency and guarantee reliable operation.
Inspect filters monthly, wash or replace per manufacturer guidance, and vacuum coils gently to remove debris.
Clean coils improve heat exchange and reduce compressor workload.
Record maintenance dates and replace damaged filters or corroded coils promptly to prevent performance loss and premature failure.
Winterizing and cold-weather tips
Because heat pump water heaters rely on ambient air, protecting them from freezing temperatures is essential to maintain performance and prevent damage.
Install frost protection blankets or insulated enclosures, maintain a heated room or circulation loop, drain or winterize external condensate lines, and keep clear airflow around the unit.
Regularly check temperature settings, defrost cycles, and emergency backup elements before and during cold spells.
Costs, Savings, and Incentives
An overview of upfront and recurring costs frames the economic case for a heat pump water heater, typically including equipment, labor, electrical work, and any modifications to plumbing or space.
Estimated energy savings and typical payback periods help compare long-term operating costs to conventional electric or gas models.
Available rebates, tax credits, and financing options can markedly lower net installation costs and shorten the payback timeline.
Typical installation cost breakdown
A typical heat pump water heater installation ranges from modest to substantial in upfront cost depending on equipment, labor, and site modifications; most homeowners should expect to evaluate the unit price, installation labor, any required electrical or plumbing upgrades, and potential removal/disposal of the old tank. Cost elements: unit, labor, upgrades, disposal, permits.
| Item | Typical Range | Notes |
|---|---|---|
| Unit | $800–$3,000 | Size/efficiency |
| Labor | $500–$2,000 | Complexity |
| Electrical | $200–$1,500 | Panel/ wiring |
| Plumbing | $150–$800 | Reconfigurations |
| Disposal/Permits | $50–$300 | Local fees |
Expected energy savings and payback period
Estimate energy savings and payback by comparing the heat pump water heater’s higher upfront cost against its lower operating expenses and available incentives.
Typical units cut water heating energy use by 50–70%, reducing monthly bills substantially.
Payback periods commonly range from 3 to 10 years depending on local electricity rates, hot water demand, and installation cost.
Lifetime savings can be significant.
Rebates, tax credits, and financing options
Many homeowners qualify for multiple incentives that substantially lower the net cost of a heat pump water heater. Federal tax credits, state rebates, and utility programs often cover installation or equipment.
Income-based or low-interest financing and on-bill repayment can reduce upfront burden. Eligibility, application deadlines, and combined benefit limits vary; homeowners should verify current programs, required documentation, and contractor certification before purchasing.
When to Hire a Professional
Certain stages of a heat pump water heater installation—such as electrical wiring, gas line changes, and plumbing tie-ins—require licensed electricians or plumbers.
If unexpected leaks, inadequate venting, abnormal noises, or unclear code requirements arise, the homeowner should stop work and contact a professional.
When hiring, the homeowner should verify licenses and insurance, check references and recent installations, and ask about warranties, permits, and experience with heat pump models.
Tasks that require licensed electricians or plumbers
When installing a heat pump water heater, homeowners should recognize which tasks exceed typical DIY skills and require a licensed electrician or plumber.
Electrical panel upgrades, permanent 240V circuit wiring, gas line modifications, and any work involving pressurized plumbing or municipal code compliance are best left to professionals.
Additional required tasks include circuit breaker sizing, grounding and bonding, safe fuel shutoffs, leak-tested fittings, and permit-ready inspections.
Signs you should stop and call a pro
How can a homeowner tell when a heat pump water heater project has exceeded DIY limits?
If unexpected electrical issues, gas lines, significant plumbing modifications, structural alterations, or persistent leaks arise, stop.
If diagnostic codes persist, unusual noises, refrigerant handling, or required permits and inspections appear, contact a licensed pro.
Safety, code compliance, and warranty preservation justify professional intervention.
How to vet installers and what questions to ask
Who should install the heat pump water heater and how can a homeowner be sure they are hiring the right person? A qualified licensed plumber or HVAC technician with heat pump experience is recommended.
Ask for credentials, references, warranty details, and written estimates.
- License and insurance verification
- Relevant experience and references
- Detailed written estimate
- Warranty and service terms
Conclusion
A heat pump water heater can cut household water-heating energy use by about 60% compared with conventional electric resistance units, a striking statistic that underscores its appeal. Homeowners considering one should weigh site suitability, upfront costs, and maintenance needs described above. Proper installation and routine care maximize efficiency and lifespan; when uncertainty or complexity arises, hiring a licensed professional guarantees safety and performance. Overall, a heat pump water heater is a compelling, energy-saving investment.