
How to Tell If Your Septic Aerator Is Working: 9 Signs and Quick Tests
To determine if your septic aerator is functioning properly, look for steady airflow, a humming motor, visible bubbling in the treatment chamber, and an earthy smell instead of sewage. Check the airflow at the access point, inspect indicator lights, and compare the clarity of influent and effluent. Warning signs of a malfunction include strong odors, slow drains, excessive sludge, unusual foam, or a silent, warm unit. You can perform simple tests, such as checking power, airflow, dye, and effluent, to diagnose any issues. More details are provided below.
What the Septic Aerator Does and Why It Matters
Aerobic treatment relies on oxygen to support microbes that break down waste more completely than anaerobic systems, producing fewer odors and less sludge.
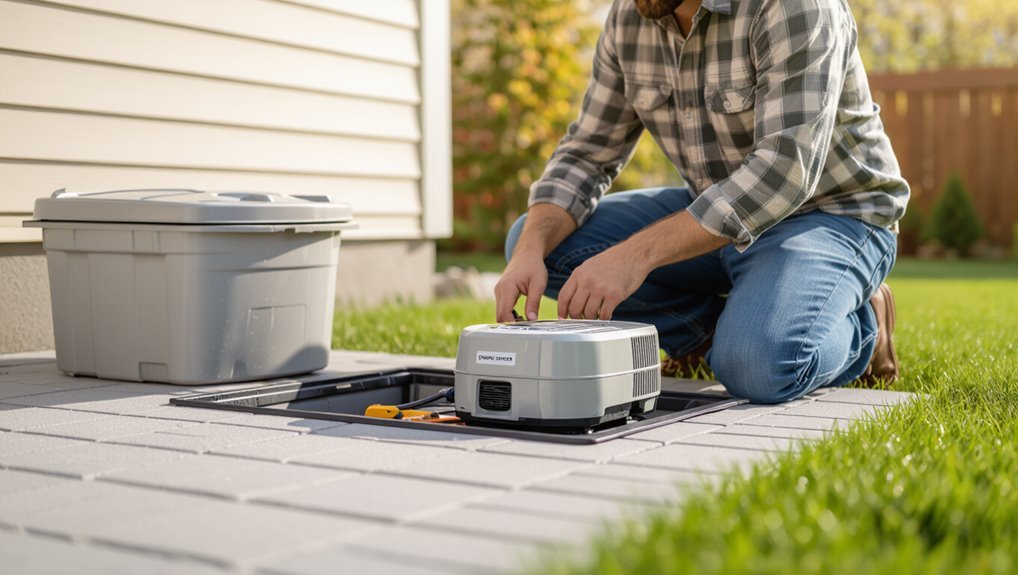
A septic aerator—usually an electrical compressor or blower mounted near the tank or in a control panel—forces air into the treatment chamber through diffusers and hoses.
Typical units last 5–15 years with routine checks, filter changes, and periodic service to prevent failures.
How aerobic treatment differs from anaerobic septic systems
How does introducing oxygen change septic treatment?
Aerobic systems use oxygen to boost bacteria that rapidly break down organic waste, reducing solids, odors, and effluent strength compared with slower, methane-producing anaerobic digestion.
Homeowners checking how to tell if septic aerator is working will notice clearer effluent, less scum, and faster recovery after high use; maintenance needs and energy use are higher than anaerobic systems.
Key components of a septic aerator and where it’s located
A septic aerator is a compact mechanical assembly that introduces air into the treatment tank to sustain oxygen-dependent bacteria.
Its primary components include an air compressor or pump, discharge tubing or diffusers, an electrical control box with timers or alarms, and filters or moisture traps to protect the blower.
Typically mounted on or near the tank lid or in a small external cabinet, it connects to interior diffusers and accessible service panels.
Typical lifespan and maintenance schedule
Reliability of a septic aerator hinges on routine care and component quality, with most residential units lasting about 5 to 15 years depending on use and maintenance.
Regular checks every 3–6 months, annual professional inspections, and timely replacement of worn diaphragms, valves, or compressors extend life.
Clean filters, guarantee proper ventilation, and address unusual noise or reduced airflow immediately to prevent system failure.
Quick Ways to Tell If Your Septic Aerator Is Working (Immediate Checks)
A quick series of sensory and visual checks can reveal whether an aerator is functioning properly or needs attention. Technicians and homeowners can assess motor noise, vibration, surface activity, odors, and control indicators to form an immediate impression.
These brief inspections help prioritize further troubleshooting or professional service.
- Listen for the steady hum or whir of the aerator motor—complete silence may indicate a power or motor failure.
- Feel for vibration at the access point and check airflow where possible to confirm the blower is running.
- Observe the aerobic treatment area or sprinkler for bubbling, foam, or water movement that signals active aeration.
- Perform a smell test for mild, earthy odors (healthy) versus strong sewage or rotten smells (failing), and check indicator lights or the control panel for error signals.
Listen for the aerator motor expected sounds and what silence means
When operating normally, the aerator motor emits a steady hum or soft whir that signals the impeller and air pump are running.
Sudden silence or an intermittent click-stop pattern usually indicates power loss, a seized shaft, or worn bearings requiring immediate inspection.
Absence of the expected sound warrants checking the breaker, power lead, and fuse, then arranging professional service to prevent system failure.
Check for vibration and airflow at the aerator access point
Although it may be quiet from the lid, tangible vibration and a steady stream of air at the aerator access point confirm the unit is delivering oxygen as planned; placing a hand lightly on the housing should reveal a mild, consistent buzz.
Feeling or using a small strip of tissue near the vent will show airflow. No vibration or air indicates clogged tubing, failed diaphragm, or compressor issues requiring inspection.
Observe surface activity in aerobic treatment area or sprinkler (bubbling, foam)
Feeling for vibration and checking airflow provides a direct confirmation of the aerator’s mechanical function; visual signs at the aerobic treatment area or sprinkler further validate biological activity.
Observers should look for steady bubbling, fine foam, or rippling across the surface—consistent, gentle agitation indicates oxygenation and microbial action.
Absence of such activity suggests reduced aeration or system issues requiring timely inspection or service.
Smell test identifying healthy vs. failing aerobic odors
How can odors reveal whether an aerobic septic system is functioning properly? A neutral, earthy or faintly musty scent near the treatment unit indicates aerobic activity.
Persistent rotten-egg, sewage, or strong sulfide smells signal oxygen deficiency, bacterial imbalance, or system failure.
Perform brief sniff checks around vents and access ports; detect sudden worsening and arrange prompt service to prevent backups and health risks.
Inspect indicator lights or control panel status
When checking immediately whether an aerobic septic aerator is functioning, inspect the unit’s indicator lights and control panel for clear signs: a steady green light typically denotes normal operation, flashing or red lights indicate faults or maintenance alerts, and an off panel suggests a power or equipment failure.
Note any error codes, consult the manual for meanings, and record status before resetting or calling service.
Nine Detailed Signs an Aerator Is Failing or Malfunctioning
A failing aerator often presents clear, observable signs that indicate reduced oxygenation and mechanical issues. Homeowners and technicians should watch for changes in sound, odors, sludge levels, drain performance, and surface conditions to identify problems early.
The following concise list highlights key warning signals to inspect promptly.
- No sound or visible movement from the unit
- Persistent strong sewage odors around the tank or drainfield
- Increased sludge accumulation or thicker scum layer
- Slow drains, backups, or unusual foam/oily sheen on the tank surface
No sound or movement from the unit
Silence or stillness around an aerator often signals loss of function: without audible vibration, gurgling, or visible paddle movement, the unit may not be introducing air into the septic tank as planned.
Immediate checks include confirming power to the circuit, inspecting wiring and breaker, examining for clogged intake or damaged impeller, and evaluating motor bearings; failure to restore movement warrants professional service or replacement.
Persistent strong sewage odors around the tank or drainfield
If foul, concentrated sewage odors persist around the tank or drainfield, it often indicates the aerator is failing to supply sufficient oxygen for proper waste breakdown.
Anaerobic conditions favor hydrogen sulfide and other malodorous compounds.
Persistent odors warrant inspection: check aerator operation, air delivery lines, and diffuser condition.
Prompt diagnosis prevents wider system impacts and limits nuisance smells.
Increased sludge accumulation or scum layer thickness
Increased sludge buildup and a thickened scum layer commonly signal that an aerator is underperforming, since inadequate oxygenation slows microbial breakdown and allows solids to accumulate.
Measured increases in sludge depth or a denser scum mat during routine inspections indicate reduced biological activity.
Persistent growth despite normal usage suggests aeration failure, compromised diffusers, or insufficient run time requiring prompt evaluation and corrective action.
Slow drains or backups in the house
Past the visible signs of thicker scum and accumulating sludge, underperforming aeration can soon affect household plumbing: slow drains or occasional backups often indicate the microbial breakdown in the tank has slowed enough that effluent leaving the system carries higher solids and biological oxygen demand.
Homeowners may notice sluggish sinks, slow flushing toilets, or gurgling pipes; these warrant prompt inspection of the aerator, tank levels, and filtration.
Unusual foam or oily sheen on the tank surface
A noticeable layer of persistent foam or an iridescent, oily sheen floating on a septic tank’s surface often signals that the aerator is not maintaining proper oxygenation and microbial activity.
This surface condition indicates disrupted bacterial breakdown, allowing fats, oils, and surfactants to accumulate.
Inspect aeration components, check diffusers for clogging, and test dissolved oxygen; corrective maintenance restores aerobic digestion and clears the film.
Frequent circuit tripping or blown fuses
Frequent circuit tripping or blown fuses often points to an electrical problem within the aeration system rather than normal wear.
Repeated trips indicate motor overload, short circuits, or wiring faults. Intermittent operation, buzzing, or heat at the control panel support electrical failure.
Prompt inspection of wiring, overload protection, and motor windings is advised; replacing faulty components prevents further damage and restores reliable aeration.
Rust, corrosion, or physical damage to the unit
Visible rust, corrosion, or physical damage on an aerator signals compromised integrity that can impair performance and shorten equipment life.
Corroded components may seize, leak, or allow moisture into electrical parts. Bent or cracked housings, damaged motors, and worn fasteners indicate urgent inspection.
Such defects increase failure risk, reduce reliability, and often necessitate repair or replacement to prevent further system harm.
Reduced effluent quality (cloudy, dark, solids)
How can one tell when an aerator’s oxygenation and mixing have faltered? Reduced effluent quality appears as cloudy, dark liquid and visible solids in tank or outlet samples.
Poor aerobic digestion allows suspended solids and odors to persist, slowing separation and increasing turbidity. Regular inspection and simple jar or clarity tests reveal deterioration, indicating maintenance or repair of the aeration system is needed.
Wet spots or unusually lush vegetation over the drainfield
Why are patches of damp ground or unusually vigorous grass often the first clue of aerator trouble? Saturated soil or exuberant vegetation signals effluent surfacing from a failing drainfield caused by inadequate aerobic treatment.
Clogged soil or reduced oxygen permits sewage to rise, nourishing plants. Prompt inspection of the aerator, distribution lines, and soil percolation prevents contamination, odors, and costly repairs.
Quick Diagnostic Tests You Can Do Yourself
The following quick diagnostic tests let a homeowner confirm basic aerator function before calling a pro. Each test is simple, safe when performed with common tools, and reveals specific failure modes. Results guide whether further inspection or service is needed.
- Power and wiring check: safe steps to confirm electricity to the unit.
- Vibration and airflow test: use a screwdriver handle or anemometer to detect motion and air movement.
- Dye/drop and effluent clarity tests: introduce a safe dye or sample effluent to observe circulation and turbidity.
- Smell and visual inspection checklist: note odors, surface scum, and component condition to corroborate other findings.
Power and wiring check safe steps to confirm electricity
Before touching any components, a basic power-and-wiring check can quickly indicate whether an aerator’s failure stems from an electrical issue rather than mechanical trouble.
Verify the circuit breaker and any GFCI outlets, look for loose or corroded connections at the control box, and confirm voltage at the motor leads with a multimeter.
If unsure, stop and consult a qualified electrician.
Vibration and airflow test with simple tools
Start by placing a hand lightly on the aerator housing and listening for steady motor vibration while observing any airflow from the outlet; consistent vibration with measurable airflow usually indicates the motor and impeller are functioning.
Next, use a simple tissue or strip of paper near the outlet to detect flow, and a handheld vibration meter or smartphone app to quantify frequency for comparison with manufacturer specifications.
Dye or drop test to observe aeration-induced circulation
Curious how to confirm that aeration is actually circulating tank contents? A non-toxic dye or food coloring drop near the aerator inlet reveals flow: watch from the inspection port or access riser for dye movement away from the insertion point.
Persistent localized color suggests poor circulation or dead zones. Repeat at multiple positions and after running the aerator to compare patterns and timing.
Basic effluent clarity test what samples to take and how to interpret
How can a homeowner quickly gauge whether an aerator is producing effective treatment?
Collect three samples: influent entering the aeration chamber, mid-chamber, and final effluent after settling.
Use clear containers, label and compare side-by-side in daylight.
Clearer effluent than influent suggests functioning aeration; persistent turbidity or sludge in final samples indicates poor aeration or settling, warranting further inspection.
Smell and visual inspection checklist for inspections
When performing a quick diagnostic, a homeowner can learn a great deal from smell and visual checks before calling a technician.
Inspect for sewage odors near lids, drains, or yard; bubbling or gurgling sounds; standing water, soggy patches, or unusually green grass; effluent discoloration or solids at lids; damaged, loose, or missing components.
Note time, location, and any rapid changes for technician reference.
When to Call a Professional and What to Expect
If home checks indicate persistent odors, no bubbles, electrical faults, or visible damage, a professional should be called to avoid safety and permitting issues.
A technician will inspect electrical connections, the compressor, diffusers, and backup batteries, and will evaluate whether repairs or a replacement are more cost-effective.
Homeowners should provide system history and records of prior maintenance to speed diagnosis and guarantee correct permitting and parts.
Safety and permit considerations for DIY vs. pro service
Because septic systems involve confined spaces, electrical components, and potential exposure to pathogens, evaluating whether a homeowner should attempt aerator maintenance requires careful attention to safety and local regulations.
Homeowners should verify permits, follow biosafety precautions, and confirm insurance coverage.
Complex repairs, confined-space entry, or electrical work warrant licensed professionals who can document compliance, secure permits, and provide liability protection.
What a technician will test (electrical, compressor, diffusers, batteries)
After deciding that a professional is appropriate, a technician will perform a systematic inspection focused on components that most commonly affect aeration performance: electrical supply and wiring, the compressor or blower motor, diffuser lines and discs, and any backup batteries or control panels.
They will measure voltage, continuity, compressor output and airflow, inspect diffuser integrity and blockage, and test battery condition and charger functionality.
Typical repair vs. replacement decisions and cost ranges
When should a homeowner expect a repair rather than a full aerator replacement?
Minor issues—clogged diffusers, worn belts, faulty check valves, or a failing compressor that’s serviceable—typically prompt repairs costing $150–$600.
Major problems—corroded tanks, irreparable compressors, or obsolete models—lead to replacement, often $1,500–$5,000 including installation.
Professionals assess age, parts availability, and long‑term cost before recommending action.
What to provide the technician (system history, previous maintenance)
If a homeowner calls a technician about an aerator issue, providing a concise system history speeds diagnosis and reduces labor time.
Include installation date, aerator make/model, service records, recent symptoms, alarm events, electrical work, tank pumping dates, effluent levels, and any DIY fixes.
Photographs, wiring diagrams, and access instructions further streamline troubleshooting and parts ordering.
Common Causes of Aerator Failure and How to Prevent Them
Common failures of septic aerators typically stem from electrical faults, mechanical blockages, environmental exposure, and misuse of chemicals that harm beneficial bacteria.
Effective prevention combines basic electrical safeguards, regular cleaning and diffuser checks, seasonal protection, and careful selection of household products. A short routine maintenance schedule with a few DIY tasks can greatly reduce failure risk.
- Electrical issues: check wiring, use surge protection, and confirm ground-fault protection.
- Clogs and diffusers: inspect and clean diffusers periodically; remove debris and buildup.
- Weather and winterization: insulate or shelter equipment and follow seasonal shutdown/startup procedures.
- Chemical exposure and maintenance: avoid harsh cleaners, preserve aerobic bacteria, and follow a simple inspection checklist.
Electrical issues and surge protection recommendations
Although septic aerators are mechanical devices, their performance often hinges on reliable electrical supply and proper protection against surges and wiring faults.
Electrical failures commonly stem from aged wiring, loose connections, tripped breakers, or capacitor/motor damage.
Install GFCI outlets, surge suppressors, and dedicated circuits with correct breakers.
Regular inspections by a qualified electrician and routine voltage checks reduce unexpected motor failures and downtime.
Clogs and diffuser maintenance best practices
Many septic aerator failures trace back to clogged air lines and fouled diffusers, which restrict airflow, reduce oxygen transfer, and stress the blower motor.
Regular inspection, gentle scrubbing of diffusers, and periodic air-line flushing with clean water or compressed air prevent buildup.
Replace damaged diffusers, use inline filters, schedule annual professional checks, and avoid chemical additives that accelerate clogging to maintain efficient aeration.
Weather-related damage and winterization tips
After addressing clogs and diffuser upkeep, attention should turn to weather-related threats that can impair aerator function.
Storms, flooding, lightning and wind can damage surface units or electrical connections; prolonged exposure accelerates wear.
In cold climates, freeze protection and insulated housings prevent diaphragm or motor failure.
Schedule seasonal inspections, secure mounting, clear drainage, and winterize power and vents to reduce weather-related outages.
Chemical and household product damage to aerobic bacteria
Chemical exposure poses a serious threat to the aerobic bacteria that drive septic aerators, since common household cleaners, solvents, and harsh chemicals can disrupt microbial activity or kill populations outright.
Bleach, antibacterial soaps, drain cleaners, pesticides, and high-concentration solvents reduce treatment efficiency, cause odors, and increase solids.
Limiting use, avoiding disposal down drains, and choosing septic-safe products helps preserve microbial balance and aerator performance.
Routine maintenance schedule and simple DIY tasks
Reliability of an aerobic septic system depends on regular inspection and a few straightforward DIY tasks; neglect is the most common cause of aerator failure.
Schedule monthly visual checks, clear vents, clean or replace foam filters quarterly, and verify blower operation.
Annually service diffusers and tighten electrical connections.
Avoid harsh chemicals, monitor water use, and document maintenance dates to prevent unexpected breakdowns.
How to Maintain and Extend the Life of Your Septic Aerator
A concise maintenance plan helps maximize aerator lifespan and prevent costly failures.
The text outlines monthly, quarterly, and annual checklists, essential spare parts to keep on hand, and proper cleaning methods for diffusers and air lines.
It also describes simple performance logs and warning signs to monitor between service visits.
Monthly, quarterly, and annual maintenance checklist
One clear maintenance rhythm—monthly, quarterly, and annual—keeps a septic aerator operating efficiently and prevents costly failures.
Tasks are concise, scheduled, and documented to catch wear early and preserve system performance.
- Monthly: inspect operation, clear vents, check electrical connections.
- Quarterly: clean diffusers, test airflow, tighten fasteners.
- Annual: professional inspection, replace worn seals, service motor.
- Record dates, observations, and actions.
Recommended parts to keep on hand
After establishing a regular inspection and service schedule, keeping a small inventory of replacement parts minimizes downtime when a component fails.
Recommended spares include air pump diaphragms or complete pumps, inlet/outlet valves, pressure/vacuum gauges, fuses and circuit breakers, flexible tubing, quick-connect fittings, and diffusers.
Stocking basic hand tools and a compatible gasket kit expedites simple repairs and reduces service calls.
Proper cleaning techniques for diffusers and air lines
Several simple, regular cleaning steps keep diffusers and air lines free of clogging and biofilm, preserving aerator performance and extending component life.
Inspect visually, shut power, and gently remove diffusers for brushing with a soft brush and diluted vinegar or enzyme cleaner.
Flush air lines with compressed air or water, replace cracked tubing, and reassemble.
Schedule periodic manual cleaning to prevent buildup.
Tracking performance: logs and signs to watch between services
How often are aerator inputs logged and what subtle changes should be noted between maintenance visits? Records should include runtime hours, pressure, airflow, alarm events, and power draws.
Technicians note gradual drops in airflow, rising motor current, intermittent cycling, odors, or surface scum.
Weekly or monthly entries detect trends; prompt investigation follows deviations beyond established baselines to prevent failure and maintain treatment efficiency.
Comparison of Common Aerator Types and Reliability Factors
Different aerator designs are compared here for lifespan, typical failure modes, maintenance needs, and differences in energy use and noise. The following table summarizes key trade-offs for common models to guide expectations and inspection priorities.
| Type | Expected Lifespan | Reliability Notes |
|---|---|---|
| Diffused-air (blowers) | 8–15 years | Sensitive to oil contamination; regular filter and belt checks needed |
| Rotary lobe (mechanical) | 5–12 years | Wear on seals and bearings common; periodic lubrication and seal replacement |
| Fine-bubble (membrane) | 7–20 years | Membranes can clog or tear; cleaning and occasional replacement required |
| Surface aerator | 4–10 years | Exposure-driven corrosion and motor burnout; keep clear of debris and check electricals |
Aerator type vs. expected lifespan, common failure modes, typical maintenance
One of the most useful ways to assess aerator reliability is by comparing types—diffused-air, mechanical surface, and venturi systems—against expected lifespans, common failure modes, and maintenance needs.
Diffused-air: 10–20 years, clogged membranes, compressor wear, periodic membrane cleaning and compressor service.
Mechanical surface: 5–15 years, bearings and motor failure, regular lubrication and impeller checks.
Venturi: 7–12 years, nozzle erosion, occasional inspection and debris removal.
Energy use and noise comparison for popular models
Why compare energy use and noise across aerator models? A concise comparison helps choose efficient, quiet options suited to site constraints.
Diffused-air systems often consume more power but run quietly; mechanical surface aerators can be louder with variable consumption.
Consider duty cycles, motor efficiency, decibel ratings, and maintenance needs.
Prioritize low wattage with acceptable noise levels for long-term cost and neighbor comfort.
Troubleshooting Scenarios and Stepwise Actions (Case-Based)
The following case-based checks guide a methodical approach to common aerator problems, pairing likely causes with targeted actions. Each scenario is presented with concise diagnostic steps and clear remedies to help isolate electrical, mechanical, or environmental issues.
Readers are encouraged to follow safety precautions and consult a professional if unfamiliar with electrical or septic work.
- No sound but unit warm to the touch: verify power at the outlet, inspect capacitor and wiring, test motor windings, and consider bearing/seizure replacement.
- Strong odors after a storm: check for surface scum disruption, inspect venting and drainfield saturation, allow recovery time or pump if necessary, and repair compromised seals.
- Circuit keeps tripping: isolate loads, test for ground faults and shorted motor coils, inspect capacitor and start relay, and replace faulty components or upgrade breaker if undersized.
- When uncertain or unsafe: shut power, document symptoms, and contact a licensed septic or electrical technician for diagnosis and repair.
Scenario: No sound but unit warm to the touch stepwise checks
If an aerator makes no audible noise yet feels warm, it likely receives power but may not be running correctly; check for blocked impellers or worn bearings by disconnecting power and inspecting the rotor, shaft, and air outlet.
Verify voltage at the unit, examine wiring and control floats, and test the motor with a known-good capacitor or replacement motor before ordering repairs.
Scenario: Strong odors after a storm diagnostics and remedies
After checking for mechanical issues when an aerator is silent but warm, attention should shift to situations where strong septic odors appear after heavy rainstorms.
Inspect lids and vents for flooding or backflow, verify drainage around the drainfield, and check manhole water levels.
Pumping or diverting surface runoff, repairing clogged outlet pipes, and scheduling professional inspection and pump-out resolve most post-storm odor incursions.
Scenario: Circuit keeps tripping isolation and resolution steps
Several common causes can make a septic aerator circuit repeatedly trip its breaker, including motor overload, shorted wiring, failed capacitor, or a partially seized impeller that draws excess current.
Isolate by switching off and unplugging, test continuity and insulation, check capacitor and motor current, inspect impeller for binding, and tighten connections.
Replace defective components and reset breaker; consult a licensed electrician if trips persist.
Final Checklist to Confirm Your Aerator Is Working Properly
The final checklist gives a concise set of actions to verify aerator performance before peak use and during emergencies. It separates routine pre-season checks from urgent measures for backups or sudden odors.
The list below highlights the four most important items to confirm functionality quickly and safely.
- Inspect power supply and audible vibration to ascertain the unit is running.
- Verify airflow and diffuser output for adequate oxygenation in the tank.
- Perform a quick visual and olfactory check for pooling, slow drains, or strong odors.
- Follow emergency steps: isolate water use, contact a septic pro, and record observations for diagnostics.
Pre-season checklist for spring/summer
1 clear walkthrough helps guarantee the aerator is ready before heavy spring and summer use.
Inspect housing, power connection, and float switches for damage. Clean intake screens and vents, remove debris.
Verify motor runs and airflow output with a simple bubble test at the diffuser. Confirm timer/settings and replace worn parts or seals.
Document maintenance date and schedule next inspection.
Emergency checklist for backups or sudden odor events
When did the problem start and how severe is it? Assess immediate risks: note backup locations, odor intensity, and any sewage surfacing.
Shut off nonessential water, avoid drains near the issue, and ventilate indoors.
Check aerator power and alarm indicators. Photograph conditions, record times, and contact a licensed septic service if backups persist, odors worsen, or electrical/aerator faults are evident.
Conclusion
Like a steady heartbeat beneath the floorboards, a working septic aerator keeps the unseen alive and balanced. It hums, breathes, and turns waste into quiet order, warding off sour storms and costly surprises. When signs flicker or tests falter, attention restores the rhythm; when maintained, the rhythm lengthens into reliability. The homeowner watches from the shore, reassured by the soft cadence of machinery that guards the household’s subterranean health.
