How Do You Know If You Have a Collapsed Pipe? 7 Clear Signs and What to Do Next
If you suspect a collapsed pipe, look for these clear signs: persistent sewage odors, multiple slow drains, unexplained backups, sudden low water pressure, sinkholes or wet patches in your yard, gurgling fixtures, and visible surface depressions. These indicators suggest a structural failure in your water or sewer line that may lead to blockages or leaks. To address the issue, avoid DIY digging; instead, document the symptoms and contact a qualified plumber for professional diagnostics and emergency shutoffs. Follow these steps to ensure a swift resolution and explore your repair options.
What a Collapsed Pipe Means for Your Home or Property
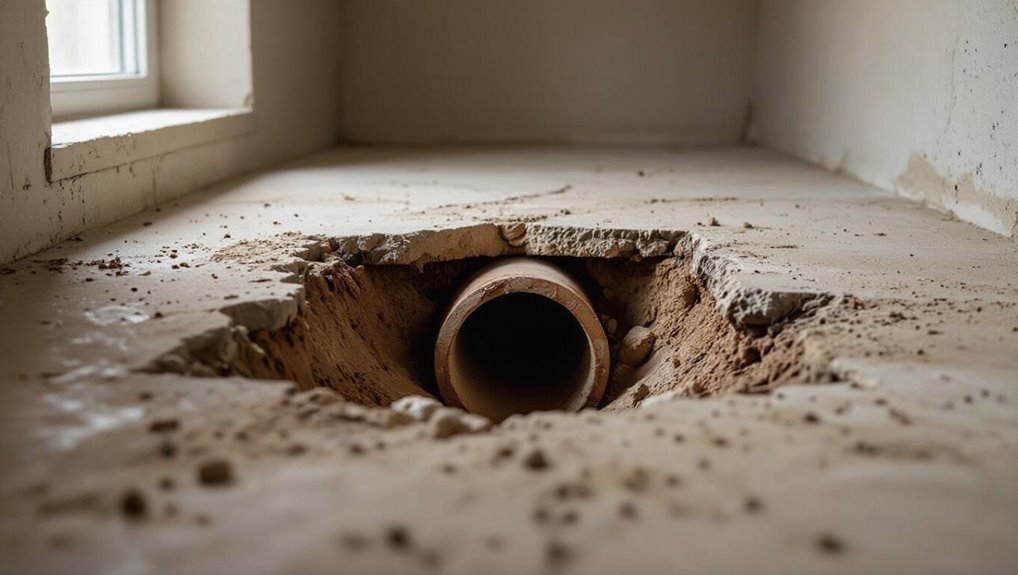
A collapsed pipe is a structural failure distinct from a burst, clog, or crushed section, and its effects depend on whether it affects sewer lines, drains, water supply, or underground mains.
Such failures commonly stem from age and corrosion, root intrusion, ground movement, or freezing, and can cause sewage backups, loss of water service, or soil instability.
Understanding the location and cause is essential to evaluating damage, repair urgency, and potential property impact.
Definition and difference between collapse, burst, clog, and crush
Distinguishing between a collapsed pipe, a burst pipe, a clogged pipe, and a crushed pipe helps homeowners understand the severity and likely remedies for each problem.
A collapse means structural failure, often sagging or blockage; a burst is a sudden rupture causing leaks; a clog restricts flow without structural damage; a crush results from external compression.
Signs answer how do you know if you have a collapsed pipe.
Common locations where pipes collapse (sewer, drain, water supply, underground)
Knowing whether a pipe has collapsed is only part of the picture; where the failure occurs determines its impact on the home or property.
Sewer collapses cause backups, odors, and contamination risks.
Drainline failures disrupt fixtures and landscaping.
Water supply pipe collapses reduce pressure, cause leaks, and threaten structural damage.
Underground mains affect multiple properties and require excavation and utility coordination for repair.
Typical causes of pipe collapse (age, corrosion, root intrusion, ground movement, freezing)
Collapse of household or municipal pipes typically stems from predictable physical and chemical processes: long-term aging and material fatigue, internal corrosion from water chemistry, aggressive root intrusion, shifting soils or settling, and freeze-thaw stresses.
Each mechanism weakens structural integrity, provoking cracks, deformation, joint failure, or full collapse.
Recognizing causes guides inspection, repair choices, and preventive measures like relining, replacement, or soil stabilization.
7 Clear Signs You May Have a Collapsed Pipe
Signs of a collapsed pipe often appear as sudden or persistent changes in a home’s plumbing performance and landscape. Homeowners should watch for the following alarming indicators that suggest a serious underground issue:
- Persistent foul odors and sewage smells near drains or yard
- Repeated slow drains or complete loss of drainage in multiple fixtures
- Sinkholes, depressions, or wet, soggy areas in the yard
- Unexplained sewer backups or toilet overflows
- Sudden, significant drop in water pressure or loss of water supply
Persistent foul odors and sewage smells near drains or yard
What does a persistent sewage smell around drains or in the yard indicate?
It often signals sewer gas escaping from broken or collapsed underground pipes, joints, or venting failures.
Odors concentrated near grates, cleanouts, or wet soil suggest leaks and organic waste reaching the surface.
Prompt inspection by a plumber or utility locator is advised to prevent health risks and greater structural damage.
Repeated slow drains or complete loss of drainage in multiple fixtures
Persistent sewage odors often accompany other functional issues with a home’s plumbing. Repeated slow drains or the sudden loss of drainage in multiple fixtures commonly follow when a main sewer line is compromised.
Water backs up unpredictably, toilets, tubs, and sinks drain sluggishly or not at all. Simultaneous blockages across the system indicate a shared downstream failure rather than isolated clogs.
Sinkholes, depressions, or wet, soggy areas in the yard
When a section of underground piping fails, the ground above may settle or become saturated, producing noticeable depressions, sinkholes, or patches of unusually wet, spongy soil in the yard.
These changes often appear suddenly or expand over time, signal underground erosion or collapse, and may coincide with foul odors or lush vegetation.
Prompt inspection and camera diagnosis can confirm pipe failure.
Unexplained sewer backups or toilet overflows
Sinkholes or soggy patches in the yard are often accompanied by more obvious plumbing symptoms inside the home: unexplained sewer backups and toilet overflows.
Persistent or worsening backups, multiple fixtures backing up simultaneously, gurgling drains, and sewage odors indicate a mainline collapse or blockage.
Immediate inspection by a licensed plumber using camera diagnostics is advised to confirm pipe integrity and prevent health hazards and structural damage.
Sudden, significant drop in water pressure or loss of water supply
If water pressure suddenly plunges throughout a home or water flow stops from multiple taps at once, it often signals a serious issue with the main underground line rather than a localized fixture problem.
A collapsed pipe can restrict or sever supply, causing widespread low pressure or complete loss. Immediate inspection by a qualified plumber or utility provider is necessary to locate the break and prevent further damage.
Gurgling sounds from drains or toilets and bubbling in toilets
A steady series of gurgles from multiple drains or bubbling in a toilet bowl often indicates trapped air moving through partially collapsed or blocked sewer lines.
Such sounds usually coincide with slow drainage, sewage odors, or intermittent backups. They suggest compromised pipe flow or a sagging section allowing air pockets.
Prompt inspection by a plumber or camera survey is recommended to confirm collapse and prevent worsening damage.
Visible cracks, bulges, or wet spots on walls, floors, or ceilings
Gurgling sounds and bubbling often precede more obvious, visible damage; when a pipe collapses, water and sewage can leak into surrounding structures, producing cracks, bulges, or damp patches on walls, floors, and ceilings.
Such signs may include peeling paint, warped drywall, soft floorboards, or mold growth.
Prompt inspection and containment limit structural damage and health risks while a professional assesses and repairs the failed pipe.
How to Quickly Assess and Confirm a Collapsed Pipe
The homeowner should start with quick interior checks—slow drains, gurgling sounds, and unusual wet spots—to gauge immediate signs of failure.
A brief yard and external inspection for sinkholes, wet patches, or misaligned fixtures can help locate an external collapse.
If basic troubleshooting and visible signs are inconclusive or hazardous, a professional inspection and camera survey is advised rather than further DIY attempts.
Immediate checks to perform inside the house
How can one quickly determine whether a pipe has collapsed inside the home?
Inspect visible drains and fixtures for slow drainage, gurgling, odors, or sudden backups.
Check ceilings, walls, and under sinks for fresh dampness, stains, bulging drywall, or pooled water.
Listen for unusual water flow or persistent low pressure.
Document findings, shut off affected water supply, and contact a professional plumber.
Yard and external inspection checklist
When evaluating the yard after suspected plumbing failure, focus on obvious external signs that indicate a collapsed pipe:
- sinkholes or sudden depressions;
- soft, spongy, or overly wet ground;
- unexplained pooling or muddy water;
- unusually lush vegetation strips;
- sewage odors outdoors;
- visible cracks in pavement or sidewalks;
- gurgling from outdoor drains;
- low water pressure across fixtures.
Document locations and avoid disturbing evidence.
When to call a professional versus DIY troubleshooting
Why investigate immediately? A rapid assessment distinguishes manageable issues from emergencies.
Homeowners can check visible collapse signs: persistent low flow, gurgling drains, wet spots, and audible leaks.
If multiple fixtures are affected, sewage odors, sinkhole formation, or suspect structural damage appear, a licensed plumber should be called.
Minor clogs or isolated slow drains may permit DIY camera rental or augering with caution.
Diagnostic Methods Professionals Use
Professionals rely on a set of diagnostic tools to confirm a collapsed pipe and determine the best repair approach. Typical methods range from direct visual inspection to non-invasive imaging, each carrying different costs, disruption, and certainty.
The choices often reflect the balance between urgency, property risk, and the homeowner’s tolerance for disturbance:
- fear of unseen damage revealed by a camera inspection
- anxiety over hidden leaks found through pressure testing
- dread of major disruption from excavation
- relief from confirming issues with ground-penetrating radar
- frustration when multiple tests are needed for a clear diagnosis
Camera inspection (sewer scope): what it shows and how it’s done
Although invisible from the surface, a collapsed or damaged sewer line can be directly assessed with a camera inspection (sewer scope), a diagnostic method that feeds a waterproof camera through the pipe to record real-time video and still images.
Technicians identify collapses, cracks, root intrusion, offsets, blockages, and pipe material. The inspection pinpoints location, depth, and severity, guiding repair or replacement decisions.
Leak detection and pressure testing
Detecting leaks and verifying pipe integrity often requires methods beyond visual inspection: technicians use acoustic listening devices, tracer gases, infrared cameras, and controlled pressure testing to locate breaches and measure leak rates.
Data from these tools identify leak positions, estimate flow loss, and determine whether pressure drops indicate fractures, joint failures, or worn seals. Results guide repair scope and urgency.
Excavation and exploratory digging
When noninvasive diagnostics indicate a significant breach or ambiguous damage location, contractors often proceed to excavation and exploratory digging to confirm pipe condition and expose failures for repair.
Crews remove soil selectively, shore trenches, and uncover joints, bellies, collapses, or root intrusion. Visual inspection, manual probing, and localized replacement follow.
Documentation and temporary shoring minimize additional disturbance and safety risks during assessment.
Ground-penetrating radar and other non-invasive options
Ground-penetrating radar (GPR) and allied non-invasive techniques offer a fast, low-disturbance way to locate collapsed or compromised underground pipes before any digging begins.
Technicians combine GPR, sonar for submerged lines, electromagnetic pipe locators, and infrared thermography to map anomalies, detect voids, and identify leaks.
Reports guide targeted repairs, reduce unnecessary excavation, and verify pipe condition with minimal surface disruption.
Short-Term Emergency Actions to Reduce Damage
When a collapsed pipe causes sewage backup, immediate steps focus on stopping flow and protecting living areas by blocking affected fixtures and removing valuables.
The water supply should be shut off and isolation verified at the main valve before any repairs proceed.
Professionals may apply temporary patches or bypass lines while observing strict safety and health precautions, including proper sewage handling and use of PPE.
Steps to stop sewage backups and protect living areas
Shut off water sources and contain the affected area immediately to halt further sewage intrusion and limit contamination.
Remove people and pets, block traffic to contaminated zones, and protect undamaged rooms with plastic sheeting and towels.
Elevate salvageable belongings, turn off non-essential electricity in wet zones, and use fans and dehumidifiers once safe.
Document damage and call professionals for cleanup and repairs.
How to shut off water supply and verify isolation
Locate the main shutoff and close valves to stop water flow immediately, ensuring isolation of the damaged section.
Confirm isolation by opening a nearby tap to drain residual water and checking meter activity; no movement indicates successful shutdown.
Tag the valve and notify occupants.
If external or building supply valves are accessible, shut them and contact the utility or a licensed plumber for verified isolation and further instructions.
Temporary fixes professionals might implement (patches, bypass lines)
Immediate temporary fixes performed by professionals aim to stop active leaks and maintain service to unaffected areas while a permanent repair is arranged.
Technicians may apply mechanical clamps, epoxy wraps, or rubber patch kits to seal breaches temporarily.
For severed runs, they can install bypass lines or temporary couplings to reroute flow.
These measures minimize damage and buy time until full excavation and replacement occur.
Safety and health precautions (sewage handling, PPE)
After applying temporary clamps or bypass lines, attention must turn to safety and health to limit exposure to sewage and contaminated water.
Workers should wear impermeable gloves, boots, eye protection and N95 or higher respirators when aerosols are present.
Restrict entry, ventilate affected areas, and use disinfectants on surfaces.
Dispose of contaminated materials per local regulations and seek medical advice for exposure incidents.
Repair and Replacement Options with Pros and Cons
Repair and replacement choices vary by condition, budget, and acceptable disruption, so the homeowner should weigh methods, costs, and expected service life. Trenchless techniques like pipe lining or bursting reduce surface damage but have trade-offs in suitability and longevity compared with full excavation. Sectional repairs can save money short-term, while full-line replacement often offers the longest lifespan.
| Option | Typical Cost Range | Disruption / Lifespan Implication |
|---|---|---|
| Trenchless (lining/bursting) | Moderate–High | Low surface disruption; lifespan often 50+ years for lining, variable for bursting |
| Traditional excavation & replacement | High | High disruption during work; typically restores full original lifespan |
| Sectional repair vs full-line replacement | Low–High (depending) | Sectional = lower cost/shorter lifespan; full-line = higher cost/longer-term solution |
Trenchless pipe repair (pipe lining, pipe bursting)
When replacing or fixing a collapsed pipe without extensive excavation, trenchless methods such as pipe lining and pipe bursting offer minimally disruptive alternatives to traditional dig-and-replace work; each technique has distinct advantages and trade-offs depending on pipe condition, access, and long-term goals.
Pipe lining relines existing sewer with cured-in-place pipe for fewer digs but slightly reduced diameter;
pipe bursting replaces pipe fully yet requires access pits and may shift nearby utilities.
Traditional excavation and pipe replacement
Traditional excavation and pipe replacement involves digging to expose the damaged line, removing the failed section, and installing new pipe—often PVC, ABS, or ductile iron—matched to the system’s size and load requirements.
This method provides permanent restoration and allows full inspection.
It is disruptive, time-consuming, and costly due to excavation, landscaping repair, and potential utility relocation, but widely applicable for severe collapses.
Sectional repair versus full-line replacement
Several common options exist for addressing a collapsed pipe: sectional repair, which targets only the damaged segments, and full-line replacement, which renews the entire run.
Sectional repair conserves material and time, preserving unaffected pipe.
Full-line replacement eliminates hidden defects and restores uniform integrity.
Choice depends on remaining pipe condition and long-term reliability goals, balancing targeted fixes against thorough renewal.
Cost ranges, disruption level, lifespan implications
Choosing between sectional repair and full-line replacement also requires weighing costs, disruption, and expected service life.
Sectional repairs typically cost less upfront, limit excavation, and restore segments for 10–25 years.
Full-line replacement is pricier, causes greater short-term disruption, but often yields 50+ years of reliable service.
Decision balances budget, tolerance for disturbance, and long-term infrastructure goals.
How to Choose the Right Plumber or Drain Specialist
When selecting a plumber or drain specialist, homeowners should prepare a brief list of questions for the initial call to clarify experience, timing, and expected costs.
They should verify credentials, insurance, and any workmanship warranties to reduce liability and guarantee coverage for damages or defects.
Finally, comparing itemized estimates and repair proposals helps identify the best value and avoids surprises during the job.
Questions to ask during the first call
How should a homeowner approach the initial call to a plumber or drain specialist to quickly separate qualified professionals from novices?
The homeowner should ask about experience with collapsed pipes, typical diagnostic steps, expected timeline, available equipment (camera, hydro-jet), preliminary cost estimates, and emergency availability.
Request clarification on communication during repair and ask for references or recent job examples before scheduling an inspection.
Credentials, insurance, and warranty considerations
After confirming experience, equipment, and references on the initial call, the homeowner should verify the plumber’s credentials, insurance, and warranty terms before authorizing work.
Check licensure, trade certifications, and local registrations.
Request proof of liability and workers’ compensation coverage.
Clarify warranty scope, duration, exclusions, and transferability in writing.
Confirm who covers secondary damages and obtain a written agreement specifying responsibilities.
Evaluating estimates and comparing repair proposals
Why choose one proposal over another? A homeowner should compare scope, materials, timeline, and line-item costs.
Verify whether quotes include permits, excavation, and restoration. Assess diagnostic methods—camera inspection versus guesswork—and warranty length.
Beware unusually low bids. Prefer detailed, written estimates from licensed professionals and request references.
Clear comparisons reduce surprises and guarantee informed selection of the right repair approach.
Preventing Future Pipe Collapses
Preventing future pipe collapses requires routine maintenance, including regular inspections, scheduled cleanings, and prompt repairs when issues are found.
Homeowners should manage landscaping and tree roots, choose durable pipe materials with planned replacements, and follow seasonal precautions in freezing climates to reduce stress on lines.
Establishing a proactive maintenance schedule and coordinating with a qualified specialist can extend pipe life and prevent emergencies.
Maintenance routines homeowners should follow
When routine inspections and simple upkeep are performed consistently, homeowners can dramatically reduce the risk of pipe collapse by catching early signs of damage and addressing minor issues before they escalate.
Regularly schedule visual checks, monitor drainage performance, clear debris from gutters and drains, maintain appropriate soil grading near foundations, inspect accessible pipes for leaks or corrosion, and document findings to guide timely professional repairs.
Landscaping and tree-root management tips
Manage landscaping and tree-root growth deliberately to reduce pressure on underground pipes and minimize future collapse risk.
Select smaller, slow-growing species and place trees at recommended distances from sewer lines.
Install root barriers and maintain turf to limit invasive roots.
Regularly inspect vulnerable areas, cut surface roots safely, and consult an arborist before planting near utility corridors to prevent long-term damage.
Upgrading materials and proactive replacement schedules
Although often overlooked until failures occur, upgrading pipe materials and adopting proactive replacement schedules are the most reliable strategies to reduce collapse risk over the long term.
Owners should assess material longevity, replace aging clay, cast iron, or degraded plastics with durable alternatives like PVC, HDPE, or ductile iron, and schedule targeted replacements based on condition assessments, service life data, and risk prioritization to prevent future failures.
Seasonal precautions for freezing climates
In many cold regions, seasonal freezing poses a major risk to underground and aboveground pipes, so owners should implement targeted precautions before temperatures drop.
They should insulate exposed lines, maintain consistent heat in vulnerable spaces, drain and winterize outdoor systems, use heat tape where appropriate, and monitor weather forecasts.
Regular inspections and timely repairs reduce freeze-related stress and future collapse likelihood.
Typical Costs, Insurance, and Timeline Expectations
Typical costs for a collapsed pipe vary with factors such as the break’s location, access difficulty, required materials, and any structural or finishing repairs.
Homeowners insurance often covers sudden, accidental damage but commonly excludes wear-and-tear or gradual deterioration, so policy details and deductibles determine out-of-pocket expenses.
Diagnosis, repair, and full restoration can span from a day for simple fixes to several weeks for extensive excavation and rebuilding, depending on permit needs and contractor availability.
Factors that drive repair cost estimates
Cost estimates for a collapsed pipe hinge on several concrete factors—extent of damage, pipe location, material type, required excavation, and local labor rates—which together determine the scope and price of repairs.
Additional drivers include access difficulty, need for specialty equipment, permit or disposal fees, and whether temporary water or structural shoring is required.
Accurate quotes follow inspection and diagnostic imaging.
What homeowners insurance usually covers (and doesn’t)
After outlining the factors that drive repair estimates, attention turns to how homeowners insurance responds to collapsed pipe incidents.
Policies commonly cover sudden, accidental pipe bursts and resulting water damage, including cleanup and structural repairs, minus deductibles.
Exclusions often apply for gradual damage, lack of maintenance, sewer backups, and preventative repairs.
Claim limits, endorsements, and documentation determine reimbursement amounts.
Expected timelines for diagnosis, repair, and restoration
Diagnosing, repairing, and fully restoring a collapsed pipe generally unfolds in distinct phases: emergency shutoff and assessment (hours), temporary fixes and water removal (1–3 days), permanent repairs or pipe replacement (1–7+ days depending on scope), and drying, mold prevention, and cosmetic restoration (several days to weeks).
Costs vary with damage and access; insurance may cover sudden failures but often excludes wear, with deductibles and documentation affecting timelines.
Real-Life Scenarios and Outcomes
Readers are presented with concrete case studies showing how small fixes differ from full replacements and why trenchless methods sometimes win out. These scenarios highlight typical symptoms, chosen repair methods, costs, and timelines to set realistic expectations.
The following points illustrate outcomes and emotional impact for homeowners facing pipe failure:
- Relief when a minor crack is fixed quickly and cheaply
- Frustration during lengthy major replacements and disrupted schedules
- Surprise at higher-than-expected costs despite apparent minor symptoms
- Gratitude when trenchless work preserves landscaping and shortens downtime
- Anxiety when full excavation is unavoidable and recovery takes longer
Minor repair case: symptoms, fix, and cost
In many typical cases, a collapsed pipe presents with localized symptoms that are straightforward to identify: reduced flow or persistent low pressure at a single fixture, unusual gurgling or slow drainage, and occasional wet spots or damp soil near the pipe run.
A minor collapse often requires targeted excavation, short section replacement or lining, minimal disruption, and costs ranging from a few hundred to a few thousand dollars.
Major replacement case: symptoms, method chosen, and timeline
Several signs point to a major pipe replacement: chronic low pressure across multiple fixtures, repeated backups despite repairs, large sinkholes or collapsing ground near the line, persistent sewage odors, and water pooling that grows over time.
In such cases, inspectors confirm collapse via camera and soil testing. Full excavation and sectional replacement follow, typically scheduled within weeks, with restoration lasting days to a few weeks.
When trenchless was preferable versus full excavation
After confirming that a line required replacement rather than repair, professionals weighed site conditions, service interruptions, and cost to determine whether trenchless methods could be used instead of full excavation.
They chose trenchless when access was limited, landscaping or pavement preservation mattered, or downtime had to be minimal.
Full excavation was selected for severely collapsed, misaligned, or heavily offset sections where lining could not restore flow.
Closing Checklist: What to Do Immediately If You Suspect a Collapsed Pipe
When a collapsed pipe is suspected, a clear checklist guides homeowners through immediate steps such as shutting off water, containing damage, and contacting a plumber.
Photographs, notes of times and actions taken, and saved receipts help document the situation for insurers and contractors.
The checklist also identifies resources and signs that warrant calling emergency services to protect safety and property.
Step-by-step action list for homeowners
If a homeowner suspects a collapsed pipe, they should follow a concise, prioritized checklist to limit water damage, guarantee safety, and preserve evidence for insurance.
Shut main water valve, turn off electricity if area is wet, evacuate occupants from immediate danger, contain spreading water with towels and buckets, call a licensed plumber and emergency restoration, and temporarily secure valves or fixtures until professionals arrive.
Documentation tips for insurance and contractors
A concise record of events and damages helps speed insurance claims and contractor assessments.
Photograph affected areas from multiple angles, note dates and times, and capture water levels, cracks, and debris.
Keep receipts for emergency repairs, temporary fixes, accommodations, and equipment rentals.
Log phone calls, inspector names, and service estimates.
Store digital copies securely and back up originals for easy access during claims and repairs.
Resources and when to seek emergency services
Several contact points and immediate actions should be lined up to secure safety and limit damage when a collapsed pipe is suspected.
Contact emergency plumbing, shut off main water, and power if needed.
Notify insurance and document conditions.
Use local emergency numbers for flooding or structural risk.
Keep occupants clear, preserve evidence for claims, and follow professionals’ guidance until repairs and inspections confirm safety.
Conclusion
Suspecting a collapsed pipe need not spiral into panic. The homeowner can follow the checklist, visually imagining water pooling maps and smoke‑detector–style alerts to prioritize actions. Even if some worry professional help is costly, prompt temporary measures—shutting valves, containing leaks, photographing damage—reduce expenses and speed repairs. With diagnostics and preventative steps outlined, property owners gain a clear, low‑stress roadmap from detection through restoration, minimizing disruption and long‑term loss.