How to Remove Sink Sprayer Quick Connect: Step-by-Step Guide for DIY Repairs
To remove a sink sprayer quick connect, first shut off the water supply and relieve any pressure. Then, access the connection under the sink. Identify whether your quick connect uses a collar or a clamp. If it’s a collar, depress it; if it’s a clamp, loosen it. Once released, pull the hose free. Inspect the seals for wear and replace them as needed before reassembling the connection. Follow the detailed instructions and troubleshooting steps provided for a successful repair and reinstallation.
What a Sink Sprayer Quick Connect Is and Why It Fails
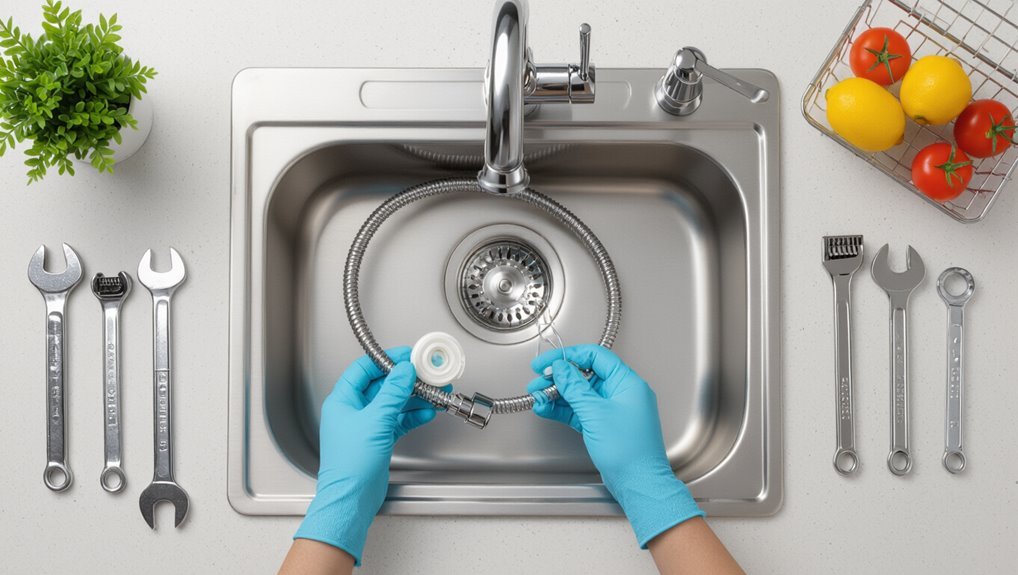
A sink sprayer quick connect is a simple push-fit fitting used to attach the sprayer hose to the faucet supply, available in plastic snap-ring, metal sleeve, and clip-style designs.
These fittings commonly fail through leaks caused by worn O-rings, connectors that become stuck from mineral buildup or corrosion, and broken or fatigued retaining clips.
Identifying the type of connector and the specific failure mode helps determine the correct removal and repair approach.
Purpose and common types of quick connect fittings
Quick-connect fittings serve as the simple mechanical link between a sink sprayer and the water supply, allowing homeowners to attach or detach the hose without tools.
They provide swift installation, sealed connections, and compatibility across fixtures. Common types include push-to-connect, clip-style, and threaded quick connects.
Tutorials on how to remove sink sprayer quick connect focus on releasing collars, clips, or threaded sleeves safely.
Typical failure modes (leaks, stuck connectors, worn clips)
Failing connections usually show themselves as drips, stiffness, or visible wear that prevent proper sealing or disconnection.
Common failure modes include torn O-rings causing leaks, mineral buildup and corrosion that seize fittings, and deformed or broken retaining clips that lose grip.
Wear from flexing and age weakens plastic housings. Identifying the mode guides repair: replace seals, clean or swap corroded parts, or renew clips.
Tools and Materials Needed Before You Start
Before beginning the removal, a concise list of essential tools—adjustable wrench, pliers, bucket, and a screwdriver—should be gathered.
Helpful optional supplies like plumber’s grease, spare O-rings, and a rag can save time if complications arise.
Basic safety precautions and preparation steps, including shutting off water, placing a bucket to catch drips, and wearing gloves and eye protection, should be completed first.
Essential tools list
A compact kit of basic hand tools and a few consumables guarantees the sprayer can be disconnected quickly and without damage.
- Adjustable wrench for nut loosening and valve access.
- Needle-nose pliers to depress retaining clips and grip fittings.
- Bucket and towels to catch water and protect finishes.
- Utility knife or small flathead to cut tape and pry seals carefully.
Optional helpful supplies
Consider including a few optional items that streamline the job and reduce risk: plumber’s grease for lubricating O-rings, Teflon tape for threaded joints, a small flashlight for under-sink visibility, zip ties to secure loose hoses, and replacement O-rings or quick-connect clips sized to the fixture.
- Plumber’s grease
- Teflon tape
- Flashlight
- Zip ties and spare fittings
Safety precautions and preparation steps
When working on a sink sprayer quick connect, wear safety glasses and gloves, shut off the water supply, and place a bucket or towels beneath the connection to catch residual water.
Verify power to any nearby garbage disposal is off.
Gather adjustable wrench, pliers, replacement O-rings, rag, and flashlight.
Confirm good lighting, ventilation, and a clear workspace to prevent slips and lost parts.
How to Identify Your Sprayer Connection Type
The reader should first inspect visible visual cues and any brand markings—Delta, Moen, Kohler and others often use characteristic fittings.
They can distinguish push-fit (smooth collar and quick-release ring), clamp-style (metal or plastic clip), and threaded connections (visible screw threads).
Decisions about removing the sprayer from under the sink or at the faucet hinge on access and the connection type: cramped spaces or hidden clamps usually require under-sink work, while threaded or easily accessible push-fits can often be detached at the faucet.
Visual cues and common brands
Identify key visual cues to determine sprayer connection types by examining the shape, color, and locking mechanism at the hose end.
Observe molded plastic collars, metal sleeves, snap tabs, and O-ring positions.
Note brand markings—Delta, Moen, Kohler, Pfister—often embossed or stamped.
Recognizing common finishes (chrome, brushed) and distinct fastener styles speeds identification and guides appropriate removal tools and replacement parts.
How to tell if it’s a push-fit, clamp, or threaded connection
How can one quickly determine whether a sink sprayer uses a push-fit, clamp, or threaded connection?
Inspect the hose end and fitting:
- push-fit has smooth plastic/metal with a visible release collar or ring;
- clamp uses a small metal band or worm-gear crimp securing the hose to a barb;
- threaded connections show matching male/female threads on hose and faucet body.
Tug gently to confirm type.
When to remove from under-sink vs. at faucet
Where should the disconnection begin—under the sink at the supply line or at the faucet itself—depends on the visible connection type and access space.
If the quick connect is obvious at the faucet shank and reachable, disconnect there to avoid disturbing valves.
If concealed or secured by mounting hardware, access under the sink to release clips, collars, or shutoff valves before detaching the sprayer.
Step-by-Step Guide to Removing a Quick Connect Sprayer
The procedure begins with shutting off the water supply and relieving pressure before any attempt to access the connection beneath the sink.
Once under the sink, the connector should be inspected to determine whether it uses a push-fit release or a clamp-style fitting.
The guide then explains how to safely release push-fit connectors and how to remove hoses secured with clamps.
Step 1: Turn off water supply and relieve pressure
Shut off the water supply to the sink and open the faucet to relieve any remaining pressure before attempting to disconnect the sprayer.
Verify both hot and cold shutoff valves are fully closed.
Drain residual water by holding the faucet open briefly.
Wear gloves and have a towel ready for drips.
Confirm no flow before proceeding to avoid leaks or injury.
Step 2: Access the connection under the sink
Crawl under the sink and clear space to reach the spray hose connection directly beneath the countertop.
The person positions a light, kneels on a pad, and removes items blocking access.
They steady the hose and locate the quick connect assembly on the spray line.
Visibility is improved with a flashlight; work area remains dry and organized to allow unobstructed manipulation.
Step 3: Inspect the connector for release mechanism
One should closely examine the quick connect assembly to identify its release mechanism before attempting removal.
The observer notes clip types: plastic tabs, metal collars, or recessed rings. Look for markings, arrows, or a visible groove indicating where to depress, lift, or slide.
Confirm orientation and any retaining clips, ensuring proper tool selection and minimizing force to avoid damage during subsequent disconnection.
Step 4: Release push-fit connectors safely
After identifying the type and release points of the quick connect in the previous step, proceed to disengage push-fit connectors by following a deliberate sequence.
Depress the collar or sleeve firmly with fingers or a small screwdriver, hold pressure, and pull the hose straight out.
Inspect the fitting for debris or damage.
Release slowly to avoid sudden detachment and water spray; have a towel handy.
Step 5: Remove sprayer hose from clamp-style fittings
Begin by locating the clamp that secures the sprayer hose to the faucet tailpiece or diverter; clamps are typically metal or plastic bands tightened with a screw or snap tab.
Loosen the screw or depress the tab, then slide the clamp away from the connection.
Gently pull the hose free, twisting slightly if needed.
Inspect the clamp and hose for damage before reassembly or replacement.
Step 6: Unscrew threaded connectors and drain water
Loosen any threaded connectors linking the sprayer hose to the faucet or supply lines using an appropriate wrench or pliers, turning counterclockwise to avoid stripping threads; hold the mating fitting steady to prevent twisting the faucet components.
Once loosened, back connectors fully by hand, catch escaping water with a towel or small container, and tilt the hose downward to drain remaining water into the sink before removal.
Step 7: Extract stuck connectors without damage
If a quick-connect fitting binds or corrodes, apply steady, controlled force while protecting surrounding components to release it without damage.
Use penetrating lubricant, allow dwell time, then tap gently with a plastic or rubber mallet.
Employ appropriate pliers with jaw covers or a strap wrench for leverage.
Work incrementally, alternating sides, and avoid twisting connectors that could fracture plastic or deform seals.
Step 8: Clean and prepare fittings for reinstallation
After freeing the quick-connect components, attention turns to cleaning and preparing the fittings for reinstallation.
All debris, mineral buildup, and old sealant are removed with a soft brush and vinegar solution.
Inspect O-rings and replace any damaged seals.
Lightly lubricate new O-rings with plumber’s grease, align fittings, and guarantee snug, leak-free connections before testing water flow.
How to Reconnect or Replace the Sprayer After Removal
After removal, attention turns to selecting a replacement hose or connector that matches the fixture’s size and material.
The discussion covers proper installation techniques for push-fit quick connects, as well as for clamp and threaded alternatives.
Finally, procedures for pressurizing the line and checking for leaks and correct spray operation are outlined.
Choosing a compatible replacement hose or connector
Compatibility hinges on matching the sprayer’s fittings, hose diameter, and material to the existing faucet assembly.
Verify thread type (male/female, NPT/metric), inner/outer diameters, and connection style.
Choose durable materials—braided stainless, reinforced EPDM, or PVC—compatible with water temperature and chemicals.
Confirm pressure rating and length.
Prefer OEM or certified replacements to guarantee leak-free performance and longevity.
Proper installation of push-fit quick connects
Begin by inspecting the push-fit quick connect for debris, damaged O-rings, and correct orientation of the collet; a clean, intact connector guarantees a reliable seal when reattaching the sprayer hose.
Push the hose straight into the fitting until it seats, then gently tug to confirm engagement.
Trim damaged tubing squarely, lubricate O-rings lightly, and test for leaks under low water pressure.
Installing clamp and threaded replacements
Install clamp-style or threaded replacements by first selecting fittings sized to the sprayer hose and sink tailpiece.
Clamp fittings use a stainless-steel band and nut to compress the hose onto a barb, while threaded adapters mate with existing male or female threads using plumber’s tape or a rubber washer for sealing.
Slide hose over barb, position clamp, tighten evenly; for threaded, wrap tape, hand-start, then wrench to snug.
Testing for leaks and proper operation
With the new clamp or threaded fitting secured, attention turns to reconnecting the sprayer hose and verifying the assembly for leaks and proper function.
Reattach hose, tighten fittings, then restore water supply slowly.
Inspect connections for drips under pressure, operate sprayer through all modes, and check for steady flow and smooth trigger action.
Tighten or reseal any leaking joints and retest until dry and functional.
Troubleshooting Common Problems During Removal
If the quick-connect resists release, the text recommends applying steady pressure, lubricating the collar, and checking for retaining clips before forcing the fitting.
For corroded or brittle plastic, gentle heat and penetrating oil may free parts, but brittle pieces should be replaced to avoid leaks.
Damaged O-rings or seals should be swapped for correct-size replacements, and a professional should be contacted when fittings are seized, severely damaged, or when leaks persist after basic repairs.
What to do if the connector won’t release
When the quick-connect collar refuses to move, remaining calm and methodical prevents damage and speeds resolution; begin by confirming water is shut off and any residual pressure is relieved.
Inspect for hidden clips or retaining rings. Use proper-sized pliers or a small flat tool to depress the collar evenly.
Apply steady outward pull while lifting the sleeve, and rotate slightly to free stuck o-rings.
Handling corroded or brittle plastic fittings
Corroded or brittle plastic fittings require careful handling to avoid cracking or releasing debris into the plumbing.
Work slowly, supporting the fitting while applying gentle, even pressure. Use plastic-safe penetrating lubricant sparingly and allow time to penetrate.
If movement is minimal, employ soft-jaw pliers or a strap wrench to reduce point stress.
Collect any loosened fragments and flush the line before reassembly.
Fixing damaged O-rings and seals
Inspect the O-rings and seals immediately after disassembly for cuts, flattening, hardening, or embedded debris.
Replace any compromised rings with correct-size replacements, lubricating new O-rings with plumber’s silicone grease to guarantee proper seating and prevent twisting.
Clean seal grooves thoroughly, removing mineral buildup.
Reassemble carefully, testing for leaks under low pressure before full use to confirm a tight, watertight fit.
When to call a professional
Call a professional if basic troubleshooting fails or if signs of major damage appear during removal, such as stripped fittings, cracked housings, persistent leaks, or inaccessible connections.
A technician can assess hidden corrosion, replace damaged valves or fittings, and safely disassemble compact assemblies.
Engage a plumber when tools or experience are insufficient, when water shutoff is uncertain, or when warranty and fixture integrity are concerns.
Preventive Maintenance to Avoid Future Quick Connect Issues
A brief preventive maintenance plan helps keep quick connects operating smoothly and reduces unexpected failures.
It should include a simple inspection and cleaning checklist, guidance on compatible lubricants and O-ring care, and recommended replacement intervals plus spare parts to have on hand.
Following these steps at regular intervals minimizes wear and makes future removal or repairs straightforward.
Routine inspection and cleaning checklist
Routine checks focus on key points where quick connect fittings commonly fail: seals, retaining clips, hose ends, and the pull-out sprayer head.
- Inspect seals for cracks or distortion; replace if compromised.
- Verify retaining clips sit flush and engage fully.
- Check hose ends for kinks, wear, or mineral buildup.
- Clean sprayer head openings and flush lines to remove debris.
Lubricants and seal care recommendations
Preventive maintenance depends on proper use of lubricants and attentive seal care to extend the life of quick connect fittings.
Use food-grade silicone grease sparingly on O-rings and valve seals to prevent drying and cracking. Avoid petroleum-based products that degrade elastomers.
Inspect seals for swelling or cuts, clean mating surfaces before reassembly, and store spare seals in a cool, dark place to preserve elasticity.
Recommended replacement intervals and spare parts to keep
Following careful lubrication and seal care, a concise schedule for replacing wear items prevents unexpected failures:
Replace O-rings and seals annually, inspect quick-connect collars and retaining clips every six months, and replace the sprayer hose every 3–5 years depending on usage.
Keep spare O-rings, retention clips, a compatible hose, and plumber’s grease on hand for prompt, low-cost repairs and reduced downtime.
Comparison of Common Quick Connect Types and Durability
A concise comparison of common quick connect types helps readers choose between plastic and metal options for both DIY repairs and long-term reliability. Plastic fittings are lightweight and inexpensive but can crack under stress, while metal fittings resist wear and last longer though they cost more. The table below summarizes key trade-offs for quick reference.
| Feature | Notes |
|---|---|
| Plastic | Affordable, easy to install, less durable |
| Metal | More durable, corrosion-resistant, higher cost |
Material pros and cons (plastic vs. metal)
Material choice for quick-connect sink sprayers—primarily plastic versus metal—directly affects durability, cost, and failure modes; plastic fittings are inexpensive and corrosion-resistant but more prone to wear, cracking, and deformation under pressure.
In contrast, metal (typically brass or stainless steel) offers superior strength and longevity but can corrode if mixed-metal connections exist and costs more.
Plastic is lighter and cheaper; metal resists impact and repeated cycles.
Best choices for DIY repairs and long-term reliability
Several popular quick-connect styles—push-to-connect, snap-ring, and threaded-adapter—offer distinct trade-offs for DIYers balancing ease of repair with long-term reliability.
Push-to-connect fits quickly but plastic variants may crack; metal versions last longer.
Snap-ring provides secure holds and replaceable rings but needs tools.
Threaded-adapter offers the best durability and leak resistance, though installation is slower and may require plumber’s tape.
Time, Cost, and Difficulty Estimates for DIY Removal and Replacement
Typical time varies by skill level: a homeowner with basic experience can complete removal and replacement in 20–40 minutes, while a novice may need 1–2 hours and a competent DIYer under 20 minutes.
Parts and tool costs are usually low—replacement quick-connect fittings cost $5–$25, with optional tools (pliers, small wrench, cloth) adding $0–$30 if not already on hand.
Overall difficulty rates as easy to moderate; simple tips like turning off water, catching residual drips, and inspecting O-rings beforehand can simplify the task.
Typical time required by skill level
A straightforward sink sprayer quick-connect removal usually takes 15–30 minutes for someone with basic DIY experience, while a novice should allow 30–60 minutes to account for careful disassembly and troubleshooting.
An experienced plumber can complete the task in 10–20 minutes. Time increases if corrosion, confined access, or unexpected fittings require extra effort, inspection, or gentle penetrating oil application.
Expected parts and tool costs
Most homeowners can expect modest expenses when removing and replacing a sink sprayer quick-connect: commonly only a few dollars for replacement clips or O-rings, $10–30 for a new quick-connect fitting or hose assembly, and $15–50 for any specialty tools not already on hand (hose pick, small snap-ring pliers, or a basin wrench).
- Replacement clips/O-rings: $2–10
- Quick-connect fitting/hose: $10–30
- Specialty tools (if needed): $15–50
- Miscellaneous (tape, cleaner): $2–8
Difficulty rating and tips to simplify the job
While the task is generally straightforward for someone with basic hand-tool skills, difficulty varies with access and fixture age: expect 15–45 minutes for a simple clip or O-ring change, 30–90 minutes to swap a quick‑connect fitting or hose, and longer if corrosion or cramped access requires extra effort.
Rate it easy to moderate; prepare by shutting water, using LED task lighting, penetrating oil, and small picks to speed removal.
Visual Aid Suggestions for the Repair Process
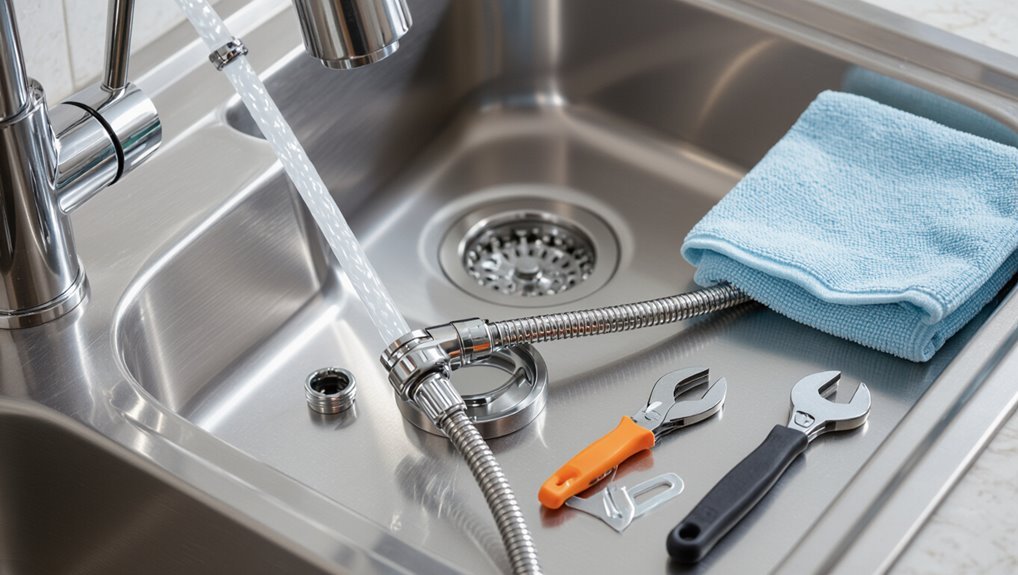
The article should recommend key photos showing different connector types, the exact release step in close-up, and common problem examples like damaged o-rings or misaligned fittings.
It should also propose simple diagrams that break the procedure into numbered steps with arrows and labels for parts and tool placement.
These visuals will help readers quickly identify their connector and follow the release and reassembly sequence.
Key photos to include (connector types, release step, problem examples)
Clear, focused photos streamline identification and removal of sink sprayer quick-connect fittings by showing connector types, the exact release step, and common failure examples.
Include close-ups of clips, collars, and O-rings; a sequence capturing finger placement and collar depression; images of seized, cracked, or corroded fittings; and a photo comparing detached versus engaged positions to confirm correct reassembly.
Diagram ideas for a clear step-by-step visual guide
Begin with a single overview panel that labels each component—sprayer head, quick-connect collar, retaining clip, hose, and O-ring—so viewers can match parts before starting;
follow with numbered step panels showing:
1) shutoff and depressurize,
2) clip release direction with close-up arrow,
3) collar push/pull motion,
4) hose pull-out,
5) O-ring inspection/replacement.
Include scale and tool icons for clarity.
Conclusion
The wrench falls silent; water beads, suspended like tiny planets, await release. Fingers hover over the quick connect, remembering stubborn clips and the soft click that meant success—or failure. A practiced twist, a gentle pull, and metal parts separate with a reluctant sigh, revealing the clean, bright path for a new sprayer. Tools laid out, the workbench hums with possibility. With care and patience, a small repair becomes the turning point between leak and lasting calm.