How to Insulate HVAC Pipes: A Step-by-Step Guide to Prevent Heat Loss and Condensation
To effectively insulate HVAC pipes and minimize heat loss and condensation, follow these essential steps. Begin by identifying the type and location of your pipes. Choose suitable insulation materials, like closed-cell elastomeric foam or fiberglass with a vapor barrier, depending on temperature and moisture levels. Measure and cut the insulation to fit, especially around elbows and valves, and secure seams with HVAC-grade tape or silicone. Regularly inspect for any gaps or compression. For further details on specific materials and cost considerations, continue reading the comprehensive guide.
Why Insulating HVAC Pipes Matters for Efficiency and Comfort
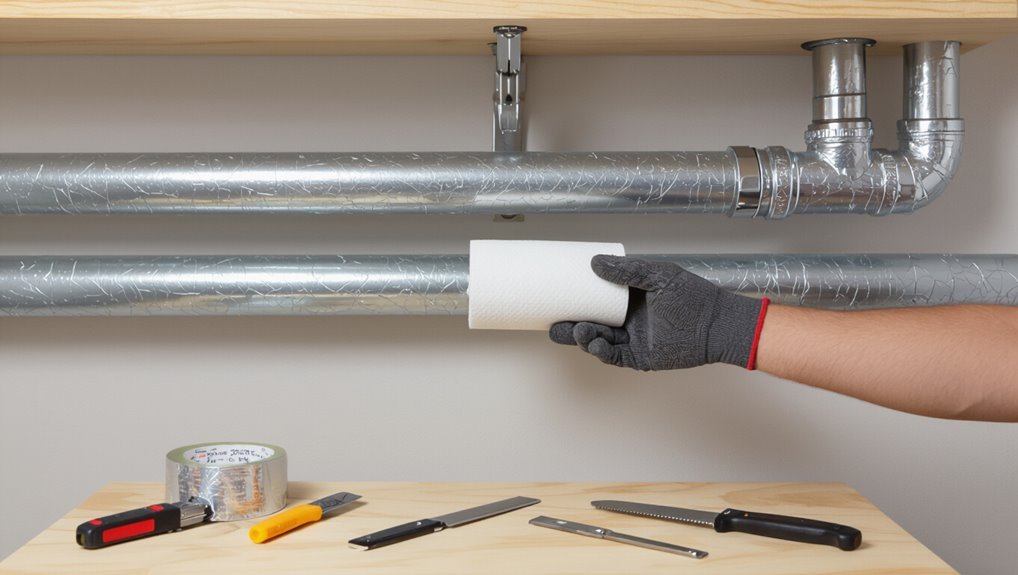
Insulating HVAC pipes reduces heat transfer, which lowers energy use and can cut utility bills.
It also prevents surface condensation that leads to mold growth and corrosion, preserving system life and indoor air quality.
The benefits are greatest in extreme climates, for exposed or high-condensation lines, and often pay back the upfront cost within a few years.
How pipe insulation reduces heat loss and energy bills
Reducing heat transfer along HVAC pipes preserves conditioned air and lowers the energy required to maintain set temperatures.
Proper pipe insulation minimizes conductive and convective losses, reducing runtime and fuel or electricity demand.
How insulation prevents condensation, mold, and corrosion
Preventing surface condensation on HVAC pipes is a primary function of proper insulation, because it maintains pipe surfaces above the dew point and stops moisture from forming.
By limiting moisture contact, insulation reduces conditions that support mold growth and microbial colonization.
It also minimizes galvanic and chemical corrosion by keeping metal dry, extending system lifespan and preserving indoor air quality and operational reliability.
When insulation is most critical (climate, pipe type, location)
Comfort and efficiency depend heavily on where and how HVAC pipes are installed: in cold, humid climates or poorly ventilated spaces, chilled-water and refrigeration lines demand continuous insulation to prevent condensation and energy loss, while in hot, arid regions the focus shifts to minimizing heat gain on supply lines.
Insulation is also critical for exterior, unconditioned, or underground runs, and for mixed-material or large-diameter piping.
Cost vs. savings: simple payback overview
Having established where insulation matters most, the financial case for insulating HVAC pipes becomes clear: upfront material and labor costs are offset by reduced energy use and lower maintenance expenses over time.
Simple payback calculates months to recoup investment from energy savings; factors include climate, fuel price, and system efficiency.
| Cost item | Typical range |
|---|---|
| Material | $0.50–$5/ft |
| Labor | $20–$75/hr |
| Savings | 5–20% energy |
| Payback | 6–36 months |
Types of HVAC Pipes and Their Insulation Needs
Different HVAC pipe types require distinct insulation strategies based on temperature, pressure, and material.
Refrigerant lines—suction and liquid—need moisture-resistant, vapor-barrier insulation to prevent condensation and maintain pressure, while hot water and hydronic heating pipes prioritize thermal lag to retain heat.
Chilled-water supply/return lines and ventilation ducts further differ in material and required R-value, so insulation selection should match the system’s temperatures, accessibility, and condensation risk.
Refrigerant lines (suction and liquid lines) special considerations
Refrigerant lines—comprising the larger insulated suction line and the smaller liquid line—require distinct insulation approaches because they carry refrigerant at differing temperatures and pressures.
The suction line needs thicker, continuous vapor-impermeable insulation to prevent condensation and thermal gain, while the liquid line benefits from thinner insulation primarily to reduce frost risk and minimize heat pickup.
Install sealed seams, proper cladding outdoors, and maintain accessibility for service.
Hot water and hydronic heating pipes
While refrigerant lines demand vapor-tight, thickness-varied insulation to manage condensation and thermal gain, hot water and hydronic heating pipes present distinct priorities: preserving supply temperature, minimizing heat loss, and preventing surface temperatures from exceeding safety limits.
Insulation selection favors closed-cell foam, mineral wool, or fiberglass with vapor barriers. Focus on appropriate thickness, secure fittings, sealed joints, and fire-rated materials where codes require.
Chilled-water supply and return pipes
Efficiency in chilled-water systems depends heavily on proper pipe insulation.
Chilled-water supply and return lines require vapor-impermeable, closed-cell insulation to prevent condensation and maintain temperature. Insulation thickness varies with pipe size, ambient conditions, and system delta-T.
Joints, valves, and fittings must be sealed and insulated. Proper installation reduces energy use, corrosion risk, and HVAC load while supporting reliable chilled-water delivery.
Ventilation ducts vs. piping differences in materials and R-value
Although both serve to transport conditioned air or fluids, ventilation ducts and HVAC piping differ considerably in materials, thermal resistance needs, and installation details; ducts are typically sheet metal, fibrous board, or flexible insulated constructions designed to control convective heat transfer and air leakage.
Whereas pipes are metal or plastic tubes that require closed-cell, vapor-impermeable insulation to prevent condensation and maintain fluid temperatures.
Ducts emphasize leakage control and surface R; pipes prioritize continuous vapor barrier and higher effective R for temperature-sensitive fluids.
Common Insulation Materials and Ratings
Common insulation choices include closed-cell elastomeric foams (neoprene, EPDM), fiberglass with a factory-applied vapor barrier, and polyethylene or foam-rubber options, each with distinct advantages and limits for moisture resistance, flexibility, and durability.
Selection should consider required pipe insulation thickness, R-value, and operating temperature range, as well as whether a separate vapor barrier, adhesive, or specialized tape is needed for a secure, long-lasting installation.
The following section compares pros and cons of each material and gives guidance on sizing, ratings, and appropriate sealing methods.
Closed-cell elastomeric foam (neoprene, EPDM) pros and cons
When insulating HVAC pipes, closed-cell elastomeric foams such as neoprene and EPDM offer a balance of flexibility, vapor resistance, and thermal performance that suits many commercial and residential applications.
They resist moisture absorption, provide stable R-values over time, and damp vibration, but can be more costly than fiberglass and may have limited high-temperature tolerance or UV resistance without protective jacketing.
Advantages: easy to install, seamless seals.
Limitations: cost, temperature and UV sensitivity.
Fiberglass with vapor barrier pros and cons
Because fiberglass pipe insulation combines high thermal resistance with a bonded outer vapor-retarder jacket, it is widely used on chilled and hot HVAC piping where moisture control and flame retardance are important.
Advantages: excellent R-value per inch, noncombustible core, good acoustic damping, compatible with high temperatures.
Drawbacks: brittle when compressed, requires careful jacketing and sealing, heavier and bulkier than flexible foams, can irritate skin.
Polyethylene foam and foam rubber
Although less dense than fiberglass, polyethylene foam and closed-cell foam rubber provide lightweight, flexible thermal insulation for HVAC piping, prized for ease of installation and moisture resistance.
These materials resist water absorption, inhibit mold, and offer good compressive resilience. Available in pre-slit tubes and sheets, they accommodate bends and fittings, cut cleanly, and bond with common adhesives and tape for reliable field sealing.
Pipe insulation thickness, R-value, and temperature ranges
Having discussed polyethylene foam and closed-cell rubber, attention shifts to how material choice, thickness, and R-value determine performance across temperature ranges. Thicker insulation yields higher R-value and better condensation control; select rating for operating temperatures. Typical guidance balances cost and thermal goals; consult manufacturer specs for extremes.
| Material | Typical R-value per inch |
|---|---|
| Polyethylene | 3.0 |
| Rubber | 4.0 |
Vapor barriers, adhesives, and tapes: when to use which
Select vapor barriers, adhesives, and tapes based on pipe temperature, environmental humidity, and the insulation material to guarantee a continuous moisture seal and secure installation.
Use vapor-impermeable jackets for chilled lines, breathable wraps for hot pipes if required, and temperature-rated adhesives to bond seams.
Use butyl or foil tapes for long-term seals; cloth or PVC tapes for temporary or low-moisture applications.
Inspect joints regularly.
Tools, Materials, and Safety Preparations
A concise checklist of required materials and tools sets the stage for an efficient insulation job, including types of insulation, adhesive, tape, a utility knife, measuring tape, and a marker.
The writer notes essential personal protective equipment—gloves, eye protection, and a dust mask—and highlights basic safety tips for working in confined spaces and around HVAC components.
Practical measurement guidance explains how to measure pipe lengths and diameters and calculate the amount of insulation and accessories needed.
Checklist of materials and tools needed
Before beginning pipe insulation, prepare a clear checklist of required tools, materials, and safety items so work proceeds smoothly and without interruption.
A concise list guarantees efficiency and correct material selection before starting.
- Foam or rubber pipe insulation (correct diameter and R-value)
- Weatherproof tape and insulation adhesive
- Utility knife and measuring tape
- Pipe supports and sealant
- Ladder and lighting
Personal protective equipment and safety tips
With materials and tools assembled, attention shifts to personal protective equipment and safety precautions to protect the installer and the work area.
The installer should wear safety glasses, cut-resistant gloves, a dust mask or respirator for fibrous insulation, and long sleeves.
Guarantee adequate ventilation, clear trip hazards, secure ladders, and isolate electrical sources.
Dispose of scraps and clean tools after completion.
How to measure pipes and calculate material needs
Once measurements are taken accurately, estimating insulation needs becomes straightforward: measure pipe length and diameter, noting bends and fittings.
Convert diameter to circumference for wrap-around foam or use inner diameter for pre-formed sleeves. Add 10–15% for waste and seams.
Calculate total linear feet and number of sleeves or roll area required. Record measurements and material specifications before purchase.
Step-by-Step Guide to Insulating Refrigerant Lines
Before beginning work, the refrigerant lines are inspected for damage, leaks, and areas needing extra attention.
Insulation sleeves are cut to fit, seams and connection points are sealed, and fittings, elbows, and valves are covered with appropriately shaped pieces.
Finally, clearance and support are verified to guarantee the insulation remains secure and does not interfere with nearby components.
Inspecting lines and identifying problem areas
Begin by visually tracing the refrigerant lines from the condenser to the evaporator, noting bends, joints, and sections exposed to sunlight, moisture, or abrasion.
Check for oil stains, corrosion, insulation gaps, crushed tubing, and loose fittings.
Identify areas with condensation buildup or existing mold.
Mark problem spots for repair or replacement, prioritizing locations prone to mechanical damage, water ingress, or thermal bridging.
Cutting and preparing insulation sleeves
When the problem areas have been marked, the installer measures each refrigerant line run and selects closed-cell elastomeric sleeves sized to the pipe diameter and local code thickness.
Cuts are made with a sharp utility knife or insulation saw, keeping slits straight and ends square so the sleeve fits snugly over fittings and bends without gaps.
Ends are chamfered slightly for tight contours and sleeve lengths adjusted for overlaps and elbows.
Sealing seams, joints, and connection points
After sleeves are fitted and trimmed to accommodate overlaps and bends, attention turns to sealing all seams, joints, and connection points to preserve insulation integrity and prevent condensation.
Use appropriate HVAC-grade foil tape or silicone sealant for longitudinal seams, and rubberized mastic for irregular gaps.
Guarantee continuous, vapor-tight seals at flanges, unions, and service ports, inspecting for pinholes and correcting immediately.
Insulating fittings, elbows, and valves
Fit pre-formed insulation pieces and custom-cut sections precisely around fittings, elbows, and valves to maintain continuous coverage and prevent thermal bridging.
Use flexible foam, split-shell covers, or molded elbows matched to pipe diameter. Secure with foil tape or clamps, ensuring tight seams and no gaps.
For irregular shapes, wrap with adhesive-backed jacket or insulating tape, trimming excess for a neat, snug fit.
Checking for proper clearance and supports
Inspect the route of refrigerant lines to confirm adequate clearance from heat sources, electrical wiring, and combustible materials.
Verify spacing meets code and manufacturer guidelines, allowing insulation thickness without compression.
Install supports at recommended intervals to prevent sagging and vibration; use cushioned clamps or hangers to avoid crushing insulation.
Guarantee thermal expansion gaps and secure shifts through walls or ceilings with protective sleeves.
Post-installation inspection and leak testing
With supports secured and clearance verified, attention shifts to verifying the integrity of the installed insulation and the refrigerant circuit.
The inspector examines seams, adhesive bonds, and vapor barriers for gaps or compression.
Pressure and leak-detection tests on the refrigerant lines follow, using appropriate gauges and electronic detectors.
Any detected faults are documented and repaired, then retested until compliance and system efficiency are confirmed.
Step-by-Step Guide to Insulating Hot Water and Chilled-Water Pipes
The procedure begins with thorough surface preparation and cleaning to guarantee adhesive bonding and corrosion inspection.
Insulation is applied to straight runs first, then shaped and fitted around bends, tees, and flanges with attention to seams and securement.
Finally, vapor barriers are installed and penetrations sealed while providing for thermal expansion and adequate mechanical supports.
Surface preparation and cleaning
Begin by ensuring all pipe surfaces are dry, free of loose debris, corrosion, oil, and old insulation remnants to promote proper adhesive contact and a tight seal.
Inspect joints, valves, and flanges for damage. Use wire brush or scraper for scale, solvent or degreaser for oils, and clean cloths to remove residues.
Allow full drying before measuring or marking locations.
Applying insulation to straight runs
Cut insulation sections to fit the pipe run, ensuring seams meet without gaps and edges remain square for tight adhesive contact.
Slide or wrap insulation along the straight length, aligning seam lines. Apply adhesive or tape per manufacturer instructions, pressing seams firmly.
Stagger section joints for continuity. Trim ends neatly at valves and supports.
Verify full coverage and secure with bands or straps spaced per spec.
Handling bends, tees, and flanges
Navigate bends, tees, and flanges with tailored pieces and precise fitting to maintain thermal continuity and prevent condensation.
Use pre-formed elbows and split tees where possible; cut and miter straight sections for smooth joins. Secure with adhesive or mechanical fasteners, ensuring no gaps.
At flanges, wrap with cut-to-fit segments and compress slightly for full contact without stressing pipe supports.
Adding vapor barriers and sealing penetrations
After fitting insulation around bends, tees, and flanges, attention shifts to adding vapor barriers and sealing pipe penetrations to prevent moisture intrusion and maintain insulation performance.
Install continuous vapor-retardant jacketing over seams, secured with adhesive or aluminum tape.
Seal wall and floor penetrations with closed-cell foam or elastomeric sealant.
Verify continuity at joints and fittings to guarantee long-term moisture control and corrosion prevention.
Ensuring expansion allowance and supports
Proper insulation must accommodate pipe movement and be supported without compressing the jacket or creating thermal bridges.
Allow expansion gaps at hangers, anchors, and at directional changes; use slip-type supports or insulated saddles to prevent crushing.
Secure insulation to allow axial movement and avoid rigid clamps that transfer heat.
Verify support spacing per pipe size and service temperature to maintain insulation integrity.
Special Scenarios and Problem-Solving
The section addresses common complications that arise when insulating HVAC pipes in crawlspaces, attics, and exterior runs, and highlights differences between commercial and residential systems.
It outlines approaches for managing existing condensation and mold remediation and for executing retrofits on older systems with limited space.
Practical tips and material choices are provided to resolve access, durability, and code-compliance challenges.
Insulating pipes in crawlspaces, attics, and exterior runs
Insulating HVAC pipes in crawlspaces, attics, and on exterior runs demands tailored strategies because each location presents distinct temperature swings, moisture risks, and access limitations.
In crawlspaces, use closed-cell foam with vapor barriers and secure fasteners.
In attics, choose UV-resistant, high-R-value insulation and guarantee ventilation.
For exterior runs, select weatherproof jacketing, continuous seams, and allow for thermal expansion while maintaining seals.
Dealing with existing condensation and mold remediation
Addressing existing condensation and mold requires first halting moisture sources and then remediating affected insulation and pipe surfaces to prevent recurrence.
Inspect for leaks, surface wetting, and poor drainage; dry thoroughly. Remove and replace contaminated insulation and non-salvageable pipe coverings.
Clean remaining surfaces with appropriate biocide, scrub, and rinse.
Improve ventilation, seal penetrations, and apply vapor barriers and proper insulation to prevent future mold.
Retrofits on older systems and limited space
Older systems’ constraints and cramped utility spaces demand tailored approaches: assess existing pipe layouts, materials, and clearances to determine whether flexible foam, closed-cell rubber, or custom-fit jacketing is appropriate.
Prioritize minimally invasive methods that preserve access for maintenance while ensuring continuous vapor protection and thermal continuity.
Use segmented pieces, adhesive seams, and thin-profile insulation; plan routing, supports, and inspection access to avoid future disruptions.
Insulation for pipes in commercial vs residential systems
When space constraints and retrofit realities have been handled, consideration shifts to scale and regulatory context: commercial systems typically demand thicker insulation, more robust vapor barriers, and fire-rated jacketing to meet code and manage higher flow rates.
In contrast, residential installations favor slimmer profiles and cost-effective materials that balance performance with aesthetics.
Selection also weighs durability, maintenance access, acoustic control, and lifecycle costs; contractors follow codes and owner priorities.
Maintenance, Inspection, and Longevity Tips
Routine inspections should check for damage, compression, gaps, and loose seams so issues can be repaired promptly.
Guidance on how often to replace insulation and clear signs of failure helps plan proactive replacements.
Cleaning small tears, repairing seams, and documenting insulation condition in service records preserve performance and simplify future maintenance.
Routine checks for damage, compression, and gaps
Inspect the insulation system at regular intervals to detect damage, compression, or gaps that can degrade performance and increase energy loss.
Inspect seams, joints, and penetration points for separation or crushed sections. Check adhesive, tape, and mechanical fasteners for failure.
Note moisture stains, mold, or odors indicating breaches. Document locations needing repair and prioritize sealing, replacing damaged sections, and restoring proper coverage promptly.
How often to replace insulation and signs of failure
How frequently insulation should be replaced depends on material, exposure, and observed deterioration; most systems require assessment every 3–10 years with immediate replacement if signs of failure appear.
Indicators include wetness, mold, compressed or crumbling foam, persistent sweating, visible gaps, loss of R-value markings, or pest damage.
Prioritize replacement when performance or structural integrity is compromised.
Cleaning and repairing small tears or loose seams
Address small tears and loose seams promptly to prevent moisture intrusion, heat loss, and accelerated deterioration of HVAC pipe insulation.
Inspect affected areas, remove dirt and old adhesive, and dry thoroughly. For minor tears, apply compatible adhesive or patch tape; reseal seams with foil-backed or UV-resistant tape.
Reinspect after curing and periodically to verify integrity and prevent recurrence.
Documenting insulation for service records
Record the condition and location of HVAC pipe insulation immediately after any maintenance or inspection to create a reliable service history.
Technicians should note material type, thickness, seams repaired, and insulation lapses, plus date, technician name, and photos.
Store entries in a centralized log or digital system with searchable tags and versioning so future inspections track changes, failures, and effectiveness over time.
Common Mistakes and How to Avoid Them
Common mistakes in pipe insulation include selecting incorrect materials or thicknesses for the application and leaving gaps at fittings and supports.
Failure to install vapor barriers in humid environments and overcompressing insulation, which reduces R-value, also undermine performance.
Addressing these issues early prevents energy loss, condensation, and premature system wear.
Using wrong material or thickness for the application
Choosing the incorrect insulation material or an inappropriate thickness is a frequent cause of HVAC inefficiency and premature system wear.
Selecting low-R-value foam for cold lines causes condensation; overly thick insulation can be unnecessary and costly for short runs.
Match material (closed-cell for moisture, fiberglass for high-temperature ductwork) and thickness to pipe size, temperature, and climate to guarantee proper thermal resistance and durability.
Leaving gaps at fittings and supports
Mistakes in material or thickness selection often show up most clearly at fittings and supports, where installers may leave gaps that undermine the insulation’s performance.
Small voids at elbows, tees, valves, and hangers create thermal bridges and allow condensation.
Insulation should be cut to fit, sealed with appropriate adhesives or tapes, and supported continuously to eliminate gaps and maintain R-value.
Ignoring vapor barriers in humid environments
Failing to include a proper vapor barrier in humid climates undermines pipe insulation by allowing moisture to reach cold surfaces, leading to condensation, corrosion, and mold growth.
Install continuous, sealed vapor barriers on cold lines, overlap and tape seams, and seal penetrations at fittings and supports.
Inspect regularly for breaches and repair promptly to maintain insulation performance and prevent moisture-related damage.
Overcompressing insulation and reducing R-value
Compressing pipe insulation too tightly reduces its effective R-value by collapsing insulating fibers or diminishing trapped air pockets, which impairs thermal resistance and can create cold spots.
Installers should fit insulation snugly without squeezing, follow manufacturer thickness and compression limits, and use properly sized preformed sections.
Replacing flattened material and inspecting seams prevents performance loss and condensation issues over time.
Cost Estimates, DIY vs Professional Installation, and Hiring Tips
Estimated costs for materials and labor are outlined to help readers budget for pipe insulation projects.
Guidance is provided on which situations are suitable for DIY work and which typically require a professional.
Recommended contractor questions and key warranty considerations are highlighted to aid hiring decisions.
Rough cost ranges for materials and labor
A few common factors determine the rough cost ranges for insulating HVAC pipes: material type and thickness, pipe length and diameter, accessibility, and whether the work is DIY or done by a professional. Typical ranges: DIY materials $0.50–$5/ft; pros add labor $30–$100/hr. Table summarizes.
| Item | DIY range | Pro range |
|---|---|---|
| Foam sleeve | $0.50–$3/ft | $1–$4/ft |
| Fiberglass | $1–$5/ft | $2–$6/ft |
| Labor | — | $30–$100/hr |
When to DIY and when to hire a pro
When is a homeowner better off insulating HVAC pipes themselves, and when is hiring a professional the smarter choice?
Simple runs in accessible areas with basic tools suit DIYers seeking low material costs.
Complex systems, tight spaces, refrigerant lines, or unclear local codes warrant pros.
Professionals guarantee correct materials, secure seals, and efficient labor; expect higher fees but reduced risk and longer-lasting results.
Questions to ask contractors and warranty considerations
Having decided whether to tackle pipe insulation personally or hire a contractor, homeowners should prepare targeted questions and understand warranty implications before soliciting bids.
Essential inquiries cover scope, materials, labor, timeline, and licensing. Confirm warranty length, coverage, and transferability.
Compare estimates and ask for references.
- Materials type and R-value?
- Labor warranty length?
- Is work licensed and insured?
- Project timeline?
- Any transferable warranty terms?
Energy and Safety Regulations, Codes, and Best Practice Standards
Before beginning insulation work, readers should verify applicable building codes and mechanical standards that govern pipe insulation materials, thickness, and fire safety.
They should also confirm local permit requirements and inspection processes to guarantee compliance.
Finally, industry best practices and manufacturer guidelines should be followed to meet performance and warranty conditions.
Relevant building codes and mechanical standards to check
Because pipe insulation affects energy performance, occupant safety, and system longevity, installers and designers must consult applicable building codes, mechanical standards, and energy regulations early in project planning.
Key references include the International Mechanical Code, ASHRAE standards (90.1 and 62.1), local energy codes, NFPA for fire safety, and manufacturers’ specifications to guarantee insulation type, thickness, and fire ratings meet jurisdictional requirements.
Local permit considerations and inspection requirements
When local permit requirements are triggered by HVAC pipe insulation work, project stakeholders must confirm scope, documentation, and inspection timelines with the authority having jurisdiction to secure compliance and avoid costly delays.
Verify permit types (mechanical, energy, structural), submit accurate drawings and specifications, schedule required inspections, retain inspection reports, and make certain corrective actions are completed.
Noncompliance may prompt fines or work stoppage.
Industry best practices and manufacturer guidelines
After confirming permit and inspection obligations with the authority having jurisdiction, attention should turn to industry best practices and manufacturer guidelines that govern HVAC pipe insulation.
Follow applicable codes (ASHRAE, NFPA, local), specified insulation materials, thicknesses, vapor barriers, and installation methods.
Adhere to manufacturer temperature limits, adhesives, and fastening recommendations.
Document compliance, maintenance intervals, and warranty conditions for safety and performance.
Quick Reference: Choosing the Right Insulation for Your HVAC Pipes
A concise quick-reference helps professionals match pipe characteristics to the right insulation and troubleshoot common issues.
- Identify pipe type (copper, PVC, steel, or flexible)
- Consider local climate and exposure (freeze risk, humidity)
- Determine required thickness for thermal performance and code compliance
- Select vapor and fire barrier options as needed
- Follow a short checklist for installation and common fixes
Use this checklist to prioritize immediate actions and confirm the right material and protection before installation.
Selection flowchart steps (pipe type → climate → thickness → barrier)
Choosing the right insulation for HVAC pipes follows a simple decision flow: identify the pipe material and function, evaluate the local climate and exposure, select the insulation thickness to control condensation or heat loss, and decide whether an external vapor or physical barrier is required.
Next, match material (copper, steel, PEX) to suitable insulation type, pick R-value/thickness per climate, and add barriers for outdoor or high-humidity situations.
Short checklist for immediate action and troubleshooting
Begin with a concise checklist that guides immediate actions and common troubleshooting steps for insulating HVAC pipes.
- Inspect pipe type and measure diameter.
- Choose insulation material and proper thickness.
- Confirm vapor barrier and seal seams with tape.
- Check for gaps, compressions, or moisture after installation.
- Monitor temperature and re-insulate or replace damaged sections promptly.
Conclusion
Insulating HVAC pipes protects system efficiency and indoor comfort, reducing energy loss and condensation risks like a well-fitted coat guarding against winter chill. Proper material selection, accurate sizing, and careful sealing prevent moisture damage and maintain performance, while adherence to codes guarantees safety. Whether tackled as a DIY project or entrusted to professionals, regular inspection and timely replacement of degraded insulation sustain long-term savings and reliability for both residential and commercial systems.