
How to Change a Toilet Drain Pipe: Step-by-Step DIY Guide for Beginners
To change a toilet drain pipe, start by shutting off the water supply and removing the toilet. Inspect the flange and subfloor for any damage. Cut out the old pipe, then dry-fit new PVC or ABS sections before securing them with glue or appropriate joins. Install a properly seated flange at the correct height. When reinstalling the toilet, use a new wax ring or rubber gasket to create a seal and test for leaks. This guide offers detailed steps, essential tools, safety tips, troubleshooting advice, and code considerations.
What It Takes to Replace a Toilet Drain Pipe
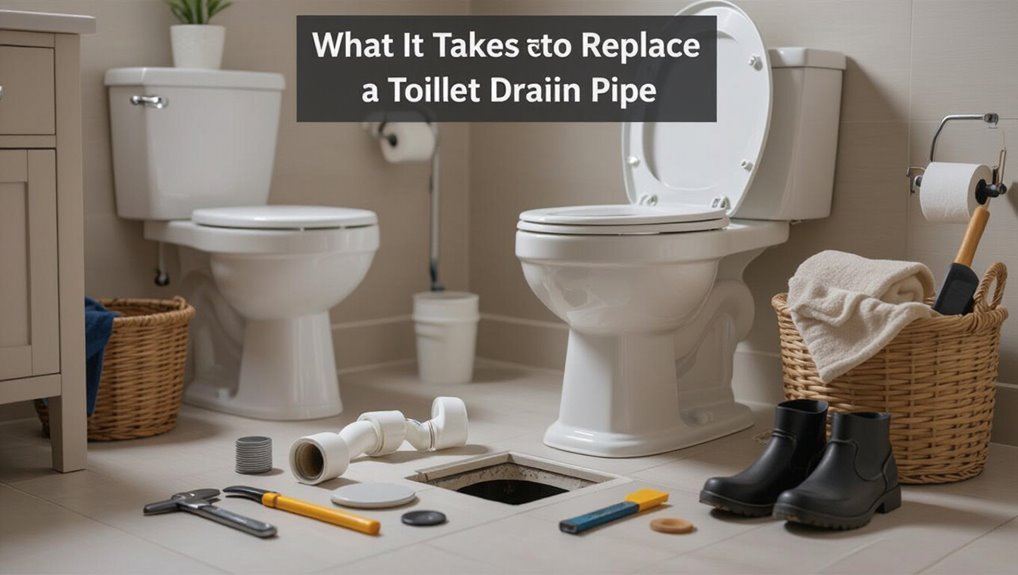
Signs such as persistent leaks, foul odors, or sewage backups indicate when a toilet drain pipe should be replaced. Common scenarios include aged clay or corroded metal pipes and damage from shifting foundations.
The replacement process typically involves removing the fixture, cutting out the old pipe, installing new piping and seals, and can range from a few hours for a simple swap to a full day or more for extensive repairs.
Basic plumbing skills and proper tools suffice for straightforward jobs, but complex layouts, structural access issues, or sewer-line connections warrant hiring a licensed professional.
When to replace the toilet drain pipe common signs and scenarios
Detecting the need to replace a toilet drain pipe hinges on observable problems and situational factors: recurring clogs despite snaking, persistent slow drainage, frequent sewer odors, visible leaks or water damage at the base of the toilet, and corrosion or cracks in exposed piping.
Other scenarios include unstable toilet movement, mold growth from hidden leaks, and sewer backups.
These signs prompt inspection before attempting how to change toilet drain pipe.
Overview of the replacement process and expected time
Replacing a toilet drain pipe typically involves removing the fixture, evaluating and cutting out the old piping, installing new drain sections and connections, setting a new flange and wax ring (or gasket), and reinstalling and testing the toilet.
For a straightforward job with accessible piping, a competent DIYer or plumber can complete the work in 2–4 hours, while complex situations—rotted subfloor, cast-iron removal, or difficult outlet locations—can extend the project to a full day or require multiple visits.
Preparatory steps include gathering parts, isolating water, and protecting floors.
Required skills and when to call a professional
Evaluating whether to tackle a toilet drain pipe replacement depends on a mix of basic plumbing proficiency, tool familiarity, and comfort with structural work.
The task requires measuring, cutting pipe, sealing joints, installing flanges, and basic drain slope knowledge.
Call a professional if leaks risk, cast-iron removal, inaccessible vents, unfamiliar code requirements, or lack of confidence—especially where structural floor work or sewer connections are involved.
Tools, Materials, and Safety Gear Checklist
Before beginning the replacement, the author lists the essential items and protective gear required for a safe, code-compliant job.
Consider these categories when preparing:
- Tools: wrenches, saws, auger, and test equipment
- Materials: PVC/ABS pipe options, fittings, wax ring, flange, couplers
- Safety: gloves, eye protection, mask, and work boots
Having the right checklist reduces delays and helps guarantee a proper installation.
Tools (wrenches, saws, auger, test equipment)
Gather the right tools to guarantee the drain pipe replacement proceeds efficiently and safely: adjustable and pipe wrenches, a hacksaw or reciprocating saw for cutting cast or PVC pipe, a plumber’s auger for clearing clogs, and test equipment such as a pressure gauge and leak detection dye.
Also include slip-joint pliers, basin wrench, deburring tool, measuring tape, marker, and a flashlight for inspection and alignment.
Materials (PVC/ABS pipe options, fittings, wax ring, flange, couplers)
Materials for replacing a toilet drain pipe should be chosen for compatibility, durability, and code compliance. Common options include PVC (schedule 40) or ABS drain pipe; select matching fittings and solvent cement or appropriate mechanical couplers.
Required parts: toilet flange, wax or wax-free ring, closet bolts, pipe couplers, elbows, and cleanouts.
Choose corrosion-resistant materials rated for waste systems and local codes.
Safety and protective equipment
A concise checklist of tools, materials, and personal protective equipment guarantees the task proceeds safely and efficiently.
Required items: adjustable wrench, pipe cutter, hacksaw, screwdriver set, pliers, plumber’s snake, bucket, rags, replacement pipe and fittings, wax ring, flange, PVC cement.
Safety gear: safety glasses, nitrile gloves, dust mask, knee pads, work boots, and hearing protection when cutting.
Understanding Toilet Drain Types and Plumbing Basics
Different drain materials—cast iron, PVC, ABS, and clay—have distinct cutting, joining, and replacement requirements that affect the approach to changing a toilet drain.
The choice between sewer and septic systems influences connection methods, venting, and waste-line routing, while toilet flange types must match pipe material and floor height for a proper seal.
Local plumbing codes and permit requirements determine acceptable materials and procedures and should be verified before work begins.
Types of toilet drain pipes (cast iron, PVC, ABS, clay)
To understand toilet drain systems, recognize the four common pipe types—cast iron, PVC, ABS, and clay—each with distinct properties, longevity, and installation methods.
Cast iron is durable and heavy; PVC is lightweight, inexpensive, and solvent-welded; ABS is impact-resistant and used in some regions; clay is brittle, historic, and prone to cracking.
Choice affects repair method and fittings.
Sewer vs. septic system considerations
Knowing the material and layout of a toilet drain informs how it connects to either a municipal sewer or an on-site septic system.
Municipal connections often require backflow prevention, inspection ports, and adherence to local codes; septic systems need proper slope, venting, and access for maintenance and avoidance of solids entering the tank.
Disposal differences affect pipe sizing, fittings, and service frequency.
Toilet flange types and compatibility
A toilet flange, the critical connector between the closet outlet and the waste line, determines how a toilet mounts and seals to the drain system.
Its type—cast iron, PVC, ABS, brass, or offset—affects compatibility with both floor material and pipe size, as well as the needed fasteners, wax or rubber gasket, and flange height relative to finished floor.
Match flange material to existing piping, verify correct diameter and secure anchoring.
Local code considerations and permits
After confirming flange type and fit, attention turns to local plumbing codes and permit requirements that govern toilet drain work.
The homeowner should verify jurisdictional rules for fixture replacement, venting, slope, and trap integrity.
Permits, inspections, and licensed-plumber mandates vary; failing to comply risks fines and failed resale inspections.
When uncertain, consult the building department or a qualified plumber before beginning.
Preparing the Site and Shutting Off Services
Before any pipe work begins, the water supply is turned off and the toilet is removed following safe lifting and disconnecting procedures.
Surfaces are protected with drop cloths and barriers while buckets and towels contain residual waste and water.
The exposed area, subfloor, and adjacent plumbing are inspected for damage, rot, or leaks before proceeding.
How to shut off water and remove toilet safely
Shut off the toilet’s water supply and clear the bowl to prevent spills and facilitate removal.
Close the shutoff valve at the wall, then flush to drain the tank; sponge remaining water.
Disconnect the supply line with a wrench.
Remove tank bolts if separating the tank, then unbolt base bolts.
Rock the toilet gently to break the wax seal and lift straight up; set aside upright to avoid warping.
Protecting bathroom surfaces and containing waste
Several simple protective steps keep fixtures and finishes safe and make cleanup easier when a toilet is removed.
Lay down contractor bags or plastic sheeting over floor and nearby cabinets, secure edges with tape, and cushion fragile surfaces with cardboard.
Place a large bin or bucket near the work area for debris and used sealant.
Seal removed wax ring in a bag to contain odors and waste.
Inspecting subfloor and surrounding plumbing
Begin by cutting power to any nearby outlets and ensuring the water supply to the toilet is fully closed.
Then remove the bowl and seat to expose the flange and surrounding floor.
Inspect the subfloor for rot, soft spots, or staining.
Check flange integrity, pipe alignment, and nearby supply lines for leaks or corrosion.
Note any structural damage requiring repair before replacing the drain pipe.
Step-by-Step Guide to Changing a Toilet Drain Pipe
The following concise sequence outlines the core actions for replacing a toilet drain pipe.
- Remove the toilet and old flange/pipe, inspect, then measure for the new layout.
- Cut and fit replacement pipe and fittings using the appropriate method (PVC/ABS or cast iron), then install and secure the new flange to the subfloor.
Step 1 Remove the old toilet and disconnect plumbing
Shut off the water supply and drain the bowl and tank before removing the fixture to prevent spills and make disconnection safer.
The writer removes the tank lid, disconnects the supply line, and empties residual water with a sponge.
Bolts securing the toilet to the floor are unscrewed, wax ring and closet bolts noted, and the toilet lifted straight up and set aside on protective cardboard.
Step 2 Inspect and remove old flange and pipe section
With the toilet removed and the floor area cleared, the next step is to inspect the flange and the visible section of the drain pipe for damage, corrosion, or misalignment.
Confirm flange integrity, rusted bolts, cracked cast iron, or warped plastic.
Cut back deteriorated pipe using appropriate tools, remove the old flange, clean the opening, and clear debris to prepare for replacement without measuring or planning layout.
Step 3 Measure and plan the new pipe layout
Before cutting or fitting new sections, measure the existing opening, floor-to-flange height, and the distance to any nearby bends or vents to create an accurate layout plan.
Record horizontal runs, slopes required (minimum 1/4″ per foot), and clearance to walls or joists.
Sketch the route, note fittings and lengths, verify vent alignment, and list materials to avoid surprises during installation.
Step 4 Cut and fit new pipe and fittings (PVC/ABS or cast iron methods)
Begin cutting and fitting the new drain by laying out each pipe and fitting on the ground to confirm lengths and angles before any permanent joins are made.
Cut pipe squarely, deburr edges, and dry-fit sections. For PVC/ABS, apply primer and solvent cement per manufacturer instructions.
For cast iron, use hubless couplings or no-hub clamps with proper gasketing.
Re-check alignment and slope before final joining.
Step 5 Install new flange and secure to subfloor
After confirming the drain line alignment and finalizing all pipe joints, the installer shifts focus to mounting the toilet flange, which creates the sealed connection between the drain pipe and the toilet.
The flange is fitted over the pipe, checked for level and height relative to the finished floor, fastened with corrosion-resistant screws into the subfloor, and sealed with appropriate adhesive or gasket as needed.
Step 6 Re-seat the toilet with new wax ring or gasket
The toilet is lowered back onto the flange using a fresh wax ring or modern foam gasket to guarantee a watertight seal; care is taken to align the bowl bolts with the flange slots and to press evenly so the seal compresses uniformly.
Bolts are tightened alternately to avoid rocking, excess wax trimmed, the toilet leveled with shims as needed, and bolt caps installed for a finished appearance.
Step 7 Test for leaks, proper drainage, and seal integrity
Flush several times while observing the base, supply connections, and drain for any signs of water or seepage.
Check bowl refill speed and tank refill valve operation.
Inspect for slow drainage or gurgling indicating vent or trap issues.
Wipe joints dry and monitor for minute leaks over 10–15 minutes.
Note any movement or rocking that could compromise the seal and address immediately.
Step 8 Finishing touches: caulking, shimming, and cleanup
Secure the toilet and finalize the installation by caulking the base, inserting shims where needed, and performing a focused cleanup to leave the area watertight and stable.
Apply a thin bead of silicone around the flange, trim visible shims, tighten bolts evenly, wipe excess sealant, and remove debris.
Reinspect for gaps, guarantee toilet rocks are eliminated, and ventilate until caulk cures.
Alternative Methods and Situational Adjustments
The article outlines when a simple patch, coupler, or a full replacement is the appropriate response to a leaking or damaged toilet drain.
It notes the special considerations required when joining cast iron to plastic and the appropriate conversion fittings.
It also highlights options for accessing and replacing sections from a basement or crawlspace versus working from the bathroom floor.
Repair vs. full replacement: when to patch or use couplers
When is a simple patch sufficient versus when does the entire drain require replacement?
A patch or coupler suits localized leaks, minor corrosion, or short damaged sections with solid surrounding pipe.
Full replacement is warranted for widespread corrosion, multiple failures, misaligned or collapsed pipes, persistent odor or backups, or when material incompatibility risks recur.
Cost, access, and long-term reliability guide the choice.
Working with cast iron vs plastic transitions
Having decided whether to patch or replace, attention turns to joining cast iron and plastic drain systems—an area that commonly affects method selection and long-term reliability.
Change choices include neoprene or rubber couplings with stainless clamps, Fernco flexible adapters, or no-hub stainless bands for cast iron.
Confirm proper pipe alignment, clean mating surfaces, correct insert depth, and use sealants or gaskets rated for wastewater to prevent leaks.
Accessing and replacing sections through the basement or crawlspace
Accessing toilet drain lines from a basement or crawlspace offers a practical alternative to tearing up finished floors, especially where stacks and traps are reachable below the fixture.
The installer should locate and isolate the section, support piping, cut back to sound material, and install compatible couplings or new runs.
Verify proper slope, venting, and secure hangers; pressure-test and inspect for leaks before finishing.
Troubleshooting Common Problems
Common problems after replacing a toilet drain pipe include persistent leaks at the flange or joints, poor flush performance or slow drainage, and an unstable toilet on an uneven floor.
Technicians should also check for bad odors or sewer gas entry that indicate a compromised seal or venting issue.
The following sections explain diagnostic steps and targeted fixes for each of these issues.
Persistent leaks at the flange or joints
Persistent leaks at the toilet flange or pipe joints often indicate a failed seal, loose fasteners, or misalignment between the toilet and drain.
Inspect the wax ring or gasket, tighten or replace flange bolts, and guarantee the flange is level and intact.
Check joint connections for cracked fittings or degraded sealant.
Replace damaged components and retest to confirm a watertight connection.
Poor flush or slow drainage after replacement
When a newly replaced toilet shows a weak flush or slow drainage, the problem usually stems from venting issues, partial blockages, or improper trapway alignment rather than the drain pipe itself.
Inspect the vent stack for obstructions, rod and snake the trap and bowl for debris, verify correct trapway orientation and seal, and guarantee water level in the tank and flush valve operation are proper.
Unstable toilet or uneven floor issues
Addressing an unstable toilet requires checking the flange, mounting bolts, and floor level to identify whether the issue stems from a warped flange, missing shims, or subfloor damage.
Tighten or replace bolts, add corrosion-resistant shims, and seat the toilet evenly.
If wobble persists, inspect and repair rotten subflooring, replace the flange or use a flange repair kit, then reseat with a new wax or rubber ring.
Bad odor or sewer gas entry after reinstallation
Detecting a foul odor after reinstalling a toilet typically indicates a compromised seal or trapped sewer gas; common causes include a misaligned or damaged wax ring, an improperly seated flange, or gaps around the toilet base.
Inspect the wax ring and flange alignment, tighten bolts evenly, replace damaged seals, and seal base gaps with caulk.
Verify venting and test for leaks before finalizing.
Cost Estimates and Time Considerations
Cost and time are key factors when choosing between a DIY approach and hiring a professional for a toilet drain pipe replacement. The following table offers a quick snapshot of typical DIY material costs versus professional labor and a rough time breakdown for major project stages. Readers can use this summary to set expectations and plan accordingly.
| Item | Typical DIY Cost | Estimated Time |
|---|---|---|
| Materials (pipe, fittings, sealant) | $30–$150 | 1–2 hours to prep/install |
| Professional service (labor + materials) | $200–$800 | 2–6 hours on site |
| Additional work (floor repair, access) | $50–$400+ | 1–8 hours depending on scope |
Typical DIY material costs vs. professional labor
A straightforward comparison of material expenses and professional labor highlights where homeowners can save and where expertise is worth the price.
Typical DIY materials—PVC pipe, fittings, wax ring, sealant, basic tools—often run $40–$150.
Hiring a plumber usually costs $200–$600+ depending on complexity and regional rates.
Complex issues, code compliance, or confidence gaps justify professional fees despite higher cost.
Estimated time breakdown for each project stage
After weighing material costs against hiring a professional, attention shifts to how long each step of a toilet drain replacement typically takes.
Preparation and shutoff: 15–30 minutes.
Toilet removal: 20–40 minutes.
Drain pipe inspection and layout: 15–30 minutes.
Cutting and fitting pipe: 30–60 minutes.
Sealing and securing: 20–40 minutes.
Reinstalling toilet and testing: 30–60 minutes.
Total: 2–4 hours.
Safety, Code Compliance, and Long-Term Maintenance
The section addresses requirements for meeting local plumbing codes and when permits or inspections are needed.
It also outlines routine maintenance tasks—such as periodic seal checks and clearing minor clogs—to extend the drain’s service life.
Finally, it highlights warning signs (persistent odors, slow flushing, leaks or cracks) that warrant professional inspection or eventual replacement.
How to ensure work meets local plumbing codes
Compliance with local plumbing codes provides a clear framework that protects safety, prevents future failures, and provides long-term functionality.
The homeowner should verify code requirements, obtain necessary permits, and consult local authority resources.
Follow approved materials, joint types, trap and vent rules, and slope specifications.
If uncertain, hire a licensed plumber and request inspection sign-off to guarantee legal compliance and insurance validity.
Routine maintenance to prolong drain life
Maintain drains proactively to extend their service life, reduce emergency repairs, and guarantee ongoing adherence to safety and code requirements.
Regular inspections, gentle clearing of hair and debris, periodic enzymatic cleaners, and maintaining proper trap seals prevent buildup and odors.
Verify venting and slope remain correct, tighten accessible joints, and document maintenance dates.
Schedule professional inspections for aging systems or recurring issues.
Signs that indicate future replacement or professional inspection
Beyond routine upkeep, certain warning signs indicate a drain pipe may need replacement or a professional inspection to guarantee safety and code adherence.
Persistent slow drains, recurrent clogs, foul odors, visible leaks, corrosion, sagging sections, sewage backups, or water stains on floors and ceilings signal deterioration.
Frequent repairs, unusual noises, or failed plumbing inspections also warrant timely professional evaluation to prevent health hazards and code violations.
Helpful Tips, Mistakes to Avoid, and Pro Best Practices
The section highlights practical guidance to reduce errors, save time, and recognize when professional help is required.
Key points include:
- Common rookie mistakes and how to prevent them
- Time-saving and durability-focused tips
- When to stop and call a licensed plumber
Readers are encouraged to apply these focused suggestions to improve outcomes and avoid costly setbacks.
Common rookie mistakes and how to prevent them
Avoiding common rookie mistakes when changing a toilet drain pipe prevents leaks, wasted time, and costly repairs.
Beginners often overtighten bolts, misalign flanges, skip proper wax ring seating, or reuse damaged gaskets.
Inspect parts, measure and align carefully, follow torque guidance, and replace seals.
Test for leaks before finalizing.
When uncertain, consult instructions or a professional to avoid repeat work.
Time-saving and durability-focused tips
Plan each step with durability and speed in mind: gather quality replacement parts, the right tools, and a checklist to prevent backtracking.
Use corrosion-resistant fittings, properly sized gaskets, and stainless fasteners.
Pre-fit assemblies before sealing. Apply thread sealant sparingly and torque to spec.
Keep workspace organized, dispose old materials, and test for leaks under pressure.
Record parts for future maintenance.
When to stop and call a licensed plumber
When should a homeowner stop and call a licensed plumber?
If leaks persist after gasket or flange replacement, if sewer gas odor, cracked soil pipe, major corrosion, or hidden damage is suspected, or if connections require rerouting through structural elements.
Also call a pro for unfamiliar tools, nonstandard traps, persistent blockages, or local code compliance—avoiding costly mistakes and health risks.
Conclusion
The homeowner gains confidence by learning the tools, the steps, and the safety practices; the homeowner avoids costly mistakes by planning, measuring, and choosing proper parts; the homeowner preserves plumbing integrity by following codes, testing seals, and scheduling maintenance. With patience, preparation, and respect for local rules, the job becomes manageable; with caution, competence, and a willingness to call a pro when needed, the toilet drain lasts longer and performance improves.
