How to Remove a Faucet Handle Cap Quickly: Step-by-Step Fix for Stuck Caps
If you’re struggling with a stuck faucet handle cap, you can free it quickly by following these steps. Start by protecting the finish with tape, then use a nylon-protected flathead or plastic wedge to gently pry at an edge. Applying heat from a hair dryer or using penetrating oil can help loosen mineral deposits. Work the cap back and forth carefully, avoiding metal tools on coated surfaces. If the cap remains stuck, turn off the water and remove the handle assembly for easier access. For more detailed troubleshooting, tools, and prevention tips, continue reading.
Quick solution to remove a stuck faucet handle cap
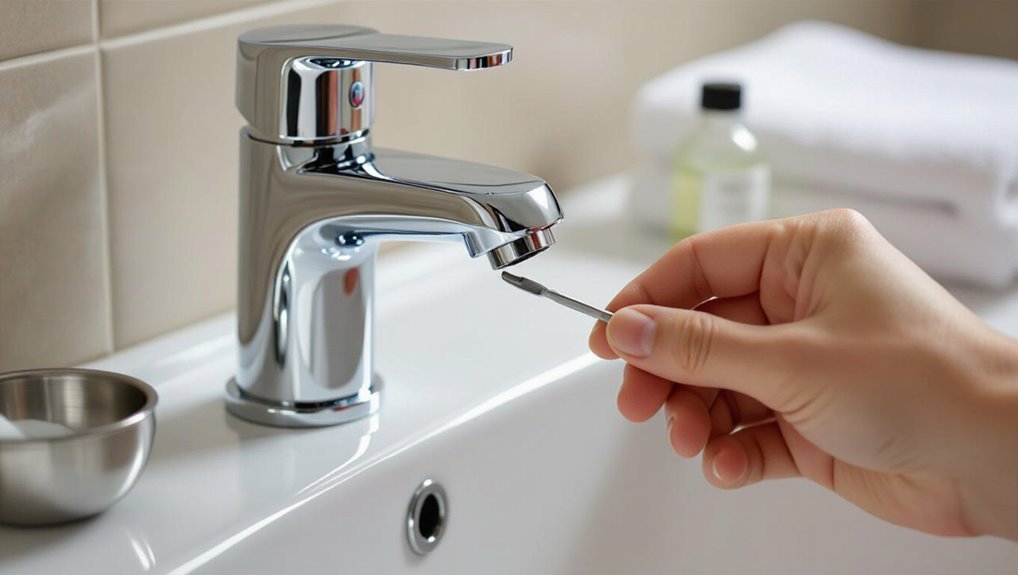
A concise one-line method for safely removing a stuck faucet handle cap is presented, emphasizing gentle prying with a thin plastic or wooden tool to avoid scratching.
Recommended tools and materials—such as a flat plastic pry tool, a cloth, penetrating oil, and gloves—are listed for quick access.
Safety tips and a brief step-by-step follow to minimize damage and effort.
One-line method to remove a stuck cap safely
Apply steady pressure with a thin, flat tool while protecting the finish to pop a stuck faucet handle cap free without damage.
The technician demonstrates how to remove faucet handle cap by slipping a nylon-protected flathead under the rim, levering outward with controlled force until the clip releases.
This one-line method minimizes risk, avoids excessive force, and preserves surrounding plating.
Tools and materials to have ready
Having used a nylon-protected flathead to pop a stubborn cap, the technician prepares a short list of tools and materials to prevent damage and speed the job.
Essentials include protective tape, penetrating oil, small picks, and a soft cloth. The kit minimizes scratches and eases removal while protecting finishes and internal parts.
- Protective tape
- Penetrating oil
- Small picks/needle tools
- Soft cloth
How faucet handle caps are attached and why they get stuck
Faucet handle caps are typically attached by small screws, snap-fit or press-fit clips, or simply serve as decorative covers that press on.
They can become stuck from mineral buildup, corrosion, paint over-spray, broken clips, or long-term wear.
Identifying the cap type—by looking for screw heads, visible seams, or flexible tabs—helps determine the safest removal method.
Common attachment types (screw-in, snap-fit, press-fit, decorative covers)
Although small and often overlooked, handle caps attach to faucet stems in a few distinct ways—screw-in, snap-fit, press-fit, and decorative covers—each method influencing how and why caps become stuck.
- Screw-in: threaded cap secured with visible or hidden screw.
- Snap-fit: plastic clips lock into place.
- Press-fit: friction holds metal or plastic sleeve.
- Decorative cover: conceals fastener, slips over base.
Causes of sticking (mineral buildup, corrosion, paint, broken clips, age)
After outlining the common attachment types, it becomes clear why certain caps seize: mineral deposits, corrosion, paint, broken clips, and age each interfere with their specific fastening method.
Mineral scale jams threads; corrosion fuses metal parts; paint fills seams and hardens; plastic clips crack or deform over time, reducing retention and alignment.
- Mineral buildup
- Corrosion
- Paint intrusion
- Mechanical wear and fracture
How to identify the cap type on your faucet
How can someone tell which type of cap is on a sink handle? The observer examines shape, material, and fastening: snap-on plastic, threaded metal, set-screw, or decorative cap hiding screws.
Check for visible seams, slots, or hex holes; try gentle prying at an edge. Sticking results from mineral deposits, corrosion, paint, or distorted clips that impede removal.
Step-by-step removal: gentle approaches first
The paragraph outlines a cautious, ordered method for cap removal beginning with workspace preparation and finish protection.
It then recommends softening mineral deposits with penetrating lubricant or vinegar and employing non-marring pry tools to avoid scratches.
If a cap resists, the technician should wiggle and rotate while pulling and inspect common hiding places for screws before escalating force.
Step 1 Prepare the area and protect finishes
Clear the surrounding area and lay down protective materials before touching the faucet. The person places towels or a soft cloth to catch drips and protect finishes, clears nearby items, and turns off water if applicable.
Small trays collect screws and parts. Gloves protect hands; a flashlight improves visibility.
Careful preparation minimizes damage and speeds subsequent steps.
Step 2 Apply penetrating lubricant or vinegar for mineral deposits
Spray a penetrating lubricant or apply white vinegar to the base and seams of the faucet handle to loosen mineral buildup and corrosion.
Allow 10–15 minutes for the solution to penetrate. Repeat application if deposits persist.
Wipe away softened residue with a soft cloth or old toothbrush.
Use caution to protect nearby finishes and avoid harsh scrubbing that could damage plating.
Step 3 Use gentle pry techniques with non-marring tools
Begin prying gently with a non-marring tool—such as a plastic spudger, guitar pick, or wood shim—placed between the handle cap and its base to avoid scratching finishes.
Apply steady, even pressure at multiple points, easing the cap upward a little at a time.
Rotate the tool slightly to release edges, pause to reassess if resistance occurs, and avoid metal tools that can mar surfaces.
Step 4 Wiggle and rotate while pulling to loosen snap-fit caps
Gently wiggle the cap side-to-side and inward while applying steady, outward pulling pressure to work a snap-fit free from its retaining catches.
Continue alternating slight rotation with rhythmic tugs to relieve friction and disengage clips.
Pause if resistance increases, inspect for hidden fasteners or debris, and repeat gentle motions until the cap releases.
Avoid excessive force to prevent damage.
Step 5 Removing caps held by hidden screws (where to look)
If wiggling and pulling fail to free the cap, hidden screws are a likely cause and should be checked before applying more force.
Inspect beneath decorative covers, under the handle base, inside inset holes, and along the rim for tiny slotted, hex, or Torx fasteners.
Use a bright light and magnifier; remove any trim gently, then unscrew and lift the cap straight off.
When gentle methods fail: safe escalation techniques
When initial gentle methods do not free the cap, measured escalation techniques can be employed. Options include applying controlled heat to expand metal or soften adhesives, using a strap wrench or rubber pads for added grip, or carefully drilling a small access hole to reach hidden screws.
If the cap remains immovable, removing the entire handle assembly is often safer than forcing the cap and risking damage.
Using heat to expand metal or soften adhesives
Apply controlled heat as a measured step to loosen corroded metal or soften adhesive residues that resist manual removal.
Use a hair dryer or low-setting heat gun at a safe distance, warming evenly for short intervals. Protect nearby finishes with a cloth and avoid overheating seals or plastic.
Test progress frequently; stop if components soften excessively or paint blisters, then allow cooling before attempting removal.
Using a strap wrench or rubber pads for extra grip
Reach for a strap wrench or rubber pads to gain extra grip without damaging finishes when gentle twisting and heat have failed.
Position the strap or pads around the cap, apply steady, even pressure, and turn slowly. A strap wrench conforms to irregular shapes; rubber pads increase friction for hand leverage.
Avoid sudden jerks; inspect for movement and repeat until the cap loosens.
Carefully drilling an access hole for hidden screws
If a strap wrench or rubber pads fail to free a stubborn cap, careful drilling can reveal a hidden retaining screw so the handle can be removed without marring the finish.
Mark the spot, use a center punch, and drill slowly with a small carbide or cobalt bit. Keep drill speed low, apply minimal pressure, stop at metal, and enlarge only as needed to expose the screw.
When to remove the handle assembly instead of forcing the cap
When repeated gentle methods fail to budge a faucet cap, removing the entire handle assembly becomes the safer alternative to continued force. This prevents damage to decorative finishes and internal components while allowing direct access to concealed fasteners and corroded parts that resist external leverage.
The technician should shut off water, document component orientation, use correct tools, and work methodically to expose and address seized screws or corrosion safely.
Tools, supplies, and alternatives to buy or improvise
A concise set of tools and improvised options can make removal of a stuck faucet cap straightforward while avoiding damage.
The discussion covers specialty tools for stubborn caps, common household items that can substitute in a pinch, and clear signs that professional help or a faucet replacement is preferable.
Practical guidance follows to match the problem severity with the right approach.
- Specialty tools (cap pullers, strap wrenches, small screw extractors)
- Household substitutes (rubber jar opener, duct tape, heat from a hair dryer)
- Safety and protective supplies (gloves, cloths, penetrating oil)
- When to call a plumber or replace the faucet (persistent seizure, broken parts, recurring leaks)
Recommended specialty tools for stubborn caps
Prepare a small set of specialty tools to tackle caps that resist standard methods: a soft-jaw gear puller or faucet cap puller minimizes surface damage, a strap wrench provides grip without marring finishes, and a thin cold chisel or dental pick helps release stubborn debris in the cap seam.
Additionally, include a magnetic pickup for lost screws, small needle-nose pliers, and a brass punch for gentle taps.
Household items that work in a pinch
Several common household items can substitute for specialty tools to remove a stubborn faucet handle cap. A rubber jar opener or silicone mat provides grip.
A flathead screwdriver wrapped in tape protects finishes. Needle-nose pliers or adjustable wrench offer leverage if padded with cloth.
A hairdryer softens hardened caulk or adhesive. Rubbing alcohol cleans residue; lubricant spray eases seized parts.
When to call a plumber or replace the faucet
If household items and basic tools fail to free a stuck faucet cap or the handle shows signs of internal damage, it may indicate a job beyond simple improv.
Call a licensed plumber when corrosion, stripped splines, leaking cartridges, or seized valve stems are present.
Consider full faucet replacement if repair costs approach or exceed replacement prices, or if matching finishes and long-term reliability are priorities.
Avoiding damage: do’s and don’ts during removal
Careful removal preserves finishes and prevents broken parts. The following points highlight how to protect chrome, brass, and painted surfaces and outline common mistakes that lead to damaged caps or handles.
Follow these do’s and don’ts to reduce the risk of scratches, corrosion, or snap-offs.
- Use soft cloths or tape to cushion metal and painted areas.
- Apply steady, even force rather than prying or twisting suddenly.
- Avoid metal tools directly on finished surfaces; use plastic pry tools when possible.
- Check for hidden set screws or retaining clips before pulling on the handle.
How to protect chrome, brass, and painted finishes
Protect finishes by working deliberately and using the right tools and materials: soft cloths, non-abrasive cleaners, and protective tape shield chrome, brass, and painted surfaces from scratches and chemical damage during cap removal.
Use plastic pry tools, wrap metal jaws with cloth before gripping, and avoid harsh solvents or steel wool. Rinse residues promptly and dry thoroughly to prevent spotting or corrosion.
Common mistakes that cause broken caps or handles
Following the precautions for finishes helps prevent many accidents, but mishandling during cap removal still leads to broken caps or stripped handles.
Common mistakes include using excessive force, wrong tools, prying at the wrong angle, and ignoring corrosion. Proper technique and patience reduce damage risk.
- Excessive force
- Wrong tools
- Incorrect angle/prying
- Ignoring corrosion
Aftercare: cleaning, reinstallation, and preventive maintenance
After removing a faucet handle cap, the next steps cover cleaning mineral buildup from caps and handles using appropriate mild acids or nondamaging scrubs.
Clear reinstallation tips are offered to align parts correctly, torque screws to the right tightness, and leave access for future removal.
Preventive measures—such as applying compatible sealants, scheduling periodic cleaning, and upgrading hardware where necessary—help keep caps from sticking.
How to clean mineral deposits from caps and handles
Begin by inspecting the removed cap and handle for white or green crusts, pitting, or cloudy film.
Soak parts in a 1:1 white vinegar–water solution for 15–30 minutes to dissolve mineral buildup.
Gently scrub with a soft toothbrush or nylon pad, rinse thoroughly, and dry.
For stubborn deposits, repeat soaking or use a mild commercial descaler following manufacturer instructions.
Proper reinstallation tips to ensure easy future removal
Once the cap and handle are clean and free of mineral buildup, reinstallation should prioritize alignment and gentle torque to prevent future seizing.
Seat components squarely, engage splines or keys fully, and tighten screws or retaining nuts just to manufacturer torque or firm hand-tight plus a quarter-turn.
Wipe away excess cleaners, confirm smooth rotation, and test hot/cold operation before final cosmetic trim installation.
Preventive measures to keep caps from sticking (sealants, regular cleaning, hardware upgrades)
Preventive care reduces the chance of a faucet cap seizing and simplifies future maintenance.
Routine cleaning, light lubrication, and proper drying prevent mineral buildup. Apply a thin silicone grease layer on contact surfaces; avoid petroleum-based products that degrade seals.
Consider stainless or brass replacements for corrosion resistance and replace worn O-rings during reinstallation to maintain smooth operation.
- Clean monthly
- Silicone grease
- Upgrade materials
- Replace O-rings
Troubleshooting specific scenarios
The guide now addresses common problem cases that require tailored removal techniques.
It covers stuck plastic decorative caps on single‑handle faucets, metal caps fused by corrosion on older fixtures, and caps immobilized by paint or caulk buildup.
It also outlines steps for when a broken clip or internal mechanism prevents normal cap removal.
Stuck plastic decorative caps on single-handle faucets
When a plastic decorative cap on a single-handle faucet becomes stuck, it often results from mineral build-up, paint, or aging plastic that bonds to the stem, making removal delicate but achievable.
Use penetrating cleaner, soft heat from a hair dryer, and plastic pry tools to loosen the cap.
Avoid metal tools that can crack plastic; work slowly, repeating treatment until it lifts free.
Metal caps fused by corrosion on older fixtures
Older fixtures often present metal handle caps that have effectively fused to the valve stem by years of corrosion and mineral deposits. This requires careful mechanical and chemical intervention to free them without damaging surrounding finishes or internal parts.
Apply penetrating oil, allow soak time, use gentle heat, and tap lightly. If needed, leverage a strap wrench or cap puller, then clean threads and protect with anti-seize.
Caps stuck due to paint or caulk buildup
Paint or caulk build-up around a faucet handle often binds the cap to the escutcheon or countertop rather than corroding the metal itself.
To free it, carefully score the joint with a utility knife, apply a solvent-compatible softener (paint remover or caulk softener) sparingly, let it penetrate, and pry gently with a plastic wedge.
Clean residue and reseal to prevent recurrence.
Broken clip or internal mechanism preventing cap removal
Inspect the handle assembly for missing or damaged retaining clips, broken plastic splines, or sheared set screws that can lock a cap in place despite apparent freedom.
If components are broken, document orientation and remove debris.
Replace clips or splines with OEM or compatible parts, or remove the entire cartridge if necessary.
Use needle-nose pliers, pick tools, and manufacturer guidance to avoid further damage.
Comparison of removal methods: speed vs. risk
Faster removal techniques can save time but often increase the chance of cosmetic or mechanical damage, while slower, careful approaches tend to preserve parts and extend faucet life. The following table summarizes trade-offs to help choose between speed and long-term benefit. Readers should weigh urgency against potential repair or replacement costs.
| Method Type | Typical Time | Primary Outcome |
|---|---|---|
| Quick (pry, force) | Minutes | Higher damage risk |
| Moderate (soft tools, heat) | 10–30 min | Balanced risk and speed |
| Slow (stepwise, parts removal) | 30+ min | Lower risk, longer service life |
Quick methods and associated damage risk
Compare common quick removal techniques by balancing time saved against the likelihood of cosmetic or mechanical damage.
Methods like prying with a flat tool, applying heat, or using pliers are fast but risk scratched finishes, stripped screws, or cracked caps.
A rubber-coated grip or cloth buffer reduces scars, while forceful twisting can deform internals.
Choose speed only when replacement parts are acceptable.
Slower methods and long-term benefits
While slower techniques take more time upfront, they markedly reduce the chance of cosmetic or mechanical damage and extend the faucet’s service life.
Controlled methods—soaking with penetrating oil, gradual heat application, and careful use of padded tools—minimize stress on finishes and internal components.
Though time-consuming, these approaches lower repair costs and preserve functionality, offering predictable, durable results compared with rapid, forceful removal.
Useful replacement and upgrade options after removal
After removing a faucet handle cap, consideration should be given to replacement parts, easier-to-use handle options, or full faucet replacement depending on condition and cost.
Simple swap-ins and upgraded covers can restore function quickly, while tool-friendly handles reduce future maintenance time. In some cases, replacing the entire faucet proves more economical than repeated repairs.
- Buy OEM or compatible replacement caps and necessary mounting hardware
- Upgrade to tool-friendly handles or snap-on covers for easier access
- Consider replacing cartridge, valve, or internal parts when compatible and affordable
- Replace the entire faucet when repair costs approach or exceed replacement price
Buying replacement caps and compatible parts
Shop with the faucet’s brand, model, and finish in hand to guarantee replacement caps fit and match. Many manufacturers offer exact OEM caps, while universal designs and decorative upgrades provide alternatives for differing budgets or aesthetics.
Check measurements, mounting types, and material (plastic, metal, plated finishes). Verify compatibility with valve stems and retaining clips.
Keep packaging for returns and buy from reputable suppliers.
Upgrading to tool-friendly handles or covers
Moving from selecting matching caps and parts, homeowners and technicians often consider upgrading to tool-friendly handles or protective covers to simplify future maintenance and improve ergonomics.
Options include lever-style handles with accessible set screws, snap-on covers with integrated hex access, and keyed cartridges enabling quick removal.
Durable materials and universal-fit adapters reduce corrosion and compatibility issues, lowering effort for routine repairs without replacing entire faucet assemblies.
When replacing the entire faucet is more cost-effective
Consider replacing the entire faucet when repeated repairs, extensive corrosion, outdated functionality, or mismatched finishes make part-by-part fixes impractical; a full replacement can save time and money by restoring performance, ensuring compatibility with modern fixtures, and allowing selection of upgrades like touchless sensors, pull-down sprays, or water-efficient cartridges.
| Option | Benefit | Note |
|---|---|---|
| Full replacement | Long-term reliability | Higher upfront cost |
| Touchless upgrade | Hygiene, convenience | Requires power |
| Water-efficient model | Lower bills | Possible rebate |
Conclusion
Removing a stuck faucet handle cap needn’t be intimidating; gentle prying, heat, and penetrating oil resolve most cases, with careful escalation to tap extractors or cutting for stubborn caps. One compelling stat: plumbing issues cause homeowners to call pros for 8% of all household repairs annually, highlighting both the commonality of small fixes and the value of learning quick, low-risk techniques. With basic tools and patience, many can avoid service calls and save time and money.