
How to Fix a Broken Drain Pipe: Step-by-Step Repair Guide for Homeowners
If you have a broken drain pipe, the first steps are to shut off the water supply and any electrical circuits, then contain any leaks. Inspect visible areas for damage, document your findings, and use a camera or moisture meter to identify hidden breaks. For small sections of PVC, copper, or PEX, you can cut out the damaged part and replace it with the appropriate fittings or use temporary epoxy fixes. Larger issues may require rerouting the pipe, ensuring proper slope and ventilation, and possibly obtaining permits. After repairs, test for leaks and dry any affected areas. If the job seems complex, it’s best to consult a professional. This guide will detail the necessary tools, techniques, and estimated costs for your repair.
What to Do Immediately When You Discover a Broken Drain Pipe
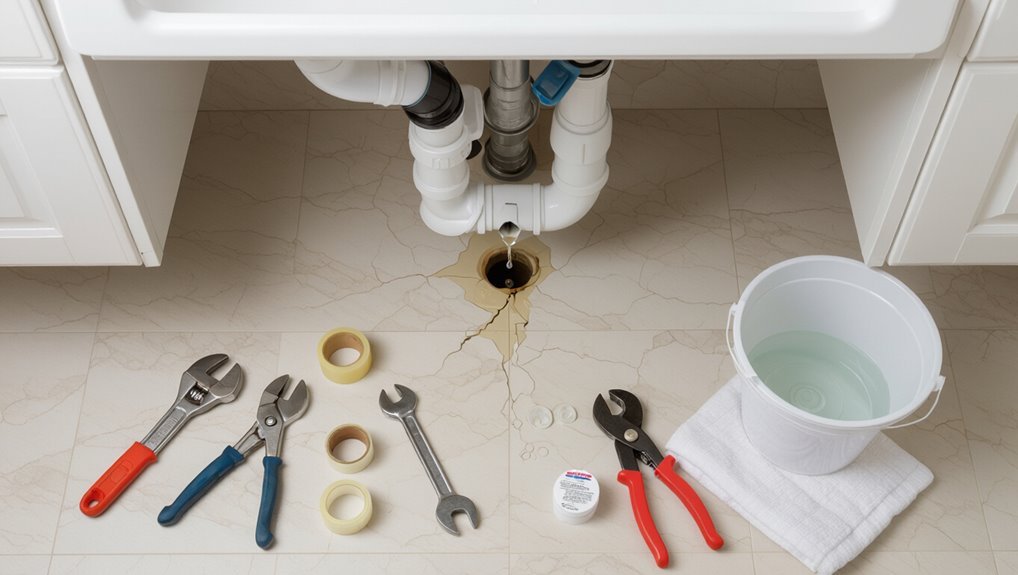
Upon noticing signs like visible leaks, foul odors, slow drains, or fresh water stains, the person should act quickly to limit damage.
Immediate steps include shutting off the water supply, turning off nearby electrical circuits, and evacuating anyone in the affected area if flooding is significant.
While awaiting repairs, contain leaks with buckets or towels, use shut-off valves where available, and position absorbent materials to protect floors and belongings.
How to recognize signs of a broken drain pipe (visible leaks, odors, slow drains, water stains)
When a drain pipe fails, early signs often appear as visible leaks, persistent odors, slow drainage, or unexplained water stains; recognizing these indicators quickly helps limit damage and informs immediate actions.
Homeowners should note damp spots, pooling water, musty smells, gurgling drains, and discoloration on ceilings or floors.
Document locations and severity to aid professionals and guide decisions about how to fix broken drain pipe.
Immediate safety steps (shut off water, turn off electrical circuits, evacuate affected area)
Noting damp spots, odors, or slow drains is only the first step; a broken drain pipe can escalate quickly and requires immediate actions to protect people and property.
The homeowner should shut off the water supply at the main valve, switch off nearby electrical circuits to prevent shock, and evacuate occupants from affected rooms.
Call a professional plumber and avoid reentering until safe.
Temporary containment measures (catching leaks, using towels, setting up buckets, shut-off valves)
Act quickly to limit water damage by containing leaks and diverting flow; place buckets under drips, layer absorbent towels or rags to catch splashes, and move furniture and valuables away from the affected area.
Next, tighten nearby shut-off valves to reduce flow, use temporary pipe clamps or rubber patches for visible holes, and continuously monitor and empty containers until professional repair is arranged.
Quick Assessment: Determine the Location and Severity of the Damage
The first step is a focused inspection of accessible areas—under sinks, in crawlspaces or basements, and around fixtures—to locate obvious leaks and water damage.
If visible signs are absent, the guide recommends targeted diagnostics such as a plumbing camera, moisture meter, or dye test to pinpoint hidden breaks.
It also notes indicators of underground or behind‑wall failures like unexplained damp spots, sinkholes, or persistent odors.
Based on the extent of damage and the reader’s skill level, the text then outlines when a homeowner can attempt repairs and when to call a professional.
Inspecting accessible areas (under sinks, in crawlspaces, basements, near fixtures)
Begin by systematically examining all accessible spaces where drain lines run—under sinks, inside crawlspaces, basements, and around fixtures—to identify visible leaks, corrosion, misaligned joints, or water stains that indicate the source and extent of damage.
Note loose fittings, cracked pipe sections, trapped debris, mold growth, and warped flooring. Photograph findings, mark locations, and prioritize areas needing immediate attention.
Using diagnostic tools (plumbing camera, moisture meter, dye test)
Employ diagnostic tools to pinpoint leaks and assess damage quickly: a plumbing camera reveals internal blockages, cracks, and joint separations; a moisture meter maps damp zones behind walls or under floors; and dye tests trace flow paths to confirm active leaks.
Use camera footage to locate repair points, moisture readings to prioritize areas, and dye results to verify leak sources before cutting or replacing pipe sections.
When the damage is hidden: signs to suspect underground or behind-wall breaks
How can one tell when a broken drain pipe is concealed beneath a wall or underground? Unexplained damp patches, persistent musty odors, and slow drains localized to one area suggest hidden leaks.
Foundation cracks, sunken or soggy yard spots, unusually high water bills, and recurring mold or peeling paint near floors reinforce suspicion.
Early detection relies on observing patterns and changes.
Deciding DIY vs professional help based on severity and skill level
Where is the break and how bad is it? The homeowner assesses access, leak size, water flow, and structural risk.
Small, accessible cracks or loose joints suit DIY if basic tools and plumbing knowledge exist.
Major breaks, collapsed pipes, sewer involvement, mold, or unclear sources require licensed professionals.
When in doubt, prioritize safety and call a pro to avoid costly mistakes.
Materials, Tools, and Safety Equipment You’ll Need
Before beginning repairs, the preparatory phase lists the common tools—pipe cutter, wrench, hacksaw, plumbing torch and plunger—alongside replacement materials appropriate to the pipe type (PVC, ABS, copper, PEX).
Necessary repair supplies include couplings, slip joints, repair clamps, epoxy putty, pipe wrap and rubber couplings.
Personal protective equipment such as gloves, goggles, a respirator and knee pads should be assembled and worn as required.
Common tools (pipe cutter, wrench, hacksaw, plumbing torch, plunger)
For a straightforward drain repair, an essential set of tools and safety gear expedites the job and reduces mistakes.
Recommended tools include a pipe cutter for clean cuts, adjustable wrenches for fittings, a hacksaw for stubborn sections, a plumbing torch for soldering copper, and a plunger for clearing blockages.
Safety gear: gloves, eye protection, and a mask for fumes and debris.
Replacement materials by pipe type (PVC, ABS, copper, PEX)
After listing the basic tools and safety gear, attention shifts to selecting replacement materials suited to the pipe type; each material—PVC, ABS, copper, and PEX—has specific fittings, adhesives, and handling requirements that affect both the repair method and required tools.
PVC and ABS use solvent cement or primer; copper requires soldering or compression fittings; PEX needs crimp or push-fit connectors.
- Match materials to existing pipe.
- Choose compatible fittings.
- Verify temperature/pressure ratings.
Repair supplies (couplings, slip joints, repair clamps, epoxy putty, pipe wrap, rubber coupling)
Gather the essential repair supplies that match the pipe material and the damage type:
- couplings and slip joints for straightforward joins,
- repair clamps and rubber couplings for quick leaks,
- epoxy putty and pipe wrap for temporary or irregular breaks,
- and appropriate gaskets or sealing tape to guarantee watertight seals.
Include pipe cutters, deburring tool, primer and solvent cement for plastic, flux and solder for copper, and a torque screwdriver for clamps.
Personal protective equipment (gloves, goggles, respirator, knee pads)
Several essential personal protective items are necessary when repairing a broken drain pipe:
chemical-resistant gloves to protect skin from sewage and solvents,
splash-resistant goggles to prevent eye exposure,
a respirator (N95 or half-mask with appropriate cartridges) when fumes or bioaerosols are present,
and knee pads to reduce strain during prolonged kneeling.
Select properly sized, certified items; inspect for damage, replace as needed, and clean after use.
Step-by-Step Repairs for Common Pipe Types
The following section outlines precise step-by-step repairs tailored to common drain materials, starting with cut-and-replace techniques for PVC and ABS.
It then covers copper repairs using soldering and compression fittings, followed by PEX connections with crimp, clamp, and push-fit methods.
Finally, it reviews when to use repair clamps, epoxy, and pipe wraps for small leaks.
Repairing PVC and ABS drain pipes (cut-and-replace method)
The process begins with locating the damaged section and cutting it out cleanly to provide square pipe ends for replacement.
Next, new fittings are dry-fitted to guarantee proper alignment before solvent welding and assembling the joint.
After assembly, the solvent must cure for the recommended time before conducting a pressure test to confirm a watertight repair.
Locating and cutting out the damaged section
Before cutting, a technician must accurately locate the damaged section by inspecting visible joints, testing for leaks, and tracing wet or discolored areas along the run.
Once identified, mark clear cut lines at least 2 inches beyond each end of the compromised area to guarantee sound pipe for joining.
Shut off water, relieve pressure, support surrounding pipe, then cut squarely with the appropriate saw, removing debris and verifying clean, even ends.
Dry-fitting and solvent welding new fittings
Begin by dry-fitting all replacement fittings and pipe pieces to confirm alignment, proper length, and that joints seat fully without gaps.
Mark orientations and depth for each socket. Clean and deburr surfaces, then apply appropriate primer for PVC or ABS where required.
Coat mating surfaces with solvent cement, assemble quickly with rotational motion, hold briefly to prevent push-out, and wipe excess.
Curing time and pressure testing
Once assembled, newly solvent-welded PVC and ABS joints require a specific curing period and careful pressure testing to guarantee a leak-free repair.
Allow manufacturer-recommended cure times—typically 15 minutes handling, 24 hours full strength at room temperature—longer in cold conditions.
Perform a non-destructive air or water pressure test at safe, low pressure, inspect all joints for seepage, then restore normal service.
Repairing copper drain pipes (soldering and compression fittings)
Repairing copper drain pipes begins with thoroughly preparing and cleaning the pipe ends to guarantee a proper joint.
The guide compares slip couplings and sweat joints, outlining when to solder and when to use compression fittings.
It concludes with recommended leak-testing procedures and insulation steps to protect the repair.
Preparing and cleaning pipe ends
Prepare the pipe ends by removing old solder, corrosion, and debris so new joints seat cleanly; this guarantees reliable soldered connections or proper compression fitting seals.
Cut squarely, deburr interiors, and file or sand outer surfaces to bright copper. Wipe with flux-applied cloth, then clean with a solvent to remove oils.
Inspect for pitting; replace sections if integrity is compromised.
Using slip couplings and sweat joints
Begin by selecting the appropriate slip coupling or sweat joint sized to the copper pipe and gathering necessary tools—emery cloth, flux, solder, torch, and a tubing cutter.
Deburr and clean pipe ends, fit coupling or slip over the joint, apply flux, heat evenly with the torch, feed solder until it wets the seam, allow cooling undisturbed, then wipe excess and reassemble fixtures.
Leak testing and insulation
After the joint is allowed to cool, inspect the connection visually for gaps or uneven solder and then perform a pressure or water test to confirm watertightness.
If leaks appear, reheat and re-solder or tighten compression fittings.
Once sealed, dry thoroughly and apply foam pipe insulation or closed-cell wrap to prevent condensation and freezing.
Label repaired section and retest after insulation is installed.
Repairing PEX drain lines (crimp, clamp, push-fit)
Repairing PEX drain lines begins with cleanly cutting and deburring the pipe to guarantee proper fit and seal.
The technician then installs the chosen connection—push-fit, crimp, or clamp—following manufacturer specifications for depth and ring placement.
Finally, all joints are inspected and the system is pressure-tested to confirm leak-free performance.
Cutting and deburring PEX
Cutting PEX for a drain repair requires the right tool and a steady, square cut to guarantee a watertight connection with crimp, clamp, or push-fit fittings.
Use a PEX tubing cutter, mark the cut, and rotate smoothly for an even edge.
Deburr with a utility knife or deburring tool to remove burrs and sizing ring remnants, ensuring proper seating and preventing leaks.
Installing push-fit or crimp fittings
Begin by selecting the appropriate fitting type—push-fit for quick, tool-free joins or crimp/clamp for a more permanent, pressure-rated connection—matching the PEX size and system requirements.
For push-fit, fully insert the pipe until the stop clicks and guarantee tubing is straight.
For crimp/clamp, position the ring 1/8–1/4 inch from the end, seat the fitting, then compress the ring evenly with the proper tool.
Verifying joints and pressure testing
After installing push-fit or crimp/clamp connections, the next step is to verify each joint and perform a pressure test to confirm watertight integrity and proper seating.
Visually inspect seals and rings, guarantee clamps are seated and crimps uniform.
Cap the system, introduce air or water per local code, monitor for pressure loss and leaks for the recommended duration, then document results and correct failures.
Using repair clamps, epoxy, and pipe wraps for small leaks
When a permanent repair or replacement must wait, temporary fixes like repair clamps, epoxy putty, and fiberglass pipe wraps can stop small drain leaks and buy time.
Clear instructions on surface preparation, mixing and curing epoxy, correct clamp placement, and proper tensioning and layering of wraps determine their effectiveness.
Users should also be told the limitations and expected lifespan of these measures so they can plan for a permanent repair.
When temporary fixes are acceptable
Temporary fixes are appropriate only for small, accessible leaks that do not compromise structural elements or pose an immediate health hazard; they serve to buy time until a permanent repair or professional assessment can be completed.
Use them when the leak is localized, water flow can be shut off, and the homeowner accepts limited durability.
Prompt scheduling of permanent repair remains essential to prevent escalation.
Proper application steps for epoxy putty and pipe wrap
If a homeowner has decided a short-term repair is acceptable while arranging a permanent fix, properly applying epoxy putty or a pipe wrap can stop small leaks quickly and reliably.
Shut off water, dry the area, and clean corrosion or debris. Knead and press epoxy firmly, smoothing seams.
For wraps, soak per instructions, overlap layers tightly, and mold to contours.
Allow full cure before restoring service.
Limitations and expected lifespan of temporary repairs
How long will a quick clamp, epoxy putty, or pipe wrap hold before a permanent repair is needed depends on factors like pipe material, leak size, water pressure, and environmental conditions.
Temporary fixes typically last weeks to a few years; clamps and wraps are shorter-term, epoxy sometimes lasts longer on clean, low-pressure joints.
They are not substitutes for full replacement when corrosion or structural damage exists.
Replacing Larger Sections and Re-routing Drain Lines
When replacing a large section or re-routing a drain line, the homeowner must first plan the run with accurate measurements and the correct slope to guarantee proper flow.
The process then moves to removing old piping, preparing clean, compatible connections, and installing new runs with correctly placed vents and traps.
Finally, attention to local code requirements and securing any necessary permits completes the preparation before testing the system.
Planning the replacement run (measurements, fall/slope requirements)
Accurate measurements and correct slope are essential before replacing a long section or rerouting a drain line; they determine pipe length, fittings, and fixture connections.
Measure run distance along planned route, include offsets and stub-outs. Maintain minimum fall—typically 1/4 inch per foot for 2–3 inch drains—ensuring uniform gradient.
Account for cleanouts, vent locations, and local code requirements when finalizing layout.
Removing old piping and preparing connections
Begin by isolating the affected section: shut off the water supply to any connected fixtures, cap or plug branch lines, and clear the workspace of debris.
Remove damaged pipe using appropriate tools, cutting back to sound material. Deburr and clean pipe ends, inspect surrounding structure for rot.
Measure and mark replacement lengths, dry-fit couplings or adapters, and guarantee access for future maintenance.
Installing new runs with proper venting and traps
Install the new run by laying out pipe and fittings to preserve slope, venting, and trap placement before joining any joints.
Measure and cut pipe to maintain 1/4″ per foot fall for horizontal drains.
Position traps near fixtures with accessible cleanouts.
Tie vent stacks into the new run above the trap arm to prevent siphoning.
Test the assembly for leaks and proper flow.
Local code considerations and permits
Why check local codes and pull permits before cutting into a main drain?
Local codes dictate allowed materials, slope, venting, and connections; permits guarantee inspections and legal compliance.
Replacing large sections or rerouting often requires engineered plans and approval to prevent sanitary issues and property damage.
Failure risks fines, mandatory rework, and insurance denial; always verify requirements and obtain permits first.
Testing, Cleaning, and Restoring the Area
After repairs are complete, the technician conducts pressure and water tests to confirm watertight seals and proper flow.
The system is then cleared of debris and flushed thoroughly, while affected spaces are dried and disinfected to inhibit mold growth.
Finally, finishes such as drywall and flooring are repaired or replaced to restore the area to its original condition.
How to pressure- and water-test repaired drains
Begin by sealing all access points and isolating the repaired section to guarantee accurate results.
Then perform both pressure and water tests to verify the integrity of the repair.
Apply air or hydrostatic pressure incrementally to manufacturer-recommended levels, monitor for drops, and inspect visible joints for leaks.
Follow required hold times, record results, and relieve pressure slowly before restoring service.
Clearing debris and flushing the system
Clear loose debris and sediment from the repair area using a shop vacuum, hand tools, or a brush before introducing water.
Then flush the line with clean water at low pressure to remove remaining particles and confirm unobstructed flow.
Inspect outflow for grit, repeat flushing until clear, and check joints for leaks.
Dispose of collected waste per local regulations.
Drying and disinfecting water-damaged areas to prevent mold
With the line confirmed clear and joints checked, attention turns to drying and disinfecting the surrounding water-damaged areas to prevent mold growth.
Ventilate and dehumidify thoroughly, remove standing moisture with pumps and fans, and discard saturated porous materials when necessary.
Clean hard surfaces with EPA-registered disinfectant, scrub visible residues, and monitor humidity below 50% until all areas are dry and odor-free.
Restoring finishes (drywall, flooring) after plumbing repair
After testing confirms dryness and disinfecting is complete, assess each finish for structural integrity and contamination before any repair work begins.
Remove damaged drywall, insulation, and flooring materials; document salvageable sections.
Repair framing as needed, install moisture-resistant backer board, replace drywall, tape, mud, sand, and prime.
Match flooring type and junction strips; allow curing before repainting and reinstalling trim and fixtures.
Troubleshooting Common Post-Repair Problems
After repair, the homeowner should observe for persistent slow drainage or gurgling noises that may indicate a partial blockage or venting problem.
Small leaks at joints can appear once pipes settle, and odors after reassembly often point to trapped debris or a compromised vent.
Before calling a professional, check trap seals, visible joint connections, and roof vents for obvious obstructions.
Persistent slow drainage or gurgling noises
When drains remain sluggish or emit gurgling sounds after a repair, these symptoms typically indicate an incomplete clearance, a partial blockage further down the line, or a venting issue rather than a failed repair.
Inspect traps and accessible lines for debris, run a sectional snake to confirm flow, check vent stacks for obstructions, and use a camera inspection if necessary to locate and address hidden blockages.
Small leaks at joints after repair
Inspecting joints for small leaks is the first step toward diagnosing why a recently repaired drain keeps dripping.
The homeowner should dry joints, run a short water test, and observe seams and fittings for hairline weeps.
Tightening couplings, replacing degraded seals or washers, and reapplying appropriate sealant or thread tape typically stops leaks.
If seepage persists, re-cutting and reseating the joint is advised.
Odors after reassembly and venting issues
Why does a repaired drain sometimes begin emitting sewer odors despite appearing watertight?
Residual trapped air, disturbed P-trap seals, or blocked vent stacks can allow sewer gases to bypass water seals.
Reassembly can displace trap primer lines or push debris into vents.
Inspect trap water level, primer connections, and vent flow; clear debris or reinstall fittings to restore proper venting and seal integrity.
What to check before calling a pro
After confirming the trap holds water and vents appear clear, a few targeted checks can often resolve lingering problems before professional help is needed.
Inspect joints for hairline leaks, guarantee all slip nuts are snug, and verify cleanout access is unobstructed.
Run water to test flow and watch for slow drainage.
Note unusual noises, odors, or recurring backups and document findings before calling a pro.
Preventive Maintenance to Avoid Future Drain Pipe Breaks
Preventive maintenance focuses on regular inspections and seasonal checks to catch wear, leaks, or early corrosion before they become failures.
Clear guidance on proper use—what not to flush or pour down drains—along with measures to protect pipes from freezing and corrosion, reduces stress on the system.
When inspection reveals age-related deterioration or repeated problems, proactive replacement of aging pipes should be considered.
Regular inspections and seasonal checks
Regular inspections and seasonal checks help catch small issues—corrosion, shifting joints, or minor clogs—before they escalate into full breaks.
Homeowners should schedule visual assessments, probe accessible fittings, and run water through drains to confirm flow.
Record findings, note moisture or odors, and clear debris.
Inspect after freeze/thaw cycles and heavy storms; address anomalies promptly or call a professional for targeted evaluation.
Proper use practices (what not to flush/dispose)
Good habits in daily use greatly reduce the risk of pipe blockages and subsequent breaks.
Homeowners should never flush grease, coffee grounds, wipes, sanitary products, dental floss, or cotton swabs. Avoid pouring paint, solvents, cooking oil, and large food scraps down drains.
Use strainers to catch hair and debris, and dispose of chemicals and bulky waste through proper municipal hazardous or solid-waste channels.
Protecting pipes from freezing and corrosion
After adopting sensible disposal habits, attention should turn to protecting pipes from freezing and corrosion, two common causes of fractures and leaks.
Insulate exposed lines, seal drafts near plumbing, and maintain steady heating during cold spells.
Use corrosion-resistant materials and apply protective coatings where metal contacts soil or moisture.
Schedule periodic inspections and promptly address minor rust or pitting to prevent larger failures.
When to replace aging pipes proactively
When should aging drain pipes be replaced before a failure occurs?
Homeowners should replace pipes showing persistent leaks, widespread corrosion, multiple repairs, recurring backups, or reduced water flow.
Consider replacement for original materials past their expected lifespan (galvanized steel, cast iron) or after root intrusion, shifting foundations, or failed inspections.
Proactive replacement minimizes emergency damage, expense, and disruption.
Cost Estimates and When to Hire a Professional
Typical cost ranges for DIY repairs are generally low—parts and basic materials—while professional service can range from a few hundred to several thousand dollars depending on complexity.
A licensed plumber is recommended for structural damage, sewer-line failures, or suspected hidden leaks that could affect safety or property integrity.
Homeowners should obtain multiple written estimates, check licenses and insurance, and verify references or online reviews before hiring.
Typical cost ranges for DIY repairs vs professional service
Repairing a broken drain pipe can cost anywhere from a few dollars for basic DIY fixes to several hundred or even a few thousand dollars for professional intervention, depending on scope and method. DIY typically ranges $5–$200 (materials, small parts); professionals start around $150–$2,500 (labor, diagnostics). Consider complexity, access, and warranties.
| Repair Type | Typical Cost | Notes |
|---|---|---|
| Patch/Clamp | $5–$50 | Temporary DIY |
| Section Replace | $50–$400 | DIY or pro |
| Trench/Replace | $500–$2,500+ | Pro recommended |
Signs you need a licensed plumber (structural, sewer line, hidden leaks)
After weighing cost ranges for DIY fixes versus hiring help, homeowners should recognize clear signs that a licensed plumber is required rather than attempting further DIY measures.
Structural damage, persistent sinkholes, or foundation settling linked to leaks demands professional assessment.
Sewage backups, foul odors, repeated clogs beyond traps, or inability to locate hidden leaks despite inspections also indicate the need for licensed intervention.
How to get accurate estimates and verify credentials
Several clear steps help homeowners obtain accurate cost estimates and confirm a plumber’s credentials: request itemized written bids from multiple licensed contractors, check state licensing and insurance records, verify references and recent work through photos or site visits, and compare warranties and payment terms.
Evaluate bids for scope, materials, and permit fees; prefer plumbers with clear timelines, written guarantees, and transparent payment schedules before hiring.
Useful Resources and Quick Reference Guides
A concise checklist for DIY drain pipe repair, including tools, materials, and safety steps, helps homeowners act quickly and correctly.
An emergency contact list should name the insurer, a licensed plumber, and restoration services with phone numbers and policy details.
Links to recommended online tutorials and official manufacturer repair guides provide step‑by‑step visuals and product-specific instructions.
Checklist for a DIY drain pipe repair
Anyone attempting a DIY drain pipe repair should first assemble a concise checklist that covers tools, materials, safety gear, and reference sources; this guarantees efficient work and reduces the chance of missed steps.
- Tools: wrenches, pipe cutter, auger, sealant applicator, inspection camera.
- Materials: appropriate pipe/ fittings, seals, solvent, replacement sections.
- Safety & references: gloves, goggles, ventilation, plumbing code guide, repair manual.
Emergency contact checklist (insurance, plumber, restoration)
Frequently, homeowners will need a concise emergency contact checklist that groups insurer, licensed plumber, and restoration services with quick-reference details—policy numbers, preferred contractor names, license and certification checks, and 24/7 phone lines—so response time and claims handling are streamlined during a leak or collapse.
Include primary and backup contacts, claim reference fields, arrival time expectations, invoice authorization limits, and a notes line for on-site observations.
Recommended online tutorials and manufacturer guides
Where can homeowners find reliable, step‑by‑step guidance for repairing or replacing a drain pipe? Trusted sources include manufacturer installation manuals, vetted DIY video channels, and municipal plumbing codes.
These deliver parts lists, torque/spec details, and safety notes. Cross‑reference sources to confirm compatibility and warranty conditions.
- Manufacturer installation and troubleshooting guides
- Accredited plumbing association tutorials
- Reputable DIY video series with professional reviewers
Conclusion
After a morning spent wrestling an old clay line, one homeowner likened fixing a drain to patching a leaky roof: small, timely repairs prevent a cascade. With basic tools, safety gear, and a clear assessment, most cracks and joint failures can be sealed or replaced; larger reroutes may need pros. Follow maintenance tips, monitor repairs, and remember that a stitch-in-time approach cuts costs and water damage, preserving home health for years.
