
How to Install Ductwork in Existing Walls: A Step-by-Step Guide for DIYers and Pros
Installing ductwork in existing walls involves precise planning and execution. To begin, you’ll need to map out routes that navigate around studs and utilities while ensuring compliance with local building codes. Next, cut access openings, thread the appropriate duct types (flexible, semi-rigid, or rigid), and secure connections using adapters, screws, and mastic. Don’t forget to insulate and fireblock any penetrations. Position registers and dampers to achieve balanced airflow, and test and adjust velocities as needed. Always use proper safety gear and obtain necessary permits. For detailed procedures, tool lists, and troubleshooting tips, continue reading.
Overview of Installing Ductwork in Existing Walls
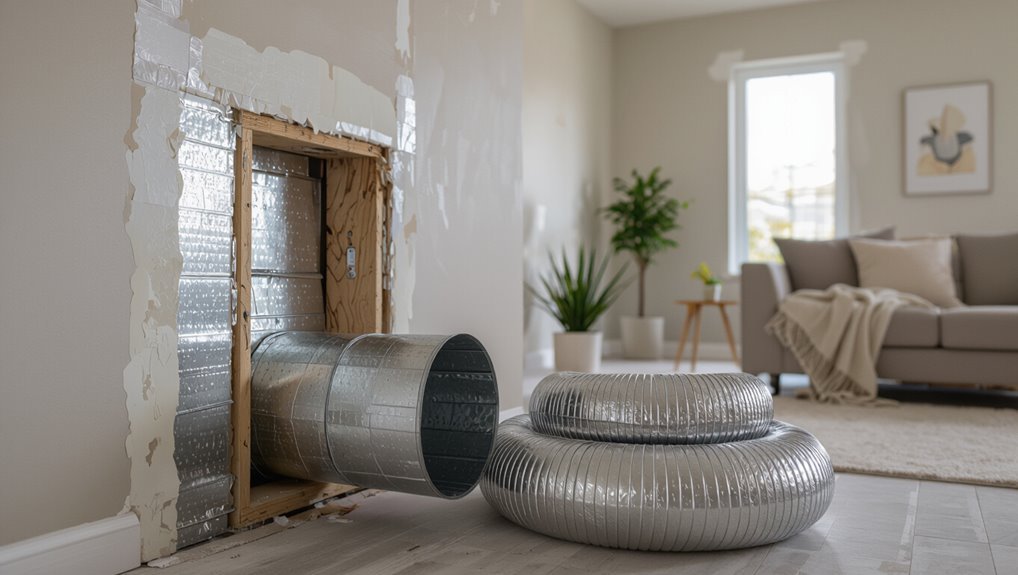
Running ductwork through existing walls is considered when space constraints or aesthetic priorities prevent using attics, basements, or exposed soffits.
Typical challenges include limited access, hidden obstructions, drywall repair, and reduced duct size, which can exceed DIY skill or tool capabilities.
Homeowners should expect basic carpentry and HVAC knowledge, several hours to days per run, and varying costs that may justify hiring a professional for complex layouts.
When and why you would run ducts through existing walls
Deciding to route ducts through existing walls typically occurs during retrofits or major remodels when attic or crawlspace access is limited, when preserving ceiling height is important, or when zoning and airflow needs require more direct pathways to specific rooms.
Professionals and experienced DIYers choose this approach to reach remote rooms, improve efficiency, balance airflow, and minimize visible ceiling or floor work; guidance on how to install ductwork in existing walls follows.
Typical challenges and limits for DIYers
Routing ducts through existing walls can solve access and aesthetic problems, but it presents specific challenges and limits that often affect whether a homeowner should attempt the work.
Structural obstacles, load-bearing members, and hidden utilities restrict routing options.
Firestopping, insulation, sound control, and code compliance add complexity.
Limited wall cavity space often forces creative fittings or partial wall openings, increasing difficulty and risk for DIYers.
Required skills, time, and cost expectations
Installing ductwork within existing walls requires a blend of framing knowledge, sheet-metal or flexible-duct skills, and familiarity with local building and fire codes. A competent DIYer should be comfortable cutting and reinforcing wall studs, making airtight connections, insulating and sealing joints, and relocating or avoiding plumbing and electrical runs.
Typical projects take a weekend to several weeks depending on scope. Budget $200–$2,500 plus permit and equipment costs.
Tools, Materials, and Safety Equipment Needed
The section lists essential tools—such as snips, a drill, a reciprocating saw, tape measure, and sealing tools—needed to cut, fasten, and seal duct runs in existing walls.
It compares common duct materials and shapes (flexible, rigid, semi-rigid, and rectangular) with brief notes on performance, routing ease, and sealing requirements.
It also outlines required safety gear and precautions for working inside walls, including respirators, gloves, eye protection, and protocols to avoid electrical and structural hazards.
Essential tools list
A concise set of tools, materials, and safety equipment is essential before beginning any ductwork project: basic hand tools, cutting and fastening gear, measuring devices, and PPE.
Proper selection minimizes errors and hazards.
- Cordless drill, tin snips, utility knife, pry bar
- Sheet metal screws, foil tape, clamps, mastic
- Tape measure, level, stud finder, marker
- Safety glasses, N95 respirator, gloves, ear protection
Materials and duct types to choose (flex, rigid, semi-rigid, rectangular)
After assembling the listed tools and safety gear, attention turns to selecting duct materials and types that match the job’s layout, airflow requirements, and budget.
Flexible ducting suits tight runs and retrofit work but limits airflow and longevity.
Rigid and semi-rigid metal offer superior efficiency and durability; rectangular sheet-metal ducts maximize space in stud bays yet require precise fabrication and sealing for peak performance.
Safety gear and precautions for working inside walls
Several essential safety items and strict precautions must be observed when working inside walls to prevent injury, inhalation of dust or fibers, and accidental damage to existing wiring, plumbing, or structural elements.
Workers should wear N95 respirators, safety goggles, gloves, hard hats, and hearing protection.
Use non-contact voltage testers, stud finders, and proper lighting.
Ventilate, control dust, shut off power, and follow local codes.
Planning the Duct Route and System Layout
Before laying ductwork, the installer evaluates the existing HVAC system and capacity to guarantee the new ducts match equipment capability.
They calculate required CFM and select duct sizes accordingly, then map routes around studs, wiring, plumbing, and access points to minimize bends and obstructions.
Finally, the planner checks permits and local codes and determines when conditions warrant hiring a licensed HVAC professional.
Assessing existing HVAC system and capacity
Evaluate the existing HVAC equipment and ductwork capacity to guarantee the new routing will deliver adequate airflow and not overload the system.
Inspect unit age, model, and rated output, examine current trunk and branch condition, note leaks or restrictions, verify blower and filter condition, and confirm available static pressure margin.
Document electrical and condensate provisions and plan for professional inspection if uncertainties arise.
Calculating duct size and airflow requirements (CFM basics)
Calculating duct size and airflow requirements centers on matching cubic feet per minute (CFM) needs to duct geometry and system limitations so each zone receives proper ventilation without excessive friction or noise.
Determine room CFM from load or register capacity, sum branch demands, and select duct diameters using friction charts or equivalent lengths.
Allow for fittings, maintain recommended velocities, and verify total system capacity against the blower.
Mapping routes: stud layout, electrical/plumbing obstacles, and access points
A stud wall grid, existing wiring, and plumbing runs dictate where ducts can realistically travel, so the planner must trace a continuous route that minimizes bends, preserves structural members, and avoids conflicts with electrical and water lines.
The planner marks stud bays, locates junction boxes and pipes with a detector, plans access panels at junctions, and selects straight, serviceable paths for efficient airflow and future maintenance.
Permits, local code considerations, and when to call an HVAC pro
Before cutting or fastening any ductwork, the planner must confirm permit requirements and applicable local codes to guarantee the route and system comply with fire, insulation, airflow, and mechanical ventilation standards.
Verify setback, clearances, and required inspections; submit plans if required.
Call a licensed HVAC professional for main trunk sizing, combustion appliance interactions, complex offsets, or when structural or fire-rated assemblies are affected to avoid violations and hazards.
Preparing Walls and Access Points
Before cutting, the installer locates studs, joists, and hidden utilities with appropriate scanners to map safe paths.
They mark and cut access openings carefully to avoid structural damage while preserving firestops and insulation.
Where possible, the installer creates chase cavities or uses existing interior or exterior wall cavities to route ducts with minimal modification.
Locating studs, joists, and hidden utilities with scanners
Several reliable passes with a multi-mode scanner reveal the hidden framework and utilities behind walls and ceilings, facilitating safe placement of ducts and access points.
Operators interpret stud, joist, pipe, and live-wire indicators, marking edges and centers. Calibration against known anchors guarantees accuracy.
Scan patterns include vertical, horizontal, and angled sweeps; results guide routing decisions and minimize risk before cutting or drilling.
Marking and cutting access openings without damaging structure
Mark the access opening using measurements tied to previously identified studs, joists, and utilities so cuts fall between structural members and clear of pipes or wiring.
Transfer lines to the wall surface, double-check clearance, and square the layout.
Use appropriate saws and bits, cut small pilot holes first, then expand to full openings.
Support nearby framing, remove debris, and label access panels for future service.
Creating chase cavities and using existing cavities (interior vs exterior walls)
When routing ductwork through walls, installers evaluate whether to create new chase cavities or utilize existing voids. Interior partitions often allow straightforward access to studs and service cavities, while exterior walls require attention to insulation, vapor barriers, and thermal bridging.
The decision balances structural integrity, fireblocking, and code. Creating chases demands framing and sealing; using existing cavities speeds installation but may require insulation removal, remediation, and careful sealing.
Installing Different Types of Ducts Inside Walls
The section outlines step‑by‑step methods for running flexible, semi‑rigid, and rigid ducts through stud bays, emphasizing secure supports and proper clearances.
It also covers connecting new runs to existing trunk lines and boots, with attention to sealing joints and connections.
Soundproofing and airtight sealing within wall cavities are highlighted to minimize noise and prevent air leakage.
Installing flexible duct inside stud bays: step-by-step
Begin by measuring each stud bay and planning a continuous path for the flexible duct that minimizes bends and maintains required clearances around insulation and wiring.
Cut drywall access as needed, feed and gently pull the liner through bays, secure with straps or zip ties every 4–6 feet, seal connections with approved tape or mastic, and restore drywall.
Test airflow and adjust sagging sections.
Installing semi-rigid and rigid ductwork inside walls: step-by-step
Installers should plan, measure, and prepare before placing semi-rigid or rigid duct inside wall cavities to guarantee proper fit, airflow, and code compliance.
Cut access holes at studs, notch or chisel plates for clear paths, slide and support ducts with straps or brackets, secure joints with metal tape or clamps, seal seams with mastic, maintain required clearances to insulation and wiring, and restore wall finishes carefully.
Connecting to existing trunk lines and boots
Connecting existing wall-mounted ducts to trunk lines and boots requires careful alignment, secure connections, and proper sealing to preserve airflow and system balance.
The installer measures offsets, trims duct ends, and uses compatible adapters or takeoffs. Fasteners, sheet-metal screws, and supported hangers maintain mechanical integrity.
Balancing dampers and access panels are added for airflow adjustment and future service without altering structural elements.
Sealing joints, transitions, and soundproofing within walls
After securing trunk connections and adjusting takeoffs, attention turns to sealing joints, managing changes in cross-section, and minimizing sound transmission where ducts pass through or run inside walls.
Apply UL-approved foil tape and mastic to all seams, insulate junctions with fiberglass or closed-cell foam, and use resilient mounts or acoustic wrap at wall penetrations.
Confirm airtightness and test for vibration noise.
Vent Placement, Register Installation, and Trim Work
Proper vent placement is addressed first to guarantee balanced airflow throughout the space, with attention to room layout and return locations.
Next, cutting openings and installing register boxes and boots in drywall are described, including secure fastening and sealant use to prevent leaks.
The section concludes with guidance on finishing trim and grills and installing required fire and air barriers to meet code and maintain aesthetics.
Optimal register placement for airflow balance
Several factors determine ideal register placement to achieve balanced airflow throughout a space.
Registers should be located to promote circulation: supply registers near exterior walls or windows, returns centrally or opposite supplies, and high or low depending on heating or cooling.
Distance from obstructions, room size, and furniture layout guide spacing.
Zoning and adjustable dampers fine-tune airflow for consistent comfort.
Cutting and installing register boxes and boots in drywall
With register locations set to balance airflow, attention shifts to cutting openings in drywall and fitting register boxes and boots to match those layouts.
Measure and mark precisely, score drywall, and cut clean openings.
Slide box or boot into stud bay, secure to framing with screws or clips, seal gaps with HVAC foil tape or mastic, and verify alignment and level before continuing duct connections.
Finishing trim, grills, and fire/air barriers
Begin by locating and orienting registers and grilles so airflow, sightlines, and trim reveal are consistent with the room layout and HVAC plans.
Install grills securely, sealing gaps with acoustic caulk.
Fit trim, maintaining uniform reveal and paint or stain as required.
Where ducts penetrate fire or airtight barriers, install rated collars, firestop sealant, and insulation to restore fire resistance and minimize leakage.
Insulation, Vapor Barrier, and Fire Stopping
Proper insulation of ducts and adjacent wall cavities reduces heat loss and prevents condensation that can degrade system performance.
Attention to intact vapor barriers and correct sealing prevents moisture intrusion and mold risk.
Fireblocking and firestopping at wall penetrations must meet code to maintain compartmentation and slow fire and smoke spread.
Insulating ducts and wall cavities to prevent heat loss and condensation
Insulating ductwork and adjacent wall cavities reduces heat loss, limits condensation, and improves system efficiency by maintaining airflow temperature and preventing moisture buildup.
Contractors should fit closed-cell foam or fiberglass with appropriate R-value around ducts, sealing seams with foil tape or mastic.
Install fire-rated batt or sealants at penetrations to preserve fire barriers.
Verify insulation does not obstruct airflow or access for future maintenance.
Maintaining vapor barriers and preventing moisture issues
Maintain continuous vapor barriers and correctly detail fire-stopping at duct penetrations to prevent moisture migration, mold growth, and compromise of fire-resistive assemblies.
Guarantee seals remain intact when cutting or routing ducts, repair tears with compatible tape or sealant, and overlap membranes per manufacturer instructions.
Maintain proper insulation to keep surfaces above dew point, provide ventilation to control humidity, and inspect periodically for breaches.
Fireblocking and firestopping requirements for wall penetrations
When ducts, pipes, or cables penetrate walls, floors, or ceilings, they create paths that must be sealed with both fireblocking and firestopping measures to preserve compartmentation and thermal-moisture performance.
Codes require installing approved materials—caulks, mineral wool, intumescent collars—at each penetration.
Guarantee continuity of insulation and vapor barrier while selecting products compatible with duct materials, and follow manufacturer and local code specifications for testing and maintenance.
Testing, Balancing, and Troubleshooting
Following installation, basic airflow testing and simple balancing procedures allow a DIYer to confirm that registers deliver desired volumes and that static pressure is within acceptable ranges.
Common post-installation issues—such as leaks, incorrect damper settings, and disconnected takeoffs—have straightforward fixes like sealing joints, adjusting dampers, and re-routing sections.
Persistent low airflow, excessive noise, or signs of system strain indicate the need for professional diagnosis and corrective service.
Airflow testing and balancing basics for DIYers
How can a DIYer verify that a newly installed duct system delivers balanced airflow to each room? A basic approach uses a quality handheld anemometer, static pressure gauge, and room-by-room measurements.
Record supply velocities and compare to design targets, adjust dampers incrementally, and recheck. Aim for consistent airflow ratios, acceptable pressures, and audible absence of turbulence; document results for future reference.
Common problems after installation and how to fix them
Troubleshooting ductwork after installation focuses on identifying common airflow, pressure, and noise issues and applying targeted fixes that restore system performance.
Technicians or DIYers should test flows, seal leaks, adjust dampers, and isolate noises quickly to prevent inefficiency.
- Measure airflow and rebalance registers.
- Seal leaks with mastic or UL tape.
- Adjust or replace dampers.
- Insulate and secure vibrating sections.
When poor performance indicates professional intervention
When measurable performance gaps persist despite basic fixes, it indicates the need for professional testing, balancing, and troubleshooting to diagnose underlying issues accurately.
Certified technicians use airflow meters, static pressure gauges, and thermal imaging to locate leaks, blockages, or design flaws. They adjust dampers, rebalance zones, and recommend duct resizing or insulation upgrades.
DIYers should document symptoms and hire licensed pros for definitive solutions.
Time-Saving Tips and Common Mistakes to Avoid
A concise set of time-saving practices can streamline duct installation while maintaining code compliance, such as prefabricating sections, using proper layout templates, and confirming clearances before fastening.
Common DIY errors—incorrect sizing, poor sealing, and neglecting support or insulation—often cause performance loss and code violations.
Highlighting simple preventive steps and checklists reduces rework and inspection failures.
Best practices to speed installation and ensure code compliance
Streamline ductwork installation by planning layouts, material staging, and crew tasks to minimize labor hours while maintaining code compliance.
Inspect local codes, pre-fit sections, label runs, and use approved sealants and fasteners.
Coordinate inspections early and document clearances.
Prioritize efficient access, safe cutting, and proper firestopping to avoid rework.
- Pre-plan routes
- Stage materials
- Follow code specs
- Schedule inspections
Frequent DIY mistakes and how to prevent them
Many DIY installers underestimate planning and overestimate skill, which leads to leaky joints, improper sizing, and unsafe clearances that cost time and money.
Common mistakes include poor sealing, inadequate support, wrong materials, and ignoring airflow balance.
Prevention requires careful measurements, following code, using correct fittings and mastic, pressure-testing, and consulting pros for complex runs to avoid rework and safety risks.
Cost Breakdown and Material Comparison
The article outlines typical cost ranges for materials and tools, highlighting upfront expenses homeowners can expect.
It compares common duct types—flexible, sheet metal, and ductboard—against installation complexity and durability.
Long-term efficiency and maintenance implications are noted to help balance initial cost with lifetime performance.
Typical cost ranges for materials and tools
A clear grasp of typical costs for ductwork materials and tools helps homeowners and contractors budget accurately.
Sheet metal, flexible ducting, insulation, fasteners, sealants, and specialty fittings each carry distinct price ranges influenced by size, quality, and regional availability.
Typical ranges:
- sheet metal $1–4/ft
- flex duct $0.50–3/ft
- insulation $0.30–2/ft
- fasteners and sealants $10–60
- specialty fittings $5–150 each.
Comparing duct types and long-term efficiency
When evaluating duct types for long-term efficiency, homeowners and contractors should weigh upfront material and installation costs against lifecycle energy losses, maintenance needs, and replacement frequency. Rigid metal offers low leakage and longevity; flex is cheaper but more resistant to flow; insulated ducts balance cost and thermal loss. Choices affect operating costs, indoor air quality, and retrofit complexity.
| Type | Cost | Lifespan |
|---|---|---|
| Rigid metal | High | 30+ yrs |
| Flexible | Low | 10–15 yrs |
| Insulated | Medium | 20–25 yrs |
Step-by-Step Project Checklist
The project checklist organizes tasks into clear phases: pre-work items to confirm measurements and locate utilities before cutting into walls, execution steps for installation day, and final inspection and maintenance tasks.
Each phase lists required tools, safety checks, and quality benchmarks. Following the checklist reduces rework and guarantees code compliance.
Pre-work checklist before cutting into walls
Before cutting into walls, prepare a concise checklist that verifies structural, safety, and service conditions:
- Confirm stud locations and load-bearing status with plans or scanner.
- Locate electrical, plumbing, gas, and low-voltage runs; mark and de-energize circuits.
- Verify permit requirements and local code limits for new duct penetrations.
- Assemble safety gear, dust containment, and temporary HVAC isolation measures.
Execution checklist for installation day
Typically, the installer begins the day by reviewing the full work sequence, confirming tool and material staging, and assigning specific tasks to each crew member to guarantee a coordinated, efficient workflow.
The checklist focuses on safety, sequence, and verification before sealing walls.
- Confirm permits, utilities marked, and PPE use
- Verify measurements and duct routing
- Stage tools, fasteners, sealants, and insulation
- Conduct brief hazard and communication briefing
Final inspection and maintenance checklist
Begin a systematic final inspection to verify installation integrity, performance, and readiness for handover.
The installer checks seals, insulation, airflow balance, and noise. Document measurements, photos, and corrective actions. Provide homeowner with maintenance schedule and filter specifications.
- Verify seals, joints, and insulation.
- Measure airflow and static pressure.
- Test system operation and acoustics.
- Record documentation and maintenance plan.
Conclusion
Installing ductwork in existing walls transforms airflow like turning a key in a locked door: careful planning, the right tools, and adherence to codes release efficient ventilation. Whether tackling the job as a DIYer or a pro, methodical routing, secure fastening, and thorough sealing guarantee performance and safety. Regular testing and balancing finalize the system, while learning from common pitfalls saves time and money. With this guide, the project proceeds confidently toward lasting comfort.
