
How to Fix a Freon Leak in a Heat Pump: Step-by-Step Repair Guide and When to Call a Pro
If you’re dealing with a Freon leak in your heat pump, it can lead to decreased efficiency and potential health risks. To fix it, start by inspecting for signs like oil stains, hissing sounds, or frost on coils. Use a leak detector or a soap solution to identify leaks, then tighten any loose fittings, replace O-rings, or braze small copper pinholes. After repairs, vacuum the system and recharge it with refrigerant. However, for major leaks or complex issues, it’s best to call a certified HVAC professional. This guide will provide a detailed step-by-step procedure, a list of necessary tools, and key decision points for when to seek help.
What a Freon Leak in a Heat Pump Means for Performance and Safety
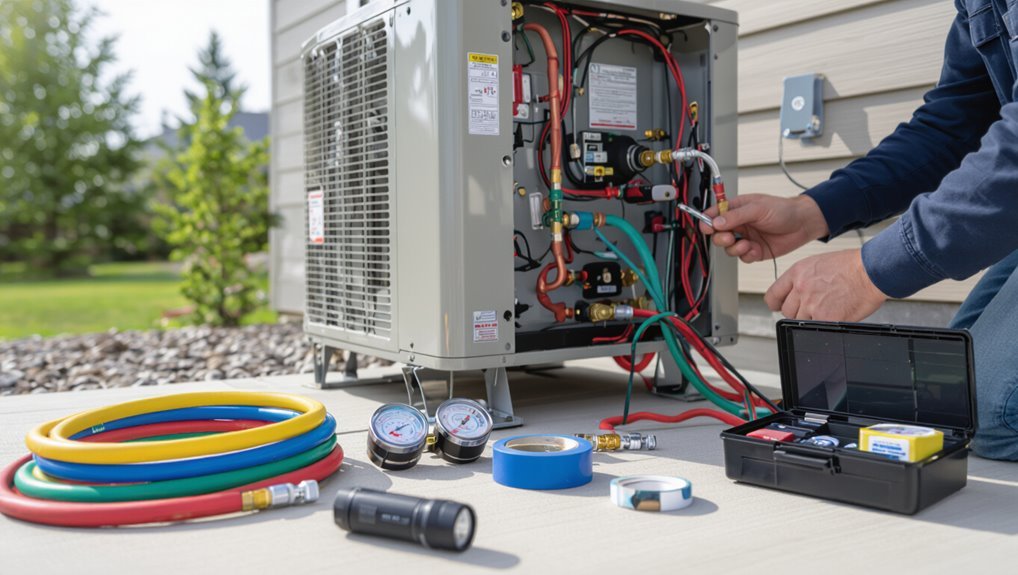
A loss of refrigerant reduces a heat pump’s ability to transfer heat, causing longer run times, reduced capacity, and possible compressor damage.
Visible signs such as ice on coils, hissing noises, or poor heating/cooling performance often indicate a leak.
Beyond performance, refrigerant leaks pose health risks if inhaled, harm the environment through ozone depletion or global warming potential, and may trigger regulatory reporting and repair requirements.
How refrigerant (Freon) affects heat pump operation
Detecting a refrigerant leak signals immediate and measurable impacts on a heat pump’s efficiency and safety.
Refrigerant levels dictate heat transfer capacity; low charge reduces heating/cooling output, increases compressor runtime, and raises energy use.
Oil circulation and component lubrication suffer, risking mechanical failure.
Addressing this requires skilled diagnosis and repair; instructions like how to fix a freon leak in heat pump guide safe procedures and regulatory compliance.
Signs and symptoms of a refrigerant leak
Signs of a refrigerant leak in a heat pump are often subtle at first but produce predictable effects on performance and safety: diminished heating or cooling output, longer run cycles, frost or ice on coils, hissing sounds near lines or fittings, and higher energy bills.
Additionally, uneven indoor temperatures, frequent cycling, reduced airflow, and visible oil residue around connections indicate loss of charge requiring inspection and repair.
Health, environmental, and legal concerns of Freon leaks
Although often initially undetected, a Freon leak in a heat pump poses clear health risks, environmental harm, and potential legal liability: inhalation can cause dizziness, nausea, or worse with prolonged exposure; refrigerants deplete ozone or act as potent greenhouse gases.
Leaking systems underperform and can damage compressors. Regulators mandate repair and proper disposal, and noncompliance can incur fines, remediation costs, and liability for occupants’ harm.
Quick Checklist: When You Can Troubleshoot vs When to Call a Technician
A concise checklist helps homeowners distinguish simple, safe diagnostics—such as checking for visible oil stains, listening for hissing, or verifying airflow—from situations that mandate a licensed HVAC technician or EPA-certified pro.
Complex leaks, suspected refrigerant recharge, system brazing, or warranty-covered equipment should prompt professional service.
Typical repair costs and how warranties affect who pays are important factors to weigh when deciding whether to proceed or call a technician.
Simple diagnostics homeowners can safely perform
When should a homeowner attempt simple diagnostics on a suspected heat pump refrigerant leak, and which tasks remain safe to perform without professional tools?
A homeowner can inspect visible tubing, fittings, and coils for oil stains, listen for hissing, check system pressure via manufacturer gauges if available, verify airflow and filter condition, and guarantee outdoor unit debris is cleared.
Record observations and call a pro if uncertainty persists.
Situations that require a licensed HVAC technician or EPA-certified pro
If homeowners encounter any signs beyond basic visual checks—such as persistent pressure loss, visible oil streaks on lines, repeated short-cycling, or suspected refrigerant exposure—they should engage a licensed HVAC technician or EPA-certified professional.
Call a pro for failed leak detection, inaccessible lines, compressor faults, brazing/welding needs, system evacuation or recharge, or safety concerns involving refrigerant handling, high pressures, or regulatory compliance.
Typical repair costs and warranty considerations
Costs vary widely depending on leak location, system size, and required repairs.
Typical expenses range from minor seal repairs ($150–$400) to compressor replacement ($1,000–$3,500). Warranty status often dictates responsibility; manufacturers may cover components but not labor or refrigerant if improperly maintained.
- Small joint leak: low cost, quick fix
- Coil replacement: moderate cost, invasive
- Compressor: high cost, consider replacement
Tools, Materials, and Safety Precautions Before Starting Any Repair
Before attempting refrigerant repairs, one must assemble the correct tools and diagnostic equipment—pressure gauges, an electronic leak detector, and a vacuum pump—alongside necessary consumables and replacement parts such as the specified refrigerant, fittings, and approved sealants.
Proper personal protective equipment and safe work practices are essential to prevent injury, contamination, and equipment damage.
Compliance with legal and environmental regulations for refrigerant handling and disposal is required and may necessitate certification or professional assistance.
Required tools and diagnostic equipment (gauges, leak detector, vacuum pump)
A compact set of calibrated gauges, a reliable electronic leak detector, and a vacuum pump form the core diagnostic toolkit for locating and repairing Freon leaks in a heat pump. Each item serves a distinct function—pressure measurement, leak confirmation, and moisture/air removal—so selecting quality, HVAC-grade equipment is essential for accurate diagnosis and safe service.
Additional useful items include hose sets with service valves, manifold adapters, a thermometer, and protective gloves and eyewear.
Consumables and replacement parts (refrigerant, fittings, sealants)
Several specific consumables and replacement parts are required to complete a safe, code-compliant Freon repair on a heat pump: the correct type and charge of refrigerant matched to the system, replacement flare or compression fittings sized for the lines, new drier/receiver or filter‑drier cartridges, appropriate sealants and leak‑repair compounds rated for refrigerant systems, and fresh access port caps and O‑rings.
Technicians should also stock replacement valves, brazing rods or solder, and approved refrigerant recovery canisters, ensuring compatibility and certification documentation for all parts.
Personal protective equipment and safe work practices
Having gathered the correct refrigerant, fittings, and replacement components, technicians must now equip themselves with appropriate personal protective equipment and follow safe work practices to prevent injury and environmental release.
Required PPE includes safety goggles, chemical-resistant gloves, long sleeves, and steel-toed boots; a suitable respirator when ventilation is inadequate; and hearing protection.
Use leak detectors, calibrated gauges, and follow lockout/tagout and proper ventilation procedures.
Legal and environmental rules for handling refrigerants
Because refrigerants are regulated substances with significant environmental and safety implications, technicians must comply with federal, state, and local laws governing their purchase, handling, recovery, and disposal.
Certification (e.g., EPA Section 608) is required to service systems. Mandatory recovery equipment prevents atmospheric release; proper documentation and disposal records are essential.
Violations can incur fines, liability, and criminal charges.
Step-by-Step Guide to Locating a Freon Leak
Before beginning, the technician powers off the unit and removes access panels to expose tubing, coils, and service ports.
A systematic inspection follows, starting with a visual check of common leak points such as fittings, coils, and service valves. Then, employing electronic leak detectors and UV dye if needed.
If uncertainty remains, pressure testing and soap-bubble checks are performed to confirm and pinpoint the leak location.
Preparing the heat pump for inspection (power off, access panels)
Shut off the heat pump’s power and remove the access panels to prepare for a leak inspection.
Confirm power is isolated at the disconnect and circuit breaker.
Wear safety gloves and eye protection.
Clear surrounding area for unobstructed access.
Keep screws and panels organized.
Verify refrigerant lines and electrical components are visible but do not touch wiring or piping until diagnostics begin.
Visual inspection: common leak points (fittings, coils, service valves)
A systematic visual inspection focuses on common refrigerant leak points: service valves, flare and compression fittings, and exposed coil surfaces.
The technician scans for oil stains, corrosion, and bent fins. Prioritize accessible joints and the indoor coil underneath insulation.
Imagery checklist:
- Dark oily residue around a flare fitting.
- White corrosion at a service valve.
- Sparse, crushed fins on the coil.
Using electronic leak detectors and UV dye methods
Begin by powering up and calibrating the electronic leak detector according to the manufacturer’s instructions to guarantee sensitivity and false‑alarm reduction.
Sweep joints, fittings, and coil seams slowly, noting detector response peaks.
If available, inject UV tracer into the system per label directions, run briefly, then inspect with a UV lamp in darkened conditions.
Mark and document detected leak locations for repair.
Pressure testing and soap-bubble testing procedures
Prepare the system for controlled pressure testing and soap‑bubble inspection by isolating and evacuating remaining refrigerant per regulations.
Then charge the circuit with dry, inert tracer gas (usually nitrogen) to a specified test pressure while monitoring for stability.
Inspect joints, fittings, coils, and service ports with soapy solution, watching for persistent bubbles.
Verify leaks by holding pressure and documenting locations for repair or replacement.
Step-by-Step Repair Methods for Different Leak Types
The section outlines practical repair methods tailored to common leak types, from tightening loose fittings and service valves to replacing damaged tubing with properly brazed joints.
It describes step-by-step procedures for soldering or brazing small pinhole leaks in copper lines, criteria for when coils or heat exchangers can be patched versus when full replacement is required, and guidance on replacing tubing sections.
It also evaluates professional-grade sealants and stop-leak products, noting their appropriate uses and limitations.
Tightening and replacing loose fittings and service valves
Several common freon leaks originate at fittings and service valves, where vibration, thermal cycling, or improper installation can loosen connections over time.
The technician inspects with soapy solution or electronic detector, tightens flare and compression nuts to spec, replaces damaged O-rings and valve cores, and swaps corroded service valves.
After repairs, pressure-test the system and perform a vacuum and recharge if leak-free.
Repairing small pinhole leaks in copper lines (soldering/brazing) step-by-step
After tightening or replacing fittings, attention often shifts to small pinhole leaks in copper tubing, which require a different skill set and tools.
The technician locates the leak, evacuates and recovers refrigerant per regulations, cleans and fluxes the area, applies heat with a torch, and brasé or solder with appropriate alloy.
Pressure-test, evacuate, and recharge if leak-free.
Fixing leaks in coils and heat exchangers: when patching works and when replacement is needed
Evaluating leaks in coils and heat exchangers begins with identifying leak size, location, and the material and construction of the component—factors that determine whether a localized patch, epoxy/stitch repair, or full replacement is appropriate.
Small external cracks or seam failures may accept reinforced epoxy or mechanical clamps temporarily.
Extensive corrosion, internal pinholing across fins, or structural failure necessitate coil or exchanger replacement for reliable, code-compliant service.
Replacing damaged sections of tubing and making proper brazed joints
Begin by isolating the damaged tubing and depressurizing the system to create a safe, dry workspace for cutting, fitting, and brazing replacement sections.
Cut out corroded or crushed segments, deburr and clean tube ends, and fit properly sized replacement pieces with correct flare or sleeve fittings.
Use purge gas, appropriate flux, and silver solder; heat evenly to form full-penetration brazed joints, then leak-test.
Using professional-grade sealants and stop-leak products: pros and cons
Consider professional-grade sealants and stop-leak products as temporary or complementary options for addressing small refrigerant leaks in a heat pump. They can plug pinholes, slow seepage, and simplify short-term recovery without requiring full tubing replacement.
Advantages: quick, inexpensive, and noninvasive.
Disadvantages: unreliable long-term, may clog components, complicate future repairs, and often void warranties.
Use sparingly and document application for technicians.
Evacuating, Testing, and Recharging the System After Repairs
After repairs, the technician evacuates the circuit with a vacuum pump to remove air and moisture and holds the vacuum to verify system tightness.
A pressure test using helium or nitrogen follows to confirm the repair is leak-free before introducing refrigerant.
The system is then recharged with the correct refrigerant and charge amount, using subcooling and superheat measurements and startup checks to verify proper performance.
Proper evacuation and vacuuming procedure to remove moisture and air
A technician must evacuate the repaired heat pump to remove air and moisture that can compromise system performance and contaminate refrigerant. This involves connecting a vacuum pump and manifold gauges, pulling a deep vacuum (typically 500 microns or lower), and holding it to verify the system maintains vacuum before proceeding.
After stable vacuum, isolate, perform a vacuum rise check, and only then begin controlled refrigerant charging per specifications.
Helium or nitrogen pressure test to confirm repair integrity
With the system holding a verified deep vacuum, the next step is to perform a pressure test using an inert tracer gas—commonly nitrogen or a helium-nitrogen mix—to confirm the repair is leak-free.
Pressurize to manufacturer-recommended psi, monitor gauges for stabilization, and sweep joints with a helium detector or electronic sniffer.
Maintain pressure for the specified hold time to validate integrity before proceeding.
Correct refrigerant recharge: matching type, charge amount, and measuring subcooling/superheat
Before recharging, the technician must confirm the exact refrigerant type specified by the manufacturer.
The technician then evacuates the system to the required deep vacuum and prepares gauges and scales to measure charge accurately.
The technician charges with the specified refrigerant, monitors weight to within factory tolerances, and adjusts based on measured subcooling or superheat using accurate pressure-temperature charts and thermistors.
This ensures proper charge without overfilling.
System startup checks and performance verification
Once repairs and a correct refrigerant recharge are complete, the technician performs systematic startup checks and performance verification to confirm the heat pump operates safely and efficiently.
They evacuate and pressure-test for leaks, verify proper compressor operation, check airflow, measure temperatures, and confirm target subcooling/superheat under load.
Final documentation includes readings, service actions, and customer guidance for monitoring system performance.
Troubleshooting Persistent or Recurring Refrigerant Loss
When refrigerant loss recurs despite repaired external leaks, technicians should consider hard-to-find sources such as internal system leaks or compressor failures.
Persistent loss can signal broader equipment failure—examples include a failing compressor or a brazed coil leak that cannot be reliably sealed.
Maintenance personnel should document leak history and track refrigerant additions to identify patterns and justify replacement versus repair.
Identifying hard-to-find leaks (internal leaks, compressor issues)
How can a leak elude visual inspection and standard leak-detection methods?
Internal leaks often occur inside coils, valves, or compressor housings where dye, electronic detectors, or soap bubbles cannot reach.
Symptoms include unexplained pressure loss, abnormal oil residue, and intermittent performance drops.
Detecting these requires tracer gas, vacuum decay tests, pressure balance analysis, or compressor isolation checks before considering major component replacement.
When leaks indicate broader system failure (compressor, brazed coil leaks)
If persistent refrigerant loss recurs despite repeated repairs, it often signals a fundamental system failure rather than an isolated leak.
Recurring loss may indicate compressor internal failure, porosity or stress cracks in brazed coils, or corrosioned tubing joints. Such faults usually require component replacement or major brazing work.
A technician should perform pressure decay, vacuum, and electronic leak detection to confirm scope and advise replacement versus repair.
Documenting leak history and tracking refrigerant usage
A clear, chronological record of every refrigerant top-up, leak repair, pressure test, and component change is essential for diagnosing persistent losses.
Technicians should log dates, charge amounts, pressure readings, dye or electronic detection results, parts replaced, and technician IDs.
Compare cumulative refrigerant additions to expected system capacity, flag anomalies, and use trends to determine recurring leak locations or the need for major component replacement.
Cost, Time, and Risk Comparison: DIY vs Professional Repair
While some homeowners weigh cost savings against professional expertise, comparing DIY and professional repair requires evaluating upfront expense, time investment, and safety risk together. DIY lowers labor cost but increases time, liability, and potential for improper repair; professionals charge more yet guarantee certification, leak testing, and warranty.
| Aspect | DIY vs Professional |
|---|---|
| Cost | Lower vs Higher |
| Time | Longer vs Shorter |
| Risk | Higher vs Lower |
| Warranty | None vs Usually Included |
Preventive Maintenance to Avoid Future Freon Leaks
A regular inspection schedule helps catch weak spots before they become leaks, focusing on coils, refrigerant lines, insulation, fittings, and mounting points.
Proper coil care, secure and intact line insulation, and measures to control compressor and line vibration greatly reduce stress on joints and fittings.
A concise seasonal tune-up checklist with recommended service intervals guarantees preventive tasks are performed reliably and on time.
Regular inspection schedule and what to inspect
Regular inspections form the backbone of preventive maintenance for heat pump Freon leaks, establishing a predictable schedule that targets components most prone to deterioration.
Technicians should perform quarterly visual checks, annual refrigerant pressure testing, and spring/fall full-system evaluations.
Inspectors verify compressor condition, service ports, access fittings, copper lines for corrosion, electrical connections, and record refrigerant levels to detect slow loss trends.
Best practices for coil care, line insulation, and vibration control
Building on scheduled inspections, preventative care of coils, line insulation, and vibration control targets the common physical causes of refrigerant loss.
Coils should be cleaned gently, fins straightened, and corrosion treated.
Insulation on suction lines must be continuous, UV- and tear-resistant.
Secure piping with vibration isolators and clamps to prevent chafing and joint stress.
Document repairs and recheck seals.
Seasonal tune-up checklist and recommended service intervals
Schedule a concise seasonal tune-up to catch wear and leaks before they become failures.
A technician inspects coils, lines, and fittings; checks refrigerant charge; tests pressures and controls; and verifies insulation.
Recommended intervals: annual for mild climates, biannual for heavy-use or extreme climates, and immediate post-repair verification.
Typical checklist items:
- Visual coil and line inspection
- Pressure and leak diagnostics
- Insulation and vibration checks
How to Choose a Qualified HVAC Technician and Verify Certification
Homeowners should ask potential contractors about specific experience with heat pumps, request references, and clarify what the written quote includes.
They should verify technicians hold EPA Section 608 certification for handling refrigerants and any required state or local HVAC licenses.
Comparing itemized estimates, service guarantees, and warranty terms helps guarantee fair pricing and reliable post-repair support.
Questions to ask potential contractors
What should be asked before hiring an HVAC technician to locate and repair a freon leak?
Ask about experience with heat pump refrigerant leaks, diagnostic methods used, estimated timeline, warranty on repairs and replacement parts, written cost estimates, proof of insurance, references or reviews, availability for follow-up, emergency response options, and procedures for verifying successful leak repair and system recharge.
Required certifications and licensing to handle refrigerants
After confirming experience, methods, timelines, and warranties with prospective contractors, attention should turn to the specific certifications and licenses that legally permit refrigerant work.
Technicians must hold EPA Section 608 certification for handling refrigerants; contractors often carry state HVAC licenses and business registration.
Verify certificate numbers, expiration dates, and insurance.
Request proof of training on refrigerant recovery, leak detection, and applicable local regulations.
Evaluating quotes and warranties
How should a property owner compare bids and warranties to confirm value and protection? A concise evaluation checks itemized scope, parts versus labor coverage, warranty length, transferability, and exclusions.
Verify technician credentials, EPA Section 608 certification, and company insurance.
Obtain multiple written bids, compare total lifecycle costs, ask about refrigerant guarantees and leak return policies, and prefer clear, documented commitments over verbal assurances.
Common Mistakes to Avoid When Attempting Refrigerant Repairs
Technicians and DIYers should avoid unsafe or illegal refrigerant handling practices that risk health, equipment damage, and regulatory penalties.
Incorrect charging—either overcharging or undercharging the system—can reduce efficiency and cause compressor failure.
Temporary fixes that mask underlying issues delay proper repair and often lead to larger, more costly failures.
Unsafe or illegal refrigerant handling practices
While attempting refrigerant repairs, individuals may unknowingly engage in unsafe or illegal practices that endanger themselves, violate regulations, and worsen system damage.
Examples include releasing refrigerant to atmosphere, using uncertified technicians or counterfeit refrigerants, improvising recovery equipment, and bypassing leak detection protocols.
Such actions risk legal penalties, environmental harm, personal injury, and costly system failure; certified professionals and proper tools are essential.
Overcharging or undercharging the system
Mistaken refrigerant handling—such as venting gas or using uncertified supplies—often precedes another common error: incorrect charge levels.
Overcharging raises pressure, reduces efficiency, risks compressor damage and oil carryover.
Undercharging causes poor cooling, coil freeze, and compressor overheating.
Accurate diagnosis, manufacturer specifications, proper gauges, and certified technicians prevent performance loss and costly failures while ensuring safe, legal refrigerant service.
Using temporary fixes that mask larger problems
Apply quick patches can seem practical, but temporary fixes—like adding sealant to a leaking joint, taping insulation over a corroded line, or repeatedly topping off refrigerant—often conceal underlying faults that will worsen over time.
Such measures delay proper diagnosis, risk equipment damage, reduce efficiency, and create safety hazards.
Permanent repair by a qualified technician guarantees system integrity, correct refrigerant charge, and long-term reliability.
Final Safety and Compliance Reminders Before You Finish Repairs
The technician must guarantee recovered refrigerant and any replaced components are disposed of according to local regulations and facility procedures.
They should complete clear documentation of the repair, parts used, and refrigerant quantities to support future service and regulatory compliance.
Finally, a follow-up inspection and scheduled monitoring should be recommended to confirm system integrity and performance.
Proper disposal of recovered refrigerant and used components
Proper disposal of recovered refrigerant and used components guarantees legal compliance and protects the environment. Technicians must follow mandated procedures for handling, labeling, and transporting recovered refrigerant and for segregating contaminated or hazardous parts.
Recovered refrigerant is placed in approved cylinders, shipped via certified carriers, and returned to reclamation centers. Contaminated oils, filters, and damaged piping are disposed of as hazardous waste per local regulations.
Documentation and recordkeeping for future service
After recovered refrigerant and contaminated parts are handled, attention shifts to documenting the repair so future service calls are accurate and efficient.
Technicians record leak location, repaired components, refrigerant type and charge, pressures, temperatures, test results, and performed leak tests.
Include date, technician name, equipment serial numbers, and disposal receipts.
Store records in service logs and digital files for regulatory compliance and warranty support.
When to schedule follow-up inspection and monitoring
Scheduling is essential to guarantee repaired systems remain safe and compliant; technicians should set a follow-up inspection based on leak severity, refrigerant type, repair quality, and applicable regulations.
Recommended timelines vary: immediate (24–72 hours) for major leaks, 7–30 days for moderate issues, and quarterly checks for systems with recurrent problems.
Document results, monitor pressures and emissions, and escalate to certified specialists if anomalies persist.
Conclusion
A freon leak in a heat pump is a quiet thief of comfort and efficiency; when addressed promptly, it yields restored warmth and peace of mind. Readers who follow safe, stepwise checks and know when to call a certified technician will avert larger damage and legal risk. Like a careful gardener tending fragile roots, one preserves system life through vigilance, proper tools, and routine maintenance—small acts that keep cold at bay and systems running true.
