How to Troubleshoot a Gas Hot Water Heater: Step-by-Step Fixes and Safety Tips
To troubleshoot a gas hot water heater effectively, start by ensuring safety: turn off the gas and power, ventilate the area, and relieve tank pressure. Next, inspect key components such as the pilot light, thermocouple, burner flame, vents, and pressure-relief valve, while also checking for leaks or corrosion. Test for gas leaks, verify thermostat settings, and flush out sediment if you hear unusual noises. Common fixes include relighting the pilot, replacing the thermocouple, or cleaning the burner. For detailed step-by-step guidance, parts identification, and advice on when to call a professional, continue reading.
How to Diagnose a Gas Hot Water Heater Problem Quickly
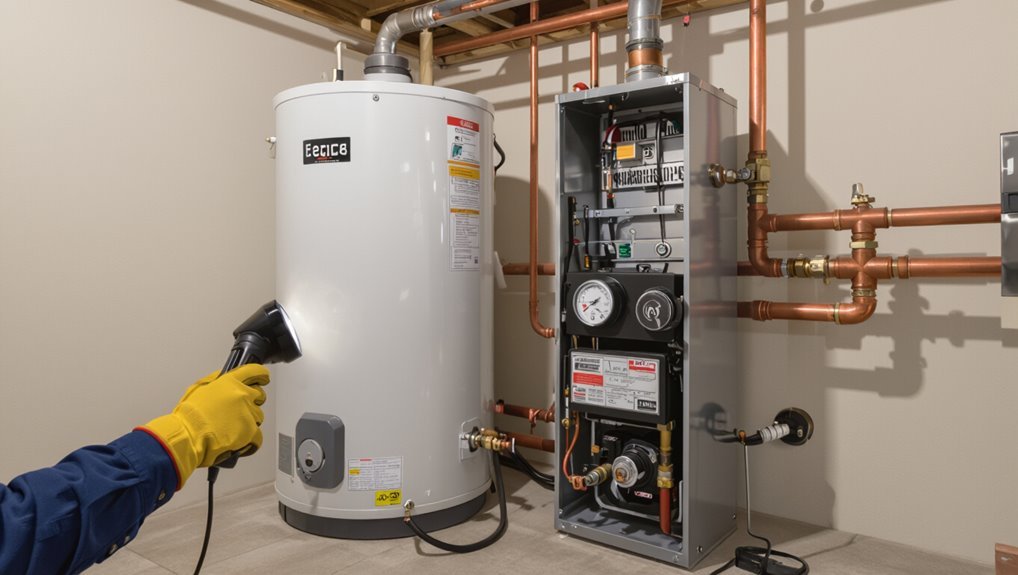
A quick diagnosis begins with recognizing common symptoms—no hot water, strange noises, leaks, or unusual smells—that narrow likely causes.
A brief, safe inspection of the pilot, gas supply, vents, and visible components can confirm simple fixes or hazards to avoid.
If the issue involves gas leaks, complex internal parts, or uncertainty about safety, a qualified technician should be called rather than attempting DIY repairs.
Recognizing common symptoms of failure
How can a homeowner quickly tell when a gas hot water heater is failing?
Indicators include fluctuating or no hot water, unusual noises (popping, rumbling), visible leaks or corrosion, discolored water, persistent pilot light issues, and rising gas bills.
Noting smell of gas or frequent cycling also helps.
These signs guide initial decisions about how to troubleshoot gas hot water heater.
How to safely inspect the unit before troubleshooting
With common failure signs identified, the next step is a methodical, safety-first inspection of the heater before any troubleshooting or repairs begin.
The inspector verifies gas is off, power is disconnected, and the area is ventilated.
Visual checks target corrosion, leaks, loose connections, burner flame color, vent obstruction, and pilot assembly.
Document findings and take photos for reference.
When to call a professional vs. DIY
Many homeowners can handle basic checks and minor fixes, but distinguishing quick DIY tasks from issues requiring a licensed technician hinges on safety risk, required tools, and local code considerations.
Call a pro for gas leaks, pilot assembly or thermocouple replacement if unfamiliar, combustion problems, venting, major corrosion, electrical components, or permits.
DIY limited to draining, adjusting thermostat, and replacing accessible anode rods when competent.
Safety Precautions Before Any Work
Before any work begins, the technician must shut off the gas supply, follow proper pilot-light procedures, and shut off the cold-water valve while relieving tank pressure.
The area should be well ventilated, cleared of combustibles, and monitored for carbon monoxide risk.
Appropriate PPE—gloves, eye protection, and a respirator when needed—must be worn.
Turning off gas and pilot procedures
Shut off the gas supply to the water heater and extinguish the pilot light to eliminate ignition sources before performing any work.
Confirm the valve is fully closed, then ventilate the area to disperse residual gas.
Use a gas detector or soapy water to check for leaks at connections.
If unsure, contact the utility provider or a qualified technician for safe intervention.
Shutting off water supply and reliving pressure
With the gas secured and the pilot extinguished, attention should move to the water side to prevent sudden discharge or pressure-related hazards.
Close the cold-water shutoff valve at the heater. Open a nearby hot faucet and a pressure-relief drain to bleed residual pressure.
Confirm flow cessation and no leaks before loosening fittings or servicing components. Use towels for small spills.
Ventilation, combustible clearance, and carbon monoxide risks
Many homes and utility spaces require adequate ventilation and safe clearance around a gas water heater to prevent heat buildup, ignition of nearby combustibles, and the accumulation of carbon monoxide.
Verify air vents are unobstructed, maintain the manufacturer-specified clearance distances on all sides, and keep flammable materials—paint cans, rags, solvents—well away from the unit.
Inspect venting for corrosion, confirm proper draft and sealed connections, and install a CO alarm nearby.
Required personal protective equipment
Before any inspection or maintenance, appropriate personal protective equipment (PPE) must be donned to reduce risks from heat, sharp edges, fuel vapors, and debris.
Recommended PPE includes heat-resistant gloves, safety glasses or goggles, long-sleeve flame-retardant clothing, and steel-toe boots.
A fitted respirator or N95 protects against fumes; ear protection is advised for noisy environments.
High-visibility clothing may be used if required.
Tools and Materials Needed for Troubleshooting and Repair
The following tools and parts are essential for diagnosing and fixing common gas water heater issues.
- Multimeter, adjustable wrench, screwdriver set
- Gas leak detector, propane torch, pressure gauge
- Replacement thermocouple, gas control valve, pilot assembly
A brief inventory before starting will save time and reduce safety risks.
Basic tools and testing equipment
A compact set of reliable hand tools and a few key testing devices enables efficient diagnosis and safe repair of a gas hot water heater.
Essential items include adjustable wrench, screwdrivers, pliers, pipe joint tools, and a wire brush.
Testing equipment: multimeter, gas leak detector or soapy solution, ignition tester, and infrared thermometer.
PPE: gloves, safety glasses, and a flashlight.
Replacement parts commonly required
Common replacement parts for gas hot water heaters include thermostats, thermocouples, gas control valves, pilot assemblies, gas burners, thermopiles, pressure relief valves, dip tubes, anode rods, and various gaskets and fittings.
Technicians also stock flexible connectors, drain valves, ignition modules, and flue baffles.
Parts selection depends on model, age, and symptom diagnosis; quality and compatibility guarantee safe, lasting repairs.
Step-by-Step Troubleshooting Guide (Starter to Advanced)
The guide proceeds through a focused sequence of checks, beginning with confirming whether there is any hot water at all.
It then moves to inspect the pilot and ignition, verify gas supply and valve function, and test the thermocouple for replacement if needed.
Finally, gas control and thermostat settings and operation are evaluated to restore safe, reliable heating.
Step 1 Confirm there is no hot water at all
How can one be certain the problem is a complete loss of hot water rather than a partial issue?
Verify by running hot taps at multiple fixtures, testing both bathtub/shower and kitchen sink, checking cold-water mixing valves, and noting any temperature variation.
Confirm no hot water from both nearby and distant outlets, and guarantee the heater’s hot outlet pipe remains cool to the touch before proceeding to ignition and tank checks.
Step 2 Check the pilot light and ignition system
The technician inspects the pilot assembly and ignition components to identify why the burner will not light.
For units with a standing pilot, checks include confirming a steady flame, cleaning the orifice, and testing thermocouple operation.
For electronic ignition systems, the technician examines power supply, spark or hot surface igniter function, and control module diagnostics.
Troubleshooting a standing pilot light
One clear step in diagnosing a gas hot water heater is to inspect the standing pilot light and its ignition components for proper operation.
Verify pilot flame presence, color (steady blue with a small yellow tip), and size.
Clean pilot assembly and thermocouple from soot or debris.
Test thermocouple voltage and replace if failing.
Confirm gas valve seating and proper airflow.
Troubleshooting electronic ignition systems
After confirming the standing pilot and its components, attention shifts to electronic ignition systems, which replace a continuously burning pilot with spark or hot surface igniters and associated control modules.
Inspect igniter condition, wiring, and connections; verify control module diagnostics and error codes; test flame sensor continuity and voltage; guarantee proper gas valve operation and safety interlocks; replace faulty components per manufacturer specifications.
Step 3 Inspect the gas supply and gas valve
Because a steady gas flow and a functioning valve are essential for ignition and sustained heating, this step focuses on verifying the supply line, shutoff valve, gas control valve, and connections for leaks, blockages, or incorrect settings.
Inspect for odor, damaged piping, loose fittings, and proper shutoff position. Use a soapy water test for leaks and confirm the valve operates smoothly without excessive resistance.
Step 4 Test the thermocouple and replace if faulty
With the gas supply and valve confirmed functional, attention shifts to the thermocouple, a small safety sensor that detects the pilot flame and signals the gas valve to stay open.
Inspect for discoloration or bend, clean contacts, then test continuity with a multimeter; replace if readings fall outside manufacturer specifications or if physical damage exists.
Reassemble and verify pilot stability.
Step 5 Evaluate the gas control/thermostat settings and operation
Inspect the gas control valve and thermostat settings to verify they regulate burner temperature and safety functions correctly; these components govern pilot ignition, main burner operation, and over-temperature protection.
Confirm set temperature matches desired output, test control knob positions (OFF, PILOT, ON), and observe pilot flame response to thermostat call.
Check for loose wiring, corrosion, or error codes and replace the control if unresponsive.
Step 6 Check and clean the burner and combustion chamber
Begin by shutting off the gas supply and allowing the heater to cool.
Then remove the burner access panel to expose the burner assembly and combustion chamber.
Inspect for soot, corrosion, insect nests, or debris.
Use a soft brush and vacuum to clean surfaces, ports, and pilot areas.
Replace damaged components, reseat panels, restore gas, and test ignition for proper flame pattern and stability.
Step 7 Examine the flue, venting, and draft issues
After cleaning the burner and combustion chamber, attention turns to the flue, venting, and draft, since even a spotless burner cannot function safely without proper exhaust flow.
Inspect flue connections, caps, and joint seals for corrosion, blockages, or animal nests. Verify vertical rise, clearances, and termination.
Test draft with a smoke pencil or match; correct upslope, backdrafts, or obstructions promptly.
Step 8 Diagnose water temperature inconsistencies and thermostat calibration
Diagnose temperature inconsistencies by systematically checking thermostat settings, sensor function, and mixing valves to isolate whether the issue is control-related, supply-related, or caused by user-side mixing.
Verify setpoint accuracy with a calibrated thermometer at hot taps, inspect thermocouple/thermistor continuity, test temperature rise across the exchanger, and confirm bypass or anti-scald devices aren’t misadjusted.
Document findings before adjusting.
Step 9 Address noises, rumbling, or sediment buildup
Noises, rumbling, and reduced heating efficiency often indicate sediment accumulation in the tank.
The next step is to flush the tank to remove settled minerals and restore proper operation.
Instructions should cover shutting off gas and water, draining the tank, flushing until clear, and safely refilling.
Flushing the tank to remove sediment
Begin by shutting off the gas and cold-water supply to the water heater.
Attach a hose to the drain valve, open a hot faucet to relieve vacuum, then open the drain to flush until clear.
Close valve, refill slowly to purge air, restore cold supply, relight pilot per manufacturer instructions, and verify operation.
Repeat annually or if performance degrades.
Step 10 Inspect and replace the sacrificial anode rod if needed
Remove the tank’s access panel and check the sacrificial anode rod for heavy corrosion or thinning, since a degraded rod accelerates tank corrosion and shortens the heater’s life.
If more than 50% depleted or covered in pitting, shut off water, drain enough to access the rod, loosen and remove it, and replace with a compatible anode.
Reinspect annually.
Common Problems and How to Fix Them
The following common issues are summarized with straightforward fixes to guide readers through quick diagnostics and basic repairs.
- No hot water / ignition failure;
- Insufficient or rapidly depleted hot water;
- Leaks, overheating, and odd noises.
Each item will be followed by clear causes, simple checks, and safe next steps or when to call a professional.
No hot water due to pilot or ignition failure
One common cause of a cold tank is a failed pilot light or ignition system, which prevents the burner from firing and heating the water.
Technicians check pilot assembly, thermocouple, and ignition module for damage, soot, or loose connections.
They relight per manufacturer instructions, replace faulty thermocouples or igniters, and verify gas supply and safety controls before restoring service.
Insufficient hot water or rapid depletion
Diagnose insufficient hot water by isolating whether the tank, controls, or household demand is at fault: common causes include a undersized or failing tank, a malfunctioning thermostat, a sediment-clogged heat exchanger that reduces capacity, a leaking tank or plumbing, or unusually high simultaneous hot-water use.
Inspect for leaks, measure recovery time, flush sediment, verify thermostat operation, and compare tank size to household demand; replace or upgrade as needed.
Water too hot or thermostat not responding
Several common causes can make a gas hot water heater produce scalding water or appear unresponsive to thermostat adjustments.
Faulty thermostat, incorrect setting, or a stuck mixing valve often cause overheating.
Sediment buildup can trap heat, and a defective temperature-pressure relief valve may fail to regulate.
Recommended actions: verify settings, test/replace thermostat or mixing valve, flush tank to remove sediment, and call a licensed technician.
Leaks from tank, valves, or fittings
When a gas hot water heater develops leaks at the tank, valves, or fittings, water spots, pooling, or steady dripping indicate whether the issue is slow corrosion, loose connections, or a failed component.
Inspect connections, tighten fittings, and test the temperature/pressure (T&P) relief valve.
Small valve or fitting leaks often require tightening or replacement; a leaking tank mandates professional replacement due to corrosion.
Strange noises, banging, or vibration
Rattling, popping, rumbling, or a sharp knock from a gas hot water heater often signals mineral buildup, sediment shifting, or a failing component causing uneven heating and steam formation.
Inspect for sediment in the tank, flush per manufacturer instructions, check burner and pilot assembly, secure loose fittings, and verify mounting.
Persistent vibration may indicate worn anode, failing baffles, or motorized components requiring professional replacement.
Smells of gas or signs of carbon monoxide
Detecting a rotten-egg odor near a gas hot water heater or symptoms like headache, dizziness, or nausea can indicate a natural gas leak or carbon monoxide (CO) exposure—both serious safety hazards requiring immediate attention.
Evacuate, call emergency services and the gas company from a safe location. Do not operate appliances or switches.
Have a licensed technician inspect and repair leaks, venting, or faulty burners, and install CO detectors.
Parts Replacement and Repair Procedures
The section outlines clear, step-by-step procedures for replacing common components such as the thermocouple, gas control valve or thermostat, and pilot assembly or igniter.
It also covers repair or replacement of a leaking pressure relief valve and criteria for when full tank replacement is necessary.
Safety precautions, required tools, and when to call a licensed technician are highlighted.
Replacing a thermocouple step-by-step
Begin by shutting off the gas supply and closing the water valve to guarantee a safe work area before removing access panels and disconnecting the pilot assembly; this prepares the heater for the thermocouple swap while minimizing risk.
Remove the old thermocouple at its fittings, install a matching replacement, secure connections, reposition probe near the pilot flame, restore gas, test for proper ignition and leaks, and reassemble panels.
Replacing a gas control valve or thermostat
Replace a faulty gas control valve or thermostat only after confirming power and gas supplies are off and the unit is cool; this reduces risk while allowing safe disassembly and accurate component matching.
Disconnect remaining fittings, label wiring, and remove mounting screws.
Transfer thermostat or valve settings and trim plate.
Install matching replacement, tighten connections to specified torque, restore gas and power, then test for leaks and correct operation.
Replacing a pilot assembly or igniter
When a pilot assembly or igniter fails, proceed only after turning off gas and power and allowing the heater to cool to prevent burns and leaks.
Then confirm the exact replacement part by matching model numbers and terminal configurations to verify compatibility.
Disconnect wiring and gas line, remove mounting screws, swap the assembly, reseal fittings with approved thread sealant, restore gas and power, and test for proper ignition and leaks.
Repairing or replacing a leaking pressure relief valve
A leaking temperature-and-pressure (T&P) relief valve requires prompt attention to prevent water damage and unsafe pressure buildup.
The technician should first shut off the water supply and relieve tank pressure by opening a hot-water tap before inspecting the valve body, discharge pipe, and outlet for mineral buildup, corrosion, or obvious mechanical failure.
If clogged or faulty, replace with correct-pressure-rated valve, test operation, and verify proper discharge routing.
When tank replacement is necessary
If extensive corrosion, irreparable leaks, or repeated failures of internal components are present, tank replacement becomes the only reliable solution.
A technician should assess age, warranty, and repair costs versus replacement. Severe rust, bulging, sediment-compromised heating, or failed welded seams justify new installation.
Prioritize codes, proper sizing, improved efficiency, and safe disposal of the old tank to prevent future hazards.
Preventive Maintenance Schedule and Checklist
A concise preventive maintenance schedule helps prevent failures and keep efficiency high.
Key items to address include:
- Monthly checks homeowners should perform
- Annual maintenance tasks and professional inspections
- Steps to extend the water heater’s lifespan
The following checklist outlines simple actions and timing so owners can spot issues early and schedule professional service when needed.
Monthly checks homeowners should perform
Because monthly checks catch small problems before they escalate, homeowners should perform a concise set of inspections on gas hot water heaters to secure safe, efficient operation and to extend equipment life.
Inspect for leaks, corrosion, and proper venting; test the temperature-pressure relief valve briefly; confirm pilot/burner operation and flame color; check thermostat settings; verify area clearance and no gas odor.
Annual maintenance tasks and professional inspections
Monthly homeowner checks set the baseline for safe operation, but annual maintenance and professional inspections catch issues beyond routine observation and restore system efficiency.
A licensed technician should inspect combustion, venting, gas connections, thermostat calibration, and burner condition.
Tasks include tank flushing, anode rod assessment, pressure-relief valve testing, and carbon monoxide detection verification.
Document findings, schedule repairs, and retain service records for warranty and safety compliance.
How to extend your water heater’s lifespan
Although often overlooked until problems arise, a concise preventive maintenance schedule and checklist can greatly extend a gas water heater’s lifespan by ensuring timely care and early detection of issues.
Include monthly visual inspections, quarterly drain-and-flush reminders, annual anode rod checks and combustion inspections, thermostat calibration, pressure-relief valve testing, and prompt repairs.
Record dates, findings, and actions to track wear and plan professional service.
Troubleshooting Comparison: Tank vs. Tankless Gas Water Heaters
A concise comparison highlights how symptoms and remedies often differ between tank and tankless gas water heaters, guiding targeted troubleshooting steps. The table below summarizes common symptom patterns, typical causes, and divergent fixes to clarify when methods separate. Technicians can use these distinctions to choose appropriate diagnostics and repairs.
| Symptom | Typical Cause (Tank) | Typical Cause (Tankless) |
|---|---|---|
| No hot water | Pilot outage, sediment-clogged burner or dip tube | Ignition failure, flow sensor or scale buildup |
| Intermittent heat or fluctuations | Thermostat or sediment insulating element | Heat exchanger scaling, modulating valve issue |
| Reduced flow/low hot water volume | Sediment in tank or corroded dip tube | Flow sensor fault or clogged inlet filter |
Key differences in symptoms and fixes
How do symptoms and remedies diverge between tank and tankless gas water heaters?
Tank units show gradual temperature loss, sediment noise, leaks, and pilot issues; fixes involve flushing, anode replacement, valve repair, or tank replacement.
Tankless units display flow-dependent cold bursts, error codes, and scale buildup; remedies focus on descaling, sensor/ignition checks, and flow-rate restoration, often requiring electronic diagnostics or module replacement.
When troubleshooting methods diverge
Having outlined the distinct symptoms and fixes for tank and tankless gas water heaters, the discussion now shifts to situations where troubleshooting approaches must diverge because of fundamental design and control differences.
Tank units require checks of storage, venting, and ignition systems; tankless units demand flow sensor, heat exchanger, and electronic control diagnostics.
Safety protocols and replacement strategies also differ accordingly.
Safety Signs That Require Immediate Professional Intervention
Any smell of gas, persistent leaks or visible major corrosion warrant immediate professional attention to prevent fire or flooding.
Repeated ignition failures or activation of a carbon monoxide detector indicate dangers that should not be handled by an untrained homeowner.
Electrical hazards or significant structural damage to the tank require shutting off utilities and calling a qualified technician.
Gas odor, persistent leaks, or major corrosion
A single whiff of gas, persistent dripping from the tank or considerable rust and flaking metal are clear indicators that a gas hot water heater poses an immediate hazard and requires professional attention.
Evacuate the area if gas is detected, shut off the gas supply only if safely accessible, and contact a licensed technician.
Do not attempt DIY repairs for leaks or extensive corrosion.
Repeated ignition failures or carbon monoxide detector activation
After evacuating for gas smells or arranging a technician for leaks and heavy corrosion, attention should turn to ignition problems and carbon monoxide alarms, which also signal immediate danger.
Repeated ignition failures or detector activation indicate burner malfunction, flue blockage, or incomplete combustion.
Ventilate, evacuate if alarmed, shut off the gas supply at the appliance, and call a licensed technician immediately for inspection and repair.
Electrical hazards or major structural tank damage
Multiple indications of electrical hazards or major structural tank damage demand immediate professional intervention because they pose acute risks of shock, fire, explosion, or flooding.
Visible arcing, burning odors, exposed wiring, bulging or ruptured tank walls, or active leaks require shutting power and gas, evacuating the area, and calling a licensed plumber or electrician.
Do not attempt temporary fixes.
Cost Estimates and Timeframes for Common Repairs
Costs and timeframes for common gas water heater repairs vary widely between DIY attempts and professional services, and clear estimates help prioritize action. The following table highlights typical outlays and duration for a few frequent fixes to guide decision-making. Homeowners should weigh parts, skill level, and safety when choosing between self-repair and hiring a technician.
| Repair type | Typical DIY vs. Professional |
|---|---|
| Replace thermostat | DIY: $20–$80 / Pro: $150–$300, 30–90 min |
| Flush tank / sediment | DIY: $0–$50 / Pro: $75–$150, 30–60 min |
| Replace thermocouple/pilot | DIY: $10–$60 / Pro: $100–$250, 30–120 min |
Typical DIY vs. professional repair costs
Although some minor gas water heater tasks are suitable for a competent homeowner, many fixes require specialized tools, parts, and safety knowledge. Consequently, deciding between DIY and professional repair depends on the specific failure, local labor rates, and the homeowner’s skill level.
DIY parts often cost $10–$150; DIY saves labor but risks mistakes.
Professional calls typically range $150–$600+, covering diagnosis, parts, and warranty.
Estimated time to complete common fixes
Repair time for common gas water heater issues varies with the problem’s complexity, parts availability, and the technician’s experience.
Typical tasks:
- pilot light relight or thermostat reset — 15–30 minutes;
- replacement of a thermocouple or gas control valve — 30–90 minutes;
- drain and flush — 30–60 minutes;
- dip tube or heating element replacement — 1–2 hours;
- full tank replacement — 2–4+ hours including disposal.
Quick Troubleshooting Flowchart and Action Steps
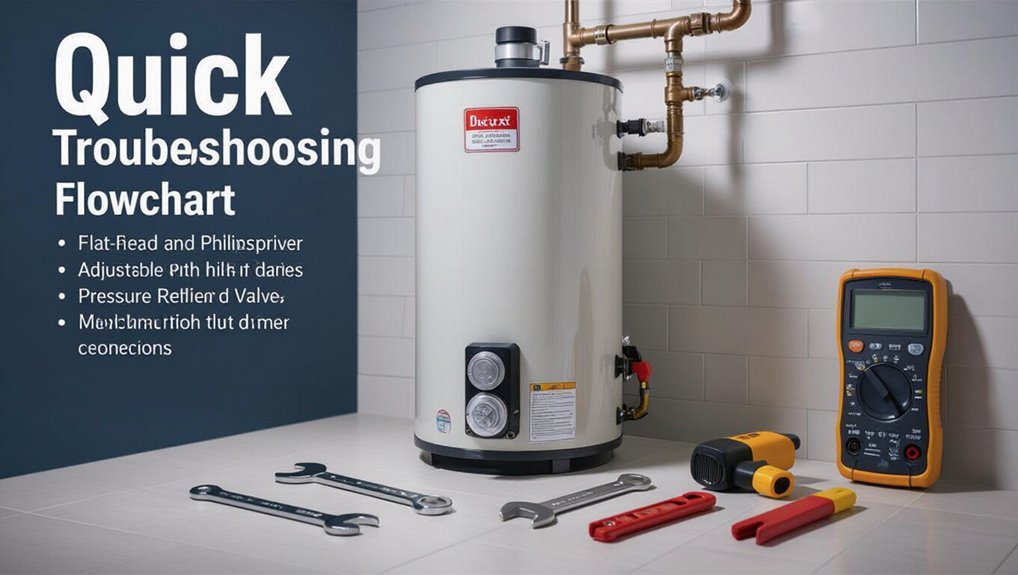
Start by following a compact decision flow that guides the user from symptom to safe, immediate action and then to next steps for diagnosis or professional service.
The flowchart lists common symptoms, checks (pilot, gas supply, thermostat, pressure relief), immediate safety actions (shut gas, ventilate, evacuate), basic corrective steps, and when to call a licensed technician.
Record findings and timestamps.
Conclusion
Like a vigilant lighthouse guiding through fog, the troubleshooting guide illuminates common faults, safety steps, and repair paths for gas hot water heaters. Readers gain clear starting points, necessary tools, and measured warnings that separate do‑it‑yourself fixes from hazards requiring professionals. Whether confronting a cold tank or a sputtering burner, the roadmap lends confidence and caution in equal measure—so homeowners can restore reliable hot water while keeping safety at the forefront of every decision.