
How to Insulate Hot Water Pipes: A Step-by-Step Guide to Save Energy and Prevent Heat Loss
How to Insulate Hot Water Pipes: A Quick Guide
Insulating hot water pipes effectively reduces heat loss, speeds up hot water delivery, and can lower your energy bills by 4–10%. To get started, measure and clean your pipes. Fit foam tubes or rubber sleeves onto straight runs, sealing seams with insulation tape and securing the insulation every 6–12 inches. For elbows and valves, use pre-formed pieces or removable covers, and ensure outdoor pipes have weatherproof jackets. Remember to inspect your insulation annually and replace any damaged sections. For detailed step-by-step methods, material options, costs, and troubleshooting tips, continue reading.
Why Insulating Hot Water Pipes Matters for Energy Savings and Comfort
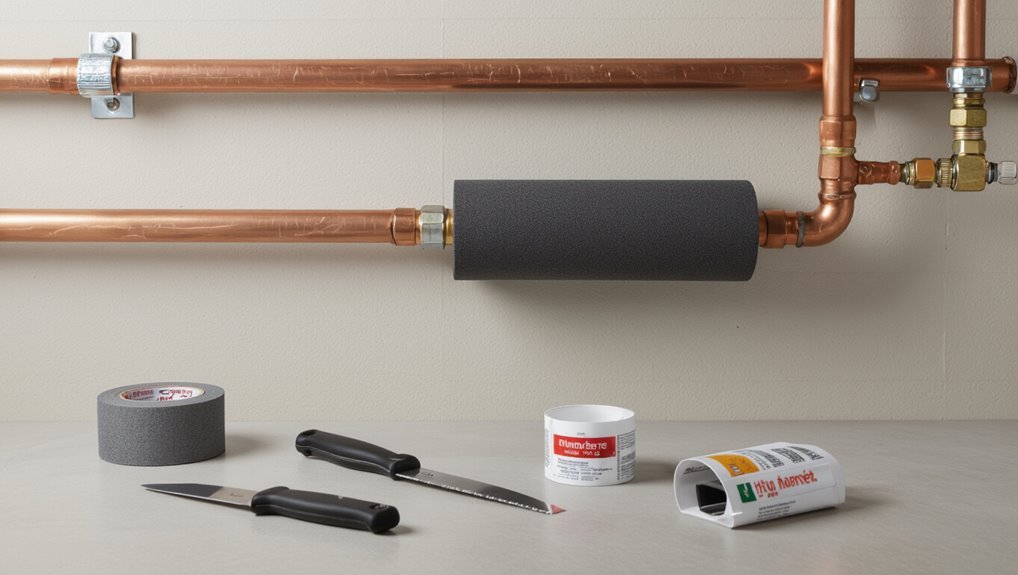
Insulating hot water pipes reduces heat loss from circulating water, which lowers boiler or heater runtime and cuts energy bills.
It also improves comfort by delivering hot water faster, lowers freeze risk in cold spaces, and can reduce plumbing noise.
Typical projects often save a few percent on heating costs with payback periods measured in months to a few years depending on fuel prices and installation extent.
How pipe insulation reduces heat loss and energy bills
Many homes and buildings lose a surprising share of hot water temperature through uninsulated pipes, increasing energy consumption and extending wait times for hot water at faucets.
Properly applied pipe insulation cuts conductive and convective losses, preserving temperature along runs.
Explaining how to insulate hot water pipes clarifies material choice, thickness, and installation quality, which together lower reheating needs and reduce utility bills.
Benefits beyond energy savings (faster hot water, reduced freeze risk, noise reduction)
A layer of insulation on hot water pipes delivers benefits that extend beyond lower energy bills: it shortens the wait for hot water at taps, lowers the likelihood of pipe freezing in cold weather, and dampens the sound of water flowing through the system.
Insulation maintains temperature, reduces standby heat loss, minimizes condensation on cold surfaces adjacent to hot lines, and can prolong valve and pump life by stabilizing operating temperatures.
Typical energy savings estimates and payback period
Energy savings from wrapping hot water pipes are modest but measurable: typical reductions in water heating energy range from about 4% to 10% for whole-house systems, with larger percentage gains in unheated or poorly insulated spaces where standby heat loss is significant.
Payback periods commonly span 1–3 years for most homes, varying with fuel cost, insulation quality, pipe length, and labor or DIY expense.
Which Pipes to Insulate and When to Prioritize
The discussion identifies hot water supply lines, return loops, and tank connections as the primary targets for insulation.
Priority is given to pipes in unheated spaces—basements, crawlspaces, attics, garages, and exterior walls—where heat loss is greatest.
Pipes showing condensation, slow hot-water delivery, or contributing to high energy use should be insulated first.
Identifying hot water supply lines, return loops, and tank connections
Identifying which pipes to insulate begins with mapping the system: hot water supply lines carry heated water from the water heater to fixtures.
Return loops (in homes with recirculation) bring unused hot water back to the heater to maintain temperature.
Tank connections include the heater’s inlet and outlet and any nearby valves and fittings that are heat-loss points.
Inspect accessible runs, note materials and age, and mark insulated targets.
Prioritizing based on location: unheated basements, crawlspaces, attics, garages, exterior walls
Because heat loss increases where ambient temperatures drop, priority should be given to insulating hot water lines located in unheated basements, crawlspaces, attics, garages, and along exterior walls.
Pipes in these zones lose heat fastest and cost more to reheat. Start with main supply and return runs, then branch lines serving distant fixtures.
Focus on continuous coverage and sealed joints for maximum efficiency.
Signs that pipes need insulation (condensation, slow hot-water delivery, high energy use)
Efficiency and comfort losses become apparent when hot water pipes lack insulation.
Visible condensation forms on cold surfaces, indicating heat transfer and moisture risk.
Delayed hot-water delivery and long wait times signal heat loss along runs.
Elevated energy bills or frequent boiler cycling reveal inefficiency.
Prioritize insulating exposed, unheated, and long-distance pipes to reduce condensation, speed delivery, and lower energy consumption.
Materials and Tools You Need
The section outlines suitable insulation options—foam tubes, fiberglass wrap, rubber sleeves, self-sealing varieties, and reflective tape—along with their R-values, diameter compatibility, temperature ratings, and moisture resistance to help match material to pipe conditions.
It also lists essential tools and supplies such as a measuring tape, utility knife, zip ties, heat-resistant tape, and sealant for accurate fit and secure installation.
Readers are guided to evaluate performance specifications and practical tools together when selecting materials.
Types of insulation (foam tube, fiberglass wrap, rubber sleeve, self-sealing, reflective tape)
Choosing the right insulation involves matching pipe size, location, and temperature needs to material characteristics like R-value, moisture resistance, and ease of installation.
Different types suit varied applications and budgets; selection affects durability and maintenance.
- Foam tube: easy, common
- Fiberglass wrap: high-temp areas
- Rubber sleeve: flexible, durable
- Self-sealing: quick install
- Reflective tape: surface heat control
R-values, diameter compatibility, temperature ratings, and moisture resistance
Because pipe insulation must balance heat retention, fit, and durability, understanding R-values, diameter compatibility, temperature ratings, and moisture resistance is essential before buying materials and tools.
Choose insulation with an R-value appropriate for hot water lines, match internal diameters to pipe sizes for snug fit, verify maximum service temperatures, and prefer moisture-resistant or vapor-barrier options for damp or exposed locations to prevent degradation and mold.
Tools and supplies: measuring tape, utility knife, zip ties, heat-resistant tape, sealant
Having settled on the right insulation type and specifications, attention turns to the basic tools and supplies needed to install it properly.
A measuring tape guarantees accurate cuts; a sharp utility knife provides clean seams.
Zip ties and heat-resistant tape secure and seal joints. High-temperature sealant prevents leaks and moisture ingress.
Spare insulation and gloves are recommended for safe, precise work.
Step-by-Step Guide to Insulating Straight Hot Water Pipes
The guide begins by measuring pipe length and diameter to choose appropriately sized insulation.
Next, pipes are cleaned, dried, and water is shut off if necessary before foam tubes or sleeves are cut to fit.
Seams and joints are sealed with tape or adhesive, insulation is secured with zip ties or tape, and the work is inspected for gaps.
Measuring pipe length and diameter for material selection
Before selecting insulation, measure each straight run of hot water pipe for total length and record the outside diameter at several points to account for fittings or irregularities.
Note pipe material and insulation thickness required for desired R-value. Round up lengths for waste and joints.
Tabulate runs by length, diameter, and insulation type to purchase correct quantities and avoid mismatches during installation.
Preparing pipes: cleaning, drying, and turning off water if needed
Begin by shutting off water to the affected section if work involves joints, valves, or repairs that could allow leakage; for simple sleeving of straight runs this step is often unnecessary but should be confirmed.
Remove loose debris, oil, and corrosion with a wire brush or cloth.
Thoroughly dry surfaces to prevent trapped moisture.
Confirm workspace is ventilated and pipes cool before proceeding.
Cutting and fitting foam tubes or sleeves
Measure each straight run and select foam sleeves with an inner diameter that matches the pipe and a wall thickness appropriate for the climate.
Cut sleeves slightly longer than runs, using a sharp utility knife for clean ends. Slip halves over pipes or slide whole sleeves along runs, aligning longitudinal seams neatly.
Trim around fixtures and supports for snug, gap-free coverage before final sealing.
Sealing seams and joints with tape or adhesive
Secure seams and joints with either specialized insulation tape or a compatible adhesive to confirm continuous thermal protection and prevent heat loss.
Press edges firmly, ensuring adhesive contact along the entire seam. Overlap tape slightly for a weatherproof seal. Trim excess material for a neat finish.
Allow adhesive to cure per manufacturer instructions before restoring service to confirm durable, watertight insulation.
Securing insulation with zip ties or tape and testing for gaps
After seams and joints are sealed, the installer fastens the insulation along the straight run using zip ties or insulation tape to hold the material snugly against the pipe.
Ties should be spaced every 6–12 inches depending on pipe diameter, tightened enough to prevent slippage but not so tight as to compress the insulation and reduce R-value.
The installer then inspects for gaps, pressing seams and adding tape or additional padding where heat loss appears likely.
Insulating Elbows, Valves, and Hard-to-Reach Areas
Elbows and fittings are best covered with pre-formed insulation pieces or tightly wrapped foam to maintain a continuous thermal barrier.
Valves, unions, and meters require removable or split covers that insulate without blocking access for maintenance.
In cramped locations, flexible wrap or canned spray foam can fill gaps while preserving serviceability when used sparingly.
Techniques for insulating elbows and fittings with pre-formed pieces or wrap
Insulating elbows, valves, and other irregular fittings requires a mix of pre-formed components and flexible wrap to maintain continuous thermal protection without gaps.
Use molded elbow sections for common angles, cutting to fit where needed.
For odd shapes, wrap closed-cell foam or fiberglass with vapor barrier tape, overlapping seams tightly.
Secure with zip ties or foil tape, ensuring no exposed pipe or gaps remain.
Insulating valves, unions, and meters without restricting access
Following the techniques for elbows and odd fittings, attention turns to valves, unions, and meters where access must be preserved.
Removable insulation covers, split foam sections, and thin neoprene sleeves fit around components without impeding operation.
Label removable pieces and secure with Velcro or clips for easy removal.
Maintain clearance for wrenches and inspection, and avoid permanent adhesives that block future service.
Working in tight spaces: flexible wrap and spray-foam options
Work in tight spaces often requires flexible wraps and spray-foam solutions that conform to irregular shapes and reach areas rigid insulation cannot.
Flexible pipe wrap, self-sealing foam tape, and pre-slit silicone sleeves fit elbows and valves while preserving access.
Low-expansion spray foam fills voids around unions and brackets without distorting fittings.
Choose materials rated for plumbing temperatures and apply in thin, even layers for reliable thermal protection.
Insulating Hot Water Return Lines and Circulation Systems
Insulating return loops and pump lines considerably reduces heat loss and improves system efficiency, especially in long or exposed runs.
Special attention is required around circulating pumps and check valves, where removable or heat-resistant insulation and proper clearances prevent overheating and allow airflow.
Insulation should be applied so it can be removed or opened for routine service and inspection without damaging the piping or components.
Importance of insulating return loops and pump lines
Protecting return loops and pump lines with insulation reduces heat loss, prevents unnecessary cycling of the boiler or circulator, and improves overall system efficiency.
Insulation stabilizes return-water temperature, minimizes energy waste, and extends equipment life by reducing thermal stress.
Properly sized, continuous insulation on loops and branch returns also lowers standby losses and helps maintain design flow rates for consistent heat delivery.
Special considerations for insulation on circulating pumps and check valves
When addressing circulating pumps and check valves, installers must account for irregular shapes, maintenance access, and heat generated by motor housings and bearings.
Tailored insulation solutions—such as removable jackets, split-shell sections, or thin high-temperature wraps—preserve thermal performance while allowing serviceability and preventing overheating of sensitive components.
Insulation must seal gaps, resist vibration, and tolerate local temperatures; label removable pieces for easy reassembly.
Balancing insulation with necessary service access
Achieving the right balance between pipe insulation and service access requires planning that prioritizes both thermal efficiency and maintainability.
Insulation should cover return lines and circulation loops while leaving removable access panels or split sections at pumps, valves, and test points.
Use labeled, easily removable fittings and avoid permanent adhesives.
Schedule access zones to minimize heat loss yet allow routine inspection, repair, and meter reading.
Dealing with Exterior and Exposed Pipes
Exterior and exposed hot water pipes require weatherproof insulation and UV‑resistant jacketing to maintain thermal performance and prevent material degradation.
Durable outer coverings and rodent‑resistant barriers help protect insulation from physical damage.
In colder climates, combining proper insulation with electric heat tracing reduces the risk of freezing and burst pipes.
Weatherproofing insulation for outdoor sections
A few simple but durable measures are essential for weatherproofing insulation on outdoor hot water pipes to prevent heat loss, moisture damage, and freeze-related failures.
Use closed-cell foam or rubber insulation, seal seams with waterproof tape or silicone, and apply corrosion-resistant tape at joints.
Guarantee proper slope for drainage, secure insulation against wind, and inspect regularly for compression or damage.
UV protection, jacketing, and protection against rodents
Once outdoor insulation is sealed and fastened against wind and moisture, attention turns to long-term surface protection: sunlight, physical wear, and pests pose separate threats that degrade insulation and expose piping.
Use UV-resistant jacketing (aluminum, PVC or UV-stabilized polyethylene), secure seams and fasteners, and add metal or heavy-gauge mesh barriers where rodents frequent.
Inspect periodically and repair abrasions promptly to prevent moisture ingress.
Preventing freeze damage with combined insulation and heat tracing
Cold-weather protection for exterior and exposed hot water pipes combines thermal insulation with electric heat tracing to prevent freezing while minimizing energy use.
The approach layers closed-cell foam or fiberglass with UV-resistant jacketing, then applies self-regulating heat tape along critical runs and fittings.
Proper thermostat and GFCI protection guarantee safety.
Routine inspection and secure fastening prevent moisture intrusion and maintain reliable freeze protection.
Safety, Building Codes, and Maintenance
Attention to fire ratings and maximum temperature limits for pipe insulation is essential to prevent hazards.
Local building codes and permit requirements should be checked and a licensed plumber consulted when work affects combustion appliances or concealed piping.
Routine inspections for damaged, compressed, or waterlogged insulation and replacement every few years or after signs of wear help maintain efficiency and safety.
Fire safety and temperature limits for insulation materials
Safety is paramount when selecting and installing pipe insulation, because materials vary in combustibility, smoke production, and maximum service temperature.
Choose insulation rated above the system’s operating temperature and certified for fire resistance (e.g., Class A/B).
Avoid materials that degrade or off‑gas at high heat.
Maintain clearances from heat sources, use noncombustible jacketing where required, and follow manufacturer temperature limits.
Local code considerations and when to consult a plumber
After confirming insulation materials meet temperature and fire‑resistance requirements, attention must turn to local building codes and when professional help is warranted.
Codes may dictate insulation type, R‑value, clearances, and work permits.
For complex layouts, concealed piping, gas lines, or code interpretation, consult a licensed plumber or inspector.
Professional assessment guarantees compliance, safety, and avoids costly rework or violations.
Inspecting and replacing insulation: schedule and warning signs
Regular inspections of hot water pipe insulation should occur at least once a year and after any plumbing work or seasonal temperature extremes; more frequent checks are advisable in high‑humidity or mechanically active areas.
Inspect for compression, gaps, mold, deterioration, or displaced seams.
Replace insulation showing water damage, persistent odor, or thermal loss.
Keep records of dates, materials, and any contractor action for code compliance and warranty purposes.
Cost Estimates, DIY vs. Professional Installation, and Return on Investment
Typical DIY materials for insulating hot water pipes often cost between $10 and $100 and can take a few hours for a homeowner to install.
A professional installer is recommended for complex layouts or inaccessible piping, with labor and materials commonly totaling $100–$500 or more.
Comparing these costs to projected energy savings and estimated payback periods (often 6 months to a few years) helps determine the most cost-effective option.
Typical DIY material costs and time estimates
Estimate materials and time before starting to insulate hot water pipes to set a realistic budget and schedule.
Typical DIY supplies—foam sleeves, tape, adhesive, and pipe wrap—cost $20–$80 for a small house; larger jobs reach $100–$200.
Labor for a competent DIYer typically runs 1–6 hours depending on complexity.
Expected payback from energy savings usually appears within 1–3 years.
When to hire a professional and expected professional costs
Deciding whether to hire a professional depends on the home’s plumbing complexity, the homeowner’s skill level, and the value placed on warranty and code compliance.
Professionals typically charge $150–$500 for pipe insulation jobs, higher for complex or hard-to-reach systems.
Hiring offers guaranteed workmanship, compliance with local codes, and faster completion; DIY saves labor costs but may lack professional warranty or thorough coverage.
Calculating energy savings and estimated payback
Compare projected fuel or electricity use before and after insulating hot water pipes to quantify savings and payback. Estimate annual energy saved, convert to dollars, then subtract material and labor costs. Compare DIY versus professional quotes to find payback period and ROI. Consider maintenance and warranty when choosing installation.
| Item | Value |
|---|---|
| Annual energy saved | |
| Energy cost ($/kWh or therm) | |
| Annual savings ($) | |
| Installation cost ($) | |
| Payback period (years) |
Common Mistakes to Avoid and Troubleshooting
Common errors include gaps, compressed insulation, and improper sealing that leave heat loss paths and reduce effectiveness.
Over-insulating near heat-sensitive equipment can cause overheating or damage if clearances and material limits are ignored.
Practical troubleshooting focuses on locating and fixing air pockets, addressing condensation, and repairing sources of lingering heat loss.
Gaps, compressed insulation, and improper sealing
Inspecting for gaps, compressed insulation, and improper sealing is essential because these issues negate the effectiveness of pipe insulation by allowing heat loss, moisture intrusion, and condensation.
Examine joints, bends, and seams for voids or flattened material. Replace crushed sections, realign insulation for full coverage, and reseal with appropriate tape or sealant.
Regular checks prevent energy waste and corrosion.
Over-insulating near heat-sensitive equipment
When insulation is applied too thickly or continuously around boilers, pumps, valves, electrical junctions, or sensors, it can trap heat and raise local temperatures enough to damage components or disrupt operation.
Inspect mounting points and service access, leave specified clearance, and follow manufacturer guidelines for thermal management.
Use removable or thinner insulation sections near heat-sensitive parts and label them for maintenance access to prevent overheating.
Fixes for air pockets, condensation, and lingering heat loss
Address trapped air, condensation, and persistent heat loss promptly to restore system efficiency and prevent damage.
Bleed air from radiators and high points, recheck slope and venting.
Repair insulation gaps or compression; replace degraded jackets.
Add vapor barriers where condensation forms and guarantee adequate ventilation.
Measure surface temperatures to locate residual losses, then seal joints and secure insulation to eliminate drafts and thermal bridges.
Quick Checklist for a Successful Pipe Insulation Project
A concise checklist helps guarantee pipe insulation is measured, installed, and maintained correctly.
It prompts verification of pre-installation measurements and appropriate materials, step-by-step installation with quality checks, and a post-installation inspection plus maintenance schedule. Following the checklist reduces errors and extends system efficiency.
- Measure pipe runs and choose compatible insulation materials
- Confirm fitting, sealing, and secure attachment during installation
- Inspect joints, valves, and bends for gaps or compression
- Schedule a post-installation inspection within a month
- Establish a regular maintenance and recheck calendar
Pre-installation measurements and material selection
Measure each run of hot water pipe and note diameter, length, fittings, and nearby obstacles before purchasing materials; accurate dimensions determine sleeve size, quantities, adhesive needs, and whether rigid or flexible insulation is appropriate.
Then select insulation type (foam, fiberglass, elastomeric), appropriate wall thickness for temperature loss goals, compatible adhesives and tape, and any supporting hardware, prioritizing moisture resistance and local code compliance.
Installation steps and quality checks
Begin by confirming that all measured runs, materials, and tools are staged and the system is depressurized and cool; this verifies work proceeds safely and without interruptions.
Cut and fit insulation to length, secure seams with appropriate tape or adhesive, and seal joints and valves.
Verify snug fit without compression, confirm continuity across fittings, and record locations needing future access or adjustments.
Post-installation inspection and maintenance schedule
With installations complete and records made of access points, the post-installation inspection and maintenance schedule should be established immediately to preserve insulation performance and detect issues early.
Inspect monthly for damage, compression, moisture, and seal integrity; document findings. Replace compromised sections promptly.
Perform annual thermal checks and re-secure fastenings. Schedule touch-ups after plumbing work.
Retain records for warranty and energy-audit purposes.
Product Recommendations and Where to Buy
Recommendations cover when to use foam versus rubber insulation and which products work best for indoor, outdoor, or high-temperature applications.
Important accessories such as insulation tape, protective jackets, and pipe fasteners are noted for proper installation and longevity.
Guidance is provided on shopping both online and at local retailers, including tips for measuring pipe diameters and matching available sizes.
Best foam and rubber pipe insulation options by use-case
Several common use-cases—short indoor runs, exposed outdoor lines, buried service lines, and decorative or visible plumbing—call for different foam or rubber pipe insulation types to balance thermal performance, moisture resistance, flexibility, and durability.
Recommended options by use-case and typical retailers:
- Closed-cell polyethylene foam sleeves — hardware stores, online
- Armaflex rubber — insulation suppliers, Amazon
- Elastomeric tubular covers — HVAC outlets
- Fiberglass with vapor barrier — home centers
- High-density polyethylene wraps — plumbing wholesalers
Accessories: tapes, jackets, and fasteners
A handful of accessories—tapes, protective jackets, and fasteners—are essential for securing insulation, preventing moisture intrusion, and finishing visible runs.
Recommended items include foil HVAC tape, weatherproof self-sealing tape, polyethylene jackets for outdoor exposure, and stainless steel or plastic zip straps and clamps.
Purchase from hardware stores, plumbing suppliers, or reputable online retailers; choose materials rated for temperature and UV resistance.
Online and local retailer tips for finding the right sizes
Shopping for pipe insulation requires matching product dimensions to pipe measurements and site conditions; accurate pipe diameter, insulation thickness, and length are the primary criteria.
Online retailers list inner diameters, R‑values, and lengths; use filters and customer photos.
Local hardware stores allow on‑site measuring and returns; bring a tape measure and a sample.
Compare prices, warranties, and installation ease before purchasing.
Conclusion
Insulating hot water pipes yields tangible energy savings, reduced heat loss, and faster hot-water delivery, improving comfort like a cozy blanket wrapping a chilly morning. Prioritizing trunk lines, uninsulated hot runs, and cold-attic pipes delivers the best returns; use foam sleeves, tape, and sealants for straight runs and foam/foil wraps for fittings. Avoid gaps, compression, and incompatible adhesives. With modest cost and simple skills, most homeowners recoup expenses quickly and enjoy lasting benefits.

