
How to Turn Outside Water Back On After Winter: A Step-by-Step Guide
To safely turn your outside water back on after winter, start by checking your outdoor faucets, shutoff valves, and irrigation boxes for any damage or debris. Make sure daytime temperatures are consistently above freezing. Locate the indoor shutoff for the exterior line and slowly open it to re-pressurize the system. Bleed any air and drain low spots, then test each faucet and hose for leaks and proper flow. Gradually re-pressurize sprinkler zones and backflow preventers while inspecting the heads. Following these steps will help prevent burst pipes, and additional guidance is available for troubleshooting and maintenance.
How to Turn Outside Water Back On After Winter: Quick Overview
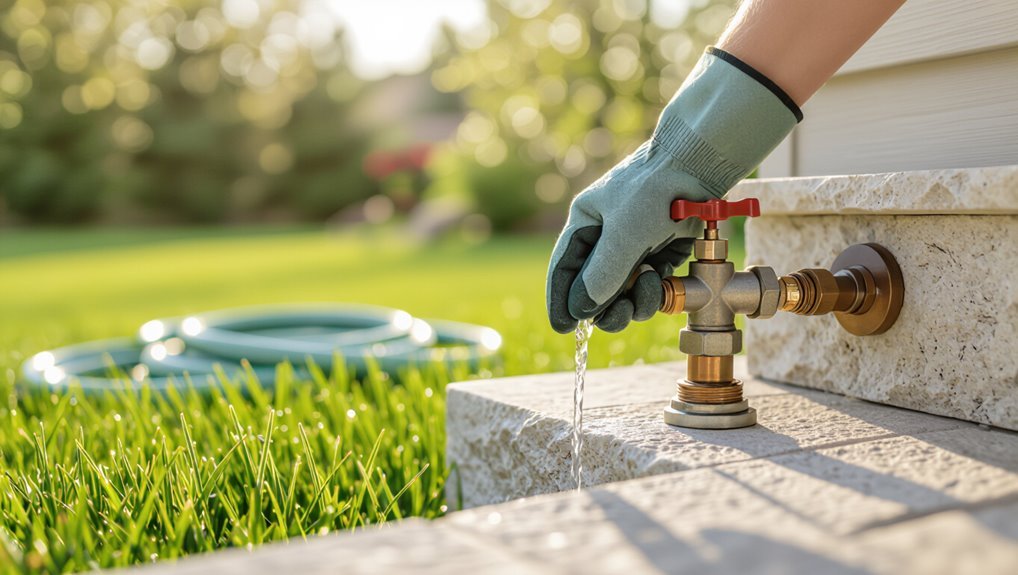
The article outlines when it is safe to restore outdoor water—typically after consistent daytime temperatures stay above freezing—and what checks to perform first.
It also lists essential tools and materials, such as insulated gloves, a hose, a pressure regulator, pipe sealant, and a wrench.
These points prepare the reader to proceed methodically and avoid damage when turning the system back on.
When to turn outdoor water back on safely
When outdoor temperatures consistently stay above freezing for several days, homeowners should consider restoring exterior water to prevent burst pipes and guarantee irrigation systems operate properly.
Determination depends on local forecasts, soil thawing, and absence of overnight freezes.
Timing for how to turn outside water back on after winter centers on sustained warm nights, minimizing refreeze risk and protecting fixtures and landscaping from cold-related damage.
Tools and materials you’ll need
A compact toolkit helps streamline restarting outdoor water after winter: shutoff wrench or adjustable pliers, replacement washers and hose bibs, a garden hose for flushing, Teflon tape, and a bucket for draining.
Also recommended are pipe insulation, a flashlight, leak-detecting solution, adjustable wrench, screwdriver set, and a pressure gauge.
Spare hose clamps and a rag complete the essentials for quick inspection and minor repairs.
Prepare Before You Begin
Before restoring outdoor water, the homeowner should visually inspect the faucet, hose bib, and surrounding area for obvious damage or debris.
They should locate and verify the position of the main shutoff valve and any outdoor shutoff(s).
Finally, check for signs of freeze damage or leaks so repairs can be made before pressure is reapplied.
Inspect the outdoor faucet, hose bib, and surrounding area
Inspect the outdoor faucet, hose bib, and surrounding area for visible damage, leaks, or debris that could hinder safe startup.
Note cracks, corrosion, loose fittings, or missing washers.
Clear leaves, dirt, and ice from the enclosure and ground.
Verify the spout turns smoothly without excessive force.
Photograph issues for reference and plan any necessary repairs before restoring water.
Check the main shutoff valve and outdoor shutoff(s)
Locate and identify the main shutoff valve and any exterior shutoff valves that control water to the outdoor faucet(s). Confirm valves are accessible, labeled, and fully closed before winter reopening. Note valve types and tool needs for operation; prepare to turn water on slowly to monitor.
| Valve location | Type | Tool needed |
|---|---|---|
| Basement | Gate | Adjustable wrench |
| Utility room | Ball | None |
| Exterior box | Stop | Pliers |
Look for signs of freeze damage or leaks
Carefully examine exposed pipes, hose bibs, and fittings for visible cracks, bulging, rust-colored stains, or small drips that indicate freeze damage or leaks.
Note any soft spots, unexplained pooling, or discolored insulation. If damage appears, stop and plan repairs before restoring pressure to prevent worsened breaks or flooding.
- Cracks or split pipe
- Corroded fittings
- Persistent dripping
- Wet ground or pooling
Step-by-Step: Turning on Water to Outdoor Faucets
The homeowner should first locate and slowly open the indoor shutoff that controls the exterior line, opening it gradually to restore pressure and reduce stress on plumbing.
After the valve is open, air should be bled from the line and any low spots drained to prevent sputtering or trapped water.
Finally, each outdoor faucet and attached hose should be tested for steady flow and inspected for leaks.
Locate and open the indoor shutoff for the exterior line
Before opening the outdoor spigot, identify the indoor shutoff valve that controls the exterior water line—typically found in a basement, utility room, or crawlspace near where the main supply branches off.
Confirm the valve serves the exterior by tracing the pipe or checking labels, then turn the valve slowly to the open position.
Inspect for leaks at joints and the shutoff itself.
Slowly restore water pressure and why gradual opening matters
With the indoor shutoff open and joints inspected, water should be reintroduced to the exterior line slowly to avoid pressure shocks and reveal leaks gradually.
Gradual opening limits stress on fittings, prevents sudden bursts, and allows detection of damp spots before full pressure.
Pause as pressure rises, monitor meters and visible connections, and stop immediately if seepage or unusual noises occur.
Bleed air and drain lines after turning on water
Open the outdoor faucet slowly and listen for rushing water as trapped air expels; bleeding the line prevents sputtering, protects fixtures, and guarantees drains clear.
Continue until flow is steady and air-free. Open any inline drain valves or low points to remove residual water and sediment.
Close drains, retighten fittings, and monitor for leaks.
Repeat for each supply branch before reconnecting hoses.
Test each outdoor faucet and attached hoses
Proceed to test each outdoor faucet and any attached hoses to confirm proper flow, temperature, and leak-free connections.
Open valves fully, observe steady stream and correct temperature, then close briefly to check shutoff.
Inspect hose couplings, spigots, and nearby fittings for drips.
Replace washers or tighten connections if needed.
Note persistent leaks for repair or professional service.
Dealing with Outdoor Sprinkler Systems
For sprinkler systems, identifying the system type and confirming how it was winterized guides the restart procedure.
The process typically includes slowly re-pressurizing the lines, checking and priming irrigation valves and the backflow preventer, then running a controlled startup cycle.
During that cycle, each zone and sprinkler head should be inspected for leaks, clogs, broken nozzles, and proper coverage.
Types of sprinkler systems and winterization methods
Sprinkler systems fall into two main categories—underground automatic systems and above-ground hose-end or soaker setups—each requiring different winterization and reactivation steps. Underground systems often need blowout or isolation; above-ground hoses and soakers require draining and storage. Regular inspection prevents damage.
| System Type | Winterization Method |
|---|---|
| Underground | Compressed-air blowout |
| Above-ground | Drain and store hoses |
| Soaker lines | Roll up and dry |
Re-pressurizing the system: step-by-step
After the main shutoff and any isolation valves have been reopened, the system should be re-pressurized slowly and methodically to avoid damage and reveal any winter-related issues.
Open the supply valve a quarter turn, wait, then incrementally increase to full.
Observe pressure gauges and listen for leaks.
Stop and isolate if pressure spikes or unusual noises occur; repair before full operation.
Checking and priming irrigation valves and backflow preventer
Begin by verifying that each irrigation zone is fully closed at the controller and any manual ball valves are shut before working on the valves and backflow preventer. Inspect solenoids, diaphragms, and valve bodies for damage. Slowly open water supply, bleed trapped air, and prime the backflow per manufacturer instructions. Test for leaks and proper operation before resuming automated schedules.
| Item | Action | Check |
|---|---|---|
| Solenoid | Inspect | Tighten/replace |
| Diaphragm | Examine | Clear debris |
| Backflow | Prime | Leak test |
Running a startup cycle and inspecting sprinkler heads
Start a controlled startup cycle to confirm each zone operates and to reveal leaks, clogs, or misaligned heads.
Observe spray patterns, listen for irregular flow, and note low-pressure zones. Manually advance stations if needed.
Remove debris, straighten or replace damaged heads, and clear clogged nozzles.
Repair leaks and adjust coverage to prevent overspray on paths or structures before returning to automatic scheduling.
Inspecting and Testing for Damage
A careful visual inspection can reveal burst pipes, cracked hose bibs, and frozen or separated fittings by looking for wet spots, corrosion, and visible deformation.
Simple pressure tests—using a gauge on the supply line or isolating zones and monitoring pressure drop—help detect hidden leaks.
Small leaks may be patched temporarily with tape or hose repair kits, but significant damage or persistent pressure loss warrants a professional evaluation.
How to spot burst pipes, cracked hose bibs, and frozen fittings
How can one quickly recognize signs of burst pipes, cracked hose bibs, and frozen fittings before turning the water back on? Inspect visually for bulges, cracks, corrosion, ice, or moisture; listen for drips; feel for cold spots. Replace damaged components. When unsure, shut main and call a plumber.
| Symptom | What to check |
|---|---|
| Bulging/ice | Pipe surface |
| Leaks/drips | Connections and bibs |
Pressure test methods to detect hidden leaks
Perform a controlled pressure test to reveal hidden leaks by isolating the outdoor supply, attaching a pressure gauge and a hand pump or compressor, and noting any unexpected drop in pressure over a set period.
Smaller drops suggest slow leaks in buried lines or fittings, while rapid loss indicates larger failures requiring immediate repair.
Record baseline pressure, monitor for steady declines, and inspect joints where pressure falls.
Temporary fixes vs. when to call a professional
Detecting a pressure drop during testing helps pinpoint whether a leak is minor and temporarily manageable or severe enough to need professional attention.
Small pinhole leaks, loose fittings, or cracked hose bibs may be patched, tightened, or replaced temporarily.
Significant pressure loss, frozen-burst pipes, recurrent leaks, or buried line damage requires immediate professional diagnosis and repair to prevent extensive water damage and costly failures.
Backflow Preventer Specific Steps
The writer notes the importance of locating and identifying the backflow preventer before any reactivation.
They outline steps to turn the device back on and verify proper operation with simple pressure and flow checks.
Brief winter maintenance tips for backflow assemblies are provided to prevent future freezing and guarantee reliable performance.
Locating and identifying your backflow preventer
A homeowner should first know that a backflow preventer is typically installed where the irrigation or outdoor water line leaves the house—near the main shutoff, by the hose bibs, or adjacent to the water meter.
Inspect exterior walls, utility boxes, and the ground near meters for a small assembly with test cocks, shutoff valves, or caps.
Note material, model, and visible damage.
How to turn it back on and test for proper operation
With the backflow preventer located and inspected for visible damage, proceed to reopen it slowly to avoid pressure shocks.
Open inlet valve quarter-turn increments, then the outlet. Listen for leaks and watch pressure gauges for stable rise.
Operate isolation valves to confirm flow.
Exercise test cocks per manufacturer sequence, recording readings.
Close and recheck for steady pressure and absence of leaks.
Winter maintenance tips for backflow assemblies
Begin winterizing backflow assemblies by draining trapped water and isolating the device to prevent freeze damage.
Inspect valves, test check springs, and replace worn seals or caps. Lubricate moving parts with manufacturer-approved products.
Label shutoffs and document configurations. Store removable covers and insulate exposed piping.
Schedule annual professional testing and record results to guarantee compliance and reliable operation after thaw.
Common Problems and Troubleshooting
After opening the indoor valve, the homeowner may find no water at the outdoor faucet, low pressure or sputtering flow, or discover leaks as thawed fittings settle.
Each symptom points to different causes—blocked lines, partially closed valves, damaged seals, or remaining frozen sections—and requires specific checks.
If a frozen section is suspected, the homeowner should follow safe thawing procedures to avoid pipe damage or injury.
No water at the outdoor faucet after turning on indoor valve
If the indoor shutoff has been opened but the outdoor faucet remains dry, the most likely causes are an upstream valve still closed, a frozen or trapped section of pipe, or a faulty vacuum breaker/backflow preventer; each should be checked in turn to identify where flow stops.
Verify all interior and exterior valves, feel pipes for cold spots, inspect and cycle the backflow device, and replace faulty parts.
Low pressure or sputtering water
Detecting low pressure or sputtering at an outdoor faucet usually signals a partial obstruction, an air pocket, or a malfunctioning backflow preventer rather than a complete shutdown.
Inspect and clean the spout screen, flush the line by briefly opening the valve fully, and bleed trapped air.
If issues persist, check and service the backflow device or partially clogged supply lines; replace damaged components as needed.
Leaks after thawing
Inspecting outdoor plumbing after the thaw often reveals leaks caused by cracked pipes, damaged valves, loosened fittings, or compromised hose bibs. The guide advises isolating the leak, shutting water, drying the area, and using temporary clamps or tape until a proper repair or replacement is made. For safety, recommend professional help for major damage or hidden leaks.
| Symptom | Action |
|---|---|
| Small drip | Tighten or seal |
| Visible crack | Replace pipe |
| Valve leak | Replace valve |
Frozen section still present how to safely thaw
Begin thawing frozen sections cautiously to prevent burst pipes and minimize damage.
If ice remains, isolate the section, open nearby faucets slightly, and apply gentle heat moving from faucet toward the frozen area.
Monitor for leaks and pressure changes; stop and consult a professional if unsure.
- Use a hairdryer or heat tape
- Avoid open flames
- Keep valves closed initially
- Inspect for cracks
Preventing Future Winter Issues
To reduce recurring winter problems, the article outlines proper winterization techniques for faucets, hoses, and sprinkler systems.
It also compares insulation and heat tape options suitable for outdoor plumbing.
A concise seasonal checklist for shutting down and reactivating outdoor water rounds out the guidance.
Proper winterization techniques for faucets, hoses, and sprinklers
Winter-proofing faucets, hoses, and sprinkler systems requires systematic steps to prevent freezing damage and simplify spring reactivation. Exterior faucets should be drained and shut off; hoses removed and stored; sprinklers blown out or drained per manufacturer guidance. Regular inspections catch leaks early. Documentation of shutoff locations speeds future maintenance.
| Item | Action | Frequency |
|---|---|---|
| Faucet | Drain/close | Annually |
| Hose | Remove/store | After use |
| Sprinkler | Drain/blow out | Annually |
Recommended insulation and heat tape options
After completing shutoffs and drain-downs, attention turns to insulating exposed plumbing and applying heat tape where needed to reduce the chance of future freeze damage.
Use closed-cell foam pipe insulation for durability and easy installation; thicker diameters suit larger pipes.
Select UL-approved self-regulating heat tape with built-in thermostat for exterior use, waterproof connections, and proper outlet protection.
Regularly inspect for wear.
Seasonal checklist for shutting down and reactivating outdoor water
When seasonal temperatures begin to drop, homeowners should follow a concise checklist for shutting down outdoor water and later reactivating it to prevent freeze damage and guarantee reliable operation.
Include: shut off exterior valves, drain hoses and spigots, open faucets and bleed lines, insulate exposed piping, label shutoffs, test shutoff operation, close foundation vents.
Reopen sequence reverses steps, checks leaks, and restores pressure slowly.
When to Hire a Plumber
Evidence of major damage—such as broken pipes, persistent low pressure, or water pooling—indicates a professional is needed.
Homeowners should document symptoms, recent actions taken, valve positions, and any visible corrosion or leaks before calling.
Providing this concise information speeds diagnosis and helps the plumber prepare appropriate tools and parts.
Signs of major damage or complex repairs
Several clear indicators suggest the situation exceeds basic maintenance and requires professional attention. Visible pipe cracks, persistent low pressure, sewer odors, multiple leaks, or collapsed valves signal major damage. Frozen-burst evidence or extensive corrosion also necessitates a plumber.
| Indicator | Likely issue |
|---|---|
| Visible cracks/burst | Structural failure |
| Persistent leaks/odors | Hidden damage |
| Multiple failures | System-wide repair |
What information to provide a professional for faster diagnosis
How should a homeowner prepare before calling a plumber: compile specific details about the issue, including when the problem began, any visible damage or odors, locations of affected outdoor faucets and irrigation lines, whether the system was fully drained or winterized, recent repairs or freeze events, and results of basic troubleshooting (e.g., attempted valve turns, water pressure checks, or temporary fixes).
- Exact faucet/location list
- Recent maintenance dates
- Observed symptoms and timing
- Photos or videos of damage
Conclusion
Like spring coaxing sleep from the soil, restoring outside water after winter breathes life back into a yard. With careful steps—uncovering valves, opening lines slowly, and checking for leaks—the garden’s thirst is gently answered. Troubleshooting and preventive care act as a gardener’s steady hands, keeping pipes from shattering frost’s memory. When uncertainty clouds the task, a plumber’s expertise shines like a guiding lantern, ensuring flow returns safely and the landscape wakes renewed.
