How to Fix a Main Water Line Clog: Step-by-Step Guide for Homeowners
If you’re facing a main water line clog, it’s crucial to act quickly and methodically. Start by shutting off the main water supply and draining your fixtures. Assess any risks, such as potential sewage exposure, and wear appropriate protective gear. Use a camera to pinpoint the blockage, and for minor clogs, a hand or power auger may suffice. For tougher obstructions, consider hydro-jetting or hiring a professional for root-cutting. After clearing the clog, test the water flow, check for leaks, and plan a follow-up inspection. Follow this guide for a comprehensive step-by-step approach and tips for preventing future clogs.
What a Clogged Main Water Line Is and Why It Matters
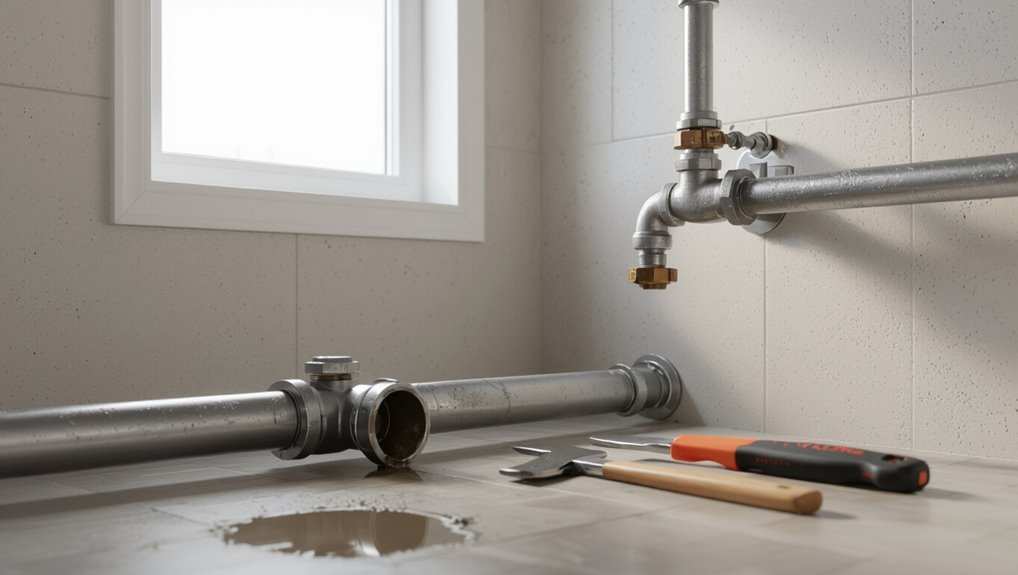
The main water line is the primary pipe that brings supply from the municipal connection or well into a building, distinct from smaller branch pipes that serve individual fixtures.
Clogs in the main line commonly result from invading roots, mineral buildup, accumulated debris, or pipe collapse, and they can restrict water flow or cause backups throughout the property.
Unlike isolated fixture or branch clogs, a main line blockage typically produces multiple simultaneous symptoms—low pressure at several faucets, sewage backups, or no water at all—signaling a systemic issue.
Definition of the main water line and how it differs from branch plumbing
A home’s main water line is the primary pipe that brings potable water from the municipal supply or private well into the building, distinct from branch plumbing, which distributes that supply to individual fixtures.
The main line serves as the single entry point; diagnosing and repairing it differs from fixture-level work.
Homeowners seeking how to fix a main water line clog should prioritize professional assessment.
Common causes of main line clogs (roots, minerals, debris, pipe collapse)
Roots, mineral buildup, accumulated debris, and structural failure are the primary causes of main water line clogs, each producing distinct symptoms and risks.
Tree roots infiltrate joints, mineral deposits narrow flow over years, sediment and waste create blockages, and corroded or collapsed pipes obstruct passage entirely.
Understanding these mechanisms guides appropriate inspection, repair, or replacement strategies to restore reliable water service.
Signs and symptoms of a main line clog versus other plumbing issues
How can homeowners distinguish a main water line clog from routine plumbing issues? A main line clog produces low water pressure or no water throughout the entire house, multiple fixtures affected simultaneously, sewage backup in drains, gurgling noises, and unusually high water bills.
Localized slow drains, single-fixture issues, or isolated leaks usually indicate branch pipe or fixture problems, not the main line.
Immediate Safety and Assessment Steps Before You Begin
Before any repair work begins, the homeowner should locate and shut off the main water supply to isolate the property and limit further flooding.
They must assess electrical hazards and potential sewage exposure, don appropriate protective gear, and avoid contact with contaminated water.
If flooding is severe, electrical systems are wet, or the source is unclear, a professional should be called immediately.
How to shut off the main water supply and isolate the property
Locate and turn off the property’s main shutoff valve to stop water flow and prevent flooding while work proceeds.
Then drain residual pressure by opening a lowest outdoor spigot and an upstairs faucet.
Notify occupants and post a visible sign at the meter or entry.
If the meter box or shutoff is inaccessible, contact the utility.
Confirm zero flow before beginning repairs.
Safety precautions: electrical hazards, sewage exposure, protective gear
Any person preparing to work on a main water line must first assess immediate hazards and don appropriate protective gear.
Identify electrical sources near standing water; shut power if safe.
Assume sewage contamination—avoid contact, ventilate the area, and contain runoff.
Wear insulated boots, rubber gloves, eye protection, and a respirator if odors are strong.
Dispose of contaminated clothing safely and wash thoroughly afterward.
When to call a professional immediately (backup advice)
After addressing electrical risks and donning protective gear, the homeowner should immediately call a licensed plumber or emergency services if any of the following are present:
- sewage backing up into the home,
- multiple fixtures affected across the property,
- visible sinkholes or large wet patches in the yard,
- gushing water from a broken main, or
- inability to stop water flow with the shutoff valve.
Additional triggers include loss of water pressure network-wide, foul odors indicating contamination, visible pipe collapses, or repeated failures after temporary fixes.
Tools and Materials You’ll Need
A concise list of tools and materials helps determine whether a homeowner can handle a main line clog or should call a pro.
Essential items include basic tools (wrenches, gloves, buckets, flashlights), common drain-cleaning equipment (plumber’s snake/auger and alternatives to hydro-jetting), and notes on when specialized gear—camera inspection or heavy-duty augers—is necessary.
The section also outlines typical costs and rental options for those tools.
Basic homeowner tools (wrenches, gloves, buckets, flashlights)
Before starting work on the main water line, the homeowner should assemble a small set of basic tools—an adjustable wrench and pipe wrench for fittings, heavy-duty gloves to protect hands, several sturdy buckets for catching water, and a bright flashlight or headlamp for visibility in tight, dim spaces.
A tape measure, channel locks, replacement washers, and rags complete the minimal kit for safe, simple repairs.
Drain-cleaning tools and equipment (plumbers’ snake/auger, hydro-jet alternatives)
Gather the right drain-cleaning tools to tackle a main line clog safely and effectively: a plumbers’ snake (manual or power auger) for breaking and retrieving obstructions, and alternatives to hydro-jetting—such as high-torque electric drain cleaners, sectional cable machines, or chemical-safe enzymatic treatments—when water-jet equipment is unavailable or unsuitable.
Include durable gloves, eye protection, drain fittings, extension cables, and a sturdy bucket for debris containment.
When specialized equipment is required (camera inspection, heavy-duty augers)
Call in specialized equipment when standard snakes and hand tools cannot confirm or clear a blockage—situations that include repeated backups, unknown pipe conditions, deep or long lateral runs, or suspected tree-root intrusion.
Camera inspection locates exact blockage, assesses pipe condition and guides repair decisions.
Heavy-duty augers or hydro-jetting remove dense obstructions or roots.
Trenchless tools enable targeted repairs with minimal excavation.
Estimated costs for common tools and rental options
A realistic budget helps homeowners decide whether to buy, rent, or hire a pro for main-line work: estimated costs vary by tool and region.
Typical price ranges include short-term rentals, purchases, and professional rates to evaluate.
- Heavy-duty auger rental: $40–$120/day or $300–$800 to buy
- Inspection camera rental: $60–$150/day
- Hydro-jetter rental: $150–$400/day or $1,500–$6,000 to buy
Step-by-Step Guide to Diagnosing a Main Line Clog
The technician begins by confirming the blockage is in the main line through multiple fixture tests and inspection of yard cleanouts.
Next, they locate and open the cleanout access point to gain entry for further examination.
If needed, a camera inspection is run, with footage recorded and interpreted to identify the clog type, location, and any required repairs.
How to confirm the clog is in the main line (multiple fixture tests, yard cleanouts)
If multiple fixtures back up or drain slowly despite individual traps being clear, it indicates the obstruction likely lies in the main sewer line rather than in a single branch.
Confirm by testing several fixtures (toilet, sink, tub) simultaneously for correlated backups and by inspecting external yard cleanouts for standing sewage or slow flow.
Consistent symptoms across fixtures point to a main-line clog.
Using a cleanout access point: locating and opening the cleanout
Several straightforward steps guide locating and opening the main cleanout to inspect a suspected clog.
The homeowner locates the cleanout near the foundation, basement wall, or yard by following the drain line path and utility maps.
After clearing debris, they loosen the cap with appropriate tools, wear gloves and eye protection, and slowly relieve pressure.
Replace cap securely after inspection.
How to perform a camera inspection overview and what to look for
After replacing the cleanout cap and confirming no immediate backup, attention shifts to a camera inspection to pinpoint blockages and assess pipe condition.
A technician feeds a waterproof camera through the cleanout, advancing slowly while recording.
Look for intrusions: tree roots, scale buildup, collapsed sections, foreign objects, offsets, and joint leaks.
Note pipe material, sediment layers, and active flow patterns during inspection.
Recording and interpreting inspection results
Begin by saving the entire camera recording file with a clear timestamped name and backing it up to at least one secondary location to preserve an unaltered reference.
The inspector then annotates key frames, notes blockage type, location, and pipe condition, and exports stills for reports.
Visual cues guide repair decisions:
- accumulated root mass blocking flow
- collapsed pipe section with sediment
- smooth grease film suggesting buildup
Step-by-Step Repair Methods for Homeowners
The following section outlines practical repair methods homeowners may consider for a clogged main water line.
It covers manual and power augers, options for hydro-jetting including rental versus professional services, mechanical and chemical root removal, and short-term measures like bypass pumps and temporary patches.
Each method’s typical steps, benefits, and limitations are summarized to help inform an appropriate course of action.
Method 1 Clearing with a hand or power auger
The section outlines how to prepare the work area and access the cleanout before any auger work begins.
It then describes safe hand and power auger techniques, including proper feed, rotation, and PPE.
Finally, it covers troubleshooting steps for situations when the auger cannot pass the blockage and when to stop and call a professional.
Preparing the area and accessing the cleanout
Before opening the cleanout, the area should be cleared and secured so work can proceed safely and efficiently.
The homeowner guarantees adequate lighting, removes obstacles, and wears protective gloves and eyewear.
Locate the cleanout cap—typically near the foundation or sidewalk—clear surrounding soil or debris, expose the cap, and keep a bucket, rags, and tools nearby for quick access.
Proper technique for using an auger safely
Begin by confirming that power is disconnected for an electric auger and that the area around the cleanout is clear of bystanders and trip hazards.
Wear gloves, eye protection, and sturdy footwear.
Feed the auger steadily, avoiding rapid thrusts. Keep a firm grip, maintain straight alignment, and listen for changes in resistance.
Retract slowly while rotating to clear debris and prevent pipe damage.
Troubleshooting: when the auger can’t pass the blockage
If the auger cannot pass the blockage, remain calm and assess the situation carefully: note how far the cable has advanced, whether resistance is solid or intermittent, and whether any unusual sounds or pipe movement occur.
Stop rotating if binding or buckling appears.
Try backing out, repositioning entry angle, or using a stiffer head.
If unsuccessful, halt and call a professional to avoid pipe damage.
Method 2 Using hydro-jetting (rental vs professional)
Hydro-jetting can remove stubborn blockages and root intrusions but may overstress older clay, cast iron, or brittle PVC lines. Therefore, pipe condition should be confirmed before choosing this method.
Homeowners must weigh renting a consumer-grade unit for minor clogs against hiring professionals who bring higher-pressure equipment and diagnostic experience.
If renting, basic safe steps include reviewing the machine manual, wearing protective gear, securing proper adapters, starting at low pressure, and progressing cautiously while monitoring for leaks or damage.
When hydro-jetting is appropriate and risks to older pipes
When considering whether to use high-pressure water to clear a main line, homeowners should weigh pipe material, age, and documented damage history because older or fragile systems can be further harmed by the force.
Hydro-jetting suits durable, modern pipes with heavy buildup; pre-inspection via camera is advised.
Professional assessment reduces risk, as hidden cracks, joints, or corroded sections may fail under pressure.
How to operate a rented hydro-jet safely (basic steps)
A homeowner renting a hydro-jet should follow a clear sequence of safety checks and setup steps to minimize risk and guarantee effective clearing:
inspect hose, nozzle, and fittings for damage;
wear goggles, gloves, and hearing protection;
confirm water pressure limits and backflow prevention;
secure access points and nearby drains;
start at low pressure, advance slowly, and retreat if resistance or leaks occur;
drain and store equipment properly.
Method 3 Mechanical root removal and chemical root treatment
Mechanical cutting tools can remove intrusive roots from a clogged main line, followed by targeted chemical treatment to inhibit regrowth.
Proper selection and operation of cutters minimizes pipe damage, while root-killing chemicals should be applied according to label directions to guarantee effectiveness.
Care must be taken to avoid overuse or runoff, and to follow environmental and local regulatory precautions.
Mechanical cutting tools and follow-up treatments
Operators employ cutting tools to remove intrusive roots and then apply targeted chemical treatments to inhibit regrowth and protect the repaired line.
Rotary cutters, chain flails, and auger blades are selected based on pipe diameter and material.
After cutting, debris is flushed, inspections confirm clearance, and measured chemical doses are applied to root zones.
Follow-up inspections monitor effectiveness and structural integrity.
Safe use of root-killing chemicals and environmental cautions
Prepare to handle root-killing chemicals with strict precautions to protect people, pets, and the environment.
The homeowner must read labels, wear gloves and eye protection, and avoid inhalation or skin contact.
Apply only recommended doses, target roots inside pipes, and prevent runoff to soil, drains, or waterways.
Rinse equipment safely and store chemicals locked away, following disposal guidelines and local regulations.
Temporary fixes and when they are appropriate (bypass pumps, patching leaks)
When a main water line clog cannot be cleared immediately, homeowners may need temporary measures to restore service or prevent further damage.
Bypass pumps and quick patching are common stopgap options that buy time until professional repairs can be completed.
Bypass pumps reroute flow to maintain supply; inflatable plugs or epoxy patches stop leaks briefly.
Use only until licensed plumbers assess permanent repair; monitor pressure and safety.
Post-Repair Checks and Verification
After clearing the main line, the technician tests water flow and pressure at multiple fixtures to confirm normal delivery.
A careful inspection follows to identify any leaks, pipe damage, or lingering backups that might require repair.
If issues persist or the blockage was severe, a scheduled follow-up camera inspection is recommended to verify interior pipe condition.
How to test water flow and pressure after clearing the line
Verify that system performance meets expectations by measuring flow and pressure at multiple fixtures immediately after the main line is cleared.
Use a calibrated pressure gauge at an outdoor spigot or hose bib and note PSI.
Run several faucets and the shower, recording flow rates (liters or gallons per minute) and comparing to baseline or municipal values.
Document results and retest if readings remain low.
Inspecting for leaks, pipe damage, and residual backups
With flow and pressure confirmed, attention shifts to a careful inspection for leaks, pipe damage, and any lingering backups to verify the repair holds.
The homeowner or technician examines visible joints, exposed piping, and connection points for dampness, corrosion, or deformation.
Interior fixtures and drains are checked for slow drainage or odors.
Any signs of compromise prompt immediate sealing, patching, or professional assessment.
When to run a follow-up camera inspection
When is a follow-up camera inspection warranted?
A post-repair camera check is recommended after clearing persistent blockages, restoring flow but suspecting residue, replacing pipe sections, or when recurring backups or leaks occurred.
It verifies defect removal, joint integrity, and remaining obstructions.
Schedule immediately if symptoms persist; otherwise perform within weeks to confirm stability and prevent unnoticed deterioration.
Repair Options When DIY Isn’t Enough
When DIY attempts fail, homeowners typically consider professional services such as excavation and replacement or trenchless repair.
The choice between full replacement and pipe-lining often hinges on pipe condition, cost, and disruption, so comparing pros and cons is essential.
Selecting a licensed plumber requires asking about licenses, insurance, warranties, estimated costs and timelines, and references before agreeing to work.
Common professional services: excavation and replacement, trenchless repair
Addressing a main water line clog often requires professional interventions beyond plumbing snakes and chemical cleaners; two primary options are full excavation and replacement or trenchless repair.
Excavation replaces damaged pipe sections, suitable for severely deteriorated or misaligned lines.
Trenchless repair rehabilitates pipes with minimal digging using lining or pipe bursting.
Technicians assess damage, access points, permits, timelines, and cost estimates.
Pros and cons of trenchless pipe lining vs full replacement
Although both trenchless pipe lining and full replacement restore main water line function, they differ markedly in scope, cost, disruption, and longevity. Trenchless minimizes digging, is faster, and often costs less but may not suit severely damaged pipes. Full replacement is disruptive and pricier but addresses extensive deterioration and offers longer service life.
| Trenchless | Full replacement |
|---|---|
| Less disruption | Complete renewal |
| Lower short-term cost | Higher long-term durability |
How to choose a licensed plumber and what questions to ask
Choosing between trenchless lining and full replacement often leads homeowners to seek professional help; finding a licensed plumber who can evaluate pipe condition and recommend the best approach is the next step.
Verify license, insurance, reviews, and specialized experience. Ask about inspection methods, warranty, and permits.
Visualize the work:
- technician using a camera down the pipe
- crew preparing minimal excavation
- lining resin being applied and cured
Typical costs and timelines for professional repairs
Many homeowners can expect a range of costs and timelines depending on the chosen repair: simple spot repairs or hydro-jetting typically run several hundred to a few thousand dollars and can be completed in a day.
Trenchless pipe lining usually costs $2,000–$8,000 and takes one to three days, while full main-line replacement often ranges from $5,000 to $20,000+ and requires several days to a week or more depending on excavation, permits, and restoration.
Professionals also factor inspection fees, emergency callouts, warranties, and regional labor or material variations when estimating final quotes.
Preventing Future Main Line Clogs
A clear prevention plan begins with a routine maintenance schedule for the main line, including periodic inspections and professional cleanings.
Homeowners should pair this with landscaping and root management practices that keep trees and shrubs away from sewer paths and use root barriers when necessary.
Simple household habits—avoiding flushing grease, wipes, and oversized solids—along with installing backflow preventers and strainers, further reduce clog risks.
Routine maintenance schedule for main lines
Several straightforward tasks, carried out on a regular schedule, considerably reduce the risk of main line clogs.
Inspectors recommend biannual visual inspections, annual professional camera scans, and seasonal cleanouts after heavy debris or sediment events.
Filters and strainers should be checked monthly.
Replace worn seals, valves, and corrosion-prone fittings per manufacturer guidance.
Document dates and findings to track trends and prompt timely repairs.
Landscaping and root management best practices
When planning outdoor spaces, homeowners and landscapers should prioritize plant placement and soil management to minimize root intrusion into main water lines.
Select non-invasive species, maintain appropriate setbacks from sewer and water lines, and use root barriers or deep watering techniques to discourage shallow root growth.
Regular inspections and professional root pruning reduce risk, while avoiding planting near utility easements preserves line integrity.
What not to flush or drain: household habits that protect the main line
Household disposal habits have a direct impact on main water line health, so residents should refrain from flushing or draining items that can accumulate, bind, or foster blockages.
Common offenders include fibrous, greasy, and solid waste. Visualize refuse that clings and builds.
- Wet wipes and paper towels forming dense mats
- Cooking grease congealing into pipes
- Coffee grounds and egg shells settling and compacting
Installing and using backflow preventers and strainers
Install and maintain backflow preventers and inlet strainers to stop contaminants and debris from entering the main line and causing blockages.
Professionals should select appropriate models, install them at service entry points, and guarantee accessible placement for inspection.
Routine cleaning and seasonal checks prevent accumulation.
Test backflow devices annually per local codes; replace worn seals and damaged screens promptly to sustain flow and protect municipal supply.
Common Mistakes Homeowners Make and How to Avoid Them
Homeowners often reach for chemical drain cleaners or temporary fixes when a main line shows trouble, but these choices can damage pipes and only postpone larger repairs.
Relying on short-term solutions and ignoring early warning signs increases the risk of costly failures. A clear understanding of safer alternatives and prompt attention to symptoms can prevent escalation.
Using chemical drain cleaners on main lines: risks and alternatives
Although a quick pour of chemical drain cleaner can seem like an easy fix for a clogged main water line, it often worsens the problem and creates new hazards.
Corrosive chemicals can damage pipes, harm nearby joints, and pose health risks.
Safer alternatives include mechanical snaking, hydro-jetting by professionals, enzymatic cleaners for organic buildup, and consulting a licensed plumber for proper diagnosis.
Over-reliance on short-term fixes
Relying on quick fixes like boiling water, temporary patching, or repeated chemical pours often masks underlying issues rather than resolving them, leading to recurring clogs and more costly repairs.
Homeowners delay proper diagnosis, ignore structural failures, and increase corrosion or pipe damage.
Professional inspection and permanent repairs prevent escalation, preserve system integrity, and reduce long-term expenses compared with repeated short-term interventions.
Ignoring early warning signs
Short-term repairs not only mask problems but also dull attention to small signs that precede a main line failure.
Homeowners often dismiss slow drains, gurgling toilets, or damp patches as minor nuisances. Ignoring these warnings delays diagnosis, increases repair complexity, and raises costs.
Prompt inspection and tracking of recurring symptoms enable early professional intervention, preventing extensive damage and service interruptions.
Quick Reference Checklist for Handling a Main Line Clog
A concise checklist helps homeowners act quickly when a main line clog occurs, outlining emergency actions, a decision flow for DIY versus calling a professional, and essential items to have ready.
It should present clear step-by-step emergency procedures first, then simple criteria to determine when to stop and seek expert help.
Contact information for trusted plumbers and a prepared kit of tools and supplies complete the checklist for efficient response.
Step-by-step emergency actions
Act swiftly: this quick-reference checklist summarizes essential emergency steps to contain a main water line clog, protect property, and prepare for repairs.
Shut off the main water valve.
Turn off electricity in affected areas if flooding occurs.
Open faucets to drain pressure.
Stop water-using appliances.
Move valuables away from water.
Document damage with photos.
Call water utility or repair service.
Decision flow: DIY vs call a pro
With immediate containment steps completed, determine whether the clog can be handled safely by the homeowner or requires professional intervention.
Inspect severity, access, and health risks. If doubt exists, call a pro.
Quick visual cues:
- Water pooling around foundation, muddy flow
- Broken pipe or visible collapse
- Sewage odor or rapid pressure loss
Choose safety over savings.
Items to have on hand and contact info to prepare in advance
Checklist items and key contacts should be assembled before attempting any repair so responses are swift, safe, and organized.
A compact kit: gloves, goggles, adjustable wrench, pipe tape, hose, drain snake, bucket, tarp, flashlight, basic plumbing fittings.
Emergency contacts: licensed plumber, water utility, homeowner’s insurance, local building inspector.
Record account numbers, policy details, and preferred contractor phone and email for immediate access.
Additional Resources and Local Considerations
The article notes that main line issues can extend beyond a single property when municipal systems or neighboring connections are involved.
Readers should verify responsibility before proceeding. It recommends consulting manufacturer guides, local plumbing codes, and permitting requirements via suggested lookups to guarantee compliant repairs.
A brief glossary of common main line repair terms is provided to clarify technical language for nonprofessionals.
When municipal lines and neighbors may be involved
If a clog appears near the property boundary or affects more than one household, municipal authorities and neighboring property owners should be contacted promptly to determine responsibility and coordinate repairs.
Doing so can prevent duplicate work, liability disputes, and delays in restoring service. Documentation of symptoms, dates, and communication helps clarify jurisdiction.
Shared-service lines may require joint decisions, cost-sharing agreements, and coordinated access for technicians.
Links to manufacturer guides, local plumbing codes, and permitting (suggested lookup)
Where to find authoritative guidance is critical: manufacturers’ manuals, local plumbing codes, and permitting offices provide the technical specifications, installation limits, and legal requirements that determine acceptable repair methods and materials.
Homeowners should bookmark manufacturer support pages, download relevant code sections from municipal websites, and contact permit departments for filing procedures and inspections.
Verify model-specific fittings, warranty conditions, and local setback or connection rules before repairs.
Glossary of common terms used in main line repair
Glossary entries clarify technical terms homeowners and contractors encounter during main water line repair, ensuring accurate communication with manufacturers, inspectors, and tradespeople.
Include concise definitions for terms like main shutoff, service lateral, tracer wire, sewer cleanout, hydrant tap, pressure test, trenchless repair, pipe coupling, backflow preventer, video inspection, root intrusion, and PSI.
Reference local code variations and measurement units.
Conclusion
In conclusion, the homeowner is reminded that a clogged main water line can be a major headache but is manageable with careful diagnosis, proper tools, and safety first. By following the steps, calling a professional when necessary, and adopting regular maintenance, the plumbing will run more smoothly—avoiding a repeat of the same old song and dance. Vigilance and prompt action keep small issues from turning into costly disasters.