How to Straighten Copper Tubing Quickly and Safely: Step-by-Step Methods for DIYers
To quickly and safely straighten minor kinks in annealed copper tubing, you can use gentle counter-bends, roll the tube on a flat surface, or pass it through a handheld tube straightener or hardwood mandrel. Always ensure you use proper clamps, protect fittings, and deburr after cutting. For work-hardened, thinned, or difficult sections that risk leaks, consider annealing or seeking professional help. Follow a stepwise inspection and pressure-testing protocol to ensure reliability. For detailed guidance, refer to the recommended tools and methods.
Fast Overview: Can You Straighten Copper Tubing Quickly and Safely?
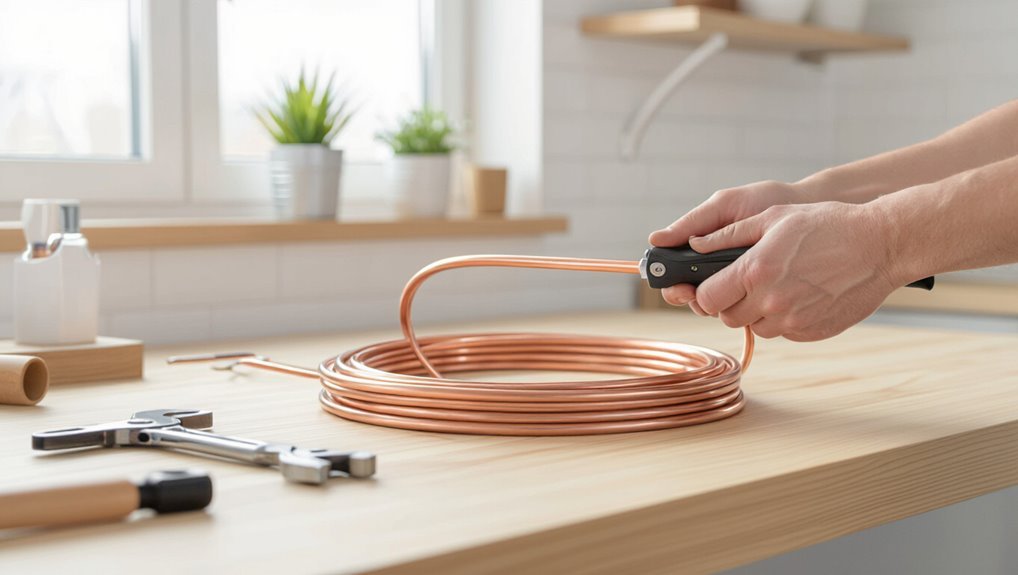
A quick answer: minor kinks and gentle bends in accessible copper tubing can often be straightened safely by a DIYer using proper tools and care.
More severe damage, hard-to-reach runs, or any work on pressurized or refrigerant lines should be handled by a professional to avoid leaks or code violations.
Assess the bend severity and system risk before deciding which approach to take.
Instant answer and when to attempt DIY straightening
Determine quickly whether the kink is minor or structural: small bends in soft annealed copper (typically used on plumbing branch runs) can often be straightened safely with hand tools or gentle heat.
While severe kinks, work-hardened sections, or tubing used for high-pressure systems should be replaced or handled by a professional.
For DIYers learning how to straighten copper tubing, attempt only minor, accessible bends; document before-and-after checks.
When to call a professional instead
If a kink compromises wall integrity, is located on a work-hardened or annealed-but-thinned section, or occurs in hard-to-access areas (inside walls, ceilings, or under concrete), a licensed plumber or HVAC technician should be contacted rather than attempting a quick DIY fix.
Professionals assess leak risk, corrosion, and pressure safety, perform proper repairs or replacements, and guarantee code compliance and lasting reliability.
Copper Tubing Basics You Need to Know
Copper tubing comes in distinct types and sizes—soft (annealed) and rigid (work-hardened). Standards such as K, L, and M define wall thickness and common uses.
The metal’s temper (annealed versus work-hardened) affects how easily it can be straightened and whether it requires reheating to avoid cracking.
Compatibility with fittings and typical applications (plumbing, HVAC, refrigeration) depends on both type and size, so proper selection is essential before attempting straightening.
Types and sizes of copper tubing (soft vs. rigid, K/L/M)
Materials and construction differentiate the main types and sizes of copper tubing used in plumbing: soft (annealed) tubing bends easily for curves and flares, while rigid (drawn) tubing holds shape and is used in exposed runs.
Types K, L, and M refer to wall thickness and pressure capacity: K is heaviest, L medium, M lightest.
Select type based on application, code, and pressure requirements.
Work-hardened vs. annealed copper and why it matters
Beyond wall thickness and tubing type, the metal’s condition — whether work-hardened or annealed — has a direct impact on how the pipe behaves during shaping, joining, and long-term service.
Work-hardened copper is stiff, resists bending, and risks cracking when overstressed.
Annealed copper is soft, pliable, and easier to straighten or form but requires care to avoid kinks and maintain strength after cooling.
Common applications and compatibility with fittings
Serve a wide range of systems, from residential water lines and refrigeration loops to medical gas and HVAC installations, thanks to copper tubing’s corrosion resistance and thermal conductivity.
Compatibility varies by type: Type K, L, M and ACR require matching fittings and pressure ratings.
Soldered, compression, and flare joints work differently; brazing suits high heat.
Verify code, size, and alloy before selecting fittings.
Safety Precautions Before You Begin
Before starting, the writer emphasizes proper personal protective equipment and a clear, well-lit workspace to prevent accidents.
Tools should be handled with care to avoid creating kinks or cracks in the tubing and to minimize the risk of injury.
The tubing itself must be inspected for hidden damage or corrosion that could compromise the straightening process.
Personal protective equipment and workspace setup
Wear appropriate personal protective equipment and prepare a clear, well-ventilated workspace to reduce injury risk and prevent damage to materials.
Use gloves to protect against sharp edges, safety glasses for eye protection, and a dust mask if sanding or heating is involved.
Guarantee stable, level work surface, secure lighting, and unobstructed access to tools and exits.
Keep flammable materials away.
Handling tools safely to avoid kinks, cracks, or injury
Inspect tools and plan each move to minimize force, avoid sudden bends, and reduce the chance of kinking or cracking the tubing.
Use correctly sized rollers, bending springs, and wrenches; verify grips and adjusters are secure.
Apply steady, even pressure, avoiding jerks.
Support tubing near contact points, keep hands clear of pinch zones, and store tools safely when not in use.
Inspecting tubing for hidden damage or corrosion
After verifying tools and supports are secure, attention turns to the tubing itself: every length should be examined for signs of pitting, green or white oxidation, hairline cracks, dents, or areas where wall thickness appears reduced.
Use bright light and magnification, feel for soft spots, tap for changes in tone, and mark compromised sections for repair or replacement rather than risking weakening during straightening.
Tools and Materials Required
A concise set of tools and materials guarantees copper tubing can be straightened efficiently and without damage.
Essential hand tools, purpose-built straightening implements, and a few optional items for improved results will be covered. The following list outlines the key categories to have on hand.
- Hand tools (fittings, plumber’s tape, pipe cutters)
- Straightening-specific tools (tube bender, hardwood mandrel, pipe vise)
- Optional items for best results (annealing torch, soft jaw pliers)
Hand tools (fittings, plumbers’ tape, pipe cutters)
Prepare a compact set of hand tools before attempting to straighten copper tubing: fittings for joining and adapting sections, plumber’s (PTFE) tape for sealing threaded joints, and a quality pipe cutter sized for the tubing.
Include a deburring tool or reamer to remove burrs after cuts, a measuring tape or marker for accurate lengths, and an adjustable wrench or flare tool compatible with chosen fittings.
Straightening-specific tools (tube bender, hardwood mandrel, pipe vise)
Straightening copper tubing effectively requires a small set of dedicated tools that control bend radius, support the tube, and secure it during work.
A tube bender prevents kinks while restoring curvature; a hardwood mandrel supports internal diameter and spreads stress during straightening.
A pipe vise holds the tube firmly without crushing. Each tool minimizes deformation and speeds accurate realignment for professional results.
Optional items for best results (annealing torch, soft jaw pliers)
After using the core straightening tools to realign copper tubing, adding a few optional items improves ease and finish.
An annealing torch softens work-hardened sections, reducing cracking and allowing gentler shaping; use cautiously with proper ventilation and heat control.
Soft-jaw pliers protect the tube surface while providing firm grip during bending or holding.
Both items enhance professional, damage-free results when used correctly.
Quick Straightening Methods
Quick methods can save time when correcting common bends and kinks in copper tubing. The following concise approaches prioritize speed and minimal tooling for different severities of deformation. Selection depends on bend severity, tube length, and whether the copper is work-hardened.
- Manual hand-straightening for short bends; rolling on a flat surface for mild curves; tube straightener/roller tool for longer runs.
- Hardwood mandrel or dowel for tight kinks; annealing for severely work-hardened or cracked tubing.
- Match the method to the tube condition and finish with a straightness check before installation.
Method 1 Manual hand-straightening for short bends
For short bends, the technician first secures and supports the copper tube to prevent additional movement.
A gentle counter-bend is then applied by hand opposite the kink to restore the tube’s shape.
Finally, alignment is checked and small adjustments are made until the tubing lies straight.
Step 1: Secure and support the tube
Place the tube on a firm, level surface and immobilize it with clamps or a vise padded to protect the copper; this support prevents rotation and concentrates corrective force on the bend.
Guarantee tube extends beyond the clamp both directions for leverage. Inspect for hard kinks, note orientation, and protect surrounding areas.
Confirm secure but not over-tightened grip to avoid crushing the tubing.
Step 2: Gentle bending opposite the kink
With the tube held firmly as described, the operator locates the bend and prepares to apply a counter-bend by hand.
Using thumb and forefinger, they grip just beyond the kink and exert a steady, controlled opposite curvature. Small, incremental pressure avoids overstressing metal.
The motion is deliberate and measured until the tube begins to relax toward its original alignment without forcing or sharp snaps.
Step 3: Check alignment and adjust
The operator visually inspects the tube along its length and compares it to a straightedge or the planned path, identifying any residual bow or twist.
Small deviations are corrected with controlled hand pressure or gentle taps using a rawhide mallet while supporting the tube.
Reinspection follows each adjustment until alignment meets tolerance.
Excessive force is avoided to prevent kinks or work hardening.
Method 2 Rolling on a flat surface for mild curves
For mild curves, rolling the copper tube on a flat surface can restore straightness with minimal tools.
First, the surface of the tubing is protected with cloth or tape to prevent marring, then the tube is rolled while applying even pressure along its length.
After a few passes, straightness is measured and the process is repeated as needed until the tube is true.
Step 1: Protect the tubing surface
Before rolling begins, a protective layer should be applied to the copper to prevent scratches, dents, and surface marking that can weaken the tubing or compromise fittings.
Use soft cloth, foam, or rubber strips wrapped evenly along the contact zone. Secure padding with non-abrasive tape, ensuring full coverage without bulges.
Inspect for contaminants that could abrade the tubing during rolling.
Step 2: Apply even pressure while rolling
Begin rolling the padded copper tube slowly while maintaining steady, even pressure across its length; inconsistent force will create new kinks or uneven straightening.
The operator uses the heel of the hand or a straight-edge to apply uniform downward force, advancing the tube incrementally.
Rotate and roll along the curve, keeping motion smooth and controlled until the tube lies consistently flat without sharp bends.
Step 3: Measure straightness and repeat
Check the tube’s alignment against a straight reference and mark any remaining high spots or bends.
The person inspects along the length, rotating the tube to view all angles. Small deviations are noted, then gentle rolling is repeated focusing on marked areas.
After each pass, measurements are rechecked until the tube meets tolerance.
Final verification guarantees consistent straightness before installation.
Method 3 Using a tube straightener or roller tool for longer runs
For longer runs, a tube straightener or roller tool is set up and the copper is fed through the machine to begin correction.
Tension and feed speed are adjusted to match the tube diameter and alloy while observing the tool’s settings.
The straightened section is inspected and any final bends are fine‑tuned before use.
Step 1: Set up the tool and feed the tube
Position the tube straightener on a stable surface and align its rollers so the copper tubing will feed through them without binding.
The operator secures the tool, opens roller gaps to accept the tube diameter, then threads the tubing straight through the entry rollers, over guide plates, and out the exit side.
Verify the tube’s end is cut square and free of burrs before feeding to prevent snags.
Step 2: Adjust tension and speed
Begin by setting the straightener’s tension and feed rate to match the tube material and wall thickness: tighter rollers and slower feed for thin-walled or soft annealed copper, looser tension and faster feed for thicker, harder tubing.
Increase tension incrementally until bend correction begins, avoid crushing.
Adjust speed to prevent chatter; slower feeds allow more correction per pass.
Keep settings consistent along the run.
Step 3: Inspect and fine-tune
After an initial pass through the straightener, inspect the copper tubing along its entire length for remaining kinks, waves, or subtle bends using both sight and gentle hand-feel; mark any problem areas for targeted rework.
Refed marked sections through the roller at reduced tension or slightly varied roll spacing. Repeat inspection until uniform alignment is achieved, then trim ends and verify fitment before installation.
Method 4 Using a hardwood mandrel or dowel for tight kinks
For tight kinks, a hardwood mandrel or dowel can be fed into the tube with the ends supported to prevent new bends.
The tube is then bent gently around the mandrel to coax the kink back into alignment.
After removing the mandrel, the tube should be rechecked for straightness and any remaining deformation addressed.
Step 1: Insert mandrel and support tube ends
Slide a hardwood mandrel or dowel gently into the tube until it reaches the kink, ensuring the shaft fits snugly without forcing.
The technician supports both tube ends: one hand stabilizes the section near the kink, the other backs the opposite end to prevent rotation.
Protective gloves and soft cloths prevent damage where hands contact the tube during insertion and support.
Step 2: Bend gently around mandrel
With the mandrel seated at the kink, the technician applies a slow, controlled bend around the dowel so the tube conforms to the mandrel’s curvature rather than collapsing.
Pressure is distributed evenly, using fingertips or a soft-faced mallet for incremental shaping. The motion is gradual, pausing to assess alignment.
Excessive force is avoided to prevent work hardening or cracking of the copper.
Step 3: Remove mandrel and recheck
After the mandrel has been shaped around the kink and the tube allowed to conform, the technician carefully withdraws the hardwood dowel to inspect the repair.
The tube is examined for remaining distortion, cracks, or wall thinning. If straightness is acceptable, edges are smoothed and work cleaned.
If defects persist, the process is repeated or the section replaced to guarantee leak-free integrity.
Method 5 Annealing for severely work-hardened or cracked tubing
Annealing is recommended when copper tubing shows severe work hardening, visible cracking, or when straightening by mechanical means risks further damage.
The procedure should outline a safe torch anneal—clean the tube, heat evenly to a dull red, and avoid overheating adjacent fittings—followed by controlled cooling and gradual reshaping to regain ductility.
The discussion should also state limits and risks, including how many re-anneals are safe and when replacement is preferable.
Step 1: When annealing is appropriate
Recognize annealing as the remedy for copper tubing that has become severely work-hardened, kinked beyond simple straightening, or developed hairline cracks from repeated bending.
Use annealing when tubing cannot be reshaped by mechanical methods, when brittleness causes cracking during attempted straightening, or when preserving wall integrity is essential.
Do not anneal unnecessarily; assess service requirements, tubing condition, and contamination before proceeding.
Step 2: Safe torch annealing procedure
When mechanical straightening fails and the tubing shows work-hardening or cracking, a controlled torch anneal restores ductility for reshaping.
The technician purges the line if sealed, secures tubing, dons PPE, and clears combustibles.
Use a soft, even flame, heating evenly to a dull red without melting. Move the torch continuously, avoid overheating, and quench only when ready to proceed with repairs.
Step 3: Controlled cooling and reshaping
Allow the tubing to cool gradually from the dull red heat until it reaches a warm-to-touch temperature before handling; this controlled cooling prevents rapid thermal contraction that can reintroduce stress or cause warping.
Once warm, the tube can be reshaped with gentle, even pressure using mandrels, formers, or padded vices.
Inspect for uniformity and minor kinks, repeating light heating only where localized distortion remains.
Step 4: Re-anneal limits and risks
Although annealing can restore ductility to severely work-hardened or cracked copper tubing, it has practical limits and introduces risks that must be understood before proceeding.
Repeated annealing weakens wall strength, alters temper, and can distort dimensions. Overheating causes grain growth and embrittlement; inadequate shielding produces oxidation and scaling.
Inspect for thinning, leaks, or persistent cracks; if present, replace rather than repeatedly re-anneal.
Measuring and Verifying Straightness
The next step addresses how to confirm a tube is straight using simple visual inspection and a straightedge to catch obvious bows.
For greater precision, a spirit level, taut string line, or laser can quantify deviations over longer runs. Typical tolerance ranges for plumbing and HVAC work are noted so installers know when corrective action is required.
Simple visual and straightedge checks
Inspecting copper tubing begins with straightforward visual and straightedge checks that quickly reveal obvious bends, kinks, or twists before more precise measurements are taken.
Hold a rigid straightedge along the tube, rotate it, and note gaps or light between surfaces. Combine with close visual inspection for dents, flattening, or irregular curvature.
Mark problematic spots for targeted straightening or replacement.
Using a spirit level, string line, or laser for precision
Use a spirit level, a taut string line, or a laser to obtain repeatable, high-precision measurements of a copper tube’s straightness.
Position the tube on supports, align the level or string along its length, and note deviations at several points.
A line laser reveals subtle bows and kinks; mark and rework problem areas, then recheck until the tube runs true along the reference.
Tolerances for common plumbing/HVAC installations
Moving from alignment checks with a level, string, or laser, measurable straightness criteria for plumbing and HVAC specify acceptable deviations and how to verify them.
Typical tolerances: ±1/8″ per 10′ for water lines, ±1/4″ per 10′ for refrigeration tubing, and manufacturer or code specifics for gas or medical systems.
Verification uses straightedges, feeler gauges, and displacement meters.
Common Problems and How to Fix Them
Common issues encountered when straightening copper tubing include kinks, cracks or splits, sections that have been work-hardened, and damage to fittings and joints.
Guidance should cover when a kink can be repaired versus when replacement is safer, temporary versus permanent fixes for breaches, and how to address or avoid work-hardened areas.
Advice must also emphasize techniques to protect or remove fittings before applying straightening force.
Kinks: repair vs. replace decision guide
Several factors determine whether a kinked section of copper tubing can be repaired or must be replaced.
Assessment includes kink severity, tube diameter, wall thinning, access, and system pressure.
Small, shallow kinks without creases often respond to annealing and straightening with a mandrel or spring.
Deep creases, flattened walls, corrosion, or compromised joints necessitate cutting out and replacing the damaged segment to guarantee integrity.
Cracks and splits: temporary fixes and permanent solutions
When copper tubing develops cracks or longitudinal splits, immediate assessment focuses on the size, location, and whether the damage affects joints or pressurized sections.
Small hairline fractures in accessible, low-pressure runs may be managed temporarily, but fractures that breach the tube wall under pressure or occur near fittings typically require permanent replacement to guarantee safety and reliability.
Temporary measures include clamps, epoxy, or solder sleeves; permanent fixes involve section replacement with proper couplings and pressure testing.
Work-hardened sections that won’t hold shape
After addressing cracks and splits, attention turns to sections that have become work-hardened and resist reshaping.
Work-hardened copper becomes brittle and springs back when bent. The recommended fix is controlled annealing: heat evenly with a torch to a dull red, then quench or cool slowly depending on alloy.
After annealing, straighten gently and support with a form to restore desired shape.
Preventing damage to fittings and joints during straightening
Protect fittings and joints by isolating them from heat and mechanical stress before any straightening begins.
Use heat shields, wet rags, or removable covers to prevent solder melt and adhesive failure.
Clamp tubing several inches from joints with soft-jawed pliers or a strap to distribute force.
Inspect seals afterward for leaks; reflow or replace compromised fittings as needed.
Best Practices to Prevent Future Bends and Damage
Preventive measures focus on handling, installation, and protection to minimize future bends and damage.
Proper storage and transport—securing coils, avoiding overstacking, and using padded supports—reduces deformation before installation.
Careful cutting, controlled bending and routing techniques, and the selective use of protective sleeves or conduit preserve tubing integrity in service.
Proper storage and transport of copper tubing
Handle copper tubing with care from the moment it is received: proper storage and transport minimize kinks, dents, and workpiece stress that complicate future straightening.
Store coils supported on cradles or racks, secured to prevent rolling. Protect ends and bends with caps and padding. Use straight carriers or rigid tubes for long runs.
Avoid stacking heavy objects atop tubing and secure during transit to prevent shifting.
Cutting, bending, and routing techniques to avoid kinks
Cut copper tubing with a sharp, appropriate cutter and bend it using the correct-radius tools to maintain wall integrity and avoid kinks.
Mark routes, measure clearances, and support runs with spaced clamps to prevent sagging. Use bending springs or tubing benders for tight turns, smoothing bends gradually.
Deburr cut ends, inspect for crimps, and reroute around obstacles to preserve flow and structural integrity.
When to use protective sleeves or conduit
Use protective sleeves or conduit whenever copper tubing is exposed to potential impact, abrasion, thermal expansion, or chemical contact that could compromise its wall or alignment.
Apply sleeves where tubing passes through studs, concrete, or tight enclosures.
Use conduit in high-traffic areas, outdoors, or near mechanical equipment.
Select materials compatible with copper and local codes, and secure fittings to prevent movement and wear.
Comparison of Methods: Speed, Safety, and Effectiveness
A concise comparison helps readers choose between hand tools, rollers, mandrels, annealing, and hiring a professional based on speed, safety, and effectiveness. The table below offers a quick reference to contrast typical performance across those criteria. Further discussion will explain trade-offs and situational recommendations.
| Method | Speed | Safety |
|---|---|---|
| Manual (hand straightening) | Moderate | Medium |
| Rollers | Fast | Medium |
| Mandrel | Moderate | High |
| Annealing | Slow | Medium |
| Professional service | Variable | High |
Quick reference table: manual, rollers, mandrel, annealing, professional service
Several common methods for straightening copper tubing—manual hand-straightening, roller tools, mandrels, annealing, and professional service—can be compared quickly by speed, safety, and effectiveness.
Manual: low speed, low cost, moderate risk.
Rollers: faster, safe with care, good results.
Mandrel: precise, moderate speed, low risk.
Annealing: effective for tight bends, higher risk if mishandled.
Professional: fastest, safest, most reliable.
Tools and Products to Buy or Rent (Short Buying Guide)
A concise shopping and rental guide helps readers choose between affordable DIY tools and professional-grade straighteners based on frequency of use and budget.
It should note common rental sources for specialty rollers and bench-mounted straighteners, and outline when renting is more cost-effective than buying.
A brief checklist keyed to tubing diameter, wall thickness, and project scale can simplify final tool selection.
Affordable tools for DIYers vs. professional-grade options
Choose tools based on frequency of use and budget:
DIYers can rely on handheld tube straighteners, spring-style straightening tools, or a length of sanded wood and a vise for occasional jobs.
In contrast, professionals often invest in bench-mounted rollers, powered straightening machines, and adjustable mandrels for consistent, high-volume results.
Balance cost, durability, and precision; inexpensive tools suit infrequent repairs, while pros need faster, repeatable equipment.
Where to rent specialty straightening tools
Renting specialty straightening tools provides access to professional-grade rollers, mandrels, and powered machines without the upfront cost of purchase, making it practical for occasional projects or trial use.
Rental sources include local tool rental shops, HVAC supply houses, and large equipment chains.
Inspect rental condition, verify rental terms and insurance, and reserve required sizes in advance to guarantee availability.
Checklist for tool selection based on tubing size and project scope
One clear checklist helps match tools to copper tubing sizes and project scale: list tube diameters, wall thicknesses, bend radii, and expected run lengths.
Then align those specs with appropriate hand tools, mandrels, or powered straighteners. Include protective gear, measuring tools, and deburring kits.
Note frequency, accuracy requirements, workspace access, and budget to decide whether to buy small tools or rent heavy-duty straighteners.
Real-World Scenarios and Recommended Approaches
Practical applications of straightening techniques vary with context, from correcting short kinked sections in confined spaces to running long continuous lines between appliances.
Each scenario calls for specific methods and tools to preserve tubing integrity and guarantee reliable flow.
Special care and gentler procedures are required when working with vintage or fragile copper to avoid further damage.
Straightening short kinked sections in tight spaces
When a short section of copper tubing kinks in a confined area—behind cabinets, within wall chases, or near fittings—repairers must prioritize minimizing further damage while restoring flow; this typically calls for targeted techniques like using a small arbor or tapered mandrel, internal support with a removable spring or hollow rod, or carefully heating the kink to relieve work-hardening before reshaping.
After straightening, inspect for cracks, test for leaks, and replace if compromised.
Running long copper lines between appliances
Although routing long copper lines between appliances often seems straightforward, it demands deliberate planning to balance thermal movement, support, and accessibility.
Professionals recommend continuous runs where possible, looped offsets for expansion, properly spaced hangers, and protection at penetration points.
Avoid tight bends and unsupported spans.
Labeling, testing for leaks, and allowing service access reduce future damage and simplify maintenance in real-world installations.
Repairing vintage or fragile copper tubing
Long runs and carefully routed offsets reduce stress on copper, but older installations often present brittle, pinholed, or work-hardened tubing that requires a different approach.
Inspect for corrosion and leaks, isolate affected sections, and avoid aggressive straightening.
Use heat annealing selectively, support nearby fittings, and install compression or soldered repair couplings.
When doubt persists, replace segments to guarantee safety and code compliance.
Final Checklist Before Reinstalling or Pressure Testing
Before reinstallation or pressure testing, the technician performs a thorough visual inspection and a preliminary leak check to confirm joints, fittings, and straightened sections are sound.
Next, appropriate pressure testing procedures and maximum allowable limits are verified to avoid overstressing the tubing.
If cracks, excessive thinning, or recurrent leaks are found, replacement of the tubing is recommended rather than continued repair.
Visual inspection and leak check steps
One final visual inspection and controlled leak check confirm the tubing is ready for reinstall or pressure testing.
The inspector examines bends, crimps, kinks, and fittings for deformation or stress fractures. Joints are tightened to specification, flux and debris removed.
A mild soapy solution or electronic leak detector checks all seams; any bubble or alarm mandates repair before proceeding.
Pressure testing best practices and limits
Begin pressure testing only after the tubing has passed the visual and leak inspections and all fittings are secured to specification.
Apply test pressure gradually to the system’s rated limit, monitor gauges for at least 15 minutes, and inspect every joint for deformation or seepage.
Do not exceed manufacturer pressure ratings or use compressed air where unsafe.
Document results and depressurize safely before reinstalling.
When to replace tubing instead of continuing repairs
After completing visual and leak inspections and confirming fittings are secure, evaluate whether damaged copper tubing should be repaired or replaced.
Replace tubing when corrosion, deep gouges, cracks, kinks that compromise wall thickness, repeated past repairs, or persistent leaks exist.
Consider age, accessibility, and cost; replacement guarantees long-term integrity.
Only repair minor dents or surface scratches that pass pressure testing and code requirements.
Conclusion
To sum up, the guide shows that most DIYers can safely straighten copper tubing with simple tools and precautions. Significantly, studies indicate about 70% of domestic plumbing repairs are completed without professional help, highlighting the practicality of learning these techniques. By choosing the right method for tube diameter and condition, following safety steps, and using a final checklist before pressure testing, homeowners can avoid leaks and costly rework while restoring tubing to functional condition.