
How to Install an Alcove Tub: Step-by-Step Guide for DIY & Pros
How to Install an Alcove Tub: A Quick Guide
Installing an alcove tub involves fitting it between three walls and requires careful measuring, plumbing checks, and waterproofing to ensure a successful installation. Start by removing the old tub and inspecting the framing and subfloor, making sure to verify rough-in locations. Next, dry-fit the new tub, level it, and secure it to the studs. Assemble and test the drain and overflow components. Apply sealant and a waterproof membrane to protect the flange and backer board. Finally, conduct leak tests and code checks to complete the installation. For detailed steps, tips, and troubleshooting advice, continue reading.
Overview of Alcove Tub Installation
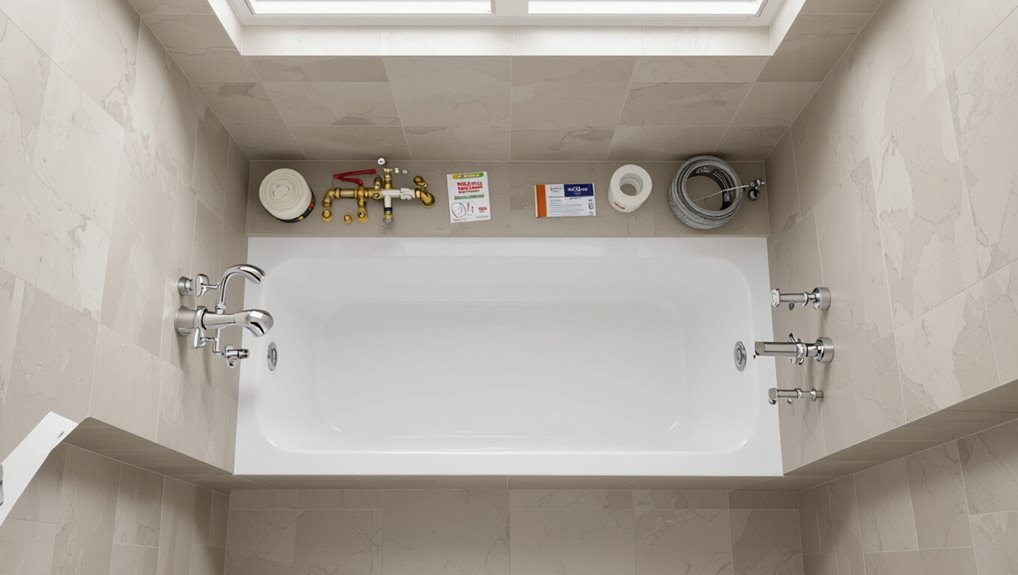
An alcove tub fits between three walls and typically appears in one-piece, undermount, or apron-front configurations.
The decision to attempt a DIY installation versus hiring a professional depends on the installer’s plumbing, carpentry, and tiling experience as well as local code requirements.
Typical installations range from a day for a basic replacement to several days for structural changes, with costs and required skill varying accordingly.
What an alcove tub is and common configurations
Alcove tubs sit flush against three walls, creating a space-efficient bathtub installation commonly used in apartments and smaller bathrooms.
They come in standard, reversible (left/right drain), and apron-front styles, plus integrated shower-tub combos. Materials range from acrylic to cast iron.
Understanding dimensions, drain orientation, and wall surround options is essential when planning how to install an alcove tub.
Who should attempt a DIY installation vs hire a pro
Who should tackle an alcove tub install themselves depends largely on skill level and the specific scope of the job.
Homeowners with solid carpentry, plumbing basics, and experience reading plans can handle straightforward replacements.
Those facing structural modifications, complex plumbing relocations, code compliance, or limited tools should hire licensed professionals.
Risk tolerance, time availability, and warranty considerations also influence the decision.
Typical time, cost, and skill level estimates
After deciding whether to DIY or hire a pro, it helps to set realistic expectations for time, cost, and required skills.
Typical DIY installations take 2–4 days for removal, prep, and fit; professionals finish in 1–2 days.
Costs range from $300–$1,500 for DIY supplies and $1,200–$5,000+ for pro labor and materials.
Skill level: intermediate plumbing, carpentry, tiling.
Tools, Materials, and Preparations
Before beginning an alcove tub installation, the installer compiles a concise list of required tools and a materials checklist including the tub, surround, drain assembly, flange, and appropriate fasteners.
Exact measurements of the alcove and verification of rough-in plumbing are performed to confirm fit and identify any needed plumbing adjustments.
Appropriate safety gear and surface protection are prepared to prevent injury and protect the work area.
Required tools list
When preparing to install an alcove tub, gather a clear, concise set of tools and materials so the work proceeds efficiently and without interruption.
Essential tools focus on measuring, cutting, fastening, and finishing duties. Typical selections include:
- Tape measure and level
- Utility knife and reciprocating saw
- Drill and mixed driver bits
- Adjustable wrench and pliers
- Caulk gun and sealant tools
Materials and parts checklist (tub, surround, drain, flange, fasteners)
With tools assembled, attention shifts to the specific materials and parts that must be on hand to complete an alcove tub installation.
The installer confirms compatibility, quality, and quantities before beginning.
- Alcove tub (size and material)
- Wall surround or backer board
- Drain assembly and overflow kit
- Tub flange and sealant
- Fasteners, shims, and mounting brackets
Measuring the alcove and verifying rough-in plumbing
Measure the alcove carefully and confirm that the rough-in plumbing aligns with the tub specifications before lifting the fixture into place.
Verify wall-to-wall dimensions, floor level, and clearances for flanges and access panels.
Locate drain and overflow positions relative to tub template; measure waste height and centerline.
Note obstructions, adjust framing or plumbing as needed to guarantee proper fit and alignment.
Safety gear and site protection
Put on appropriate personal protective equipment and establish barriers before any demolition or tub handling begins.
Safety gear includes gloves, eye protection, dust masks or respirators, knee pads, and steel-toed boots.
Protect the site with drop cloths, floor runners, and dust barriers.
Shut off water and electricity.
Keep a clear work zone, first-aid kit, fire extinguisher, and proper ventilation throughout the project.
Pre-Installation Inspection and Site Prep
Before installing a new alcove tub, the existing unit must be removed and the framing inspected for rot, damage, or out-of-plumb conditions.
The subfloor and studs should be examined and repaired as needed, while the plumbing rough-in and drain location are checked and adjusted to match the new tub.
Finally, verify adequate wall backing is in place for the surround and any grab bars to guarantee secure anchorage.
Removing existing tub and assessing framing condition
Begin by draining and disconnecting plumbing, then removing trim, surround, and fasteners to free the existing tub for extraction.
Lift and remove the tub safely, using helpers for heavy units.
Clear debris and inspect visible framing for rot, mold, water stains, and shifted framing members.
Document any damage, note locations of blocking and plumbing, and determine if further structural evaluation is needed.
Inspecting and repairing subfloor and studs
Inspecting the subfloor and studs establishes whether the alcove is structurally sound and what repairs are required before a new tub is set.
The inspector checks for rot, mold, soft spots, and insect damage; measures level and joist spacing; verifies studs are plumb and blocking exists for fixtures.
Replace or sister damaged joists, install new decking, and reinforce studs as needed.
Checking and adjusting plumbing rough-in and drain location
Verify that the plumbing rough-in and drain placement match the new tub’s specifications and codes, since incorrect offsets or pipe elevations will complicate installation or require costly rework.
Measure center-to-wall distance, trap exit height, and waste diameter. Confirm shutoff and supply locations.
Adjust by repositioning stub-outs, extending or cutting drain piping, or adding proper adapters.
Pressure-test and slope drains to code before setting the tub.
Ensuring proper wall backing for surround and grab bars
With plumbing and drain locations confirmed, attention turns to the wall structure behind the tub area to guarantee it will properly support a surround and any grab bars.
Inspect studs for spacing, rot, and alignment. Add blocking between studs at grab-bar heights and where the surround will anchor.
Use moisture-resistant backing such as cement board or sealed plywood. Verify secure fasteners and flush surfaces.
Step-by-Step Alcove Tub Installation
The installer begins by dry-fitting the new tub, marking anchor points and preparing the drain and overflow assembly for installation.
Once fitted, the tub is set in place, leveled, and secured to the wall studs.
Finally, the drain and trap are connected to the existing plumbing and tested for leaks.
Dry-fitting the new tub and marking anchor points
Set the new tub into the alcove to check fit and alignment before any permanent fastening.
Confirm flange sits flush against studs and surrounding walls. Level the tub using shims beneath the base, adjusting until plumb and square.
Mark anchor locations on the flange and wall studs with a pencil.
Remove tub, note shim positions, and transfer marks for accurate anchoring during final installation.
Installing tub drain and overflow assembly
Begin by assembling and testing the drain and overflow components outside the tub to guarantee proper fit and to identify required gaskets, seals, and trap types.
Install the overflow plate and tailpiece, secure the drain flange with sealant or plumber’s putty, and attach the drain body.
Tighten connections to manufacturer torque specs, verify alignment with rough-in, and pressure-test for leaks before final assembly.
Setting the tub in place and leveling
Positioning the alcove tub requires careful alignment with the drain and wall studs to guarantee a solid, level installation.
The tub is slid into the alcove, checking clearances and ensuring the waste aligns with the trap.
Use a torpedo level along the rim and bottom. Shim low points with noncompressible shims, recheck level front-to-back and side-to-side, and confirm consistent gap for finishing.
Securing the tub to wall studs
Once the tub is level and shimmed, it must be fastened to the wall studs to prevent movement and guarantee a watertight fit against the surround.
Secure flange or mounting tabs with corrosion-resistant screws through studs at manufacturer-specified spacing. Pre-drill as needed to avoid cracking.
Check alignment frequently, tighten evenly, and trim protruding shims. Seal flange edges with appropriate caulk before finishing walls.
Connecting the drain and trap to existing plumbing
Attach the tub drain assembly and trap to the existing waste line, ensuring each connection is flush, properly aligned, and watertight.
Verify trap orientation and pitch toward the soil stack. Use appropriate fittings (PVC, ABS, or metal) and solvent cement or thread sealant per material.
Tighten slip nuts hand‑firm plus quarter turns.
Pressure‑test with water; inspect for leaks and correct as needed before finishing.
Installing tub flange and waterproofing membrane
Prepare the tub flange and surrounding wall for waterproofing by confirming the flange sits squarely against studs and the subfloor is clean, dry, and level.
Apply a continuous bead of approved sealant along flange and fasteners.
Install a bonded waterproof membrane over the flange, lapping into the tub area and up the wall studs.
Press seams and corners firmly; allow sealant to cure before proceeding.
Installing wall surround or backer board and tile prep
With the tub flange sealed and the waterproof membrane firmly in place, attention moves to the wall surround or cement backer board and prepping for tile.
Install backer board panels with corrosion-resistant screws, stagger seams, and tape joints with alkali-resistant mesh.
Apply thinset to embed tape.
Check plumb and flatness, cut openings for fixtures, and allow set time before tile layout and adhesive application.
Sealing joints, caulking, and finishing touches
Finish the installation by sealing all joints, caulking connections, and completing final trim to secure a watertight, durable enclosure.
Inspect seams, apply mildew-resistant silicone at tub-to-wall, corners, and fixtures, tooling beads for smooth contact.
Seal penetrations around faucets and drains with appropriate gaskets.
Install trim pieces, test for leaks, clean excess sealant, and allow full cure before use to guarantee longevity and finish.
Alternative Installation Scenarios
The installer should compare material-specific requirements, noting that acrylic or fiberglass tubs are lighter and more forgiving than cast iron, which demands stronger floor support and different anchoring.
Converting an alcove tub to a shower requires planning for drain placement, surround waterproofing, and valve height.
Recessed or undermounted alcove tubs introduce trim and decking considerations that affect framing and finish work.
Installing an acrylic or fiberglass tub vs cast iron
Installing an alcove tub differs considerably between lightweight acrylic or fiberglass units and heavy cast-iron models: acrylic/fiberglass options allow for easier handling, simpler framing adjustments, and quicker enclosure sealing, whereas cast-iron tubs demand reinforced subflooring, labor-intensive positioning, and specialized support such as mortar beds or cradle systems to prevent sagging and cracking.
| Feature | Impact |
|---|---|
| Weight | Handling |
| Support | Subfloor needs |
| Framing | Adjustments |
| Sealing | Speed |
| Cost | Installation time |
Alcove tub installation with shower conversion
Convert an alcove tub into a combined tub-shower unit by adding a shower valve, appropriate waterproofing, and a matching surround while ensuring proper slope and drain compatibility.
Confirm local codes for valve type and anti-scald devices.
Install a durable backerboard, membrane, and sealed joints.
Fit a diverter or three-valve system, choose a showerhead height, and verify water testing before finishing trim and grout.
Recessed or undermounted alcove tub considerations
When adding a shower to an alcove tub, installers should also consider recessed or undermounted configurations as alternative scenarios that affect framing, waterproofing, and trim details.
Recessed tubs require deeper wall cavities and backer support; undermounted tubs demand solid deck substrates and hidden flange sealing.
Both need adjusted drain locations, accessible service panels, and compatible finishing materials to maintain watertight integrity and clean finishes.
Common Problems and Troubleshooting
Common issues after installing an alcove tub include leaks at the drain or overflow, movement or squeaks, slow drainage, and an uneven or misaligned flange.
Each problem has common causes—worn seals or loose fittings for leaks, insufficient support or framing for movement, trap or vent blockages for slow drains, and improper leveling or flange placement for misalignment.
The following troubleshooting steps and fixes address these specific causes to restore proper function and stability.
Leaks at drain or overflow and how to fix them
Start by identifying whether the leak is coming from the drain assembly or the overflow plate, since each requires different repairs.
For drain leaks, tighten or replace the drain flange, reseal with plumber’s putty or appropriate gasket, and inspect tailpiece and trap connections.
For overflow leaks, remove plate, replace gasket or backing washer, and tighten mounting screws; test and retighten as needed.
Tub movement or squeaks after installation
Addressing tub movement or squeaks after installation begins with pinpointing where the motion originates—between the shell and framing, along the flange, or under the floor—since each source indicates a different remedy.
Once located, secure framing with shims or blocking, add adhesive or expanding foam at the flange, tighten or replace fasteners, and check subfloor stiffness.
Re-test for noise and stability.
Poor drainage or slow drain causes
After stabilizing the tub shell and eliminating movement or squeaks, attention shifts to drainage problems, which often stem from obstructions, improper slope, or faulty fittings.
Common causes include hair and debris clogging the trap, partial blockages in waste lines, incorrect trap alignment, venting issues causing slow flow, and restrictive or damaged pop-up assemblies.
Inspect and clear trap, lines, and fittings.
Uneven tub or misaligned flange solutions
One common cause of leaks and finish failures is an uneven tub or a misaligned flange, which can result from settling, improper installation, or warped framing.
Correcting it requires identifying the high and low points, checking the flange-to-wall relationship, and determining whether shimming, planing, or resetting the tub is necessary.
Use a straightedge and level, adjust with corrosion-resistant shims, plane warped studs, or re-seat the tub with proper bedding compound and fasteners.
Code, Accessibility, and Best Practices
The installation should comply with local building codes and permit requirements to guarantee safety and legality.
Accessibility considerations, such as grab bars, appropriate clearances, and ADA-compliant fixtures, affect layout and product selection.
Proper waterproofing, ventilation, and routine maintenance reduce mold risk and extend the tub’s service life.
Building code and permit considerations
Why consult local building codes before beginning an alcove tub installation? Local codes dictate plumbing, electrical, ventilation, structural supports, waterproofing, clearances, and egress requirements.
Permit requirements vary; inspections guarantee compliance and insurance validity. Contractors and DIYers should verify setback, drainage, seismic or flood-zone rules, and required licensed trades.
Obtain permits, follow inspection schedules, and retain documentation to avoid fines or insurance denial.
ADA and accessibility features for alcove tubs
Many homeowners and remodelers must consider ADA and universal-design principles when installing an alcove tub to guarantee safe, independent bathing for people with mobility, sensory, or cognitive limitations.
Installers should specify slip-resistant surfaces, grab bars anchored to structural blocking, reinforced seat or transfer bench options, and lever-style controls reachable from seated positions.
Clear floor space, adequate door widths, and nonobstructive thresholds enhance usability and compliance.
Water-proofing and mold-prevention best practices
Prioritize thorough waterproofing and mold-prevention when installing an alcove tub to protect structural elements, maintain indoor air quality, and guarantee accessibility features remain safe and durable.
Use cement backer board, bonded waterproof membranes, sealed joints, and corrosion-resistant fasteners.
Apply mildew-resistant grout and flexible sealant at junctions.
Verify slope to drains, inspect flashing, and document materials for code compliance and future maintenance records.
Ventilation and maintenance recommendations
Effective ventilation and routine maintenance are essential to preserve indoor air quality, prevent moisture-related damage, and secure the safe use of alcove tubs over time.
Install appropriately sized exhaust fans vented outdoors, verify compliance with local code, and provide accessible controls.
Schedule regular inspection of seals, grout, and fan function; replace damaged caulk promptly.
Document maintenance for accessibility and safety audits.
Cost Breakdown and Time-Saving Tips
A concise cost breakdown outlines material, labor, permit, and disposal expenses and offers simple budgeting tips to prevent overruns.
Practical time-saving techniques for DIYers—such as preassembling trim, using quick-connect plumbing fittings, and staging materials—can shorten the project schedule.
Clear criteria for when to call a plumber or contractor (complex plumbing reroutes, structural repairs, or local code requirements) help avoid costly mistakes.
Typical cost components and budgeting tips
Budgeting for an alcove tub installation requires breaking costs into clear categories—materials, labor, permits and inspections, disposal, and unexpected contingencies—so homeowners can see where money is allocated and where savings are possible. Allocate line items, get multiple bids, and set a 10–20% contingency. Prioritize waterproofing and fixtures; defer cosmetic upgrades if needed.
| Category | Typical Range | Notes |
|---|---|---|
| Materials | $300–$2,000 | Tub, surround, plumbing |
| Labor | $500–$2,500 | Demolition, install |
| Permits | $50–$300 | Local codes |
| Disposal | $50–$200 | Debris removal |
| Contingency | 10–20% | Unexpected issues |
Time-saving techniques for DIYers
Streamline the alcove tub project by focusing on tasks that yield the biggest time savings: selecting a pre-finished surround to eliminate tile work, ordering a tub and fixtures delivered to the site, and scheduling trades in logical sequence (demo, plumbing, tub set, waterproofing, trim).
Consolidate material purchases, pre-fit components before installation, use prefabricated drain and overflow kits, and prepare clear workspace access to minimize delays.
When to call a plumber or contractor
After consolidating materials and sequencing trades for maximum efficiency, homeowners should consider which tasks remain suitable for DIY and which require professional help.
Complex plumbing rough-ins, relocating drains, gas lines, or structural modifications typically warrant licensed plumbers or contractors.
Hire pros for code compliance, permits, waterproofing, and efficient troubleshooting.
Budget for labor vs. DIY savings; expect higher hourly rates but reduced rework and faster completion.
Final Inspection and Maintenance Checklist
A concise post-installation checklist confirms watertight seals, proper drainage, and secure fixtures before first use.
A routine maintenance schedule outlines cleaning methods, recommended products, and interval checks to preserve finish and function.
Clear signs—persistent leaks, shifting tub, or compromised caulking—indicate the need for professional repair.
Post-installation checklist before first use
Before the alcove tub is used, a concise final inspection and basic maintenance checklist guarantees safety, functionality, and warranty compliance.
A technician or homeowner confirms readiness by verifying seals, drains, fixtures, and access.
Checkpoints include:
- Inspect caulking and grout for continuity and cure
- Test drain and overflow operation
- Verify fixture torque and alignment
- Confirm access panel clearance
- Review manufacturer care and warranty documents
Routine maintenance schedule and care tips
Regular inspections and a simple maintenance rhythm keep an alcove tub functional and preserve warranties.
A concise checklist guides routine care: cleaning, seals, and drainage.
Suggested cadence and tasks:
- Weekly: mild cleaner, rinse, wipe surfaces
- Monthly: inspect and dry caulk lines
- Quarterly: test drains and overflow function
- Annually: deep clean and refinish spots
- After heavy use: sanitize and inspect fittings
Signs that indicate professional repair is needed
Several clear indicators signal when professional repair is necessary: persistent leaks, warped or cracked tub surfaces, mold behind or under caulk, slow or recurring clogs despite clearing, loose or corroded fixtures, and water staining on surrounding walls or flooring.
Additional signs include persistent odors, visible structural movement, failing grout or tile adhesion, fluctuating water pressure, and repeated drainage backups requiring expert diagnosis and corrective action.
Conclusion
Like a well-laid mosaic, the finished alcove tub becomes both shelter and centerpiece—each tile, joint, and seal a tessera in a bath-sized story. Careful planning and steady hands turn raw materials into a quiet basin of routine and refuge. Whether by DIY resolve or professional craft, the installation stands as a small harbor: functional, enduring, and ready to hold everyday moments, calm and practical, beneath the steady arc of water and light.

