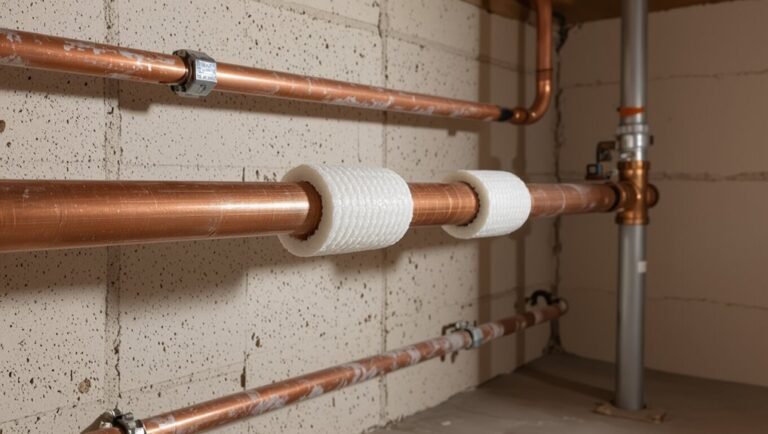
How to Fix Toilet Water Hammer Quickly: Causes, DIY Fixes, and When to Call a Plumber
To quickly fix toilet water hammer, which is the loud banging noise caused by fast-closing fill valves, you can try several DIY solutions. First, diagnose the issue by flushing your toilet at a low volume while listening for the noise and checking all fittings and shut-off valves. Simple fixes include tightening any loose connections, adjusting the fill valve speed, partially closing the shut-off valve, or installing a small water hammer arrestor on the supply line. If the banging persists, or if you notice leaks or visible damage, it’s best to call a plumber for professional assistance. More detailed steps and potential costs are outlined below.
What Causes Toilet Water Hammer and Why It Matters
Water hammer in toilet plumbing happens when fast-closing valves cause a sudden stop in water flow, creating pressure surges that reverberate through the system.
Typical components involved include the fill valve, shut-off valve, supply line, and the tank assembly, any of which can contribute to or amplify the shock.
If left unaddressed, these pressure spikes can loosen fittings, crack pipes or tanks, and shorten the lifespan of valves and seals.
How water hammer occurs in toilet plumbing
A sudden stop of fast-moving water inside the toilet supply line creates a pressure shock that reverberates through the plumbing, producing the characteristic banging known as water hammer.
This occurs when moving water is abruptly halted, forming a high-pressure wave.
Repeated shocks loosen fittings and stress pipes; identifying causes guides how to fix toilet water hammer promptly, prevent damage, and prioritize repairs.
Common components involved (fill valve, shut-off valve, supply line, tank)
Identifying the parts that interact when a pressure shock occurs helps pinpoint both cause and remedy.
The fill valve controls water refill; rapid closure can create the shock.
The shut-off valve isolates flow and can amplify pressure if partially closed or faulty.
The supply line transmits pressure pulses.
The tank’s internal air space and cushion (or lack thereof) influences damping of pressure surges.
Risks and potential damage from untreated water hammer
Several plumbing systems experience intermittent pressure spikes when a toilet’s fill valve closes suddenly, and those shocks can cause more than just noise.
Repeated water hammer stresses pipe joints, fittings, valves, and tank components, promoting leaks, pinhole corrosion, and premature failure.
Vibrations loosen supports and fixtures, risking water damage, mold growth, and costly emergency repairs if left unaddressed.
Quick Diagnostic Steps to Confirm Toilet Water Hammer
The reader is advised to recreate the flushing event at a low volume and observe the tank and pipes from a safe distance to confirm when the knocking occurs.
Noting the timing, location, and sound character helps distinguish a water hammer in the toilet supply from other plumbing noises such as loose fittings or vibration in nearby fixtures.
Simple checks—tightening visible fittings, listening at the shut-off valve, and using a wrench or flashlight to inspect connections—can quickly pinpoint the source.
How to reproduce and observe the noise safely
Recreate the conditions that trigger the knock by flushing and then operating nearby valves or fixtures to observe whether the sound coincides with the toilet’s refill cycle.
Maintain a safe distance, listen closely, and note timing, pitch, and repetition.
Check both cold and hot supply lines separately.
Use a wooden dowel or screwdriver against pipes to localize vibration without touching energized equipment.
Distinguishing toilet water hammer from other plumbing noises
How can one tell a true toilet water hammer from other plumbing noises? A water hammer is a sharp, metallic bang occurring immediately after valve closure, often linked to toilet fill or flush.
Distinguish it from continuous vibration, gurgling, or flowing sounds by timing, location (near supply lines or tank), and consistency with toilet operation; persistent or irregular noises suggest different faults.
Tools and simple checks to identify the source
Start with a few basic tools and simple checks to quickly pinpoint whether a toilet is causing a water hammer: a wrench or pliers to gently operate shut-off valves, a screwdriver to access the tank, a flashlight to inspect hard-to-see fittings, and a rubber mallet to test for loose pipes by tapping.
Verify valve tightness, listen during refill, isolate the toilet by closing its valve, and check for loose brackets.
Immediate DIY Fixes You Can Try Right Now
The section outlines simple, immediate actions a homeowner can try to reduce toilet water hammer without calling a plumber.
Suggestions include tightening loose fittings, securing or replacing the supply line (preferably with a braided hose), and adjusting the fill valve to slow closure.
If those fail, installing a water hammer arrestor or partially closing the shut-off valve can provide a quick temporary cushion.
Tighten loose fittings and secure supply lines
Check the supply-line connections and fittings for looseness and tighten them as needed to eliminate rattling and vibration that can cause water hammer.
Inspect flexible hoses, compression nuts, and mounting brackets. Hand-tighten then use a wrench only snugly to avoid damage.
Secure loose lines with clips or straps to studs or tank, ensuring no strain on fittings that could transmit shock.
Adjusting the toilet fill valve to slow valve closure
After securing loose fittings and stabilizing supply lines, attention can shift to the fill valve inside the tank to reduce abrupt closures that cause water hammer.
The homeowner should inspect the float and refill mechanism, adjust the float height or the valve’s damping screw to slow closing, and test flushes.
Replace a worn valve if adjustments don’t stop the banging.
Installing a water hammer arrestor on the toilet supply line
Install a small water hammer arrestor on the toilet supply line to absorb shock from sudden valve closures and stop banging.
A simple threaded or push-fit arrestor mounts near the shutoff valve or tank inlet.
Turn off water, drain the line, install per manufacturer instructions, then restore flow and test.
This durable, low-cost fix often eliminates noise without altering toilet components.
Adding or replacing a flexible braided supply hose
If a water hammer arrestor does not fully stop the banging, replacing the toilet’s supply hose with a flexible braided line is a quick, inexpensive next step.
A braided hose reduces vibration and resists kinking; installation requires shutting off water, draining the tank, unscrewing the old line, and hand-tightening the new fittings with a wrench.
Inspect for leaks and test flushes.
Partially closing the shut-off valve as a temporary cushion
Partially closing the shut-off valve can act as a quick, temporary cushion by slowing the flow and reducing the shock that causes banging.
A slight turn inward on the valve stem lowers inlet pressure and softens rapid valve closures, diminishing water hammer instantly.
This is a stopgap measure only; persistent or severe hammer requires inspection, proper arrestors, or professional plumbing to address root causes.
Bleeding air from the line and checking for trapped air
Bleed the line to release trapped air, a common and easily fixed cause of sudden banging when faucets or valves close.
Shut water to the toilet, open the supply line or disconnect at a coupling, then briefly reopen the main to flush air out.
Reconnect, restore supply, and test flushing.
Repeat if noise persists; trapped pockets often clear after one or two cycles.
Step-by-Step Guide: Installing a Toilet Water Hammer Arrestor
The following section outlines the step-by-step process for installing a toilet water hammer arrestor, beginning with the specific tools and materials required.
It then covers preparing the shut-off valve and draining the supply line, removing old fittings, and securing the new arrestor.
Finally, it explains how to test the repair and verify that the water hammer has been resolved.
Tools and materials needed
A small set of reliable tools and a few specific materials make installing a toilet water hammer arrestor straightforward.
The list below covers essentials for most residential installs; choose sizes and fittings matching the supply line and valve type.
- Adjustable wrench
- Pipe cutter or utility knife
- Thread seal tape (PTFE)
- Compatible water hammer arrestor (compression or threaded)
- Replacement supply line or adapters
Preparing the toilet shut-off and draining the line
After gathering the wrench, pipe cutter, seal tape, and chosen arrestor, attention turns to shutting off the toilet supply and emptying the line before installation.
Locate and close the shut-off valve clockwise. Flush to drain the tank and open the valve downstream or a nearby faucet to release trapped water.
Place a towel beneath the connection to catch residual drips before proceeding.
Removing old fittings and installing the arrestor
Begin by loosening and removing the existing supply-line nut with an adjustable wrench, taking care to support the valve body to prevent twisting.
Remove old compression rings or fittings, inspect threads and clean debris.
Fit the arrestor’s compression nut and ferrule, slide onto the valve tailpiece, and tighten evenly.
Confirm alignment; avoid over-tightening to prevent leaks or damage to threads.
Testing and verifying the fix
Test the repair by slowly turning the water supply back on while watching for leaks and listening for residual hammering.
Confirm silence during multiple flushes and rapid valve closures.
Inspect joints and arrestor for weeps and proper seating.
Monitor for 24–48 hours, noting any recurring noises or moisture.
If hammering persists, recheck installation torque and consider a larger-capacity arrestor or professional assessment.
When Toilet Valve Replacement Is the Best Solution
Persistent running, slow fill, or visible leaks signal that a toilet’s fill or flush valve may need replacement.
The discussion will cover how to identify those signs, select a compatible replacement valve for the specific toilet model, and outline a brief step-by-step replacement walkthrough.
Readers will learn when replacement is preferable to arrestor installation and what to expect during the swap.
Signs the fill valve or flush valve needs replacement
How can one tell when a fill valve or flush valve has reached the end of its useful life? Indicators include persistent running or continuous refilling despite adjustments, loud or erratic water hammering tied to valve cycles, slow or incomplete tank refills, frequent manual adjustments, visible corrosion or mineral buildup, and repeated leaks around the valve base.
These signs warrant replacement rather than minor repairs.
Choosing the right replacement valve for your toilet
When a fill or flush valve must be replaced, selecting the correct replacement means matching the valve type, tank configuration, and water pressure to guarantee reliable operation and minimize future problems.
Buyers should note tank height, inlet size, and flush mechanism (float, canister, or flapper).
Choose pressure-compatible parts, durable materials, and compatible mounting styles.
OEM or widely rated universal valves reduce compatibility risks.
Brief replacement walkthrough
After selecting a compatible replacement valve, the repair proceeds through a few straightforward steps that restore reliable flushing and stop water hammer.
Shut off water, drain the tank, and remove the old valve.
Install the new valve following manufacturer instructions, secure seals and fittings, and reconnect the supply.
Turn water on, adjust fill and flush settings, then test for leaks and noise, repeating adjustments as needed.
Preventive Measures to Avoid Future Water Hammer
A concise preventive approach begins with a routine inspection checklist to spot worn valves, loose fittings, and shifting pipe supports.
Where problems recur, upgrading to modern fill valves and flexible connections can reduce shock and wear.
For persistent or whole-house issues, installing pressure regulators and air chambers provides a systemic safeguard.
Routine inspection checklist
Regularly scheduled inspections reduce the likelihood of water hammer by identifying wear, loose fittings, and pressure issues before they escalate.
A concise checklist guides homeowners and technicians through targeted checks, documenting findings and corrective actions to prevent recurrence.
- Check supply line connections for tightness and corrosion
- Inspect shutoff valve operation
- Measure system water pressure
- Examine pipe supports and hangers
- Test fill valve cycling
Upgrading to modern fill valves and flexible connections
Upgrade toilet hardware by replacing outdated fill valves and rigid supply lines with modern, pressure-balanced fill valves and braided flexible connectors to markedly reduce the likelihood of water hammer.
These components cushion flow changes, minimize sudden pressure spikes, and improve valve response.
Installation is typically straightforward for a DIYer with basic tools; choose compatible sizes, shut off water, drain the tank, and follow manufacturer torque and seal recommendations.
Whole-home solutions: pressure regulators and air chambers
Following replacement of fill valves and flexible connectors, homeowners can address persistent or system-wide water hammer by installing whole-home devices that manage pressure and absorb shock.
A pressure-reducing valve stabilizes incoming mains pressure, preventing high-velocity surges.
In-line water hammer arrestors or properly charged expansion tanks provide air cushions at strategic points.
Professional sizing and installation guarantee effective, long-term protection and code compliance.
Troubleshooting Persistent or Complex Water Hammer Problems
When knocking persists despite basic fixes, the problem may involve multiple fixtures rather than a single toilet and requires broader system checks.
Hidden causes to evaluate include consistently high water pressure, unusually long run lengths, and incompatible pipe materials that amplify shock.
If symptoms appear across the house or pressure readings are high, the main supply or a failing pressure regulator should be suspected.
Multiple fixtures causing water hammer versus single-toilet issues
Although a single noisy toilet often points to a worn fill valve or loose seat, persistent water hammer that involves multiple fixtures indicates systemic issues—such as inadequate air chambers, a failing main arrestor, or wide pressure fluctuations—requiring a broader diagnostic approach and different remedies than a lone-toilet fix.
Inspect whole-house arrestors, verify functional air chambers, check main shutoff valve operation, and consider pressure-reducing or professional evaluation.
Hidden causes: high water pressure, pipe length, and pipe type
Systemic causes such as failing main arrestors or insufficient air chambers can point investigators toward broader plumbing problems.
However, persistent or complex water hammer often stems from less obvious factors: elevated static water pressure, exceptionally long runs of piping, and the material or diameter of the pipes themselves.
High pressure increases shock energy; long runs amplify wave reflection; rigid or undersized pipes transmit and magnify impulses, worsening noise and stress.
When to suspect main supply or pressure regulator problems
How can one tell if the source of persistent water hammer lies beyond individual fixtures and into the main supply or a failing pressure regulator?
Look for simultaneous banging across multiple fixtures, pressure spikes measured at a hose bib, fluctuating municipal pressure, or a regulator that won’t hold set pressure.
If whole-house symptoms persist after fixture fixes, suspect main supply or regulator failure and call a pro.
Cost and Time Estimates for DIY vs Professional Repair
Estimated materials for common DIY fixes—such as new fill valves, washers, or a water hammer arrestor—typically range from $10 to $60 and can take 30 minutes to a few hours for a competent homeowner.
Professional plumber rates usually run $75–$150 per hour plus parts, with a basic visit often totaling $150–$400.
Hiring a pro is generally cost-effective for inaccessible valves, persistent noise after DIY attempts, or when diagnostic time and potential water damage risk outweigh the hourly charge.
Expected materials cost and time for common DIY fixes
When tackling toilet water hammer, expected materials and time vary by the chosen fix: simple cushion kits or washers typically cost $5–$20 and take 15–30 minutes, replacement fill valves run $10–$40 and require 30–60 minutes, while installing a water hammer arrestor or new shutoff valve can cost $25–$100 in parts and take 45–90 minutes for a DIYer.
| Fix | Cost/Time |
|---|---|
| Cushion/washer | $5–$20 / 15–30 min |
| Fill valve | $10–$40 / 30–60 min |
| Arrestor | $25–$60 / 45–90 min |
| Shutoff valve | $30–$100 / 45–90 min |
Typical plumber rates and scenarios where hiring is cost-effective
Many homeowners pay plumbers by the hour—typical rates range from $75 to $150 per hour, with service call fees of $50–$100 added on top—so labor quickly surpasses parts costs for simple fixes.
Hiring is cost-effective for complex valve replacements, inaccessible shutoffs, or persistent noise after DIY attempts.
Minor repairs like tightening or replacing a fill valve usually remain economical to self-fix.
Signs You Should Call a Plumber Immediately
If water hammer is accompanied by repeated loud banging, visible leaks, or signs of damaged pipes, a professional should be contacted immediately.
Structural concerns or any situation that risks flooding or compromised supports warrant urgent assessment by a plumber.
Delaying professional help in these cases can lead to greater damage and higher repair costs.
Safety and structural concerns requiring professional help
Because water hammer can indicate failing fixtures or hidden pipe damage, immediate professional attention is warranted whenever symptoms suggest structural risk.
A plumber should assess sagging ceilings, warped floors, persistent vibration, loose wall plates, or visible cracking near plumbing runs.
Also seek help if occupants detect moldy odors, unexplained dampness, or if shutoff valves fail—these signs may require prompt repair to prevent collapse or major water damage.
Situations involving repeated loud banging, leaks, or damaged pipes
Recognize persistent loud banging, visible leaks, or signs of pipe damage as urgent warnings that require immediate professional attention.
Repeated water hammer accompanied by dripping, wet spots, corrosion, bulging, or nasty odors indicates compromised fittings or ruptured lines.
Temporary DIY measures may reduce noise but cannot guarantee safety.
A licensed plumber should inspect, isolate damaged sections, repair or replace pipes, and test system integrity to prevent flooding.
Quick Maintenance Tips After Repair
After repairs, a brief routine check can confirm the water hammer has been resolved and catch early signs of recurrence.
The technician or homeowner should perform a simple test by flushing and running nearby fixtures to listen for knocking and observe valve response.
Quarterly inspections of supply lines, shutoff valves, and mounting hardware will help maintain the fix.
How to test for recurrence
How can one quickly confirm that a toilet water hammer fix holds?
After repair, flush several times at varied intervals and listen for knocking.
Operate nearby fixtures (sink, shower) to simulate simultaneous stops.
Inspect tank refill for rapid valve closure or vibration.
Note any recurrence over 24–48 hours.
If noise persists, document conditions and consider further adjustment or professional evaluation.
Simple checks to perform quarterly
A few simple quarterly checks keep a toilet water-hammer repair reliable: inspect the fill-valve and its fastenings for looseness or wear, feel the supply line and shutoff for vibration during a flush, verify that any installed arrestor or air chamber remains unobstructed, and confirm the tank refill rate is steady without abrupt valve slams.
- Check for leaks at connections
- Test shutoff valve operation
- Listen for unusual noises
- Clean debris from inlet screens
- Verify mounting bolts are tight
Related Symptoms and When They Indicate Bigger Issues
Banging at the toilet can coincide with pressure spikes or similar shocks elsewhere in the plumbing, suggesting a systemic water hammer problem rather than a localized issue.
Homeowners are advised to note the time, duration, and conditions of each occurrence, and to record any simultaneous noises or appliance activity.
A concise log and, if possible, short audio or video clips make it easier for a plumber or warranty assessor to diagnose root causes.
Correlating banging noises with pressure spikes or water hammer elsewhere
When do toilet bangs signal isolated valve issues versus wider pressure spikes in the plumbing system?
Observing simultaneous banging at multiple fixtures, intermittent whole-house pressure swings, or kettling from pipes suggests system-wide pressure spikes.
Localized noise confined to one toilet, especially after flush or fill-valve activation, points to toilet components or nearby pipe supports.
Frequency, timing, and fixture pattern distinguish isolated faults from broader hydraulic problems.
How to document occurrences for a plumber or warranty claim
Distinguishing isolated toilet noise from system-wide pressure spikes helps determine what details a plumber or warranty reviewer will need.
Record date, time, duration, frequency, and exact fixture affected.
Note recent repairs, measurable pressure readings, photos or short video clips, and any concurrent appliance events.
Preserve invoices, model/serial numbers, and communication logs to substantiate patterns and warranty eligibility.
Conclusion
Like a storm rattling shutters, a sudden bang in the pipes warns of unseen strain. Addressing toilet water hammer—through quick checks, a temporary arrestor, or valve renewal—acts as pruning to keep the plumbing tree healthy. Timely care calms the tempest; a skilled hand is the arborist when roots run deep. Heed the small sounds before branches break, and the household’s quiet will return, steady as dawn.