How to Deburr PVC Pipe Quickly and Safely: Step-by-Step Guide
To deburr PVC pipe quickly and safely, follow this streamlined routine: Secure the pipe, then use a deburring tool or utility knife to remove rough edges. Finish by smoothing the cut end with a round file or 120–220 grit sandpaper. For larger diameters, a rotary tool with light pressure is effective. Always wear gloves, eye protection, and a mask, and check the pipe’s roundness and fit. Ensure proper ventilation and care for your tools for optimal results. Detailed recommendations on tool selection and techniques are available for further guidance.
Why Proper Deburring of PVC Pipe Matters for Safety and Performance
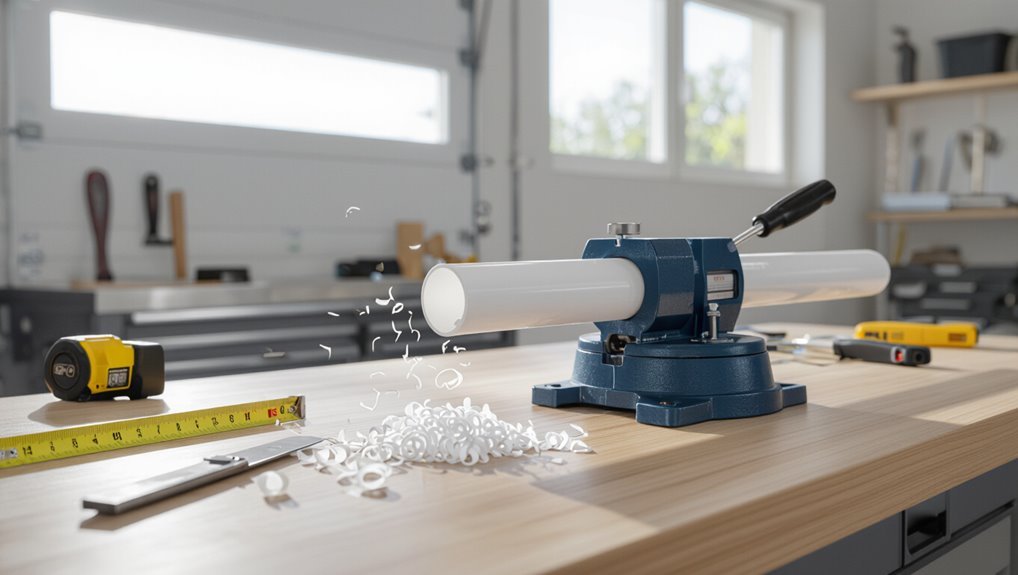
Burrs inside or on the end of PVC pipe can restrict flow, interfere with proper seating of fittings, and compromise seals.
Exposed sharp edges also pose a laceration hazard to installers handling and joining pipe. Many plumbing and irrigation codes, and some manufacturer warranties, require smooth, burr-free ends to guarantee reliable, code-compliant installations.
Effects of burrs on flow, fittings, and seals
Chipping and sharp edges left inside cut PVC can disrupt fluid flow, create turbulence, and trap particulates that reduce throughput and increase pressure loss.
Burrs impair fitting alignment, prevent full insertion, and compromise gasket seating, causing leaks and premature joint failure.
Proper how to deburr PVC pipe techniques preserve smooth interiors, guarantee reliable seals, and maintain designed hydraulic performance and component longevity.
Safety risks from sharp edges during installation
Any sharp edges left on cut PVC present tangible injury hazards during handling and installation, including cuts to hands and exposed skin, punctures to protective gloves, and snagging on clothing or tool belts.
Unremoved burrs increase risk of installer injury, compromised grip, and accidental slippage of tools or pipe sections, raising chances of drops, scrapes, and worksite incidents that slow projects and incur medical costs.
Code and warranty considerations for plumbing and irrigation
Guarantee compliance with plumbing and irrigation codes and manufacturer warranties by properly deburring PVC pipe before assembly.
Inspectors often require smooth pipe ends to verify reliable solvent-welds and gasket seals. Manufacturers may void warranties if improper preparation causes leaks or stress failures.
Document deburring procedures and retain receipts for fittings, adhesives, and tools to demonstrate adherence to standards and preserve warranty rights.
Quick Answer: Fastest Safe Methods to Deburr PVC Pipe
For quick, safe deburring on most PVC runs, a round-file or dedicated PVC deburring tool is the single best option for speed and consistent edges.
For jobs requiring greater precision—larger diameters, tight tolerances, or awkward access—a multi-tool approach using a rasp, chamfer bit, and emery cloth yields cleaner results.
The tool choice should be based on pipe size, available working space, and whether the material is rigid PVC or more fragile vinyl.
Best single-tool method for speed and safety
Choose a rotary deburring tool with a carbide or high-speed steel bit for the fastest, safest single-tool method to deburr PVC pipe; it removes burrs cleanly, minimizes heat buildup, and reduces the risk of cracking compared with aggressive hand files.
Operate at moderate speed, use light pressure, rotate evenly around the edge, inspect frequently, and wear eye protection and a dust mask for safe, consistent results.
Best multi-tool approach for precision
Combine complementary tools for the most precise, efficient deburring of PVC: start with a rotary deburring bit to remove major burrs, follow with a chamfering or countersink bit for a uniform edge, and finish with a fine-file or sanding drum to smooth and remove microburrs.
Use steady, controlled passes, secure the pipe, and inspect edges between steps to guarantee consistent, safe results without overcutting.
When to choose each method (pipe size, access, material)
Match the deburring method to pipe size, access, and material to balance speed and safety:
For small diameters, hand reamers or rotary deburring bits give control.
For large pipes, file or rasp speeds work; oscillating tools remove bulk fast.
Confined spaces favor internal tools or sandpaper wraps.
For CPVC or thin-wall PVC, use gentler cutters and lower RPMs to avoid cracking or melting.
Tools and Materials You Need
The section lists the hand and power tools commonly used to remove burrs from PVC pipe, including deburring tools, utility knives, files, chamfer tools, rotary tools with sanding drums, and oscillating tools.
It also covers essential safety gear—gloves, eye protection, and a dust mask—and gives recommended tool sizes and grit ranges matched to common PVC diameters.
Practical notes on when to choose a hand tool versus a power tool will follow.
Hand tools: deburring tool, utility knife, file, chamfer tool
Select the proper hand tools to make quick, clean deburring of PVC pipe—each tool offers different control and speed depending on the cut and finish required.
A single-blade deburring tool rounds edges fast. A sharp utility knife trims burrs on thin walls. A metal file smooths stubborn ridges. A chamfer tool creates consistent bevels for snug fittings.
Choose by pipe size and desired finish.
Power tools: rotary tool, sanding drum, oscillating tool
Use rotary and oscillating power tools with appropriate sanding drums or attachments to speed deburring of PVC pipe while maintaining control and uniform edges.
Select a variable-speed rotary tool and fine-to-medium grit sanding drums for smooth cuts; an oscillating tool with sanding pads works for larger diameters.
Secure the pipe, apply light pressure, and work consistently around the bore to avoid gouging or uneven surfaces.
Safety gear: gloves, eye protection, dust mask
Gloves, eye protection, and a dust mask form the basic personal protective equipment for deburring PVC pipe.
Nitrile or cut-resistant gloves shield hands from sharp edges and rotary tools. Safety goggles prevent chips and dust from entering eyes. A particulate respirator or dust mask reduces inhalation of fine PVC particles.
Guarantee proper fit and replace damaged gear before work.
Recommended tool sizes and grits for different PVC diameters
Different PVC diameters call for matching tool sizes and abrasive grits to achieve clean, consistent edges without removing excess material.
Recommended pairings are concise: small pipes need finer tooling, larger pipes require coarser tools with guarded removal. Select tools sized to the pipe ID/OD to avoid gouging.
- 1/2″–1″ : deburring tool or sandpaper 220–320
- 1¼”–2″ : half-round file or 120–220
- 2½” and up : coarse file or 80–120 grit
Step-by-Step Fast Deburring Process for Small PVC Pipes (1/2″ to 2″)
For small PVC pipes (1/2″ to 2″), a fast deburring routine begins with measuring, marking, and securely clamping the pipe so cuts follow best practices that minimize burr formation.
After cutting, a manual deburring tool is used in controlled passes to remove inner and outer flash, then a file or fine sandpaper smooths the edge.
A brief inspection checklist—confirming clean, even edges and no loose particles—completes the process before joining fittings.
Preparation: measuring, marking, securing the pipe
Before cutting, measure the required length carefully and mark the pipe with a fine-tip marker or pencil at the cut line.
Then use a square or combination square to extend the mark around the circumference for an accurate, square cut.
Secure the pipe in a bench vise with soft jaws or a clamping fixture to prevent crushing.
Verify alignment and stability before proceeding.
Cutting best practices to reduce burrs
With the pipe measured, marked, and secured, cutting technique becomes the primary factor in minimizing burrs on 1/2″–2″ PVC.
Use a sharp fine-toothed saw or a quality PVC cutter, cutting squarely and steadily. Apply light forward pressure, avoid twisting, and support the off-cut to prevent cracking.
For power saws, use slow feed and a thin blade to reduce melting and ragged edges.
Using a manual deburring tool step-by-step
Begin by selecting a manual deburring tool sized for 1/2″–2″ PVC—typically a handheld rotary deburrer or V-shaped edge scraper—and secure the pipe in a vise or clamp to prevent movement.
Rotate the tool gently around the cut end, removing exterior and interior burrs. Inspect frequently, clear shavings, and repeat until the edge is uniform.
Wear gloves and eye protection throughout.
Finishing with a file or sandpaper for a smooth edge
Finish the cut edge by smoothing remaining roughness with a file or sandpaper, working methodically around both the exterior and interior lip of the 1/2″–2″ PVC pipe.
Use a fine-toothed file or 120–220 grit paper, applying light, even strokes.
Remove burrs and sharp edges, check by touch, and rotate the pipe for uniform finish.
Clean residue before fitting.
Quick inspection checklist before joining fittings
A quick visual and tactile inspection guarantees the pipe is ready to join: check for any remaining burrs or raised edges on both the outer and inner lips, confirm the cut is square and the pipe end seats evenly against the fitting shoulder, verify the exterior is free of dust, shavings, or solvent residue, and make certain the outer diameter and wall thickness match the designated fitting.
Ascertain joint alignment, proper fit, and cleanliness.
Step-by-Step Fast Deburring Process for Large PVC Pipes (2 and up)
For large PVC pipes, the process begins by securing long sections in a stable vise or pipe cradle to prevent movement and protect the workpiece.
The technician then employs rotary or oscillating power tools for rapid material removal while monitoring speed and pressure to avoid heat buildup and melting.
After shaping, the pipe end is checked and adjusted for roundness to guarantee a proper fit before assembly.
Securing large pipe sections safely
Several secure clamping methods keep large PVC pipe sections stable during deburring to prevent movement and guarantee operator safety.
Use pipe vices, adjustable saddles, roller stands with straps, or padded beam clamps.
Position supports near cut ends and midspan to minimize flex.
Verify firm but nonmarring contact, lock all fasteners, and check stability before cutting or finishing to reduce vibration and accidental slips.
Using rotary or oscillating tools for faster removal
Begin with a rotary or oscillating tool equipped with a carbide or coarse sanding attachment to rapidly remove burrs from large PVC pipe edges.
Hold the tool steady, working around the circumference with light, consistent passes. Rotate the pipe or move along seams to maintain even removal.
Finish with a quick hand-sanded pass to smooth any remaining roughness before cleaning the area.
Controlling heat and melting when using power tools
After using a rotary or oscillating tool to remove bulk burrs, attention must shift to managing heat build-up and potential melting when continuing with power tools.
Operators should use lower speeds, apply light, intermittent contact, and keep tools moving. Use sharp abrasive bits, pause frequently to allow cooling, and avoid concentrated pressure.
Inspect surfaces often to prevent softening or deformation.
Ensuring roundness and proper fit after deburring
Check the pipe end for true roundness and mating fit immediately after deburring to guarantee seals seat correctly and couplings slide on without binding.
Verify with a basic ring gauge or coupling; rotate the pipe while observing gap uniformity.
Lightly ream or sand low spots, avoiding material removal beyond the bevel.
Recheck fit and seal compression before final assembly to prevent leaks or stress.
Alternative Methods When Standard Tools Aren’t Available
When standard deburring tools are missing, practical alternatives can still yield safe, serviceable edges.
The section will outline a safe sequence and angle recommendations for using a utility knife, describe improvised sanders and files suitable for field repairs, and offer quick on-site techniques for emergency fixes.
Each method focuses on minimizing stress to the pipe while maintaining a clean, chamfered or beveled edge.
Using a utility knife safely: step sequence and angle tips
Reach for a sharp utility knife only if standard deburring tools are unavailable and the user understands knife safety and control.
Hold the pipe securely, blade angled about 30–45° away from the body. Make light, controlled shaving passes around the inner and outer edges, rotating the pipe rather than forcing the blade.
Inspect frequently; stop if blade binds or the cut feels unstable. Replace dull blades.
Improvised sanders and files for field repairs
If a utility knife is the only option but control or blade safety is a concern, improvised sanders and files offer safer, more consistent alternatives for field repairs.
Workers can fashion sanding blocks from scrap wood and wrapped sandpaper, or use emery cloth folded over a dowel as a makeshift file.
Light, even strokes remove burrs; inspect edges and wipe debris before fitting.
Quick on-site deburring for emergency fixes
Address common constraints on-site by prioritizing methods that require minimal tools and deliver safe, repeatable results.
For quick emergency deburring, use a utility knife to pare burs away with controlled strokes, a folded sandpaper strip to smooth edges, or the pipe’s mating fitting to chamfer lightly.
Always wear gloves and eye protection, work slowly to avoid gouges, and inspect the joint fit before final assembly.
Common Problems and How to Fix Them
Common issues during PVC deburring include over-cutting that weakens ends, heat damage or deformation from power tools, and missed internal burrs that compromise seals.
Each problem requires a specific remedy, from trimming and sanding to cooling techniques and careful re-checking of inner bores.
When ends are visibly damaged, repair options such as cutting back to a sound section or using couplings and sleeves are recommended.
Over-cutting or removing too much material
Over-cutting occurs when too much PVC or its edge bevel is removed during deburring, weakening joints and creating gaps that compromise sealing and alignment.
To fix this, inspect affected ends, square-cut remaining pipe, and test-fit fittings.
If material loss is minor, chamfer lightly to restore fit; for significant damage, cut back to a fresh section and re-deburr to proper dimensions before assembly.
Causing melt or deformation with power tools
Using power tools at high speeds or applying excessive pressure can soften, melt, or deform PVC edges, producing rough, irregular surfaces that prevent proper sealing and fit.
To fix this, reduce speed, use light steady pressure, and employ blades or bits rated for plastic.
Allow tools to cool, pause frequently, and finish with a fine file or deburring tool to restore true edges.
Missed internal burrs that affect seals
Inspect internal bores for hidden burrs that can compromise seals and cause leaks once fittings are assembled.
Use a flashlight and rotary deburring tool, needle files, or a tapered reamer to access and remove internal flash.
After trimming, clean with a soft brush and solvent wipe to remove particles.
Reinspect with a gauge or test-fit to guarantee a smooth, uniform sealing surface before final assembly.
Repair options for damaged pipe ends
If internal burrs or nicks are found during final checks, attention should next turn to any damaged pipe ends that will prevent a proper fit.
Small nicks can be sanded smooth with fine-grit sandpaper.
Deep gouges require square cutting back to undamaged material and re-deburring.
Cracked or split ends should be replaced; short sleeves or couplings can salvage slightly shortened lengths.
Efficiency and Time-Saving Tips
Efficiency gains come from preparing multiple cuts for batch deburring, selecting and maintaining sharp blades or rotary tools, and using ergonomic techniques to reduce fatigue.
Organizing workpieces and tools before starting minimizes downtime between cuts. Regular tool inspection and posture-conscious motions sustain speed and consistency over longer jobs.
Preparing multiple cuts for batch deburring
Group cuts by diameter and length before deburring to streamline workflow and reduce setup changes.
Lay pipes on a flat surface, label stacks, and clamp similar pieces together. Pre-sort burr orientation to minimize repositioning.
Assign a single operator to each batch and use a jig or guide for consistent angles.
Inspect samples periodically to verify uniform quality and adjust spacing as needed.
Tool maintenance and blade selection for speed
After organizing batches by size and clamping them for consistent cuts, attention turns to tool upkeep and blade choice to speed the deburring process.
Inspect blades for nicks, replace or sharpen dull edges, and clean cutting surfaces. Select carbide or high-speed steel blades rated for plastic for faster, cleaner cuts.
Lubricate moving parts, tighten fittings, and store tools dry to maintain performance.
Ergonomic techniques to reduce fatigue
Adopt neutral posture and streamlined motions to minimize muscle strain and sustain productivity during extended deburring sessions.
Workers rotate tasks, use padded grips, and position pipes at waist height to avoid bending.
Short, frequent breaks and stretching preserve circulation and focus.
Proper lighting and stable clamps reduce awkward reaches.
Prioritizing ergonomics shortens fatigue recovery, maintaining consistent speed and accuracy throughout the job.
Safety Checklist and Best Practices
A concise safety checklist covers required protective equipment, proper workshop setup, and procedures for minimizing exposure to PVC dust and debris.
It also outlines correct tool operation, secure workholding, and lockout steps to prevent accidental start-up.
These best practices reduce injury risk and guarantee a cleaner, more controlled deburring process.
Protective equipment and workshop setup
Begin by establishing a clear safety zone: guarantee the work area is well-ventilated, free of trip hazards, and equipped with adequate lighting and a stable workbench or vise to secure PVC while deburring.
Wear safety glasses, cut-resistant gloves, hearing protection for power tools, and a dust mask when necessary.
Keep fire extinguisher, first-aid kit, and tool organization nearby for efficient, safe workflow.
Handling PVC dust and debris responsibly
With the work area secured and personal protective equipment in place, attention shifts to containing and managing PVC dust and debris to prevent inhalation, contamination, and slip hazards.
Use a HEPA vacuum or wet cleanup to collect particles, dispose of shavings in sealed bags, wipe surfaces with damp cloths, and mark contaminated zones.
Regularly empty filters and launder contaminated clothing separately.
Safe tool operation and lockout tips
Make certain all tools are operated according to manufacturer instructions and that power sources are isolated before maintenance or blade changes.
Operators should verify lockout/tagout, wear PPE, and confirm tool condition. Follow a concise checklist to prevent unexpected startups and injury.
- Verify power isolation and apply lockout devices.
- Inspect guards, blades, and cords.
- Use PPE and test tools before use.
Comparison of Deburring Methods and When to Use Each
A brief comparison clarifies when to choose manual versus power deburring for PVC pipe based on speed, cost, and precision. The following table outlines tool-by-tool pros and cons across common pipe sizes to aid selection. Recommendations favor manual tools for small, low-cost jobs and power tools for larger or production work.
| Tool Type | Pros / Cons by Pipe Size |
|---|---|
| Utility knife / deburring tool | Small: precise, low cost; Medium: slower; Large: impractical |
| Rotary file / rasp | Small: controllable; Medium: efficient; Large: time-consuming |
| Power rotary tool (Dremel) | Small: risk of overcutting; Medium: fast and precise; Large: good with proper bits |
| Pipe chamfer tool / deburring bit | Small: limited access; Medium: fast; Large: best for production runs |
Manual vs power tools: speed, cost, precision
Several factors determine whether manual or power deburring is the better choice for PVC pipe work: time available, budget, and the level of finish required.
Manual files and reamers cost less, offer tactile control, and suit small jobs.
Power tools save time on larger batches but increase expense, require safety precautions, and may overcut if not guided carefully.
Choose by workload and finish need.
Tool-by-tool pros and cons for different pipe sizes
When selecting a deburring method, size-specific factors—pipe diameter, wall thickness, and joint type—determine which tool delivers the best combination of speed, control, and finish.
Small-diameter PVC favors hand tools for precision, medium sizes suit handheld power tools for balance, and large-diameter or thick-walled sections often require powered cutters or rotary reamers to remove material efficiently without excessive effort.
Hand file: cheap, precise; slow.
Deburring tool: fast, controlled; limited for thick walls.
Rotary reamer: efficient for large pipes; more costly and needs power.
Pipe cutter with chamfer: quick, clean on thin walls; risks cracking thick sections.
How to Inspect and Test a Deburred Joint Before Final Assembly
A completed deburred joint should be inspected visually and by touch for smooth edges, consistent bevels, and the absence of burr fragments.
The fitting should be dry-fit to verify alignment and then subjected to appropriate low-pressure testing where applicable to confirm sealing and fit before permanent joining.
Any cracking, remaining burs, misalignment, or poor seating observed during these checks warrants rework prior to gluing or threading.
Visual and tactile inspection steps
Before final assembly, the deburred joint should undergo a focused visual and tactile inspection to confirm that all burrs and rough edges have been removed and that the mating surfaces are smooth and uniform.
Visually scan for chips, cracks, or leftover shavings. Run a gloved fingertip around edges and inside the socket to detect rough spots.
Mark and rework any imperfections before proceeding.
Dry-fit testing and pressure check guidance
Dry-fit the deburred joint to verify alignment and seating without adhesive, ensuring parts slide together smoothly and sit flush. This allows confirmation that chamfers and inner ledges are properly removed and that the mating faces have full contact.
Perform a low-pressure leak test with water or air at recommended system pressure for a short duration. Observe joints for movement or seepage, then document results before final assembly.
Signs that require rework before gluing or threading
Several clear indicators signal that a deburred joint needs rework before gluing or threading: visible nicks or raised burrs on the pipe edge, uneven or incomplete chamfers, interior ledges or ridges that prevent full insertion, mismatched mating faces that leave gaps, and contamination such as chips, grease, or moisture.
Any of these defects can cause leaks, weak bonds, misalignment, or blockage and must be corrected.
Recommended Products and Accessories
A concise list of recommended products and accessories helps guarantee clean, consistent PVC deburring.
Top-rated manual deburring tools, suitable rotary attachments and sanding drums, and appropriate consumables—sandpaper grits, replacement blades, and spare parts—are highlighted for different job scopes.
Specific model suggestions and replacement schedules follow to match durability and finish requirements.
Top-rated manual deburring tools
Explore a curated selection of top-rated manual deburring tools suited for PVC pipe work, emphasizing durability, ease of use, and consistent edge finishes.
Included are handheld deburring knives, single- and double-sided chamfer tools, adjustable pipe reamers, and flared-cup scrapers.
Each offers ergonomic grips, replaceable blades, and corrosion-resistant materials, providing reliable burr removal for clean joints without power tools.
Best rotary attachments and sanding drums
Hand tools provide precise control for edging PVC, but rotary attachments and sanding drums accelerate work on larger runs and tight fits.
Recommended choices include low-speed rotary bits with rounded profiles, tapered sanding drums for internal chamfers, and rubber-backed mandrels for secure mounting.
Prioritize balanced, compatible attachments sized to pipe diameter, heat-resistant materials, and guards to reduce chatter and melt.
Consumables: sandpaper grits, blades, and replacement parts
Select consumables that match the PVC deburring task: coarse grits (80–120) for rapid material removal, medium grits (150–220) for shaping and smoothing, and fine grits (320–400) for final finishing and polishing; use carbide or high-speed steel (HSS) blades for powered cutters and replace them at the first sign of chipping or drag.
Keep spare sanding drums, mandrels, and rubber backing pads on hand to maintain consistent performance.
- Store organized grit sets and labeled spares.
- Inspect blades and drums before each use.
- Replace worn mandrels and backing pads promptly to prevent uneven sanding.
Conclusion
Proper deburring keeps PVC joints secure and leak-free while reducing injury risk. Which quick method best fits a given job depends on pipe size, available tools, and time constraints. The reader is encouraged to follow the outlined safety checklist and test fittings before final assembly to guarantee performance. By choosing the appropriate technique—whether a deburring tool, utility knife, or sanding method—one can achieve clean, consistent edges that support durable, reliable plumbing work.