How to Add a Dehumidifier to HVAC: Step-by-Step Guide to Installation, Costs & Benefits
To add a dehumidifier to your HVAC system, you can choose from whole-home options that connect directly to your ducted system. This installation helps control humidity, enhances comfort, and prevents mold growth. Key considerations include selecting the right type—inline, bypass, or portable—and ensuring compatibility with airflow, static pressure, electrical capacity, and drainage. The installation process involves mounting the unit, connecting power and control wiring, and setting a humidistat. It’s advisable to seek professional help for permits and system balancing. Regular maintenance and proper sizing will ensure optimal performance. For detailed installation steps, costs, and troubleshooting tips, continue reading.
Overview: Adding a Dehumidifier to Your HVAC System
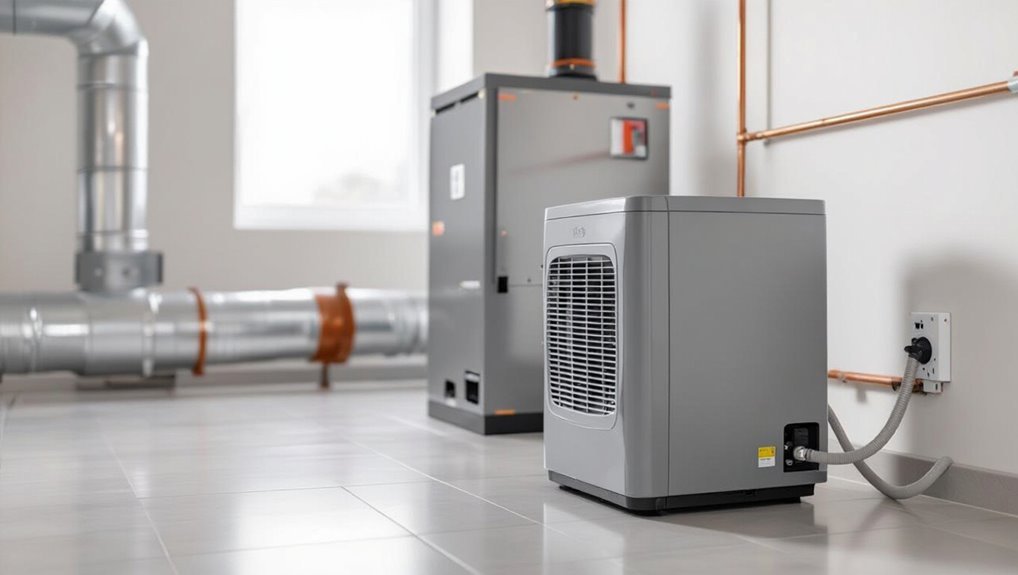
A whole-home dehumidifier removes excess moisture from the entire ducted HVAC system, commonly used in humid climates, basements, or homes with mold and condensation issues.
Integrating a dehumidifier with HVAC improves comfort and indoor air quality, can reduce allergy and mold risks, and often lowers cooling energy use while protecting building materials.
Homeowners with persistent humidity problems or moisture-sensitive belongings typically benefit from adding one, while those in dry climates may not need it.
What a whole-home dehumidifier does and typical use cases
Installers integrate a whole-home dehumidifier into an HVAC system to control indoor humidity levels across every room, rather than treating moisture in isolated spaces.
It removes excess moisture, manages condensation risks, and maintains target relative humidity via the central air handler.
Typical use cases include basements, humid climates, new construction drying, and homes with allergy or mold concerns; guidance on how to add a dehumidifier to hvac.
Benefits of integrating a dehumidifier with HVAC (comfort, health, energy, home preservation)
Comfort emerges when indoor humidity is kept within the recommended range, and integrating a whole-home dehumidifier with the HVAC system delivers that control consistently across living spaces.
It improves thermal comfort, reduces mold and dust-mite growth, protects wood, paint and electronics, and lowers perceived temperature.
Proper integration can reduce HVAC runtime and energy use while promoting healthier indoor air and longer building-material life.
Quick answer: Is adding a dehumidifier right for your home?
Given the benefits of whole-home humidity control, homeowners may wonder whether adding a dehumidifier to their HVAC is the right step.
It generally suits homes with persistent humidity, mold, allergy issues, or high AC runtime.
Evaluate local climate, current indoor humidity, duct compatibility, and budget.
Consulting a pro for load calculations and proper sizing guarantees effective, efficient integration and long-term savings.
Types of Dehumidifiers for HVAC Integration
The sections that follow compare common options for integrating dehumidification with an HVAC system, including inline (duct-mounted) and whole-house bypass units.
Differences in drain methods (condensate pump versus gravity), control features such as smart humidistats, and the trade-offs between portable and integrated systems are highlighted.
This overview helps determine which configuration best matches a home’s layout, ducting, and moisture control needs.
Inline (duct-mounted) dehumidifiers
Inline, or duct-mounted, dehumidifiers integrate directly into an HVAC duct run to control humidity centrally without separate room units.
These units mount in supply or return ducts, using the system’s blower for distribution. They offer higher capacity than portable models, reduce duct condensation, and work with existing thermostats or humidity controls.
Professional sizing and installation guarantee efficiency and airflow balance.
Whole-house bypass dehumidifiers
Bypass whole-house dehumidifiers draw a portion of return air through a dedicated unit and return the dried air to the return plenum. This allows central HVAC fans to circulate conditioned, dehumidified air throughout the home.
These units are compact, cost-effective, and easier to install than duct-mounted systems. They reduce indoor humidity uniformly, require regular maintenance, and integrate with existing thermostats and controls.
Condensate pump vs. gravity drain models
When choosing a whole-house dehumidifier, installers must decide between condensate pump and gravity drain models based on building layout and maintenance preferences.
Gravity drains use slope and existing plumbing for passive removal, requiring proper positioning and access.
Condensate pumps enable flexible placement and lift water vertically, but add moving parts, periodic servicing, and potential failure points.
Selection balances convenience, reliability, and installation cost.
Smart/humidistat-enabled units and controls
Integration of smart or humidistat-enabled dehumidifiers brings automated humidity control and system coordination to whole-house HVAC setups.
These units monitor relative humidity, modulate runtime, and communicate with thermostats or home automation hubs via wired or wireless protocols.
Features include scheduling, remote monitoring, alerts, and adaptive algorithms that reduce energy use and prevent over-dehumidification while maintaining targeted indoor moisture levels.
Portable vs. integrated systems: when each is appropriate
How should a homeowner choose between a portable dehumidifier and an integrated whole-house unit?
A portable unit suits single rooms, budget constraints, or renters needing mobility.
Integrated systems work best for whole-house humidity control, higher efficiency, and seamless HVAC coordination but require professional installation and higher upfront cost.
Consider space, long-term savings, maintenance access, and desired coverage when deciding.
Assessing Compatibility with Your Existing HVAC
Assessment begins with a review of the HVAC layout and available space to determine where a dehumidifier can be installed.
The installer must also verify airflow, static pressure, AHU capacity, electrical and breaker requirements, and viable drainage routes within local plumbing constraints.
Professional consultation is recommended when system limitations or code questions arise.
Evaluating your HVAC layout and available space
Before selecting a dehumidifier, the installer should map the HVAC layout and measure available space to determine where a unit can connect to ductwork or sit near the air handler.
They should note access for maintenance, clearances, mounting surfaces, and proximity to condensate drains and electrical supplies.
Identify potential obstructions, insulation needs, and routes for minimal duct runs to simplify installation.
Checking airflow, static pressure, and AHU capacity
Determine whether the existing HVAC can deliver the required airflow and handle added resistance by measuring system volume, static pressure, and the air handler’s available capacity.
Record supply and return CFM, compare to dehumidifier requirements, and measure external static pressure across coils and filters.
Verify fan curves and motor margin to confirm adequate flow without exceeding manufacturer limits or degrading system performance.
Electrical requirements and breaker capacity
Electrical compatibility hinges on confirming that the existing circuit, breaker, and service capacity can safely supply the dehumidifier’s startup and running currents without overloading the HVAC system or violating code.
Evaluate nameplate amps, locked-rotor current, and branch-circuit sizing.
Verify breaker trip curves, wire gauge, and available service margin.
If required, plan for a dedicated circuit or panel upgrade by a licensed electrician.
Drainage options and local plumbing constraints
Three primary drainage approaches—gravity drain to existing condensate lines, pumped discharge to a higher outlet, or internal reservoir with periodic manual emptying—should be evaluated against the dehumidifier’s runoff rate and the home’s plumbing layout.
Local codes may dictate connection points, trap requirements, and backflow prevention. Assess pipe slope, available floor drains, condensation pan capacity, and nearby sewer access to guarantee compliance and reliable discharge.
When to consult an HVAC professional
When should a homeowner call an HVAC professional to evaluate dehumidifier compatibility with an existing system?
A professional should be consulted when unsure about duct capacity, blower compatibility, electrical load, condensate routing, or warranty impacts.
Also seek expertise if the system is older, oversized, has zoning controls, or presents access constraints.
A technician can perform load calculations, recommend models, and guarantee safe, code-compliant installation.
Step-by-Step Installation Guide
The installation section lists required tools and materials, outlines safety measures and applicable code requirements, and describes how to prepare the HVAC unit and ductwork.
It then explains mounting options for attaching the dehumidifier to the duct or air handler and shows how to connect and route the condensate drain to an appropriate waste line.
Each step emphasizes clear procedures and checks to guarantee a safe, code-compliant installation.
Tools and materials required
A concise checklist of tools and materials helps guarantee a smooth dehumidifier installation and prevents delays once work begins.
Required items include the dehumidifier unit sized for the space, mounting brackets or pads, refrigerant-line kit, condensate drain tubing and trap, electrical cable, conduit, junction box, wire connectors, refrigerant fittings, wrench set, drill, hole saw, level, tape measure, insulation, and sealant.
Safety precautions and code compliance
Before beginning any work on the HVAC system, verify local electrical, plumbing, and building codes and obtain required permits to affirm the dehumidifier installation meets legal and safety standards.
Follow manufacturer instructions, use licensed electricians for wiring, ascertain proper condensate disposal per code, and maintain clearances.
Confirm circuit protection, bonding, and grounding.
Document inspections and keep compliance records for future service.
Preparing the HVAC unit and ductwork
With permits verified and electrical, condensate, and clearance requirements addressed, attention turns to preparing the HVAC unit and ductwork for dehumidifier installation.
Inspect return and supply plenums for structural integrity, seal leaks, and confirm sufficient airflow.
Clear access panels, document existing wiring and controls, and identify ideal condensate routing.
Verify filter locations and guarantee space for service access and airflow balance adjustments.
Mounting the dehumidifier to the duct or air handler
Begin by positioning the dehumidifier in its planned mounting location—either directly on the air handler or at the designated duct tap—ensuring the cabinet aligns squarely with the plenum opening and that service access remains unobstructed.
Secure with manufacturer-recommended brackets or flanges, fasten with screws, and seal seams with foil tape or mastic.
Verify unit sits level and vibration isolators are installed before finalizing.
Connecting condensate drain and routing to waste line
Connect the dehumidifier’s condensate outlet to a properly pitched drain line that leads to the building’s waste system or an approved condensate pump.
Use PVC or flexible tubing sized per manufacturer instructions, install a trap if required, and provide an air gap at the waste connection.
Verify joints are secure, slope maintains gravity flow, and test for leaks and proper drainage before finalizing the installation.
Electrical hook-up and control wiring to thermostat/humidistat
Power is isolated and the dehumidifier is positioned for wiring before any connections are made.
A dedicated circuit, properly sized breaker, and conduit are installed per local code. Line voltage connects to the unit’s power terminals; low-voltage control wires run to the thermostat or humidistat input.
All terminations are tightened, strain reliefs applied, and connections tested for correct polarity, continuity, and safe operation.
Integrating with existing thermostat or installing a dedicated controller
Decide whether to integrate the dehumidifier with the existing thermostat or to install a dedicated controller based on system compatibility, desired control granularity, and building layout.
If the thermostat supports humidity control and wiring, integration simplifies operation and centralizes settings.
Otherwise, a dedicated controller offers independent setpoints, zoning flexibility, and advanced features (timers, remote sensors).
Verify manufacturer compatibility and wiring requirements before selection.
Startup, calibration, and initial balancing of airflow
Begin the startup by confirming that all mechanical and electrical work is complete and that safety devices (disconnects, fuses, and breakers) are in place and labeled.
Then energize the unit, set controller setpoints, and verify condensate drain operation.
Calibrate humidity sensor per manufacturer procedures.
Measure supply and return airflow, adjust dampers and fan speed to achieve designed CFM balance, and document final settings.
Testing performance and leak checks
Proceed to systematic performance testing and leak verification once startup and balancing are complete.
Measure indoor humidity, dew point, and temperature at multiple locations; compare to manufacturer targets and design specifications.
Inspect all condensate connections, duct joints, and refrigerant lines for visible and pressure-tested leaks.
Verify airflow, compressor cycling, and control responses.
Document results, correct deficiencies, and retest to confirm compliant operation.
Estimated Costs and Budgeting
An overview of expected costs helps homeowners plan whether to add a dehumidifier to their HVAC system.
Typical equipment prices vary by type and capacity, professional labor rates differ by region, and additional expenses can include electrical upgrades, drain work, controls, and permits.
A clear comparison of DIY versus professional installation costs clarifies trade-offs in time, risk, and long-term performance.
Typical equipment costs by type and capacity
When planning costs for adding a dehumidifier to an existing HVAC system, homeowners and contractors should consider unit type, capacity, and installation complexity, as these factors drive price variation.
Typical equipment cost ranges by type and capacity:
- Portable units: $150–$600 for small spaces.
- Whole-house bypass: $300–$900.
- Ducted HVAC-mounted: $600–$2,500.
- Commercial/high-capacity: $2,000–$8,000.
Average professional installation labor costs and regional variations
Typical professional labor charges for installing a dehumidifier tied into an existing HVAC system generally range from about $300 to $1,200.
Simpler whole-house bypass or retrofit hookups tend to be toward the low end, while full ducted or drain-plumbed installations are typically at the high end.
Regional labor rates, contractor experience, job complexity, and local market demand drive variations.
Urban areas and high-cost states typically see higher labor charges than rural regions.
Additional costs: electrical work, drain installation, controls, permits
Although the dehumidifier unit itself and labor form the bulk of the expense, several ancillary items can add materially to the final bill: electrical upgrades, drain installation, control integration and permits.
Electrical work may require new circuits or panels; drain lines need condensate pumps or gravity runs.
Smart controls or thermostat integration raise parts and programming costs.
Local permits and inspections add fees and time.
Cost comparison: DIY vs. professional installation
After accounting for electrical upgrades, drain work, controls and permits, the decision between DIY and hiring a pro narrows to money, time and risk. DIY saves labor but increases time, tool costs, and liability; professionals cost more upfront, guarantee code compliance, and offer warranties. Consider skill level, permit requirements, and potential repair savings when choosing.
| Option | Upfront Cost | Risk/Benefit |
|---|---|---|
| DIY | Low–Medium | Higher risk |
| Pro | Medium–High | Lower risk, warranty |
| Hybrid | Medium | Shared tasks, balanced risk |
Sizing the Right Dehumidifier
Sizing a dehumidifier begins with calculating the home’s square footage and overall moisture load to determine required capacity.
The appropriate pints-per-day rating should then be chosen for the local climate zone and matched to the HVAC system’s airflow and CFM.
Careful selection avoids the performance losses and comfort problems that come from oversizing or undersizing the unit.
Calculating home square footage and moisture load
Determining the correct dehumidifier begins with accurately measuring the home’s square footage and estimating the moisture load generated by occupants, activities, and building leakage.
Calculate conditioned area floor space, note ceiling heights and finished basements. Tally occupant count, laundry, cooking frequency, and indoor plants.
Assess air infiltration and known leaks. Combine area and moisture sources to inform required dehumidification capacity.
Selecting capacity (pints/day) for climate zones
With square footage and moisture sources established, the next step is to match dehumidifier capacity—expressed in pints per day—to the home’s climate zone and calculated moisture load.
Cooler, drier regions require lower pint ratings; humid, warm climates need higher capacities. Reference local design humidity and seasonal conditions, then select a unit whose continuous extraction rate meets peak daily moisture gain with modest safety margin.
Matching unit capacity to HVAC airflow and CFM
Integrate the chosen dehumidifier into the HVAC system by matching its capacity to the system’s airflow (CFM) so the unit can treat the designated volume of conditioned air without causing pressure imbalance or bypassing treated air.
Determine required CFM from home volume and ventilation rates, then select a dehumidifier whose rated airflow aligns.
Verify coil and duct compatibility, fan curves, and static pressure to guarantee balanced operation.
Oversizing and undersizing risks
Choosing the correct dehumidifier size is critical because both oversized and undersized units create distinct performance, comfort, and efficiency problems.
Oversized units cycle short, waste energy, and fail to remove sufficient moisture during long-term loads, causing temperature swings and mold risk.
Undersized units run continuously, wear prematurely, and cannot maintain set humidity, reducing comfort and increasing operating costs.
Energy Use and Operating Costs
Adding a dehumidifier changes HVAC runtime and can either increase or optimize overall system efficiency depending on installation and controls.
Estimated energy use varies by type and size—examples in the following section translate typical wattage into monthly cost at common electricity rates.
Attention to energy-saving features such as variable-speed compressors, desiccant options, and smart controls can greatly reduce operating expenses.
How dehumidifiers affect HVAC runtime and efficiency
A dehumidifier alters HVAC runtime and efficiency by removing moisture that would otherwise require the air conditioner to run longer.
Because dehumidification reduces latent load, the system may cycle differently—shorter cooling runs with supplemental dehumidifier operation or longer continuous operation depending on configuration—leading to measurable changes in energy use and operating costs.
Proper integration shifts sensible/latent balance, affects compressor cycling, blower use, and overall system COP.
Estimated energy consumption and monthly cost examples
With changes in runtime and the balance between sensible and latent loads established, estimating the dehumidifier’s energy consumption and monthly operating cost becomes a practical next step. Typical calculations multiply unit wattage by hours of operation and local kWh rates. Example estimates:
| Scenario | Power (W) | Monthly Cost ($) |
|---|---|---|
| Low use | 300 | 12 |
| Moderate | 600 | 24 |
| High | 1200 | 48 |
Energy-saving features to look for (variable-speed, desiccant, controls)
Consider energy-saving features carefully, since they directly reduce runtime and cost while maintaining comfort.
Variable-speed compressors and fans modulate output to match load, lowering power draw.
Desiccant systems efficiently remove moisture at low temperatures with less refrigerant cycling.
Smart controls, humidity sensors, and integration with HVAC thermostats optimize cycles, enable scheduling, and prevent over-dehumidification for consistent savings and comfort.
Common Problems and How to Fix Them
Common problems after adding a dehumidifier to an HVAC system include inadequate humidity removal, increased static pressure with reduced airflow, condensate leaks or clogged drains, electrical trips or control conflicts with the thermostat, and excess noise or vibration.
Each issue has common causes—sizing or installation errors, improper ductwork or drain routing, wiring and control mismatches, or mounting problems—that guide straightforward fixes.
The following section outlines diagnostic steps and practical remedies for each problem.
Poor dehumidification or high indoor humidity
Diagnosing poor dehumidification begins by measuring indoor relative humidity and comparing it to the thermostat setpoint and outdoor conditions; persistent levels above 50–60% indicate a system or installation issue.
Common causes include incorrect humidistat wiring, improper drain routing, undersized dehumidifier, bypassing conditioned air, or refrigerant problems.
Remedies: verify sensor placement, correct wiring, guarantee proper condensate drainage, confirm unit sizing, and call a qualified technician for refrigerant or control faults.
Increased static pressure and reduced airflow
Increased static pressure in an HVAC system occurs when added resistance—often from a poorly sized or installed dehumidifier, clogged filters, closed dampers, or constricted ductwork—reduces airflow and stresses the fan and heat-exchange components.
Sustained high pressure lowers system efficiency, raises energy use, shortens equipment life, and can cause uneven temperatures.
Remedies include correct dehumidifier sizing, improved duct design, filter maintenance, and verifying damper positions.
Condensate leaks and drain clogs
When airflow or pressure patterns are altered by adding a dehumidifier, condensate management can become a separate concern: improper installation, blocked condensate lines, or misaligned pans can lead to leaks or backups that damage ceilings, insulation, and electronics.
Routine inspection, pitched drain lines, accessible cleanouts, and correctly seated drip pans prevent clogs. Promptly clear algae, install traps or float switches, and verify gravity drainage.
Electrical tripping and control conflicts with thermostat
Because a dehumidifier interfaces with HVAC power and control circuits, it can cause breakers to trip or create conflicts with the thermostat if wiring, loads, or control logic are incompatible.
Symptoms include nuisance tripping, compressor cycling, or thermostat ignoring humidity calls.
Fixes: verify dedicated circuit capacity, correct wiring per manufacturer, install isolation relay or low-voltage sequencer, and program thermostat/dehumidistat coordination.
Noise and vibration issues
Addressing noise and vibration starts with identifying their source—loose mounting, unbalanced fans or pumps, resonance from duct connections, or worn compressor mounts—since each cause requires a different remedy.
Once located, tighten or replace mounts, balance and lubricate fans, add vibration isolators, dampen ducts with flexible connectors or acoustic liner, and replace worn compressor mounts.
Regular inspections prevent recurrence.
Maintenance and Long-Term Care
Regular maintenance keeps a whole-home dehumidifier running efficiently and prevents moisture problems.
Technicians or homeowners should follow a schedule for filter and coil cleaning, clear and inspect the condensate drain and trap, and perform seasonal checks for pre-winter shutdown and startup.
Attention to persistent noise, reduced moisture removal, leaks, or frequent cycling indicates the unit may need repair or replacement.
Routine filter and coil cleaning schedule
Establishing a routine filter and coil cleaning schedule guarantees a whole-house dehumidifier and the HVAC system operate efficiently and reliably.
Replace or clean air filters every 1–3 months depending on usage and indoor air quality.
Inspect evaporator and condenser coils biannually; clean with manufacturer-approved brushes and coil cleaner to maintain airflow and heat exchange.
Record dates and observations for consistent maintenance.
Inspecting and clearing condensate drain and trap
After maintaining filters and coils, attention should shift to the condensate drain and trap, components that remove moisture collected by the dehumidifier and HVAC system.
Inspect for blockages, algae, or mineral buildup monthly.
Flush the drain with vinegar or a manufacturer-recommended cleaner, clear clogs with a wet/dry vacuum, and verify proper slope and secure connections to prevent backups and leaks.
Seasonal checks and pre-winter shutdown/startup
Seasonal checks and a clear pre-winter shutdown/startup routine guarantee the dehumidifier integrated with the HVAC system operates reliably and avoids freeze damage or moisture-related issues during colder months.
Technicians should drain and dry coils, inspect seals and insulation, disconnect or winterize external lines, verify control settings for low-temperature operation, and schedule post-winter startup testing to confirm condensate management and proper humidity control.
Signs a dehumidifier needs repair or replacement
Several clear indicators signal when a dehumidifier integrated with an HVAC system requires repair or replacement.
Persistent high indoor humidity despite operation, unusual noises, frequent cycling, water leaks, ice buildup on coils, error codes, or excessive energy use all point to malfunction.
Reduced airflow, visible corrosion, or repeated repairs justify replacement rather than continued fixes to restore reliable, efficient dehumidification.
Comparison of Popular Brands and Models
A concise comparison highlights a feature matrix for leading whole-house dehumidifiers, listing capacity, airflow, and controls side-by-side.
The discussion then identifies top picks by budget, long-term efficiency, and suitability for retrofit installations.
Finally, smart-integration options and compatible HVAC control schemes are summarized to guide selection.
Feature comparison matrix for leading whole-house units
This section presents a concise feature comparison matrix that juxtaposes leading whole-house dehumidifier models across key specifications—capacity, airflow, energy efficiency, installation type, controls, and warranty—so readers can quickly assess suitability for different home sizes and HVAC systems. A compact table highlights tradeoffs between capacity and efficiency for quick reference.
| Capacity vs Efficiency | Note |
|---|---|
| High capacity | Larger homes |
| High efficiency | Lower operating cost |
Best picks by budget, efficiency, and smart integration
For homeowners prioritizing cost, performance, or smart-home compatibility, the best whole-house dehumidifiers group into clear categories: budget-friendly units that deliver reliable moisture control with basic mechanical controls; high-efficiency models that balance greater moisture removal and lower energy consumption for larger homes; and smart-integrated systems that offer remote monitoring, app-based scheduling, and seamless HVAC communication.
- Entry-level: affordable, straightforward installation, manual controls
- Mid-range efficient: higher pints/day, ENERGY STAR rated
- Premium smart: Wi‑Fi, app alerts, HVAC integration
- Commercial-grade: highest capacity, for large or humid climates
Permits, Codes, and Warranty Considerations
Before installing a dehumidifier, the homeowner should confirm local permit and code requirements that may affect placement, electrical work, or drainage.
Manufacturer warranties and specified installation procedures must be reviewed to guarantee coverage is not voided by improper work.
It is also important to check how adding a dehumidifier could affect the existing HVAC system warranty and whether professional installation is required to preserve both warranties.
Local code and permit issues to verify before installation
Why check local codes and permits prior to installation?
Confirm zoning, electrical, plumbing, and mechanical permit requirements; verify licensed contractor or homeowner-permit rules; guarantee compliance with ventilation, condensate disposal, and wildfire or flood zone restrictions.
Check inspection schedules, fee structures, and required documentation.
Address local energy-efficiency mandates and rebates tied to permitted installations to avoid fines and insurance complications.
Manufacturer warranty coverage and installation requirements
Although warranty protection can vary widely between brands and models, manufacturers typically condition coverage on compliant installation and adherence to specified service schedules.
Warranties often require certified installers, correct electrical and drain hookups, and proof of purchase and installation.
Failure to follow installation instructions, use unauthorized parts, or skip maintenance can void coverage.
Always register the unit and retain documentation for claims.
Impact on HVAC system warranty
Manufacturer warranty stipulations for a dehumidifier can directly affect the broader HVAC system warranty when the components interact or share utilities.
Installers should follow manufacturer instructions, use authorized technicians, and retain proof of compliance.
Improper wiring, refrigerant handling, or drain modifications can void HVAC or dehumidifier warranties.
Verify overlapping coverage, register equipment, and consult warranty documents before installation to prevent denied claims.
Practical Tips for Maximizing Performance
The section outlines practical steps to keep whole-home humidity within recommended setpoints for comfort and health, typically 30–50% relative humidity.
It recommends seasonal strategies—such as tempering setpoints and using exhaust fans—to reduce the dehumidifier’s workload.
It also covers coordinating dehumidification with ventilation and indoor air quality measures and flags when HVAC upgrades may be warranted alongside a dehumidifier installation.
Optimal humidity setpoints for comfort and health
When aiming for comfort and health, maintaining indoor relative humidity between about 40% and 50% typically balances occupant comfort, mold prevention, and respiratory health.
Lower levels can dry mucous membranes and increase virus survival, while higher levels promote dust mites, mold growth, and allergic symptoms.
Set dehumidifier controls to target that range, monitor with a hygrometer, and adjust modestly for occupant sensitivity or specific medical needs.
Seasonal strategies to reduce load on dehumidifier
Seasonal adjustments can substantially reduce the workload on a dehumidifier by addressing predictable sources of moisture.
Implementing targeted measures during warm, humid months and cooler, damp periods preserves indoor comfort while lowering energy use and wear on equipment.
In summer, use exhaust fans, shade windows, and limit indoor drying.
In cooler months, seal leaks, insulate cold surfaces, and control basement humidity with spot dehumidifiers.
Coordinating dehumidification with ventilation and IAQ strategies
Balance dehumidification, ventilation, and other indoor air quality (IAQ) measures to prevent moisture control from undermining fresh-air delivery or energy goals.
Specify control logic so ventilation runs when outdoor humidity is favorable, and allow dehumidifier priority during humid conditions.
Integrate sensors for RH, CO2, and VOCs.
Use setback schedules, demand-controlled ventilation, and regular filter maintenance to optimize comfort, health, and efficiency.
When to upgrade the HVAC system alongside dehumidifier installation
After coordinating dehumidification with ventilation and IAQ controls, owners should assess whether the existing HVAC can support added moisture management without strain.
Upgrade considerations include insufficient airflow, mismatched capacity, frequent cycling, aging compressors, and inadequate condensate handling.
When ductwork, blower speed, or refrigerant capacity limit performance, plan simultaneous upgrades to guarantee efficiency, avoid short cycling, and achieve target humidity reliably.
Real-world Scenarios and Case Examples
Typical installations in basements and crawlspaces often prioritize localized drainage and higher-capacity units to address persistent moisture.
In humid climates, whole-house dehumidifiers and coordinated HVAC controls are recommended, while mixed climates may benefit from seasonal strategies and variable-speed equipment.
Retrofitting older homes commonly requires evaluating ductwork, electrical capacity, and space constraints to select feasible solutions.
Basements and crawlspaces: common solutions
When humidity infiltrates basements and crawlspaces, it creates persistent problems—mold growth, musty odors, and structural decay—that often require tailored dehumidification strategies.
Common solutions include standalone dehumidifiers sized to the space, HVAC-integrated whole-house dehumidifiers, and targeted measures such as improving ventilation, sealing vapor barriers, and addressing groundwater or drainage issues.
Professionals recommend monitoring humidity, selecting appropriate capacity, and ensuring proper condensate management.
Humid climates vs. mixed climates: tailored approaches
Because climate patterns dictate both the scale and timing of moisture management needs, humid and mixed climates require different dehumidification strategies.
In persistently humid regions, continuous whole-house or HVAC-integrated dehumidification with high-capacity equipment and robust condensate handling is often essential, while in mixed climates intermittent control combined with ventilation, smart controls, and seasonal adjustment can balance moisture control with energy efficiency.
Homes in coastal humid zones need oversizing and corrosion-resistant components; mixed-climate homes prioritize adaptive setpoints, economizers, and localized units for problem areas.
Retrofitting older homes: challenges and solutions
Many older homes present a mix of structural limitations, outdated HVAC systems, and moisture pathways that complicate adding a dehumidifier; addressing these requires diagnosing airflow imbalances, evaluating ductwork capacity, and locating reliable condensate disposal.
Retrofits often need zone-minded equipment, duct sealing or enlargement, electrical upgrades, and sump or drain routing.
Prioritizing insulation, vapor barriers, and targeted dehumidifiers minimizes disruption and improves results.
Final Checklist Before You Install
Before installation, a concise pre-installation checklist guarantees the homeowner has verified duct compatibility, electrical supply, and drain placement.
After the unit is in place, a post-installation verification checklist confirms airflow balance, control integration, and proper condensation removal.
These checks minimize surprises and guarantee reliable dehumidifier performance.
Pre-installation checklist for homeowners
Confirm all measurements, clearances, and system details are correct before initiating installation.
The homeowner reviews compatibility, obtains permits if required, schedules professional support, and confirms power and drain availability.
Prepare the space, protect finishes, and gather required tools and parts.
- Verify unit size and duct/coil fit
- Confirm electrical capacity and breaker access
- Inspect drain route and trap
- Secure installation window and permits
Post-installation verification checklist
Once the dehumidifier and all connections are in place, a final verification guarantees safe, effective operation and prevents costly rework.
Technicians check system integration, electrical safety, drainage, and controls. Confirm performance against design targets and document findings for warranty and homeowner records.
- Verify electrical connections and breaker sizing
- Test condensate drain for leaks and slope
- Validate control communication and setpoints
- Measure humidity reduction and airflow
Conclusion
Adding a dehumidifier to an HVAC system can yield comfort and efficiency gains when chosen and installed correctly. One who measures twice and cuts once avoids costly mistakes; careful compatibility checks, professional installation, and attention to permits protect equipment and warranties. With sensible budgeting and routine maintenance, the investment pays dividends in improved air quality, reduced mold risk, and extended HVAC life, making the home healthier and systems more reliable over the long term.