
How to Drill a Hole in a Stainless Steel Sink Without Cracking It
To drill a hole in a stainless steel sink without cracking it, use a sharp carbide or cobalt bit and securely clamp the sink to minimize vibration. Back the drilling area with scrap wood for support. Begin by marking and punching a pilot dimple, then tape the surface to protect the finish. Drill slowly with steady pressure, applying coolant to prevent heat buildup. Start with a small bit and gradually increase to larger sizes, and remember to deburr the edges afterward. Always wear proper safety gear for protection. For more detailed tips, tool comparisons, and troubleshooting advice, continue reading.
How to Drill a Hole in a Stainless Steel Sink Without Cracking It
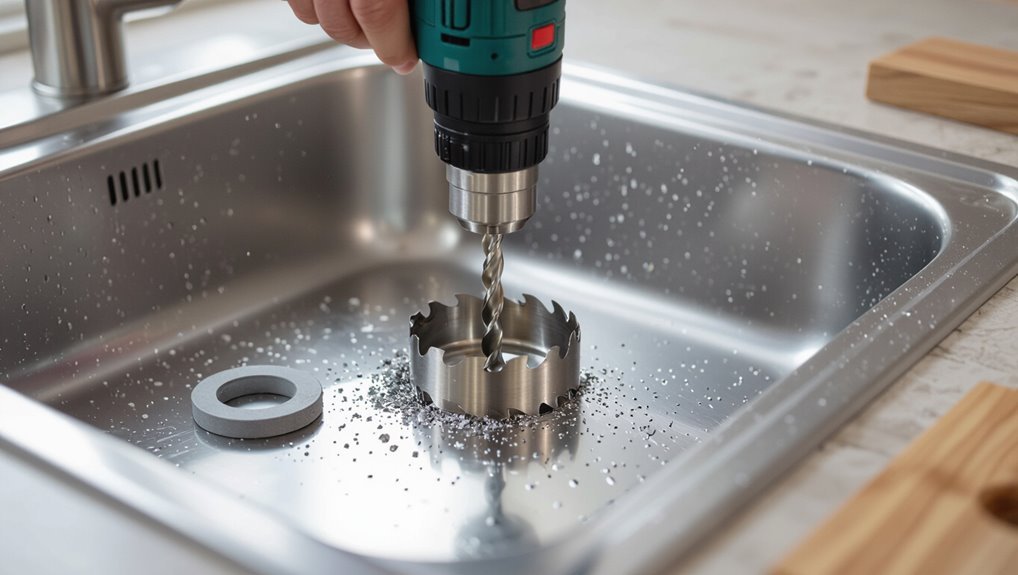
A concise overview emphasizes the safest approach: slow speed, steady pressure, and proper support to prevent cracking.
Essential materials and tools include a center punch, masking tape, lubricant, a carbide or cobalt-tipped drill bit designed for stainless steel, and clamps or backing scrap to reinforce the sink.
Following these precautions and using the right equipment minimizes heat, vibration, and stress that cause fractures.
Quick overview and safest approach
Several simple precautions dramatically reduce the risk of cracking when drilling a stainless steel sink.
The safest approach uses steady low-speed drilling, firm support beneath the sink, and marked center points.
Employ progressive drilling—pilot hole then final size—to control heat and stress.
Consistent lubrication and avoiding sudden pressure changes minimize metal fatigue.
This concise method outlines how to drill a hole in stainless steel sink safely.
Materials and tools required for a clean, crack-free hole
Building on the low-speed, well-supported method outlined earlier, gathering the right materials and tools guarantees the hole is clean and crack-free.
Essential items, used correctly, prevent chipping and stress.
- Carbide or cobalt drill bits and a pilot bit: precision and heat resistance.
- Masking tape and lubricant: stabilization and cooling.
- Clamps, scrap wood, and safety gear: support, backing, and protection.
Understanding stainless steel sinks and why cracking happens
Stainless steel sinks vary by gauge and construction, from thin laminate-backed models to heavier commercial-grade bowls. Material thickness strongly influences how they respond to drilling.
Cracking, chipping, and warping typically result from improper bit choice, excessive speed or pressure, and lack of support beneath the work area.
For thin or high-end sinks, a professional with the right tools is often recommended, while thicker, standard sinks can usually tolerate careful DIY techniques.
Types and thicknesses of stainless steel sinks
Sink construction varies by gauge and form, with most residential models made from 18- or 20-gauge steel and lighter commercial pieces as thin as 22- or 24-gauge.
Thicker gauges (16–18) resist denting and better tolerate modification; thinner gauges reduce weight and cost but flex more.
Single-bowl, double-bowl, and undermount or top-mount styles also influence available material thickness.
Common causes of cracking, warping, and chipping during drilling
Drilling into stainless steel can produce cracking, warping, or chipping when heat, stress concentration, or improper support combine with the metal’s properties; these failures typically stem from excessive drilling speed, dull or wrong drill bits, inadequate backing, or thin, uneven gauge areas that magnify localized forces.
Additional contributors include excessive feed pressure, lack of coolant, tapping vibrations, and pre-existing scratches or work-hardened zones.
When to hire a professional vs. DIY
Decide between hiring a professional and attempting a DIY job by weighing the material’s thickness, the complexity of the hole location, and the homeowner’s tool skill level; thin-gauge or curved areas, proximity to seams, or finishes that must remain flawless increase the risk of cracking and favor professional service.
A pro handles hard grades, templates, specialized bits, and coolant use; DIY suits thick, flat sinks, accessible spots, and basic tools.
Preparing the sink and workspace
Before drilling, precise measurements and a clearly marked center guarantee the hole aligns with fixtures and plumbing.
The sink should be firmly supported and clamped to minimize movement and vibration during drilling.
Protective measures—such as applying tape over the mark and placing padding under the sink—prevent scratches and distribute pressure.
How to measure and mark the exact hole location
One clear measurement and a careful mark guarantee the new hole aligns with plumbing and fixtures; the installer should verify distances from the sink lip, basin edges, and existing holes, using a tape measure and straightedge to transfer dimensions.
Then confirm placement by dry-fitting the fixture or template before scribing the final center point.
Use a fine-tip marker or center punch, double-check symmetry, and measure diagonals.
Securing and supporting the sink to prevent vibration
Clamp the sink securely to the countertop and brace the underside to eliminate movement and dampen vibration during drilling.
Use adjustable clamps positioned away from the drilling area, and support the bowl with a wooden block or foam pad under the sink to distribute pressure.
Verify stability before starting, retighten if necessary, and confirm plumbing and fixtures are clear to prevent accidental stress or shifting.
Surface protection and masking techniques to prevent scratches
Several small precautions considerably reduce the risk of scratching a stainless steel sink during preparation and drilling.
Protective measures include cleaning the surface, applying painter’s tape over the drilling area and surrounding zones, and using a sacrificial plywood or rubber pad beneath the sink.
Soft cloths shield edges; masking film prevents adhesive residue.
Tape outlines drilling marks to guide bits and limit tool contact with the finish.
Choosing the right drill bits and hardware
Choosing the correct drill bits and hardware is essential for clean, safe holes in stainless steel sinks. The text will compare cobalt, titanium-coated, carbide and step bits, explain when to use a hole saw or step bit versus a twist bit, and give recommended drill speeds and torque settings for different sink gauges.
Readers will learn which combination minimizes heat, chatter, and burrs for a professional result.
Best drill bit types for stainless steel (cobalt, titanium-coated, carbide, step bits)
Selecting the correct drill bit is critical for clean, efficient holes in stainless steel because the alloy’s hardness and work-hardening tendencies demand specific materials and geometries.
Cobalt bits resist heat and stay sharp for thick gauge. Titanium-coated bits suit lighter tasks but wear faster. Carbide excels for heavy industrial cutting.
Step bits offer progressive sizing and deburring for thin sink metal with controlled feed.
When to use a hole saw or step bit vs. twist bit
Deciding between a hole saw, step bit, or twist bit depends primarily on hole size, material thickness, and required edge finish.
Use a step bit for multiple diameters, thin gauge, and cleaner countersunk edges.
Choose a hole saw for larger diameter holes, thicker rims, or inserts.
Opt for a cobalt or carbide twist bit for pilot holes, tight spots, or small precise openings.
Recommended drill speeds and torque settings for different sink gauges
After outlining which bit type suits a given hole size and access, attention turns to matching drill speed and torque to sink gauge and bit composition.
Use higher speeds (2000–3000 RPM) with light torque for thin 18–20 gauge stainless and small HSS or cobalt bits.
For thicker 16–12 gauge, reduce speed to 500–1200 RPM and increase torque; use hole saws or step bits with frequent coolant.
Step-by-step drilling procedure for a stainless steel sink
A clear, methodical sequence guarantees a clean hole without damaging the sink. The basic workflow emphasizes preparation, controlled drilling, and finishing to produce a durable, burr-free edge.
Key actions include:
- Make a pilot indent, back the work with support, and open a small pilot hole.
- Progressively enlarge the hole while keeping steady pressure, correct speed, and coolant.
- Deburr and file the edge for a smooth, finished opening.
Step 1: Prepare the marked spot with a pilot indent or punch
Begin by creating a small, accurate indentation at the marked spot using a center punch or sharp nail and a light hammer tap.
This pilot dimple prevents the drill bit from wandering, improving accuracy and reducing slippage.
Use steady, controlled taps; avoid over‑driving which can deform thin stainless steel.
Inspect the indent for depth and centering before proceeding to drilling.
Step 2: Secure a backing support or sacrificial board
With the pilot indent in place to keep the bit centered, the next step is to support the sink from beneath.
A sacrificial board or dense foam pad is pressed under the marked area to absorb pressure and prevent flexing.
Clamp the support to hold it steady, aligning it with the indent.
Proper backing reduces vibration and minimizes the risk of denting or cracking the stainless steel.
Step 3: Start with a small pilot hole and progressively enlarge
Start the hole using a small-diameter carbide or cobalt-tipped drill bit to maintain control and reduce heat buildup.
The operator drills a shallow pilot hole first, then swaps to incrementally larger bits, advancing in small size steps to avoid stressing the metal.
Each enlargement follows the original centerline, preserving alignment and preventing chatter until the target diameter is reached.
Step 4: Maintain steady pressure, proper speed, and cooling/lubrication
Apply consistent, moderate pressure while running the drill at an appropriate speed and using coolant or lubricant to prevent overheating and bit dulling.
The operator should avoid forcing the bit, let cutting flutes remove chips, and pause periodically to reapply lubricant.
Adjust RPM for bit size and steel thickness, watching for discoloration or smoke; slow down if binding occurs to preserve bit life and hole quality.
Step 5: Deburr, file, and finish the hole for a clean edge
Clean up the newly drilled opening promptly to remove burrs and sharp edges that can snag, corrode, or cut; this guarantees a professional appearance and a safe surface for fittings.
Use a deburring tool or flat file to chamfer edges, working evenly around the perimeter.
Finish with fine-grit abrasive or emery cloth, remove residue, and inspect for smoothness before installing gaskets or fixtures.
Lubrication, cooling, and vibration control techniques
Effective lubrication and cooling preserve drill bit life and edge quality; recommended choices include cutting oil, light machine oil, or a water-soluble coolant for prolonged cutting.
Lubricant should be applied to the drill point and feed regularly, with brief pauses to reapply and allow the metal to cool on thicker stock.
To minimize vibration and overheating, use sharp bits at moderate speeds, steady clamping, and backing support or anti-vibration pads.
Best lubricants and coolants for metal drilling
Selecting the right lubricant or coolant is essential for drilling stainless steel because it reduces heat, minimizes work hardening, and prolongs bit life.
Recommended options include cutting oil, soluble oil, and high-performance synthetic coolants for sustained drills.
For hand-held work, light cutting oil or aerosol lubricants offer control.
Avoid water alone; choose products labeled for stainless to prevent staining and corrosion.
How to apply lubrication and when to pause for cooling
Apply lubricant directly to the drill point and cutting edge before starting, then maintain a steady supply during drilling to flush chips and carry heat away.
Pause every 15–30 seconds under moderate pressure to allow coolant penetration and dissipate heat.
Wipe chips from the hole, reapply lubricant, inspect the bit for glazing, and resume at controlled speed until the hole is complete.
Methods to minimize vibration and overheat
Having established routine lubrication and periodic cooling pauses, attention turns to reducing vibration and preventing overheating through specific control techniques.
Stabilize the sink with clamps and foam pads, use a sacrificial backing board, and employ low-speed, high-torque drilling.
Apply steady pressure, intermittent pecks to clear swarf, continue coolant flow, and monitor temperature.
Replace dull bits promptly to avoid excess heat.
Safety precautions and protective gear
Before starting the hole, wear proper eye protection, cut-resistant gloves, and a mask or respirator to guard against metal dust and flying shards.
Handle sharp edges and metal shavings with pliers or a brush and dispose of them safely to prevent cuts.
Make certain power tools are grounded or double-insulated and keep water and plumbing connections isolated to avoid electrical hazards.
Eye, hand, and respiratory protection recommendations
When drilling a stainless steel sink, wear ANSI- or CE-rated safety glasses with side protection, cut-resistant work gloves, and an N95 or P100 respirator to guard against metal shards, sharp edges, and fine particulate; make certain gloves fit snugly for steady grip without compromising trigger control.
Guarantee ear protection for prolonged drilling. Choose gloves compatible with hand tools, and replace damaged PPE promptly to maintain protection.
Safe handling of sharp edges and metal shavings
After putting on eye, hand, and respiratory protection, attention should shift to managing the sharp edges and metal shavings that result from drilling.
Use pliers or a magnet-equipped pickup tool to remove swarf; avoid bare fingers.
Deburr cut edges with a file or deburring tool, then wipe the area with a damp cloth.
Dispose of metal fragments in a sealed container.
Electrical safety when drilling near plumbing and fixtures
Exercise caution around electrical sources: drilling near plumbing and fixtures can risk contact with concealed wiring, energized metal pipes, or nearby outlets.
Before drilling, shut power at the breaker when circuits could be affected. Use a nonconductive drill bit holder or insulated gloves, keep water away, verify with a voltage detector, and position a GFCI-protected extension cord.
Consult an electrician for uncertain situations.
Troubleshooting common problems
If the drill bit slips or skates on the stainless surface, the guide recommends stopping and re-marking the spot with a center punch or using a drill guide to restore control.
Burrs, jagged edges, and small deformations should be removed with a deburring tool, file, or fine-grit sanding followed by polishing to prevent leaks and cuts.
If a crack appears during drilling, the guide advises evaluating the damage immediately and considering patching, welding, or sink replacement depending on crack size and location.
What to do if the drill bit slips or skates on the surface
When a drill bit slips or “skates” across a stainless steel sink, the result is a scratched finish, a ruined pilot hole, and increased risk of slipping injury.
Addressing the issue quickly preserves the workpiece and improves accuracy. Pause, clamp a sacrificial piece of wood over the mark, use a center punch or nail to create a divot, then resume with steady, low speed and firm downward pressure.
Fixing burrs, jagged edges, or deformations
A slipped bit can leave more than a scratch — it often produces burrs, jagged edges, or slight deformations around the hole that interfere with fitting fixtures and can cut hands.
Remove sharp edges with a deburring tool or a round file, working gently.
Finish with fine-grit sandpaper and a light touch of oil to smooth and prevent corrosion; test fit before final assembly.
Repair options if a crack appears during drilling
Stop drilling immediately and assess the damage: small surface cracks, hairline fractures, and through-cracks require different responses.
For minor surface cracks, sand smooth and apply corrosion-resistant epoxy or stainless steel filler.
Hairline fractures may need metal stitching or welding by a professional.
Through-cracks typically necessitate panel replacement or cutting out and welding a patch to restore strength and watertightness.
Comparison of drilling methods and tools for different sink scenarios
Different sink thicknesses call for specific bits and techniques to guarantee a clean hole without warping or cracking. The table below highlights the recommended approach for thin, medium, and thick/farmhouse sinks; further details follow in subsequent sections. Practitioners should match drill speed, bit type, and clamping methods to the sink gauge to minimize mistakes.
| Sink scenario | Recommended approach |
|---|---|
| Thin (gauge 22–24) | Use high-speed steel or step bits at low speed with backing support |
| Medium (gauge 18–21) | Use cobalt or titanium-coated bits and pilot holes; moderate speed and cooling |
| Thick/farmhouse | Use carbide-tipped bits or hole saws with arbor, low speed, steady pressure, and coolant |
Recommended approach for thin (gauge 22 to 24) sinks
When working with thin stainless steel sinks (gauge 22–24), the recommended approach prioritizes control and minimal deformation: slower drill speeds, firm backing support, and bits designed for sheet metal produce the cleanest holes with the least tear-out.
Use a sacrificial backing plate, clamp securely, pilot with a center punch, and employ sharp cobalt or carbide-tipped sheet-metal bits.
Lubricate lightly and progress steadily to avoid warping.
Recommended approach for medium (gauge 18 to 21) sinks
Moving from thin-gauge sinks, medium-thickness stainless (gauge 18–21) tolerates more aggressive methods but still benefits from controlled technique to prevent heat buildup and distortion.
Use high-quality cobalt or carbide-tipped bits, a variable-speed drill at moderate RPM, steady firm pressure, and frequent lubrication with cutting oil.
Pilot holes and stepped bits improve accuracy; clamp workpiece and cool periodically to avoid temper changes.
Recommended approach for thick or farmhouse-style sinks
For thick or farmhouse-style stainless sinks, which often exceed gauge 16 and may include reinforced rims or fireclay interfaces, drilling demands heavier-duty tools and slower, controlled technique to avoid cracking or workhardening.
Use carbide-tipped step bits, cobalt or carbide twist bits in a drill press or low-speed corded drill, abundant lubrication, incremental pilot-to-final sizes, firm clamping, and intermittent cooling to minimize heat and stress.
Additional tips to ensure a professional-looking finish
Careful attention to hole diameter, edge finishing, and protective measures guarantees fittings seat correctly and look professional.
After drilling, the sink should be cleaned of metal filings, edges smoothed, and coated or sealed as recommended to prevent corrosion.
Regular inspection and simple preventive maintenance will help avoid leaks, scratches, and future damage.
Matching hole size to fittings and hardware
Several common fittings—faucets, soap dispensers, and strainers—require precise hole diameters to seat properly and seal against the sink surface.
Measure fitting shafts and mounting plates, consult manufacturer templates, and mark centerlines.
Use the correct drill bit or hole saw size, test-fit hardware before final countersinking, and deburr edges.
Allow minimal tolerance for gaskets and silicone to guarantee a tight, professional installation.
Cleaning and protecting the sink after drilling
Wipe away metal shavings immediately with a soft, lint-free cloth to prevent scratching and corrosion.
Then rinse thoroughly with warm water to remove fine debris and grinding residue.
Dry the area completely.
Lightly polish with a stainless steel cleaner to blend the finish.
Then apply a thin coat of food-safe mineral oil or silicone barrier around the hole to seal edges and discourage water ingress.
Preventive maintenance to avoid future damage
After the hole is finished and sealed, routine preventive maintenance preserves both appearance and function; regular inspections for loose fittings, chips in the sealant, or surface scratches allow prompt correction before corrosion or leaks develop.
Periodic cleaning with nonabrasive cleaners, reapplying silicone where gaps form, tightening hardware, and using sink mats protect the area.
Record maintenance dates to track wear and plan timely repairs.
Quick checklist before you start
Before drilling, confirm that the sink material is stainless steel (not a thin laminate or coated metal), the chosen drill bit and hole saw are rated for stainless, and the exact hole location is clear of supports, wiring, and plumbing beneath the sink.
A quick checklist guarantees safety and accuracy:
- Verify material and thickness.
- Select appropriate lubricated bits and speeds.
- Protect surrounding surfaces and secure the sink.
Conclusion
Drilling a stainless steel sink need not be intimidating; with correct prep, proper bits, and steady technique, cracking is rare. Curiously, stainless sinks are typically 18–22 gauge, and sinks thinner than 20 gauge show a threefold increase in distortion and edge burrs when drilled without backing. Following the outlined steps—secure backing, center-punch, use lubricant, low speed, and progressive bit sizes—yields clean holes and a durable, professional finish.
