How to Get Hair Dye Off a Toilet Seat Quickly and Safely
To quickly and safely remove hair dye from a toilet seat, act fast by blotting up excess dye with paper towels and ventilating the bathroom. First, determine the seat material—plastic, wood, vinyl, or porcelain—and test any cleaner in an inconspicuous area. For fresh stains, rinse with cool water and try mild dish soap, a baking soda paste, or diluted vinegar. For set stains, cautiously use isopropyl alcohol or hydrogen peroxide, avoiding strong abrasives. Be sure to rinse thoroughly and dry the seat afterward. Detailed methods and follow-up steps are provided below for further assistance.
Immediate Safe Actions to Take After Hair Dye Gets on a Toilet Seat
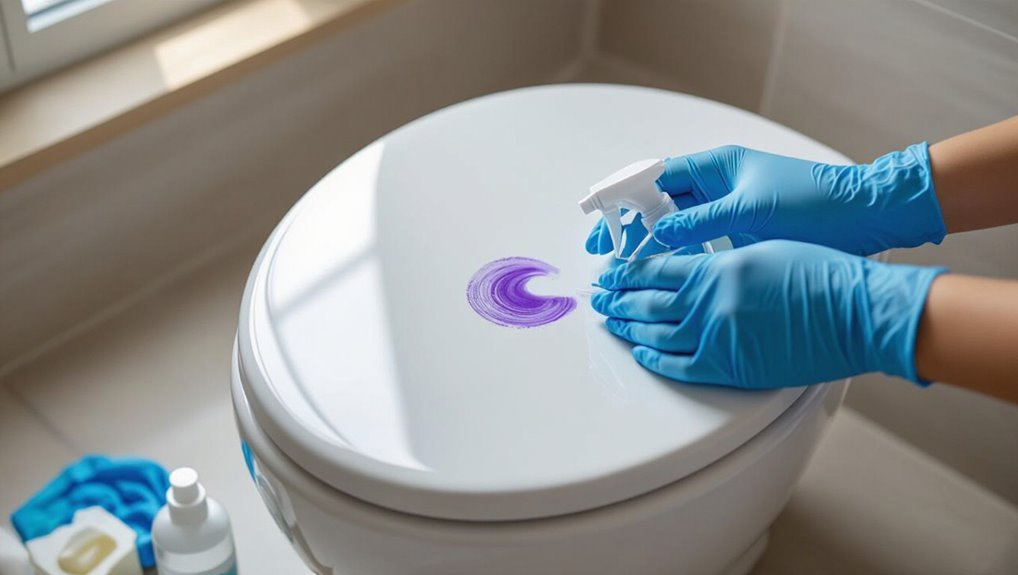
First, the person should identify the type of dye and the toilet seat material to choose an appropriate method.
Next, basic safety steps—wearing gloves, ensuring good ventilation, and testing any cleaner on an inconspicuous spot—should be taken before proceeding.
Finally, a few quick first-aid removal attempts, such as blotting with cold water or using a mild detergent, can be tried immediately.
Assess the stain dye type and seat material
How did the dye get there and what material is being stained are the two facts that determine the safest removal approach.
The cleaner assesses dye type—temporary rinse-out, semi-permanent, or permanent—and seat material—plastic, wood, padded vinyl, or porcelain.
Determining both guides choices and urgency for how to get hair dye off toilet seat, avoiding damage while selecting effective, compatible cleaners.
Safety precautions before cleaning (gloves, ventilation, test spot)
Wear chemical-resistant gloves and guarantee the bathroom is well-ventilated before attempting any stain removal; fumes from cleaners and dye can irritate skin and lungs.
Verify the seat’s finish and choose a mild cleaner. Test the chosen product on an inconspicuous spot, wait the recommended time, and inspect for discoloration or damage.
Keep children and pets away until the area is rinsed and dry.
Quick first-aid removal steps you can try right away
After confirming safety measures and testing a cleaner on an inconspicuous spot, immediate actions can limit staining and surface damage.
Blot excess dye with paper towels without rubbing. Rinse the area with cool water, then apply a mild detergent or baking soda paste briefly.
Gently agitate with a soft cloth, rinse thoroughly, and repeat as needed before trying stronger cleaners.
Step-by-Step Methods to Remove Hair Dye from Different Toilet Seat Materials
The following section outlines concise, step-by-step methods tailored to different toilet seat materials.
It addresses removing fresh dye and treating set or dried stains on both plastic and wooden or painted seats.
Each procedure highlights recommended cleaners, tools, and precautions to protect the seat finish.
Removing fresh dye from plastic toilet seats
Act quickly to prevent fresh hair dye from setting into plastic toilet seats; prompt action increases the chance of complete removal.
Wearing gloves, blot excess dye with paper towels, then apply a mild dish soap solution and gently scrub with a soft cloth.
For stubborn stains, use isopropyl alcohol or non-abrasive cleaner, rinse thoroughly, and dry to inspect; repeat if needed.
Removing fresh dye from wooden or painted toilet seats
Begin by evaluating the finish and any visible dye—solid wood, veneer, or painted surfaces require different care—then gather gloves, soft cloths, a mild cleaner, and a solvent appropriate for the finish.
Test solvent in an inconspicuous spot. Blot fresh dye gently; avoid scrubbing.
Use mild cleaner for sealed wood or a recommended paint-safe solvent for painted seats. Rinse and dry thoroughly.
Removing set or dried dye from plastic seats
Assess plastic toilet seats for surface type and stain age before attempting removal: non-porous molded plastic, thermoplastic overlays, and textured finishes respond differently to solvents and abrasives, so choose methods accordingly and always test a small, hidden area first to avoid damage.
For dried dye, start with mild soap and warm water, then try isopropyl alcohol or baking soda paste; finish with a gentle plastic polish.
Removing set or dried dye from wooden or painted seats
Wooden and painted toilet seats require gentler, targeted approaches because their finishes can absorb dye or react to harsh chemicals.
Choosing the right solvent and technique depends on whether the seat is solid wood with a clear varnish, MDF with a laminate, or a painted surface.
Test hidden area, use mild detergent, rubbing alcohol or baking soda paste for painted/MDF; mineral spirits very sparingly on varnish, then rinse and dry.
Effective Cleaning Agents and How to Use Them Safely
The article summarizes appropriate cleaning agents for removing hair dye from toilet seats, starting with mild household options like dish soap, baking soda, and white vinegar.
It then outlines when to escalate to stronger stain removers—rubbing alcohol, hydrogen peroxide, or acetone-based nail polish remover—and recommends toilet-safe commercial products.
Finally, it warns against tools and chemicals that can cause damage, such as abrasive pads and bleach on sensitive finishes.
Mild household options (dish soap, baking soda, white vinegar)
When fresh dye stains appear, mild household cleaners—dish soap, baking soda, and white vinegar—offer safe, effective first-line treatments that minimize damage to porcelain and finishes.
- Apply dish soap with warm water and a soft cloth, rub gently.
- Make a baking soda paste, test a small area, scrub softly.
- Dab diluted white vinegar, wait briefly, then rinse.
- Dry and inspect; repeat if needed.
Stronger stain removers (rubbing alcohol, hydrogen peroxide, nail polish remover) when to use
Sometimes mild cleaners fail to lift set-in dye, so stronger agents—rubbing alcohol, hydrogen peroxide, and acetone-based nail polish remover—are appropriate next steps. They dissolve pigment more effectively but require careful use to avoid damaging finishes, inhalation, or skin irritation.
Test an inconspicuous area, ventilate, wear gloves, apply briefly with a cloth, blot rather than rub, then rinse thoroughly to neutralize residues.
Commercial cleaners and toilet-safe products to consider
Several commercial cleaners formulated for bathroom surfaces can remove hair dye from toilet seats while minimizing risk to the finish and plumbing.
Recommended options and usage notes:
- Mild bathroom spray — test a hidden area first.
- Non-abrasive gel cleaner — apply, wait, wipe gently.
- Oxidizing stain remover (toilet-safe) — follow directions and rinse.
- Enzymatic cleaner — effective on organic residue; rinse thoroughly afterward.
Tools and materials to avoid (abrasive pads, bleach on sensitive finishes)
Avoid abrasive pads, harsh powders, and untested bleach on delicate finishes, as these can quickly scratch, dull, or chemically damage a toilet seat while often failing to remove dye completely.
Solvents like acetone and strong alkalis should be avoided on painted, wood, or vinyl seats.
Instead, test mild cleaners on an inconspicuous area and use soft cloths, sponge, or nonabrasive nylon brushes.
Stepwise Treatment Plans (How-To Sequences)
The article outlines three concise treatment plans tailored to timing and seat material: a quick removal plan for fresh stains (5–10 minutes), an intensive plan for stubborn or dried stains (30–60 minutes), and a weekend deep-clean method for delicate seats.
Each plan lists tools, cleaners, and step-by-step actions to maximize stain lift while protecting finishes. Readers are guided to choose the appropriate sequence based on stain age and seat sensitivity.
Quick removal plan for fresh stains (5 to 10 minutes)
Act quickly to prevent dye from setting: within five to ten minutes of a spill, a targeted sequence of simple steps can remove most color without damaging the seat.
Blot excess with a clean cloth, rinse pale dye with cool water, apply mild dish soap or diluted hydrogen peroxide briefly, gently scrub with a soft cloth, then rinse and dry.
Repeat once if needed.
Intensive removal plan for stubborn/dried stains (30 to 60 minutes)
Begin by assembling materials—gloves, a soft sponge, a non-abrasive scrub pad, white vinegar, baking soda, rubbing alcohol, a plastic scraper, and a clean microfiber cloth—so the process proceeds without interruption.
Apply vinegar to stain, sprinkle baking soda, let fizz 10–15 minutes, then gently scrub.
Use rubbing alcohol for residual dye, scrape cautiously, rinse, and dry.
Repeat once if needed.
Weekend deep-clean method for delicate seats
For a gentle, thorough weekend deep-clean of a delicate toilet seat, gather soft microfiber cloths, a mild pH-neutral cleaner, distilled white vinegar, a spray bottle, a soft-bristled toothbrush, rubber gloves, and a towel to protect surrounding surfaces;
this method prioritizes material-safe agents and slow, controlled steps to prevent damage while removing dye residue.
Test cleaner on an inconspicuous spot, mist vinegar solution, blot gently, agitate with toothbrush, rinse, dry.
Testing, Spot Treatment, and Stain-Fading Techniques
Before applying any cleaner broadly, a small, inconspicuous spot should be tested on the underside or rim to confirm the product and method do not damage the seat finish.
If the finish holds, proceed with gradual stain-lightening—using milder agents first and increasing strength only as needed—to minimize surface harm.
Treatments should be repeated only when progress stalls, allowing the recommended wait time between attempts so the cleaner can work and the seat can be inspected for changes.
How to do a spot test without damaging the seat
A small, inconspicuous spot should be selected for testing to confirm that a chosen cleaner or solvent will not discolor, dull, or crack the toilet seat material; ideal test sites include the underside of the lid or a rear edge that isn’t visible when seated.
Apply a tiny amount of product, wait the manufacturer’s recommended dwell time, blot gently, inspect under good light, then rinse and dry before broader use.
Gradual stain-lightening approaches to protect finishes
Begin with cautious, incremental methods that prioritize the seat’s finish: perform another spot test if needed, then work outward from the stain using gentle, low-abrasion cleaners and short dwell times to avoid sudden chemical or mechanical damage.
Use diluted, pH-neutral cleaners or mild solvent blends applied with soft cloths, blotting gently.
Monitor progress frequently, rinse residues, and stop if finish dulls or softens.
When to repeat treatments and how long to wait between attempts
While monitoring a treated area for signs of lift or finish change, allow at least 15–30 minutes between gentle spot treatments so residues can be rinsed and the surface observed; if no improvement appears after three short cycles (each consisting of a fresh application, brief dwell of the recommended time, and thorough rinse), switch to a milder option or stop to prevent cumulative damage.
When using stronger solvents, extend the wait to several hours and inspect under good light before repeating. After waiting, reassess; if fading is evident, continue cautiously, limiting total attempts and documenting products used to avoid chemical interactions.
Preventing Future Hair Dye Stains on Toilet Seats
Practical at-home habits—wearing gloves, securing the dye station on a stable surface, and keeping towels handy—can greatly reduce the chance of spills reaching the toilet.
Using disposable seat covers, plastic sheeting, or a temporary barrier around the bowl provides immediate protection during application and processing.
When rinsing, positioning the head over a sink or shower and following a quick cleanup routine for drips prevents residual dye from contacting the seat.
Practical habits during at-home dyeing to avoid spills
Set up a dedicated, well-lit workspace and lay down waterproof barriers before any at-home dyeing session to minimize the chance of splashes reaching a toilet seat.
Keep dye, tools, and towels organized on a stable surface; wear gloves and old clothing; mix and apply dye away from plumbing fixtures; clean spills immediately with appropriate cleaners; dispose of waste promptly to prevent accidental contact.
Protective covers and temporary barriers to use while dyeing
After organizing supplies and keeping dye activity away from plumbing fixtures, attention should turn to putting physical protections in place around the bathroom to catch any errant drops.
Use disposable waterproof seat covers, plastic wrap secured with tape, towels beneath stands, and a washable shower curtain or tarp draped over the toilet tank.
Small adhesive mats protect floors; remove coverings promptly after dyeing.
Best positioning and cleanup routine when rinsing dye
Position the toilet lid and seat to create a stable, protected workspace and place a durable absorbent mat in front of the bowl to catch drips during rinsing.
Angle the seat slightly forward, keep a spray bottle, soft cloths, and gloves within reach, and use gentle water flow toward the bowl.
After rinsing, blot edges, launder the mat, and ventilate the bathroom.
Troubleshooting Common Problems and When to Seek Professional Help
If household cleaners and gentle abrasion fail to remove set-in dye, the person should consider stronger chemical or mechanical options while weighing their risks to the seat’s surface.
Persistent stains or damage to the finish may require touch-up, refinishing, or professional repair to restore appearance without worsening discoloration.
When restoration efforts risk structural weakening or aesthetic loss, replacing the toilet seat is often the safer, more cost-effective choice.
Dye that won’t budge advanced options and risks
When stubborn hair dye resists household cleaners, escalate cautiously: assess the seat material, dye type (permanent vs. semi‑permanent), and how long the stain has set before trying stronger remedies or specialist help.
Consider commercial stain removers, color‑safe solvents, or oxygen bleach used per instructions. Test hidden areas, ventilate, wear gloves.
A professional cleaner or refinisher can advise when DIY risks cracking, discoloring, or voiding warranties.
Repairing discoloration or finish damage after cleaning
Although most cleaning attempts restore the surface, stronger solvents and scrubbing can leave visible discoloration, dulling, or small scratches that require targeted repair rather than more cleaning.
Light scratches buff with a nonabrasive polish or plastic-restoration kit; faded areas may benefit from color-matched touch-up paint or a vinyl repair compound.
For extensive finish loss or structural damage, consult a professional refinisher to avoid further harm.
When to replace the toilet seat vs. continuing restoration
After attempting repairs like polishing scratches or applying touch-up compounds, assessment should determine whether further restoration is practical or replacement is warranted.
If stains persist, finish is compromised, structural cracks exist, or hinges are corroded, replacement is safer and more cost-effective.
Minor surface blemishes and intact hardware justify continued restoration.
When in doubt, consult a hardware specialist for inspection and recommendations.
Comparison of Removal Methods by Effectiveness and Safety
A concise comparison of common removal methods helps readers choose by balancing speed, material safety, and required effort. The following quick-reference matrix summarizes typical options and their trade-offs. Use it to match the method to the toilet seat material and available time.
| Method | Notes |
|---|---|
| Baking soda paste | Gentle, moderate effort, slower on stubborn dye |
| Rubbing alcohol | Fast, moderate material risk, low effort |
| Commercial stain remover | Fastest, higher chemical risk, low effort |
Quick-reference matrix: speed, safety for materials, required effort
This quick-reference matrix summarizes common toilet-seat hair-dye removal methods, rating each for speed, material safety (porcelain, plastic, sealants), and required effort to guide selection.
Methods listed:
- water/soap (fast, very safe, low effort);
- baking soda paste (moderate, safe, moderate effort);
- vinegar (moderate, safe to cautious, moderate effort);
- rubbing alcohol (fast, caution on sealants, low effort);
- bleach (fast, risky on plastics/sealants, high caution, moderate effort).
Aftercare: Sanitizing and Restoring Toilet Seat Finish
After the dye and residue are removed, the surface should be disinfected with a cleaner that is effective yet safe for the seat material.
It should be rinsed thoroughly and dried to prevent damage.
For wooden or painted seats, any remaining dullness can be addressed with a gentle polish or a manufacturer‑recommended sealant to restore appearance and protect the finish.
Care should be taken to choose products compatible with the seat to avoid staining, warping, or degrading protective coatings.
Final sanitizing steps safe for cleaned surfaces
Several simple steps guarantee the toilet seat is sanitized and its finish preserved once visible dye is removed; they balance effective disinfection with materials care to avoid discoloration or surface damage.
First, apply a mild, non-abrasive disinfectant diluted per label, wipe with a soft cloth, rinse with water, and air-dry.
Finish by ventilating the area and disposing of used cloths safely.
Polishing and sealing tips for wooden or painted seats
One should restore a wooden or painted toilet seat’s appearance by choosing compatible polish and sealant that match the original finish and level of wear.
After cleaning and drying, test products on an inconspicuous area.
Apply polish sparingly with a soft cloth, buff to even sheen, then seal with a thin coat appropriate for wood or paint.
Allow full cure before use.
Common Mistakes to Avoid When Removing Hair Dye
Readers should be warned about combining strong chemicals or using abrasive cleaners, as these actions can set stains or create toxic reactions.
Excessive scrubbing with harsh pads or brushes risks scratching or dulling the toilet seat finish.
Practical guidance will focus on safer product choices and gentle techniques to remove dye without worsening damage.
Harmful product combinations and actions that worsen staining
Avoid mixing cleaners or trying aggressive shortcuts when removing hair dye from a toilet seat, as certain combinations and actions can worsen stains or damage the surface.
Bleach plus ammonia, acid with peroxide, or undiluted solvents can set pigments, produce harmful fumes, or etch plastic.
Test any product on an inconspicuous spot, follow label instructions, ventilate the area, and avoid prolonged chemical contact.
Over-scrubbing and finish damage pitfalls
After warning about chemical interactions and prolonged exposure, attention must turn to mechanical damage from over-scrubbing.
Excessive scrubbing abrades finishes, dulls gloss, and can remove protective coatings, making seats more porous and stain-prone.
Use gentle tools, test in an inconspicuous area, and apply minimal pressure.
Replace damaged seats rather than repeatedly sand or scour them, which worsens appearance and hygiene.
Quick Reference: Supplies Checklist to Keep for Dye Emergencies
One compact kit of targeted supplies makes quick cleanup possible when hair dye stains a toilet seat. Keep a small caddy stocked and ready:
- Gentle cleanser (dish soap or mild bathroom cleaner)
- Isopropyl alcohol or nail polish remover (acetone-free)
- Soft microfiber cloths and disposable gloves
- Non-abrasive sponge and a soft-bristled toothbrush for crevices
Conclusion
When hair dye stains a toilet seat, swift, measured action prevents permanent damage. Following tested removal steps—spot-testing cleaners, choosing agents matched to seat material, and progressing from mild to stronger treatments—protects finishes and skin. Comparing methods shows which are safest and fastest; aftercare sanitizes and restores appearance. Like a skilled surgeon, one works precisely and patiently, avoiding common mistakes and keeping a ready supplies checklist to handle future dye emergencies calmly and effectively.