How to Get Wax Out of a Sink Drain Quickly and Safely
To quickly and safely remove wax from a sink drain, act promptly based on whether the wax is liquid or hardened. For liquid wax, blot excess, then pour hot (not boiling) water mixed with dish soap while catching the runoff. For hardened wax, use a hair dryer to soften it, scrape with plastic tools, and remove fragments with a drain snake or plunger. Avoid harsh chemicals and metal tools to prevent pipe damage. Follow these steps for effective cleaning and maintenance.
What to do immediately after wax spills in a sink
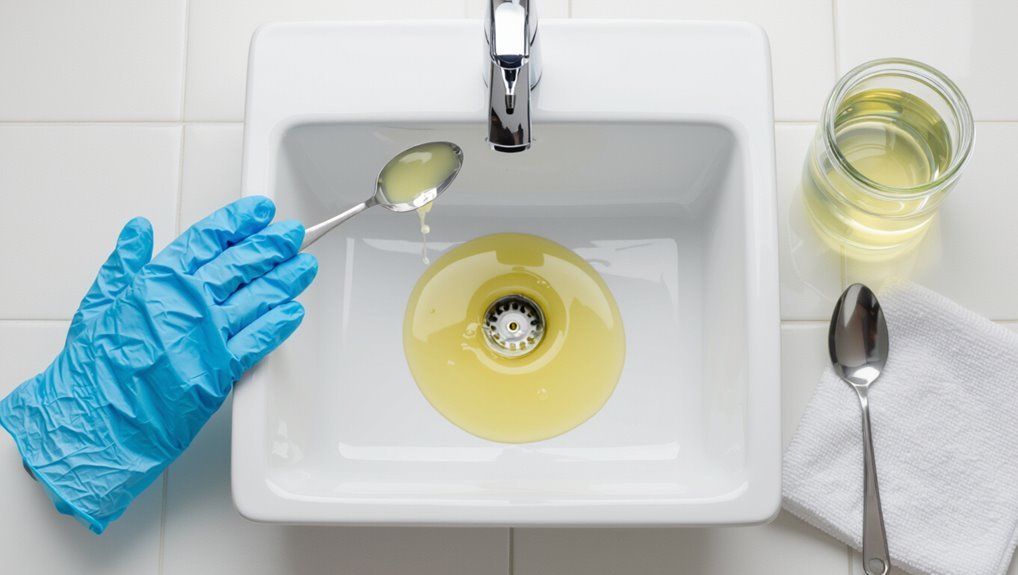
After a wax spill in the sink, the type and amount of wax should be noted to determine cleanup needs.
Protective measures—such as wearing gloves, ensuring good ventilation, and keeping heat sources away—should be taken before touching the mess.
Prompt steps to prevent the wax from cooling and entering the drain, like removing large pieces and catching runoff, can reduce clogging and make removal easier.
Assess the type of wax and amount spilled
A quick visual and tactile assessment helps determine the best removal method: identify whether the wax is hard (candle or paraffin) or soft (beeswax or cosmetic), note its color and any additives (dye, fragrance, or wick debris), and estimate the volume and whether it has cooled and solidified or is still warm and liquid.
Then determine appropriate tools and sequence for how to get wax out of sink drain.
Safety precautions before cleanup (gloves, ventilation, heat sources)
Several immediate precautions help prevent injury and further mess when wax spills into a sink:
Wear heat-resistant gloves to avoid burns from hot wax or tools.
Guarantee good ventilation if melting or using solvents, and turn off nearby heat sources or open flames.
Keep children and pets away, lay down absorbent towels to catch drips, and avoid inhaling fumes.
Quick actions to prevent clogging and hardening
Act quickly to keep wax from cooling and settling into the drain: blot away excess pooled wax with disposable paper towels.
Then use a dull tool (like a plastic scraper or an old credit card) to remove softened wax from the sink basin while avoiding force that could push debris down the drain.
Run hot water briefly to soften residues, catch fragments, and dispose of towels properly.
Fast removal methods you can use right away
The section outlines quick, practical actions for both warm or liquid wax and cooled, hardened wax in a sink drain.
It compares using hot water and dish soap—how to apply them and when they fall short—with a step-by-step ice method to solidify and lift wax.
Each method emphasizes safety and minimal tools so readers can act immediately.
Removing warm or liquid wax safely
For immediate removal of warm or liquid wax, work quickly while it remains soft: blot excess with paper towels or a lint-free cloth.
Then lift remaining residue using mild dish soap and warm water applied with a sponge or soft brush.
Rinse frequently to prevent redepositing wax.
Use a small bowl or cup to catch runoff, and dry the area thoroughly to avoid slippery surfaces.
Removing cooled or hardened wax safely
Work quickly but carefully when wax has hardened: softened by heat or mechanically loosened, it can be removed without damaging sink surfaces or plumbing.
Use plastic scrapers, wooden sticks, or credit-card edges to lift flakes. Collect debris with paper towels. A plumber’s snake or flexible pick can extract lodged pieces.
Avoid metal tools that scratch, and dispose of wax in trash to prevent re-clogging.
Using hot water and dish soap: procedure and limitations
Pouring a steady stream of very hot (but not boiling) water combined with liquid dish soap can dissolve fresh or softened wax in a sink drain quickly; the soap emulsifies oils while the heat softens wax enough to flow toward the trap.
Run hot water for several minutes while periodically adding soap, then flush; avoid porcelain thermal shock, PVC exposure limits, and overloaded clogs.
Using ice to harden and lift wax: step-by-step
Apply ice to the wax to harden it, then lift or chip the brittle pieces away; this method is quick, requires no solvents, and works best on recent drips or small clogs near the drain surface.
Secure ice in a plastic bag, press onto affected area until firm, then use a plastic scraper, tweezers, or gloved fingers to remove fragments.
Repeat until clear, then flush with warm water.
Tools and household materials that work best
A concise set of tools and common household items can handle most wax blockages, from a plunger, drain snake, or plastic scraper to boiling water, baking soda, vinegar, and clean cloths.
Heat tools such as a hair dryer or heat gun can help soften stubborn wax but should be used carefully to avoid burns or damage to pipes and fixtures.
Safety precautions—gloves, eye protection, and keeping electrical tools away from water—are recommended before attempting these methods.
Common tools (plunger, drain snake, plastic scraper)
Removing wax from a sink drain requires a few simple tools that balance reach, leverage, and gentle scraping.
A plunger can dislodge softened wax by creating pressure.
A drain snake reaches and extracts chunks lodged deep within the pipe.
A plastic scraper or putty knife helps remove residue from the drain mouth without scratching metal.
Each tool complements the others for efficient removal.
Safe household items (boiling water, baking soda, vinegar, cloths)
Use common household items—boiling water, baking soda, vinegar, and soft cloths—to soften, break down, and wipe away wax without harsh chemicals.
Pour boiling water slowly to melt surface wax, then sprinkle baking soda to lift residue.
Follow with vinegar to fizz and loosen deposits.
Use a soft cloth or microfiber to wipe softened wax from the drain rim and stopper, repeating as needed.
When to use heat tools (hair dryer, heat gun) and safety tips
When is a heat tool appropriate for wax removal from a sink drain? A heat tool suits solidified wax stubborn to flushing.
Use a hair dryer for lower, controlled heat; reserve a heat gun for robust clogs with caution.
Keep tools moving, maintain 6–8 inches distance, protect surrounding surfaces, wear heat-resistant gloves and eye protection, guarantee ventilation, and avoid prolonged exposure to plumbing seals.
Step-by-step method to clear wax from the drainpipe
First, the workspace is prepared and any surface wax is removed to prevent further clogging.
Next, the wax is softened with controlled heat and flushed while using a drain snake or grabber to pull out remaining chunks.
Finally, a finishing hot-water flush and odor-neutralizing step guarantees the pipe is clear and smells fresh.
Preparing the area and removing surface wax
Clear the immediate workspace and assemble needed tools before attempting to remove wax from a sink drain.
The person dons gloves, places towels to protect surfaces, and positions a container under the P-trap.
Using a plastic scraper, wooden stick, or tweezers, they gently lift and remove visible wax chunks.
Collected debris is sealed in a disposable bag for proper disposal.
Melting and flushing wax down the drain safely
Warm the blockage gradually and flush melted wax with hot water so it moves through the pipe without re-solidifying or causing damage.
Heat using simmering water poured slowly in stages, allowing wax to soften.
Continue with steady hot water flow for several minutes.
Follow with plenty of boiling water if pipes allow, then test the drain.
Repeat cautiously until clear.
Using a drain snake or grabber to extract wax chunks
A drain snake or grabber provides direct mechanical removal of hardened wax when flushing alone fails, allowing targeted extraction from the trap and nearby pipe without introducing chemicals.
Wear gloves and eye protection.
Remove the stopper, insert the tool, probe gently, latch or snag wax pieces, and withdraw slowly.
Repeat until clear, inspecting with a flashlight.
Clean and sanitize tools afterward.
Finishing flush and odor control
Once the bulk of wax has been extracted with a snake or grabber, attention moves to a final flush and odor control to guarantee the pipe is clear and sanitary.
Run hot water for several minutes, then pour a mixture of baking soda and vinegar, let fizz, and rinse with boiling water.
Finish with enzymatic drain cleaner if odors persist; ventilate area.
Chemical and commercial products: when and how to use them
When mechanical methods fail, chemical and commercial products can be considered for dissolving or loosening wax buildup.
Enzyme and solvent-based drain cleaners have differing effectiveness against wax, while commercial wax removers and degreasers offer trade-offs of speed versus potential pipe or environmental harm.
Safety precautions, correct product choice, and local disposal rules should guide any use.
Enzyme and solvent-based drain cleaners: suitability for wax
Many enzyme-based cleaners target organic buildup but are largely ineffective on wax, while solvent-based commercial products can dissolve candle wax yet vary in strength and safety.
Solvent choices include citrus, mineral spirits, or commercial formulations; users must check compatibility with pipes, seals, and ventilation.
Follow label instructions, use gloves and eye protection, test a small area if uncertain, and avoid mixing chemicals.
Commercial wax removers and degreasers: pros and cons
Although effective at breaking down hardened wax and grease, commercial wax removers and degreasers vary widely in formulation, strength, and compatibility with plumbing materials.
They can dissolve wax quickly and reduce manual scraping, but may damage seals, plastic pipes, or finishes if mismatched.
Choosing a product labeled for drains and following manufacturer directions maximizes effectiveness; test on inconspicuous fittings before full use.
Safety and environmental considerations
Careful selection and use of chemical or commercial wax removers reduces health risks and environmental harm while protecting plumbing.
Users should read labels, follow dilution and contact-time instructions, wear gloves and eye protection, and ventilate the area.
Avoid mixing products (especially acids and bases). Dispose of residues per local hazardous-waste guidelines.
Prefer biodegradable, low-toxicity formulas and resort to chemicals only when mechanical methods fail.
How to avoid damaging your sink and plumbing
Careful selection of materials and methods prevents damage to pipes, seals, and sink finishes.
The text will note which substances and tools—such as certain solvents, boiling water, and high-heat devices—can warp plastics, strip coatings, or loosen joints and when they should be avoided.
It will also describe simple steps to protect finishes and seals during wax removal.
Materials and methods that can harm pipes or finishes
Using common household chemicals or abrasive tools can quickly damage sink finishes and plumbing if chosen or applied improperly.
Strong acids, bleach mixes, oven cleaners, or drain cleaners can corrode metal pipes, strip coatings, and discolor surfaces.
Abrasive pads or steel wool scratch enamel and chrome.
Avoid harsh chemical combinations and rigorous scrubbing; opt for gentle, approved cleaners and nonabrasive tools to protect fixtures and seals.
When not to use boiling water, heat guns, or solvents
After warning against harsh chemicals and abrasive tools, attention should turn to heat and strong solvents, which present a different set of risks.
Boiling water should be avoided with PVC plumbing or cracked fixtures. Heat guns can warp plastic or loosen adhesives.
Solvents risk damaging seals, finishes, and rubber gaskets. If uncertain about materials, choose mechanical removal or consult a professional.
Protecting finishes and seals during cleanup
Protect finishes and seals by isolating affected areas and choosing removal methods that minimize contact with metal, enamel, and rubber components.
Use soft tools—plastic scrapers, microfiber cloths—and low-heat approaches. Apply minimal solvent sparingly on a cloth, not poured. Protect exposed seals with tape.
Rinse gently, inspect gaskets for degradation, and replace any compromised components to prevent future leaks or corrosion.
Troubleshooting persistent or hidden wax blockages
If water still drains slowly or a faint waxy odor persists, wax may remain in the P-trap or farther down the line.
The next steps are safely removing and cleaning the P-trap to check for congealed wax and using gentle heat or a plumber’s snake for deeper blockages.
If efforts fail, recurring clogs, damage risk, or inaccessible buildup warrant contacting a professional plumber.
Signs wax is still trapped in the trap or deeper pipes
How can one tell when wax remains lodged beyond easy reach? Persistent slow drainage, gurgling noises, or recurring partial backups after attempted clearing suggest residual obstruction.
Foul odors or warm spots on exposed pipe sections indicate trapped softened wax.
Repeated melting attempts that temporarily improve flow but then regress also point to deeper deposits requiring inspection or targeted intervention beyond surface fixes.
How to remove and clean the P-trap safely
When signs point to wax lodged deeper than surface fixes can reach, attention shifts to the P-trap as the most likely location of persistent blockage.
Shut off water, place a bucket beneath, loosen slip nuts by hand or wrench, and remove the trap.
Scrape wax with a plastic scraper, rinse with hot water, and flush.
Reassemble, check for leaks, and dispose of debris properly.
When to call a professional plumber
Call a professional plumber when routine measures—boiling water, enzymatic drain cleaners, and P-trap removal—fail to clear wax or when signs indicate a deeper, less accessible obstruction.
A plumber can diagnose with cameras, remove hardened deposits, and assess damaged pipes or clogs beyond the trap.
Seek expert help if backups persist, odors continue, or multiple fixtures are affected to prevent damage and repeated attempts.
Preventive measures to avoid future wax spills and clogs
To prevent recurrent wax blockages, the article outlines safe candle habits near sinks and bathroom-specific precautions.
It also covers proper disposal methods for wax and oily residues to keep drains from accumulating debris.
Finally, simple regular maintenance routines and checks are recommended to catch buildup before it becomes a clog.
Safe candle use near sinks and bathroom tips
Maintain clear habits around burning candles near sinks and in bathrooms to reduce the risk of wax spills and clogged drains.
Use stable, heat-resistant holders placed well away from edges and water sources. Extinguish candles before leaving the room.
Keep wicks trimmed and avoid drafts that cause uneven melting.
Store candles upright and catch drips with protective liners to prevent stray wax.
Best practices for disposing wax and oily debris
Dispose wax and oily debris deliberately to prevent buildup and plumbing issues: small amounts of cooled wax or grease should be scraped into a sealed container or wrapped in paper and placed with regular trash rather than rinsed down the drain.
- Collect solidified wax in disposable containers
- Wipe greasy pans with paper towels first
- Use compostable liners where appropriate
- Seal oily rags before disposal
- Recycle metal tins when clean
Regular maintenance tips to keep drains clear
Prevent regular buildup by establishing simple, consistent drain-care habits that minimize wax and oily deposits before they accumulate.
Rinse with hot water after use, wipe excess wax from containers into trash, and use a sink strainer.
Periodically flush with a biodegradable degreasing solution or baking soda and vinegar, then hot water.
Inspect and clean strainers weekly to prevent blockages.
Quick comparison of removal options and recommended scenarios
A brief comparison helps readers choose a removal method based on speed, safety, cost, and effectiveness. The table below summarizes common options and recommended scenarios for each. Practical guidance follows so readers can match the method to their situation.
| Method | Best for | Notes |
|---|---|---|
| Hot water + sink stopper | Small, recent spills | Fast and low-cost but not for major clogs |
| Plunger or plumbing snake | Moderate clogs | Effective and safe when used properly |
| Hairdryer or heat gun | Localized wax buildup | Quick and precise; keep heat away from finishes |
| Boiling water + drain cleaner | Stubborn clogs | Higher effectiveness; check pipe material first |
| Professional service | Large or persistent clogs | Safest and most reliable, higher cost |
Speed, safety, cost, and effectiveness for each method
Speed, safety, cost, and effectiveness vary considerably across common wax-removal methods, so choosing the right approach depends on the amount of wax, pipe material, available tools, and user comfort with heat or chemicals.
Hot water and dish soap: fast, low cost, low risk for small clogs.
Boiling water/heat gun: faster, moderate risk, low cost.
Mechanical scooping: safe, cheap, effective.
Chemical solvents: costly, risky, use last.
Practical checklist: step-by-step cleanup plan to follow now
Begin by assembling tools and safety items: gloves, a sink stopper or rag, a heat source (hairdryer or boiling water), a narrow tool for scraping (plastic scraper or wooden spatula), trash bag, and a flashlight.
Then follow this concise checklist:
- Block drain, protect overflow
- Soften wax with controlled heat
- Scrape softened wax gently
- Flush with hot water
- Dispose of wax and clean tools
Conclusion
After a wax spill, timely action prevents bigger clogs: about 80% of household drain blockages start from fats, oils, hair and debris, so removing wax quickly keeps plumbing flowing. Immediate cooling, careful scraping, and flushing with hot water or a hairdryer-directed melt followed by a protected plunge usually resolves the problem. If residue remains, dismantling the trap or using a safe commercial solvent is effective. Regular drain guards and mindful disposal prevent repeat incidents.