How to Update an Old Bathtub: Affordable DIY Tricks to Refresh Your Bathroom
Updating an old bathtub can be done affordably through a series of focused DIY steps. Begin with a thorough cleaning and repair of any chips. Next, sand the surface and apply a reglazing or tub-paint kit for a fresh look. Consider replacing fixtures, adding a slip-resistant mat, and enhancing the surround with peel-and-stick tiles or an acrylic liner. Always prioritize ventilation and wear personal protective equipment (PPE) during refinishing. If you encounter leaks or structural concerns, it’s best to consult a professional. Continue reading for practical tips on techniques, costs, and when to seek expert help.
How to Decide Whether to Refresh or Replace an Old Bathtub
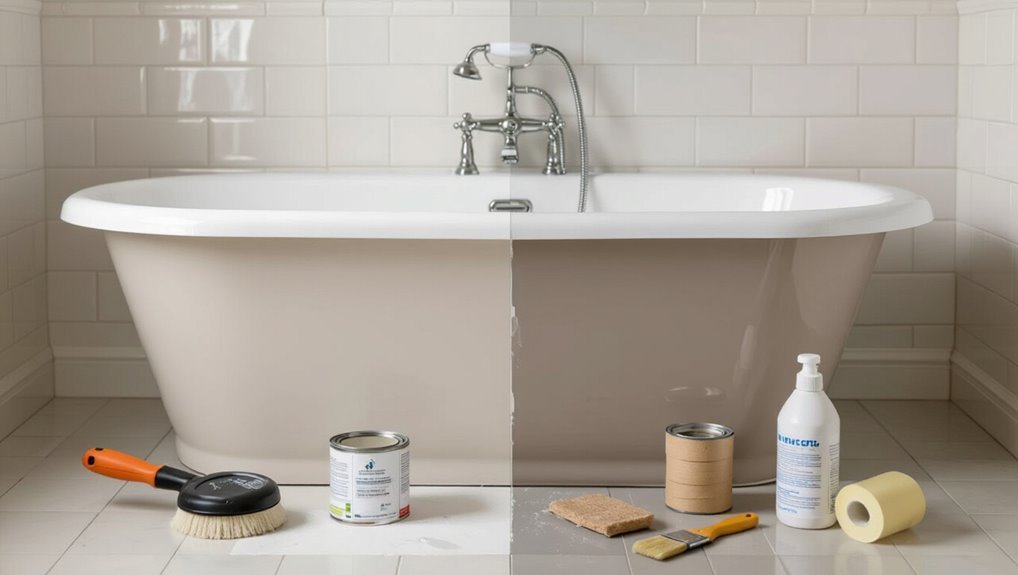
Evaluating whether to refresh or replace an old bathtub begins with identifying clear signs of need: visible damage, persistent stains, safety hazards like slippery surfaces or faulty grab bars, and diminished functionality.
The decision also hinges on a cost and time comparison—simpler surface treatments are cheaper and quicker, while full replacement resolves structural issues but requires more expense and disruption.
A DIY refresh may suit cosmetic wear and users comfortable with basic repairs, whereas structural damage, extensive leaks, or complex plumbing work call for a professional.
Signs your bathtub needs updating (damage, stains, safety, functionality)
When visible cracks, persistent stains, or loose fixtures appear, they indicate the tub’s condition may no longer meet practical or aesthetic needs.
Signs include chipped enamel, deep discoloration, mold in grout, slow drainage, and unstable grab bars.
Safety hazards, frequent maintenance, or outdated design signal consideration of how to update an old bathtub versus pursuing a full replacement.
Cost and time comparison: refresh vs full replacement
Noting visible damage, persistent stains, or safety risks leads naturally to weighing whether a refresh will suffice or a full replacement is warranted. A refresh typically costs less and finishes in days; replacement costs more and can take weeks. Consider budget, timeline, and long-term value.
| Option | Typical outcome |
|---|---|
| Refresh | Lower cost, quicker |
| Replacement | Higher cost, longer time |
When a DIY refresh is appropriate and when to call a pro
Decide based on damage, skill level, and goals: minor surface issues, such as superficial chips, faded finish, or mild staining, can usually be handled by a confident DIYer using kits for cleaning, reglazing, or applying a tub refinishing coating.
Meanwhile, structural problems—cracks through the material, persistent leaks, compromised drains, or deteriorated surrounding tile and subfloor—require a professional to guarantee safety, code compliance, and a durable result.
For borderline cases, consult a contractor for inspection and costed options before committing.
Quick, Affordable Ways to Refresh an Old Bathtub
Quick, affordable updates can extend a bathtub’s life and improve appearance without full replacement.
Practical options include deep cleaning and stain removal, professional or DIY reglazing and refinishing with their trade-offs, and tub paint or epoxy kits with straightforward application steps.
For a temporary, low-cost fix, rubber or slip-resistant mats and liners provide immediate safety and surface coverage.
Deep cleaning and stain removal techniques
Start by removing surface grime with a gentle, nonabrasive cleaner and a soft-bristled brush to expose underlying stains and mineral deposits.
Apply a paste of baking soda and vinegar for soap scum, let sit, then scrub.
Use diluted bleach for mold (ventilate), or a commercial lime remover for hard water rings.
Rinse thoroughly and dry to prevent recurrence.
Reglazing and refinishing basics: what it is, pros and cons
What does reglazing actually involve and when does it make sense for an aging tub?
Reglazing, or refinishing, resurfaces damaged glaze with bonding primer and a durable topcoat, restoring appearance and sealing minor chips.
Pros: lower cost, quick turnaround, improved aesthetics.
Cons: less durable than replacement, unsuitable for severe structural damage or persistent leaks, and longevity depends on surface prep and usage.
Tub paint kits and epoxy coatings: step-by-step overview
Revitalizing a worn bathtub with a paint kit or epoxy coating offers a budget-friendly alternative to full replacement that can be completed in a day or two.
Prepare by cleaning, sanding, and masking.
Mix components per instructions, apply thin even coats with brush or roller, allow proper cure time between layers, then ventilate until fully cured.
Inspect for coverage and smoothness before use.
Rubber and slip-resistant bath mats and liners as temporary fixes
Slip-resistant rubber mats and tub liners provide a fast, low-cost way to improve safety and hide minor surface flaws in an old bathtub.
They install without tools, reduce slip risk, and conceal stains or chips temporarily. Choose mildew-resistant, properly sized options and secure edges to prevent shifting.
Regular cleaning and inspection maintain hygiene; replace when wear, odor, or visible deterioration appears.
Step-by-Step DIY Reglazing/Refinishing Process
The section outlines a concise, step-by-step DIY reglazing workflow, beginning with a tools and materials checklist and thorough surface preparation including cleaning, sanding, and chip repair.
It then covers priming, coating, recommended drying times, and finishing touches with curing tips to guarantee durability.
Common problems encountered during refinishing are listed with practical fixes to address adhesion, runs, and uneven coverage.
Tools and materials checklist
A concise checklist of tools and materials helps guarantee the reglazing process proceeds smoothly and safely; essential items include respirators and protective eyewear, chemical stripper or acid etcher, sandpaper and sanding blocks, cleaning solvents, epoxy or bonding primer, bathtub refinishing kit or topcoat, high-quality brushes and foam rollers, painter’s tape and drop cloths, mixing containers, and replacement caulk.
- Safety gear and ventilation equipment
- Primers, topcoats, and applicators
- Tape, drop cloths, and mixing supplies
- Caulk, finish tools, and waste disposal materials
Surface preparation: cleaning, sanding, and repairing chips
Begin by removing soap scum, oils, and loose finish so the new coating can bond to a clean, stable surface.
Degrease with a nonabrasive cleaner, rinse, and dry.
Sand glossy areas and feather edges of worn spots with medium then fine grit.
Fill chips with epoxy or polyester filler, sand smooth, and wipe residue.
Verify surface is defect-free before proceeding.
Priming, coating, and drying times
Several thin coats applied in sequence yield a stronger, more even finish than a single heavy layer.
After cleaning and sanding, a bonding primer is brushed or rolled on, following manufacturer flash times.
Apply two to three thin topcoats, allowing specified tack-free intervals between coats.
Drying times vary with temperature and humidity; consult product labels and allow full dry time before light use.
Finishing touches and curing tips for long-lasting results
One final set of precise steps guarantees a durable, professional-looking finish: inspect the cured surface for imperfections, lightly sand any dust nibs with fine-grit sandpaper, remove residue, and apply a final ultra-thin topcoat if needed.
Then follow strict curing conditions (stable temperature, low humidity, and no direct use) until the manufacturer’s full cure time elapses.
After curing, buff very lightly and avoid harsh cleaners for several weeks.
Common problems during refinishing and how to fix them
Expect a handful of recurring issues during DIY bathtub refinishing—orange peel, runs, fish eyes, poor adhesion, and bubbling—and address each with targeted corrective steps.
Sand orange peel, re-spray thin coats; sand and feather runs, recoat; clean oils, use proper primer to eliminate fish eyes; strip and re-etch for adhesion; pop bubbles, sand, and reapply in controlled humidity and temperature.
Alternative Low-Cost Upgrades That Change the Look
Minor, low-cost changes can dramatically refresh an aging bathtub without a full remodel.
Simple swaps like new faucets, showerheads, and drain hardware, or installing a tub surround or acrylic liner, update function and appearance quickly.
Painting surrounding walls, applying tile decals or peel-and-stick tiles, and adding coordinated accessories—shower curtains, storage, grips, and trim—complete the new look.
Replacing faucet, showerhead, and drain hardware
Swapping out the faucet, showerhead, and drain hardware delivers a dramatic visual upgrade without gutting the bathroom.
Select finishes that match fixtures and budget—brushed nickel, matte black, or polished chrome.
Replace corroded trim, install a water-saving showerhead, and fit a new pop-up drain for smoother operation.
Most tasks require basic tools and moderate DIY skill, producing immediate style and function improvements.
Installing a tub surround or acrylic liner
Consider installing a tub surround or acrylic liner to refresh a worn bathtub without full demolition. These prefabricated panels adhere over existing surfaces, covering stains, chips, and grout issues.
Installation is faster and less messy than retile; liners can be custom-fitted to dimensions. Proper surface preparation, waterproof adhesive, and sealed joints guarantee longevity.
This approach balances cost, durability, and visual improvement.
Painting surrounding walls, adding tile decals or peel-and-stick tiles
Revitalizing the area around an old tub with a fresh coat of paint, tile decals, or peel-and-stick tiles quickly transforms the bathroom’s appearance without major expense or construction.
- Choose mildew-resistant paint and prime properly for lasting finish.
- Measure and plan patterns before applying decals or tiles.
- Use peel-and-stick tiles for quick focal areas or backsplash updates.
- Seal edges and grout lines where recommended to prevent moisture intrusion.
Accessorizing: shower curtains, storage, grips, and trim updates
One simple way to refresh a dated bathtub area is through accessories: a new shower curtain, smarter storage, safety grips, and updated trim can alter aesthetics and function without major work.
Coordinated textiles, tension-rod shelves, adhesive hooks, and magnetic caddies reduce clutter. Replace caulked trim, swap dated hardware finishes, and install slip-resistant grips for safety.
These affordable swaps provide immediate visual impact and practicality.
Safety, Ventilation, and Environmental Considerations
Before beginning any refinishing work, the article notes the importance of adequate ventilation and proper personal protective equipment to reduce exposure to fumes and dust.
It also raises concerns about VOCs in coatings, safe disposal of removed finishes, and choosing lower-toxicity materials when possible.
Finally, accessibility and safety upgrades—such as ADA-compliant grab bars and anti-slip treatments—are recommended to protect users and meet code where relevant.
Proper ventilation and PPE for refinishing projects
Guarantee adequate ventilation and appropriate personal protective equipment (PPE) are prioritized during any bathtub refinishing project to limit inhalation of fumes and contact with hazardous chemicals.
Use exhaust fans, open windows, and cross-ventilation; consider window fans or temporary ducting.
Wear NIOSH-rated respirators, chemical-resistant gloves, eye protection, and long sleeves.
Monitor air quality and pause work if odors intensify or symptoms appear.
VOCs, disposal of old coatings, and safer material choices
Consider the airborne and waste hazards inherent in refinishing: volatile organic compounds (VOCs) released by primers, paints, and solvents can accumulate quickly without adequate ventilation.
Removed coatings—especially old lead- or solvent-based finishes—require careful collection and disposal to prevent environmental contamination.
Use low-VOC or water-based products, follow local hazardous-waste rules for disposal, and favor certified non-toxic sealants to reduce risk.
ADA and accessibility upgrades (grab bars, anti-slip coatings)
Having addressed airborne and waste hazards from coatings and solvents, attention turns to physical accessibility upgrades like grab bars and anti-slip treatments that change bathtub use and maintenance.
Select code-compliant, load-rated grab bars and install into studs or with proper anchors.
Apply textured, waterproof anti-slip coatings or adhesive treads designed for wet areas.
Regularly inspect fixtures, clean with nonabrasive cleaners, and replace worn elements promptly.
Budgeting, Timeline, and Material Selection
A clear budget comparison helps weigh DIY refinishing kits, partial repairs, and full professional replacements by outlining typical material and labor costs.
Estimating realistic timelines for each approach—single-day reglazes, multi-day repairs, or week-long replacements—sets expectations and informs scheduling.
Product choices should align with tub material, selecting acrylic-specific cleaners and repair kits, porcelain-friendly enamels, or heavy-duty primers and coatings for cast iron.
Typical cost breakdown for DIY options vs pros
Many homeowners weigh whether to do a tub refresh themselves or hire a pro by comparing upfront costs, time commitment, and material choices; DIY routes typically save on labor but require more time and risk for mistakes, while professionals add cost for expertise and warranty coverage.
| Option | Typical Cost | Notes |
|---|---|---|
| DIY reglaze | $50–$200 | Materials only |
| DIY refinishing kit | $100–$300 | Skill dependent |
| Pro refinish/replace | $600–$3,000+ | Includes labor/warranty |
How to estimate time for each method
Cost differences between DIY and professional routes naturally lead to questions about how long each approach will take and what materials are required.
Estimating time involves task breakdowns: surface prep (1–4 hours), repairs (minutes to days), priming and curing (several hours to overnight), and finish coats (hours plus drying).
Factor skill level, tool availability, and project sequencing into the schedule and budget.
Choosing the right products for acrylic, porcelain, and cast-iron tubs
Select products that match the tub material, budget, and timeline to guarantee durable results:
acrylic requires cleaners and repair kits formulated for plastic and low-temperature curing refinishes;
porcelain benefits from acid-free etchants and high-build enamel or epoxy finishes that tolerate higher temperatures;
cast iron demands rust-treatment, high-adhesion primers, and heavy-duty epoxy or enamel topcoats.
Choose VOC-compliant, warranty-backed kits and match cure times to scheduling.
When to Hire a Professional and How to Find One
When an old tub shows structural damage, persistent leaks, major staining, or repeatedly fails refinishing attempts, a professional should be engaged.
Homeowners should ask contractors about specific repair or replacement methods, request itemized quotes to compare materials and labor, and inspect timelines, permits, and inclusion of cleanup in estimates.
Before hiring, verify licenses and insurance, confirm warranty terms, and review recent customer feedback and references.
Signs you need professional repair or replacement
How can a homeowner know if a bathtub problem has outgrown DIY fixes?
Persistent leaks, structural cracks, major rust, water damage to surrounding floors or walls, mold infestations, or recurring drainage failures indicate professional intervention.
If repairs require plumbing rerouting, reglazing beyond surface chips, or replacement for safety and code compliance, engaging a licensed contractor guarantees proper diagnosis, warranty protection, and long-term solutions.
Questions to ask contractors and what to inspect in quotes
After recognizing signs that exceed DIY capabilities, homeowners should prepare targeted questions and know what to inspect in written estimates to compare contractors objectively.
- Scope: confirm detailed tasks, materials, timeline, and cleanup.
- Cost breakdown: labor, materials, permits, contingencies, and payment schedule.
- Subcontractors and insurance: who will work and liability coverage.
- Change orders and warranty terms: process for modifications and remedies for defects.
How to verify licenses, warranties, and reviews
Who verifies the paperwork and reputations that protect a homeowner’s investment?
A homeowner should confirm contractor licenses with state licensing boards, validate warranties in writing and note coverage periods, and cross-check independent reviews on multiple platforms.
Request proof of insurance, ask for references, and verify complaint histories.
When uncertainty persists, hire a licensed professional offering clear, documented guarantees and verifiable past work.
Long-Term Maintenance to Keep a Refreshed Tub Looking New
A simple maintenance routine helps preserve a refreshed tub: establish a regular cleaning schedule using nonabrasive cleaners and microfiber cloths to prevent buildup and stains.
Protective measures—soft mats, gentle handling of heavy objects, and prompt drying—reduce chips and inhibit mold growth.
Periodic inspections determine when small touch-ups suffice versus when a full restoration is needed.
Cleaning schedule and recommended products
Regular maintenance keeps an old bathtub functional and visually fresh, and establishing a simple cleaning schedule with the right products prevents stains and surface damage over time.
Weekly mild cleaner and nonabrasive sponge remove soap scum; monthly deep clean with a baking soda paste or gentle commercial tub cleaner addresses buildup.
Use pH-neutral products for coated surfaces, rinse thoroughly, and dry after each use to prolong finish.
Preventing chips, stains, and mold
Preserve an old bathtub’s surface by addressing the common culprits—impact, abrasive cleaners, and trapped moisture—before damage appears.
Use soft nonabrasive cleaners, microfiber cloths, and cushioned bath mats to prevent chips. Wipe surfaces dry after use and guarantee exhaust ventilation to limit mold.
Promptly treat small stains with gentle bleach solutions or enzyme cleaners and inspect grout and caulking quarterly for repairs.
When to touch up vs when to redo the restoration
When should a homeowner touch up a chipped or dull finish and when is a full redo warranted?
Small chips, surface scratches, or localized discoloration can be fixed with spot repairs, epoxy kits, or touch-up paint.
Widespread peeling, deep cracks, persistent staining, or recurring adhesion failures signal the need for complete refinishing or replacement to guarantee durability and safety.
Real-World Budget-friendly Project Examples
The following examples illustrate three common paths: a small-budget refresh with step-by-step tasks, itemized costs, and realistic results.
A mid-range DIY refinishing case shows the timeline and clear before-and-after outcomes.
A brief comparison explains when full replacement proved the more sensible option.
Small-budget refresh: steps, costs, and expected results
Several straightforward interventions can transform an aged bathtub on a tight budget: reglazing or refinishing, replacing fixtures and caulking, installing a liner or slip-resistant mat, and updating surrounding tile grout.
Typical steps: clean, sand, repair chips, apply finish or install liner, fit new faucet and showerhead, recaulk.
Costs range $50–$600 depending on DIY or materials; results: refreshed appearance, improved function, extended service life.
Mid-range DIY refinishing case: timeline and before/after outcomes
A homeowner tackles a mid-range DIY bathtub refinishing project over a weekend-plus timeline, combining rented equipment, off-the-shelf repair kits, and a professional-grade refinishing kit to balance cost and quality.
Day one: strip, clean, and repair chips.
Day two: sand, prime, and apply coats.
Final day: cure and reinstall fixtures.
Result: smooth, even finish resembling professional work at a fraction of replacement cost.
When replacement made more sense: quick case comparison
Considered side-by-side, replacement sometimes proved the smarter, more cost-effective choice than refinishing—especially when structural damage, pervasive staining, or persistent leaks would have required extensive, costly repairs before any coating could adhere properly. Three budget-friendly examples contrasted scope, cost, and outcome to justify replacement decisions.
| Issue | Decision |
|---|---|
| Cracked underlayer | Replace |
| Mold-ridden surround | Replace |
| Surface discoloration | Refinish |
Conclusion
Deciding between rejuvenating and replacing an old bathtub often balances cost, condition, and goals. Quick fixes and DIY reglazing can save thousands: refinishing typically costs 60–80% less than full replacement, and studies show properly refinished tubs can last 7–10 years. With sensible ventilation, safe materials, and occasional professional help for complex damage, homeowners can achieve a rejuvenated, durable bathroom on a modest budget while extending fixture life and reducing waste.