How to Fix an Oscillating Sprinkler: Quick Troubleshooting & Repair Guide
To fix an oscillating sprinkler, start by identifying common issues such as clogs, worn gears, bent nozzles, low water pressure, or hose leaks. Inspect for debris, stripped gears, and distorted spray arms. Clean the screens and nozzles, soak any mineral buildup in vinegar, realign the linkage, tighten fittings, and replace damaged washers or gears. Check the water supply pressure and look for kinks or leaks in the hose. Lubricate moving parts and winterize your sprinkler to enhance its longevity. For detailed step-by-step fixes, parts guidance, and troubleshooting scenarios, continue reading.
What Causes an Oscillating Sprinkler to Malfunction
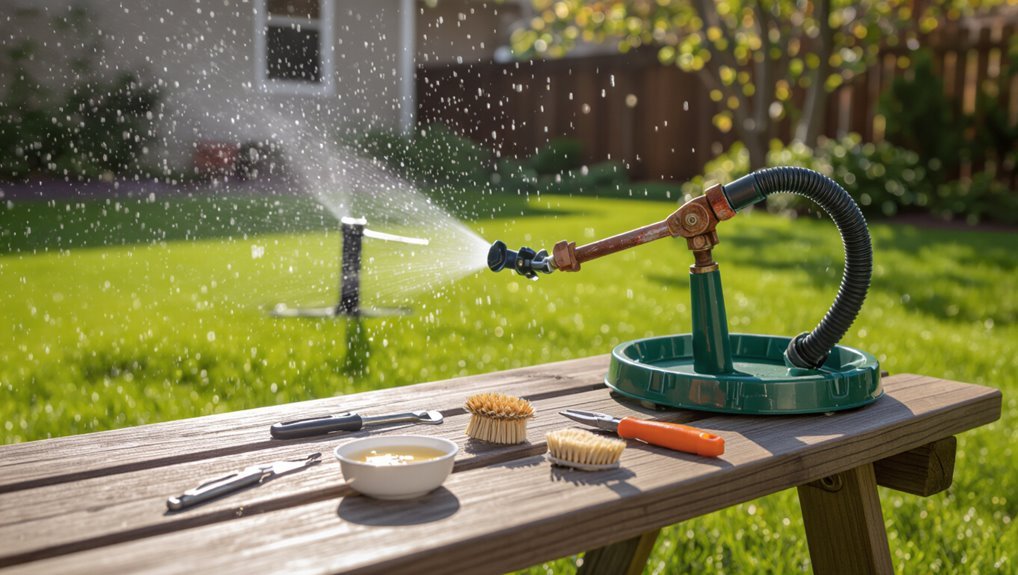
Common causes of oscillating sprinkler malfunctions include mechanical issues such as clogs, worn gears, and bent nozzles that impede movement or spray patterns.
Inadequate water pressure or flow, and problems with hoses and connections, also reduce performance.
Seasonal and environmental factors—freezing temperatures, debris, and mineral buildup—further contribute to failures and accelerated wear.
Common mechanical problems (clogs, worn gears, bent nozzles)
Mechanical breakdowns in oscillating sprinklers typically stem from a few straightforward issues: debris-clogged inlet screens and nozzles, worn or stripped drive gears, and bent or misaligned spray arms.
Inspection reveals blockages, gear play, or distorted nozzles.
Routine cleaning, gear replacement, nozzle straightening, and lubrication explain how to fix an oscillating sprinkler.
Regular maintenance prevents recurrence and restores uniform coverage.
Water pressure and flow issues
When water supply is too weak, inconsistent, or obstructed, an oscillating sprinkler will fail to reach its designed range and pattern.
Low pressure reduces nozzle velocity and causes uneven arc coverage. Flow restrictions from municipal supply limits, pressure-reducing valves, or upstream leaks cut output.
Measuring PSI/flow and ensuring adequate system demand helps isolate pressure problems before replacing sprinkler components.
Hose and connection problems
After checking pressure and flow, attention should turn to hoses and fittings, since leaks, kinks, or loose connections often mimic supply problems by reducing volume and disrupting spray patterns.
Inspect for pinholes, split ends, and crushed sections; replace or patch damaged hose.
Tighten or reseat connectors and ferrules.
Verify the hose swivel and sprinkler inlet are aligned and free of strain to restore consistent operation.
Seasonal and environmental factors (freezing, debris, mineral buildup)
Because exposure to freezing temperatures, accumulating debris, and mineral-laden water each present distinct stressors, oscillating sprinklers commonly fail for environmental rather than mechanical reasons.
Ice expands and cracks plastic or seals; leaves, grass clippings, and soil clog nozzles or ports; calcium and iron deposits restrict flow and jam gears.
Seasonal inspection, winterization, and descaling prevent most failures.
Quick Diagnosis: How to Identify the Problem Fast
A rapid assessment begins with a visual inspection checklist—looking for clogged nozzles, cracked housings, loose fittings, and visible debris.
Next, testing water pressure and flow while listening for stuttering or uneven oscillation helps distinguish supply issues from mechanical ones.
If the sprinkler hesitates, grinds, or fails to complete smooth sweeps despite good flow, internal gear or drive failure should be suspected.
Visual inspection checklist
Several quick visual checks can reveal the most common causes of an oscillating sprinkler failure.
Inspect nozzle and arm for clogs or mineral buildup. Check for cracked or bent components and loose fasteners. Verify hose connection and leaks. Confirm base stability and alignment.
- Nozzles: debris or calcification
- Arms: bends, breaks, or blockage
- Connections: loose or leaking
- Base: wobble or misalignment
How to test water pressure and flow
Test the water pressure and flow to determine whether the sprinkler’s issue is hydraulic rather than mechanical.
Measure static pressure at the spigot with a gauge, then run the sprinkler and note dynamic pressure drop.
Check flow by timing bucket fill (gallons per minute).
Compare results to sprinkler specifications.
Low pressure or restricted flow indicates supply issues—check valves, filters, or main line obstructions.
Listening and movement cues (stuttering, uneven oscillation)
Listen for irregular sounds and watch the head’s motion to quickly distinguish mechanical from hydraulic problems: a steady whine or hissing plus smooth travel suggests pressure issues, while clicking, grinding, or audible sticking paired with jerky, uneven oscillation points to worn gears, debris in the drive mechanism, or a bent linkage.
Note intermittent stalls tied to specific positions; observe repeatable patterns and timing.
When to suspect internal gear or drive failure
A few clear signs point to internal gear or drive failure: persistent grinding or clicking that continues regardless of water pressure, oscillation that stalls or skips at the same positions, and motion that is jerky even when the sprinkler is raised and manually turned.
Additional indicators include excessive play in the output shaft, visible gear teeth damage when inspected, and complete loss of indexed movement under normal flow.
Tools and Materials You’ll Need
A compact set of hand tools — pliers, a flathead and Phillips screwdriver, and an adjustable wrench — is sufficient for most sprinkler repairs.
It is also useful to keep common replacement parts on hand, such as nozzles, drive gears, and rubber seals, to speed up fixes.
Mention will be made of specialty tools (tube cutters, small bearing pullers) and the situations in which they become necessary.
Basic toolkit (pliers, screwdriver, wrench)
Gather a small set of hand tools before starting work on an oscillating sprinkler: slip-joint or needle-nose pliers, a flathead and Phillips screwdriver, and an adjustable wrench cover the common fasteners and fittings encountered.
A compact kit speeds diagnosis and safe adjustments.
- Slip-joint or needle-nose pliers
- Flathead screwdriver
- Phillips screwdriver
- Adjustable wrench
Replacement parts to keep on hand (nozzles, gears, seals)
Alongside the basic hand tools, keeping a small stock of common replacement parts prevents small failures from stopping yard work.
Spare nozzles in varied spray patterns, a couple of drive gears compatible with the model, and assorted O-rings and seals for joints and valves cover most failures.
Include a small tube of silicone grease and replacement screws to finish quick, reliable repairs.
Specialty tools and when to use them
Select specialty tools that match the sprinkler model and the task at hand to save time and prevent damage.
Essential items include small torque wrenches for precise fastener torque, needle-nose pliers for clip removal, gear pullers for seized drives, hex bit sets for internal screws, and a pressure gauge for flow diagnostics.
Use ultrasonic cleaners for delicate nozzle buildup.
Step-by-Step Repair Procedures
The repair section begins with safe shutdown and disconnection of the sprinkler from its water source before any work begins.
It then covers clearing clogs, cleaning nozzles, adjusting and realigning the oscillating arm, and replacing worn gears or drive components as needed.
Finally, procedures for fixing leaking or loose hose connections are outlined to restore reliable operation.
How to safely shut off and disconnect the sprinkler
Begin by locating and shutting off the water supply to the sprinkler system at the main valve or dedicated shutoff point to prevent irrigation while working.
Relieve line pressure by opening a downstream faucet or quick‑connect.
Disconnect the hose or lateral from the sprinkler head using pliers if needed.
Cap exposed fittings, inspect for leaks, and wear gloves and eye protection during all steps.
Clearing clogs and cleaning nozzles
The guide proceeds to explain how to remove spray heads for inspection and cleaning.
Each nozzle should be rinsed and brushed to dislodge debris before reassembly.
For mineral buildup, vinegar or a commercial descaling solution is recommended to soak and dissolve deposits.
Removing and cleaning spray heads
Loosen and lift each spray head from its riser to access the nozzle and filter screen; this allows a clear inspection for grit, mineral buildup, or insect nests that commonly restrict flow.
Remove debris with a soft brush or compressed air, inspect o-rings and seals for wear, replace damaged parts, and reassemble securely.
Test water flow and adjust alignment before final tightening.
Using vinegar or descaling solutions for mineral buildup
After cleaning visible debris from spray heads and checking seals, attention turns to mineral deposits that remain embedded in nozzles and screens.
Soak removable parts in white vinegar or a commercial descaler per product instructions until deposits loosen.
Use a soft brush or toothpick to clear softened residue, rinse thoroughly, and reassemble.
Test operation; repeat if flow remains restricted.
Adjusting and realigning the oscillating arm
Begin by positioning the sprinkler on a level surface and shutting off water to prevent unintended movement; this guarantees safe, controlled access to the oscillating arm.
Inspect linkage for bends or debris, gently straighten misalignments, and remove obstructions.
Loosen mounting screws, realign the arm to its travel range, then retighten.
Test with low pressure, fine-tune stops for even coverage, and confirm smooth operation.
Replacing worn gears or drive components
To replace worn gears or drive components, the technician first locates and opens the gear housing by removing retaining screws and lifting the cover to expose the mechanism.
They inspect gear teeth and shafts to confirm wear, then match replacement parts by comparing size, tooth count, and shaft dimensions or using the sprinkler model number.
Finally, the new gears are seated, lubricated with manufacturer-recommended grease, the housing is reassembled, and the unit is tested for smooth operation.
How to access the gear housing
Accessing the gear housing requires isolating the sprinkler, relieving internal pressure, and removing the outer cover and any retaining clips or screws that secure the gearbox.
Once exposed, note gear orientation and take photos for reference. Disconnect any linkage or driveshaft carefully, keep small parts contained, and clean the cavity of debris.
Inspect seals and mounting points before proceeding to replacements.
Matching and installing replacement gears
Select replacement gears that match the original in size, tooth count, material, and shaft fit before installation; verify part numbers or measure module, pitch diameter, and bore to confirm compatibility.
Compare new and old gears side-by-side for wear patterns or dimensional differences. Clean the housing, lubricate bearings and gear teeth with approved grease, seat gears correctly on shafts, secure retainers, and test rotation under low pressure.
Fixing leaking or loose hose connections
Begin by shutting off the water supply and relieving pressure in the hose to prevent spray while working; then visually inspect the connection points for worn washers, cracked fittings, or cross-threading.
Replace damaged rubber washers, clean threads, apply plumber’s tape to male threads, and hand-tighten fittings.
If damage persists, swap the hose end or adapter.
Test for leaks and retighten as needed.
Restoring proper water pressure (pressure regulators, aerator checks)
After confirming hose connections are sound, attention shifts to water pressure issues that can cause weak or uneven spray from an oscillating sprinkler.
Inspect and clean faucet aerator and hose-end filter for debris.
Check inline pressure regulator; adjust or replace if pressure is below recommended range.
Test flow with hose only to isolate sprinkler.
Restore ideal pressure and re-evaluate sprinkler performance.
Simple Adjustments to Improve Coverage and Performance
The next section explains straightforward adjustments that can enhance an oscillating sprinkler’s coverage and performance.
It covers changing spray patterns and range settings, positioning and leveling the unit for even distribution, and using hose or nozzle extenders to reach problem areas.
Clear, targeted tweaks often fix common gaps without major repairs.
Changing spray patterns and range settings
Adjusting an oscillating sprinkler’s spray pattern and range lets users match water distribution to lawn shape and plant needs without moving the unit.
Controls typically include dialed range stops and adjustable nozzles; users set arc width, length, and flow rate to avoid runoff and dry spots.
Test runs reveal necessary tweaks; repeat until spray reaches designated borders and overlaps minimally for uniform coverage.
Positioning and leveling the sprinkler for even coverage
Once spray pattern and range are set, correct placement and a level base guarantee that water lands where aimed.
Position the sprinkler centrally to the targeted zone, avoiding obstructions and slopes. Use a flat, stable surface or small platform to eliminate tilt.
Verify coverage by observing wetting patterns, then fine-tune location and height until coverage is uniform without pooling or dry spots.
Using hose or nozzle extenders for problem areas
Raise coverage for hard-to-reach spots by adding a hose or nozzle extender to the oscillating sprinkler setup.
Install a short rigid or flexible extension to redirect flow, increasing reach without altering sprinkler mechanics.
Match diameter and thread to prevent leaks, secure with hose clamps or adapters, and test spray pattern.
Use adjustable nozzles for targeted watering and avoid overpressurizing fittings to prevent damage.
Preventive Maintenance to Keep an Oscillating Sprinkler Working
Preventive maintenance extends an oscillating sprinkler’s lifespan and preserves performance through simple routine tasks.
A regular cleaning schedule, winterizing and proper storage, inspection and lubrication of seals and moving parts, and monitoring water quality to prevent mineral buildup each address common failure points.
Attention to these areas reduces repairs and keeps the sprinkler operating reliably.
Regular cleaning schedule
Establishing a regular cleaning schedule keeps an oscillating sprinkler operating reliably and extends its service life.
A concise routine prevents clogs, corrosion, and uneven spray. Tasks focus on quick inspections and targeted cleaning.
- Flush water before each season
- Wipe nozzles and spray bar weekly
- Remove mineral buildup monthly
- Lubricate moving joints quarterly
Winterizing and storage tips
As the active season ends, attention shifts from routine cleaning to preparing the sprinkler for cold weather and storage.
Drain all water from the unit and hoses to prevent freeze damage.
Disconnect and store hoses indoors.
Store the sprinkler in a dry, sheltered place off the floor and away from direct sunlight.
Use a breathable cover to keep dust off during storage.
Inspecting seals and lubricating moving parts
Inspect all rubber seals, O-rings, and gaskets for cracks, flattening, or hardening before reassembly.
Replace damaged seals with correct-size parts and apply a thin coat of silicone grease to O-rings to preserve elasticity.
Clean metal pivots and oscillating gears, remove debris, then lubricate lightly with a water-resistant lubricant.
Recheck movement for smooth, noise-free operation and proper alignment.
Monitoring water quality to prevent buildup
After seals and moving parts are cleaned and lubricated, attention should turn to the quality of water feeding the sprinkler, since mineral deposits and organic matter accelerate wear and clog nozzles.
Regular testing for hardness and particulates, installing a simple sediment filter or softener where needed, and flushing lines periodically reduces buildup.
Document results and adjust maintenance frequency based on local water characteristics.
Troubleshooting Scenarios and Solutions
A concise set of common problems and fixes helps identify the quickest path to a working oscillating sprinkler.
Typical scenarios include uneven spray, jerky motion, complete failure to oscillate, reduced range, and stubborn leaks; each has focused troubleshooting steps.
Consider these quick-check points to guide repairs:
- Sprinkler spins but doesn’t spray evenly
- Sprinkler jerks or skips while oscillating
- Sprinkler won’t oscillate at all
- Low spray distance despite normal water flow
Sprinkler spins but doesn’t spray evenly
When an oscillating sprinkler rotates but delivers uneven water coverage, common causes include blocked nozzles, worn seals, or uneven water pressure across the turbine. Diagnosing the specific fault quickly directs the appropriate fix.
Inspect and clean nozzle ports, flush the inlet, and replace damaged seals or gaskets. Verify supply pressure and remove hose kinks. Test after each adjustment to confirm even spray distribution.
Sprinkler jerks or skips while oscillating
Check the mechanism for intermittent resistance, as jerking or skipping during oscillation usually signals irregular movement from seized gears, debris in the drive train, air pockets in the water line, or fluctuating water pressure.
Inspect and clean gears and bearings, flush the inlet to remove air and sediment, tighten loose linkages, and test under steady pressure.
Replace worn drive components if irregular motion persists.
Sprinkler won’t oscillate at all
Begin troubleshooting by confirming the basics: verify the sprinkler is receiving water, the shutoff and any valves are fully open, and the hose or supply line is free of kinks and leaks.
If still stationary, inspect the drive mechanism for stuck gears, bent or broken linkage, debris build-up, or seized bearings.
Replace damaged parts, clean moving components, and test under pressure before reuse.
Low spray distance despite normal water flow
After confirming the sprinkler receives adequate water and its drive mechanism moves freely, attention shifts to situations where spray distance is noticeably reduced despite normal flow.
Possible causes include clogged nozzle or rotor ports, worn or misaligned diffusers, incorrect nozzle size, or partially obstructed outlet arms.
Recommend cleaning or replacing nozzles, checking alignment, and swapping to correct spray pattern components to restore distance.
Persistent leaks after tightening connections
Investigate persistent leaks that continue after connections are tightened by inspecting threads, fittings, and seals for damage or improper assembly.
Replace cracked washers, O-rings, or corroded fittings. Clean mating surfaces and apply appropriate thread sealant or plumber’s tape, ensuring correct direction and quantity.
If plastic threads are stripped, install a brass adapter or replace the connector.
Re-test at normal pressure for confirmation.
When to Repair vs. When to Replace
A brief comparison of repair costs and time helps determine whether to fix an oscillating sprinkler or replace it.
Clear indicators that a unit is beyond economical repair—such as extensive corrosion, warped metal, or recurring leaks—should prompt replacement rather than repeated fixes.
When choosing a replacement, look for durable materials, easy-to-service parts, coverage area, and any additional features like adjustable spray patterns or rust-resistant coatings.
Cost and time comparison of common repairs
Many common oscillating sprinkler problems—clogged nozzles, worn gears, damaged spray arms, and leaking seals—vary widely in cost and repair time, so deciding whether to fix or replace depends on part prices, labor, and expected remaining life. Typical comparisons help prioritize quick DIY fixes versus replacement for extensive wear.
| Repair | Typical time/cost |
|---|---|
| Nozzle cleaning | 10–20 min / $0–$10 |
| Seal replacement | 20–40 min / $5–$20 |
| Gear repair | 30–60 min / $10–$40 |
| Arm replacement | 15–45 min / $5–$30 |
Signs a sprinkler is beyond economical repair
Decide to replace the sprinkler when repair costs, time, or uncertainty clearly exceed the value of continued use.
Significant metal corrosion, cracked or warped housing, persistent leaks after multiple fixes, recurring mechanical failures, seized oscillation, or missing obsolete parts indicate end of life.
If repairs require specialized tools, repeated service, or exceed replacement price, replacement is the prudent choice.
Choosing a replacement: features to look for
When replacing an oscillating sprinkler, prioritize durability, coverage, and ease of maintenance to guarantee the new unit delivers reliable performance without frequent repairs.
Inspect materials (metal base, UV-resistant plastic), adjustable spray patterns, range and width controls, easy-access nozzles, and a stable connection to the hose.
Prefer models with replaceable parts and clear warranty terms to extend service life and minimize downtime.
Quick Safety and Best-Practice Tips
Before beginning repairs, the article recommends basic electrical and water safety precautions to prevent shocks and slips.
It also outlines environmentally safe cleaning and disposal options for damaged parts or chemicals.
Finally, concise tips for simple maintenance are offered to extend the sprinkler’s lifespan with minimal effort.
Electrical and water safety precautions
Safety around water is nonnegotiable: treat any electrical components near a sprinkler system as potentially hazardous and isolate power before touching controllers, timers, or solenoid valves.
Wear dry gloves and insulated tools, keep connections elevated and dry, and shut off water when servicing wiring.
Verify absence of voltage with a tester, replace damaged cables, and call a licensed electrician for uncertain or submerged electrical issues.
Environmentally safe cleaning and disposal options
Several simple practices greatly reduce environmental impact when cleaning or disposing of an oscillating sprinkler.
Use biodegradable, phosphate-free cleaners and collect rinsewater for garden use.
Remove batteries or electronic parts for proper recycling.
Donate functioning units or sell for reuse.
For irreparable metal or plastic components, separate materials and take them to local recycling facilities or hazardous-waste centers to prevent landfill contamination.
Tips for extending lifespan with minimal effort
A few straightforward habits can greatly extend an oscillating sprinkler’s service life with minimal time or cost.
Store indoors during freezing weather, rinse and drain after use, and lubricate moving parts yearly with a silicone spray.
Check hoses and fittings for leaks, tighten clamps, and replace worn washers.
Use gentle water pressure and avoid striking the unit to prevent misalignment.
Conclusion
After a proper diagnosis and a few decisive taps, the rebellious oscillating sprinkler is either a humble servant again or a dramatic prop destined for the shed of defeat. Gardeners can imagine it sulking like a disgruntled butler when fixed, or throwing a farewell sprinkler salute if replaced. Either way, the chore is done, pride partially intact, and the lawn will drink—quietly mocking the brief human illusion of complete control over household hydraulics.