How to Fix a Water Main Break: Step-by-Step Emergency Repair Guide
If you discover a water main break, act quickly and follow these steps for emergency repair: First, assess immediate hazards and ensure the safety of people and property. If safe to do so, shut off the main water supply. Isolate any electrical sources nearby and secure the area. Notify your utility company or emergency services promptly. For homeowners, after depressurizing the line, apply temporary fixes like clamps, rubber patches, or repair couplings. For public mains or significant repairs, rely on municipal crews or licensed plumbers. Always adhere to boil-water advisories and document any repairs made. Continue reading for detailed step-by-step temporary fixes and long-term solutions.
What to do immediately when you discover a water main break
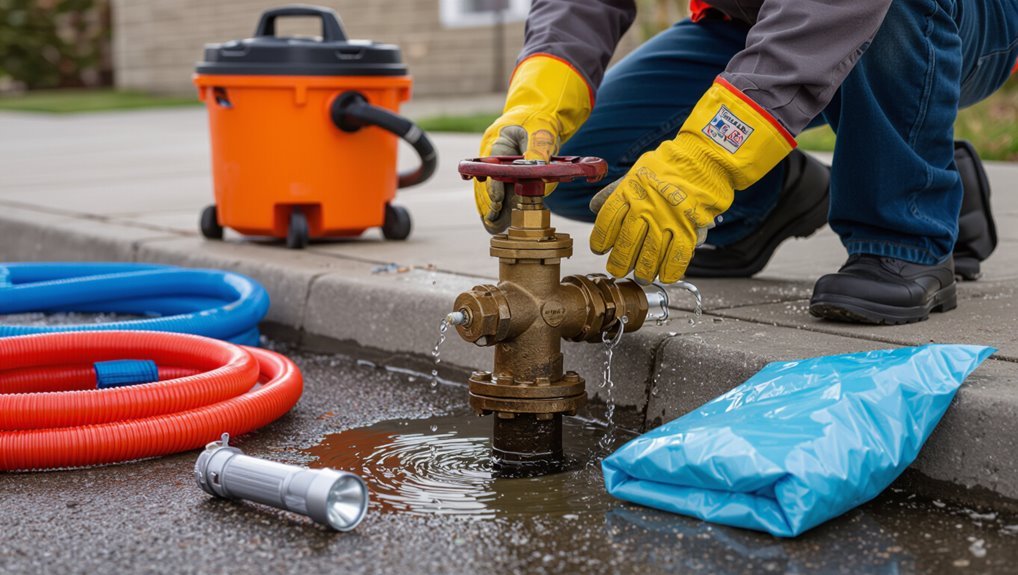
Upon noticing gushing water, sinkholes, reduced pressure, or discolored flow, the observer should assess severity and potential hazards.
They should immediately protect people and property by keeping clear of fast-moving water, shutting off the property’s main valve if safe, and isolating electrical sources.
If flooding is rapid, structural damage is apparent, or utilities are compromised, evacuation is warranted; for minor leaks contained outside the structure, remaining on site to manage shutoff and mitigation may be appropriate.
How to recognize a water main break (signs and severity indicators)
How can a water main break be recognized quickly and accurately? Observers note sudden gushing, pooling, or erosion; unusually low water pressure and discolored or muddy water; loud underground rumbling or hissing; sinkholes or pavement collapse; sudden widespread service loss.
Severity indicators include flow volume, rate of ground collapse, and proximity to structures. These signs guide priorities in how to fix a water main break.
Immediate safety actions to protect people and property
When a water main breaks, immediate actions focus on protecting people and limiting property damage: secure the area to keep bystanders away, shut off nearby utilities and valves if trained personnel are available, and evacuate occupants from threatened structures.
Notify emergency services and the water utility, isolate electrical hazards, document conditions for responders, and prevent vehicle access.
Prioritize life safety and clear communication.
How to shut off water to your property quickly (steps and valve locations)
At discovery of a water main break, the priority is to stop water entering the property by locating and turning off the appropriate shutoff valves as quickly and safely as possible.
Identify the interior main shutoff near the water meter, then the exterior curb stop at the property line.
Use a wrench or key, turn clockwise fully, and notify the utility once closed.
When to evacuate and when to stay put
If flooding is rapid, electrical hazards are present, or sewer backflow occurs, occupants should evacuate immediately to higher ground or outside the structure; otherwise, they should stay put in a safe, dry area and shut off utilities if it can be done without risk.
Emergency responders and utility crews should be contacted, pets and vulnerable people assisted, and hazards documented from a safe distance until professionals arrive.
Assessing the situation before repairs
Before beginning repairs, the responder should determine whether the break lies on private property or the municipal main to identify responsibility and which authorities to notify.
A brief, cautious inspection—using gloves, boots, a flashlight, and maintaining a safe distance from unstable ground and live electrical hazards—helps assess visible damage and risks.
Clear photos and concise notes of the scene, pipe condition, and any affected structures should be recorded for municipal reports and insurance claims.
Determining if the break is on your property or the municipal main
How can one tell whether a water main break lies within the homeowner’s service line or the municipal supply?
Visual cues include localized pooling near the property versus multiple neighboring properties affected.
Check whether only the residence experiences loss of pressure or visible leaks.
Consult the water meter location and municipal outage reports; contact the utility to confirm responsibility before arranging repairs or shutting off internal valves.
How to safely inspect the damaged area (tools and precautions)
Once responsibility for the break is established, a careful inspection of the damaged area should follow to assess hazards and scope.
The inspector uses PPE (gloves, boots, eye protection), a flashlight, non‑contact voltage tester, and a camera.
Check for gas smells, electrical risks, unstable ground, contaminated water, and nearby utilities.
Mark hazards, keep bystanders back, and call professionals for any unsafe conditions.
Documenting damage for authorities and insurance (photos, notes)
A clear, methodical record of the break is essential for authorities and insurers; the inspector should immediately begin photographing the scene, taking wide shots to show context and close-ups of the pipe, surrounding damage, and any utility markings.
They should timestamp images, note locations, record measurements, list visible causes, and log actions taken.
Secure copies, submit reports promptly, and preserve originals for claims.
Step-by-step emergency repair for homeowners (temporary fixes)
The homeowner should be guided through a concise, step-by-step emergency repair plan that lists essential materials and tools.
It should show how to stop leaks with pipe clamps or rubber patches and explain when to use repair couplings or slip sleeves for temporary seals.
Instructions should also cover safe use of pipe-freezing kits for freeze repairs and clear steps for re-pressurizing and testing the temporary fix.
Emphasis remains on quick, temporary measures that stabilize the break until professional permanent repair can be arranged.
Materials and tools to have on hand for emergency repairs
Prepare a compact kit of durable, easy-to-use items so a homeowner can apply a temporary repair immediately after discovering a water main break.
The kit should enable containment, safety, and basic shutoff until professionals arrive.
- Adjustable wrench, pipe vise grips
- Heavy-duty rubber gloves, safety goggles
- Plastic sheeting, absorbent towels
- Shutoff key, roll of plumber’s tape and hose clamps
Stopping leaks with pipe clamps and rubber patches
Begin by shutting off the supply to the affected section and draining residual pressure.
Inspect the leak, dry the area, and select a rubber patch sized to cover the hole.
Center the patch, wrap with hose clamps or a stainless steel pipe clamp, and tighten evenly to compress the rubber.
Confirm no seepage, and reapply torque after a short test period.
These are temporary; call a plumber.
Using repair couplings and slip sleeves for temporary seals
After securing the supply and applying a rubber patch or clamp to control active seepage, attention can shift to installing repair couplings or slip sleeves for a more robust temporary seal.
The homeowner should select a coupling sized to the pipe, clean and dry mating surfaces, slide the sleeve over the damaged section, tighten clamps evenly, and test slowly for leaks before restoring full pressure.
How to perform a freeze repair (when and how to use pipe-freezing kits)
When water cannot be shut off quickly at a convenient location, a pipe-freezing kit lets a homeowner create a temporary ice plug to stop flow for a short, controlled repair.
The user selects appropriate clamp size, isolates the section, applies coolant per instructions, monitors ice formation, and confirms stoppage.
Maintain safe distance, wear PPE, and label the frozen section. Use only rated kits.
Re-pressurizing and testing the temporary repair safely
Carefully restore pressure to the repaired section while monitoring for leaks and signs of failure.
Gradually open the main valve, increasing pressure in stages and pausing between increments.
Inspect joints, clamps, and temporary plugs for seepage or deformation.
Use a pressure gauge to verify stable readings and a moisture detector or cloth for hidden drips.
If issues appear, depressurize and reinforce the repair before retesting.
When to call professionals and municipal services
The section explains how to contact the local water utility—phone numbers, online outage portals, and the key information to report (address, nature of the break, visible flooding, and any hazards).
It then clarifies when a homeowner should call a licensed plumber for private pipe repairs versus when to notify municipal emergency crews for main-line failures.
Finally, it outlines what professional crews typically do on arrival, expected repair steps, and reasonable timelines for temporary and permanent fixes.
How to contact your water utility and what information to provide
Contact the local water utility immediately after discovering a suspected main break or uncontrollable water flow.
Provide the exact address, visible landmarks, time discovered, severity (volume, flooding), any visible damage, and whether utilities or traffic are affected.
Report observed contaminants or smells.
Give a callback number and stay reachable.
Follow utility instructions; evacuate if ordered and keep clear of the site.
When to call a licensed plumber versus emergency municipal crews
When should a licensed plumber be called instead of municipal emergency crews depends on the location, cause, and immediate risk posed by the break.
Municipal crews handle public mains, major street flooding, and hazards requiring traffic or utility coordination.
A licensed plumber is appropriate for private service lines, meter-to-house leaks, or when temporary isolation and internal repairs are needed without broader public-safety implications.
What to expect from professional repair crews and repair timelines
Expect professional repair crews to operate with coordinated roles, clear safety protocols, and staged priorities: isolating the leak, evaluating damage, stabilizing the site, and planning permanent repairs.
Municipal teams secure mains, traffic, and utilities; licensed contractors perform pipe assessment, trenching, and replacement.
Timelines vary: emergency shutdowns within hours, temporary patches same day, full pipe replacement from days to weeks depending on permitting, complexity, and weather.
Permanent repair options and process
Utilities typically consider trenching and full pipe replacement, pipe bursting, or cured-in-place lining as permanent solutions, each with distinct costs, disruption levels, and longevity.
Pipe bursting can replace degraded mains without continuous open trenching but risks nearby utility disturbance, while lining minimizes excavation but may not restore original diameter or be suitable for severely damaged sections.
The replacement process generally requires permits, planned excavation and shoring, pressure testing and disinfection, and coordination to convert temporary patches into the permanent repair.
Typical permanent repair methods used by utilities (trenching, pipe replacement, lining)
Repair crews typically choose among three permanent methods—open trench replacement, targeted sectional replacement, and trenchless lining—based on pipe material, depth, soil conditions, and service disruption constraints.
Open trenching removes and replaces entire runs.
Sectional replacement isolates and swaps damaged segments with couplings.
Trenchless lining installs an internal liner to seal cracks and restore flow without extensive excavation, minimizing surface restoration needs.
Pros and cons of pipe bursting, pipe lining, and full replacement
When selecting a permanent fix for a broken water main, crews weigh pipe bursting, pipe lining, and full replacement against site-specific factors such as access, pipe material, diameter, and traffic impacts. Each option offers tradeoffs: bursting is fast but disruptive, lining is less invasive with diameter loss, and full replacement is most flexible but costliest.
| Option | Key tradeoff |
|---|---|
| Pipe bursting | Rapid, restores diameter, surface disturbance |
| Pipe lining | Minimal excavation, reduced capacity |
| Full replacement | Complete renewal, highest cost and time |
Steps involved in replacing a section of water main (permits, excavation, testing)
After choosing full replacement over lining or bursting because of site constraints, the replacement process begins with permit acquisition and stakeholder coordination, followed by staged shutdowns, excavation to expose the failed section, installation of new pipe and fittings, pressure and leak testing, disinfection and bacteriological sampling, backfilling and compaction, and final restoration of pavement and landscaping.
Documentation, inspections, and warranty handover conclude the project.
Connecting temporary repairs to a long-term solution
Although a temporary clamp or bypass can restore service quickly, shifting to a permanent solution requires coordinated planning, asset evaluation, and clear criteria for timing and scope.
The utility assesses pipe condition, traffic impacts, and regulations, then selects trenchless relining, section replacement, or full reroute.
Project scheduling, procurement, traffic control, and quality testing guarantee the temporary measure is removed and a durable repair is implemented.
Handling water and sanitation after a break
After a water main break, officials may issue boil-water advisories and consumers must be informed how to follow them safely.
The article will also cover disinfecting household lines and systematic flushing procedures to restore potable supply after repairs.
Finally, it will address managing sewage backups and decontamination of affected areas to reduce health risks.
Boil-water advisories and how to follow them
When a water main breaks, public health officials may issue a boil-water advisory to prevent illness from contaminated tap water.
Residents should treat all household water for drinking, cooking, and oral hygiene until the advisory is lifted.
Follow guidance: boil for one minute (three at elevation), use bottled water, avoid ice, wash produce with boiled or bottled water, and heed official updates until testing confirms safety.
Disinfecting water lines and flushing procedures after repair
Flush and disinfect water lines to remove contaminants introduced during the break and to restore safe service.
Technicians isolate repaired sections, chlorinate per utility protocols (target free chlorine residual), allow contact time, then systematically flush mains and service lines until clear and residuals meet standards.
Confirm bacteriological safety with sampling and laboratory analysis before rescinding advisories and returning to normal operation.
Managing sewage backups and contaminated areas
Address sewage backups and contaminated areas promptly to minimize health risks and environmental damage.
Professionals should cordon off affected zones, stop household water use, and disable HVAC to prevent aerosol spread.
Pump and remove standing sewage, dispose of contaminated materials per regulations, and disinfect surfaces with appropriate biocides.
Test soil and groundwater if infiltration occurred, and document damage for remediation and insurance.
Safety, legal and financial considerations
Responsibility and potential liability for a water main break can fall on either the homeowner or the municipality depending on the location of the service line and local ordinances.
Homeowners are advised to review their insurance policies for coverage limits, excluded perils, and the proper steps and documentation needed to file a claim.
Before repairs begin, required permits, utility locates, and compliance with legal requirements should be confirmed to avoid fines and unsafe excavation.
Liability and responsibility: homeowner vs. municipality
When a water main breaks, determining who is legally and financially responsible can be complex, since liability often depends on where the pipe lies, whether negligence or inadequate maintenance played a role, and applicable local ordinances.
Typically, municipalities cover mains in public rights-of-way; homeowners are liable for private service lines.
Responsibility affects repair authorization, timelines, and potential claims; clear documentation and prompt reporting are essential.
Insurance coverage: what to check and how to file a claim
After establishing whether the municipality or the homeowner bears responsibility for a broken water main, attention turns to insurance implications and the steps needed to secure coverage.
The homeowner should review policy exclusions, limits, deductibles, and water-damage provisions, document damage with photos, obtain repair estimates, and notify the insurer promptly.
Keep records of communications, emergency repairs, receipts, and contractor details to support the claim.
Permits, utility locates, and legal requirements for repairs
Compliance with permits, utility locates, and local repair statutes is essential before any excavation or pipe replacement begins.
Contractors must secure necessary permits, request utility locates to identify buried lines, and document approvals.
Failure risks fines, service interruptions, and liability.
Municipal codes often dictate materials, inspection schedules, and restoration standards; adherence protects public safety and guarantees insurance and warranty validity.
Preventing future water main breaks and maintenance tips
Routine inspections that note pressure changes, leaks, corrosion, and ground movement can help catch progressive failures before they become emergencies.
Seasonal measures such as insulating exposed lines, maintaining proper soil cover, and installing heat-traced or drained sections reduce freeze-related breaks.
Upgrading to more durable materials, increasing burial depth, and adding insulation or protective sleeves are recommended to lower long-term break risk.
Regular inspection and signs to monitor year-round
Although water mains are built to last, consistent year-round inspections are essential to catch early warning signs before they become emergencies.
Inspectors should monitor pressure fluctuations, unusual meter readings, wet spots, sinkholes, corrosion, and visible joint movement.
Routine acoustic leak detection, valve exercise, and record-keeping enable trend analysis.
Promptly addressing minor leaks, pipe pitting, or soil erosion reduces rupture risk and costly emergency repairs.
Winterization and frost protection strategies for water lines
Because freezing temperatures dramatically increase the risk of pipe rupture, winterization and frost protection measures are essential to safeguarding water mains and service lines.
Implementing controlled drainage, insulating accessible valves and meter pits, maintaining heat in utility spaces, and installing heat tape where allowed reduce freeze risk.
Regular winter inspections, timely snow clearing over line routes, and prompt repair of insulation breaches complete a proactive protection routine.
Recommended upgrades to reduce future break risk (materials, depth, insulation)
Upgrade recommendations focus on reducing mechanical stress and thermal exposure by selecting durable materials, increasing burial depth where soil frost is a factor, and adding targeted insulation.
Municipalities should favor ductile iron, HDPE, or coated steel with flexible joints; install mains below local frost lines; apply closed-cell foam or heat-traced enclosures around fittings; improve bedding and drainage; and schedule regular inspections to detect corrosion, movement, or insulation damage.
Tools, supplies, and emergency kit checklist for water-main incidents
A concise inventory of tools and consumables is essential before responding to a water-main incident. The text outlines recommended professional-grade tools with suggestions on where to rent or purchase them, and lists consumables and replacement parts to keep on hand for rapid repairs.
Preparedness reduces downtime and mitigates damage.
- Heavy-duty pipe cutter, portable hydraulic pipe clamp, and torque wrench (rental at tool shops or purchase from plumbing suppliers)
- Compression fittings, repair sleeves, and assorted pipe couplings in common diameters
- Replacement valves, gate stems, and gasket kits for quick swaps
- Consumables: plumber’s tape, epoxy putty, stainless steel hose clamps, and rubber repair patches
Recommended professional-grade tools and where to rent or buy
Several essential professional-grade tools and supplies are recommended to quickly isolate, repair, and mitigate damage from a water main break: heavy-duty pipe cutters, adjustable pipe wrenches, hydraulic or chain-driven pipe clamps, roll-type and inflatable pipe plugs, portable water pumps, and corrosion-resistant repair couplings.
These items are available from specialty plumbing suppliers, industrial rental houses, and major home-improvement stores; equipment rental is suitable for infrequent needs.
Consumables and replacement parts to keep on hand
Having access to professional-grade tools is useful, but stockpiling consumables and common replacement parts guarantees rapid response when a water main fails.
Maintain spare gaskets, O-rings, hose clamps, repair clamps, coupling sleeves, pipe repair tape, threaded adapters, sealing compound, pipe dope, plumber’s epoxy, and compression fittings.
Include gloves, rags, replacement valves, and a basic first-aid kit for site safety and efficiency.
Real-world scenarios and quick case examples
The section summarizes three common cases: a small residential main break with typical repair timeline and cost estimates, a major street break showing municipal response procedures and service interruptions, and an instance of a DIY repair gone wrong with the resulting lessons and corrective steps.
Each example highlights decision points, expected outcomes, and who bears responsibility. Readers are encouraged to compare scenarios to determine when to call professionals versus manage short-term containment.
Small residential main break: repair timeline and costs
Begin by outlining a typical small residential water main break scenario: a single service line fracture or joint failure affecting one house or a short block, usually discovered by reduced pressure, visible wet spots, or an alert from the meter.
Response: homeowner contacts utility, technician arrives within hours, temporary shutoff and excavation take 2–6 hours, full repair and backfill 1–2 days.
Costs: $500–$4,000.
Major street main break: municipal response and interruption impacts
Responding to a major street main break demands coordinated municipal action that quickly shifts from emergency isolation to public safety and service restoration.
Crews secure the scene, shut valves, and reroute traffic and utilities. Communications alert residents and businesses about outages, boil-water notices, and timelines.
Restoration often requires night work, temporary water distribution, and coordinated inspections before full service resumes.
DIY attempted repair gone wrong: lessons learned and corrective steps
After an improvised clamp or amateur splice fails, household attempts to fix a water main can quickly escalate from a manageable leak to contaminated supply, flooding, or structural damage.
Case examples show improper seals causing basement inundation and cross-contamination.
Corrective steps: shut main, isolate affected zone, call utility or licensed plumber, document damage, disinfect system, and secure professional repairs to prevent recurrence and liability.
Signs repairs are complete and follow-up actions
After repairs, inspectors confirm completion by testing water quality and pressure to guarantee system integrity.
They continue monitoring for signs of recurrent leaks—damp spots, pressure drops, or unusual meter activity—and note any anomalies.
All findings are recorded and used to update the preventive maintenance schedule.
How to verify water quality and system integrity post-repair
Several clear indicators confirm that a water main repair has restored system integrity and water quality: steady, clear flow at restored pressure, absence of visible leaks or wet spots along the repaired section, and stable pressure readings matching pre-failure levels.
Post-repair verification includes flushing lines, sampling for turbidity and bacterial contamination, confirming chlorine residuals, documenting readings, and clearing debris before returning the system to normal service.
Monitoring for recurrent leaks and what to watch for
Ongoing monitoring for recurrent leaks focuses on early detection of subtle signs that a repair may have failed, including gradual pressure drops, new or worsening wet spots near the repair site, recurring discolored or turbid water, and intermittent audible running or hissing in nearby valves and service lines.
Inspect fittings, joints, and surrounding soil; verify stable pressure over repeated cycles; document anomalies; schedule prompt reinspection and targeted repairs if issues recur.
Recordkeeping and preventive maintenance schedule
A concise record of repair details and a defined preventive maintenance schedule confirm that a water main break has been fully resolved and reduce the risk of recurrence.
Entries detail location, cause, materials, tests, timestamps, crew, and approvals.
Scheduled inspections, valve exercises, pipe condition assessments, and corrosion control are assigned frequencies and responsible parties.
Completion of follow-up checks and documented passing results signal closure.
Conclusion
Water rushes like silver ribbon cut abruptly, spilling onto cracked pavement and into startled basements. The homeowner moves through shock into steady action: stopping flow, clamping leaks, and calling trained crews whose heavy boots and machines rewrite the landscape. Temporary patches hold like bandages until crews lay new pipe beneath humming streets. In the quiet aftermath, meters tick true again and hoses rest; lessons settle like sediment, shaping care and readiness for the next storm.