How to Relight a Gas Boiler Safely: Step-by-Step Guide for Homeowners
To safely relight a gas boiler, start by checking for gas smells, hissing sounds, or CO alarm activation. If any are present, evacuate immediately. Next, shut off the gas and power, ventilate the area, and gather necessary tools: a lighter, flashlight, gloves, and a CO detector. Access the pilot or control panel, set it to “pilot,” and press the control knob while igniting the pilot light. Confirm a steady blue flame before restoring gas and power. Monitor the system for normal operation and check for leaks. If problems persist, cease attempts and contact a qualified technician for assistance.
What to Do Immediately If Your Gas Boiler Has Gone Out
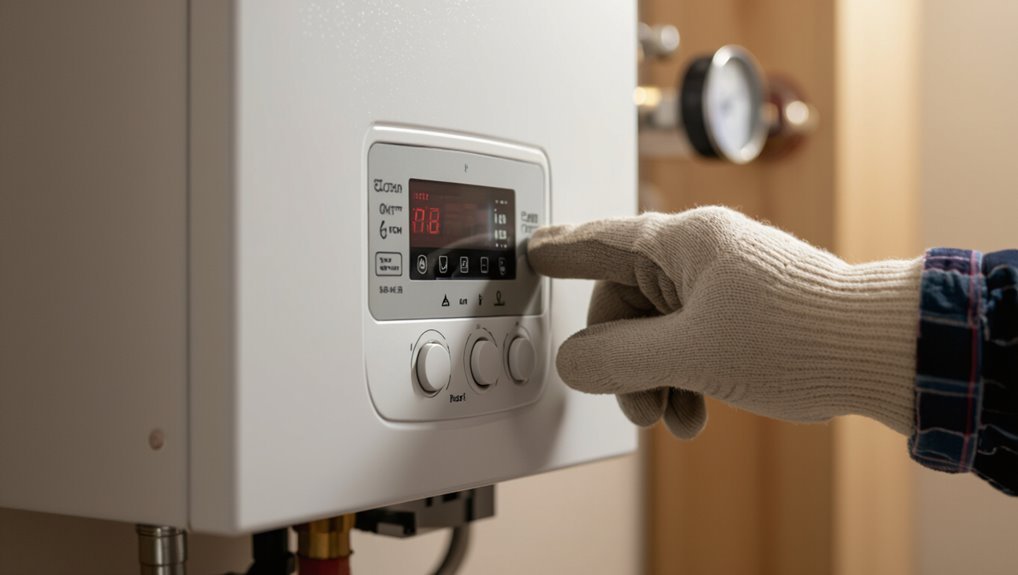
First, verify whether the burner flame is actually out by consulting the boiler’s indicator or inspecting the view port according to the manufacturer’s instructions.
Then perform basic safety checks—smell for gas, confirm ventilation, and switch off electrical supply—before any relighting attempt.
If there is a gas smell, any doubt about the cause, or repeated shutdowns, stop and contact a qualified gas engineer.
How to check if the boiler has actually lost its flame
How can one tell whether a gas boiler has actually lost its flame?
One should visually inspect the pilot or viewing window for a steady blue flame and listen for burner operation.
If no flame or only a weak orange flicker appears, the boiler has gone out.
Document readings, note error codes, and consult the boiler manual for instructions on how to relight a gas boiler.
Safety checks to perform before attempting relight
After confirming the flame is absent or unstable, a series of immediate safety checks should be carried out before any relighting is attempted.
Inspect for gas smell, listen for hissing, and guarantee gas supply valves are open.
Verify adequate ventilation, clear nearby combustibles, and check for water leaks or frozen condensate pipes.
Confirm carbon monoxide alarm functionality before proceeding.
When to stop and call a professional
If any of the preliminary checks reveal the scent of gas, persistent hissing, visible damage, or signs of carbon monoxide exposure, operations should cease immediately and a qualified engineer contacted.
Similarly, if relighting attempts fail, the pilot will not stay lit, or the boiler displays error codes or strange noises, the situation requires professional assessment rather than further user intervention.
Arrange ventilation, evacuate if necessary, and call a certified gas-safe engineer.
Tools and Safety Equipment Needed Before Relighting
Before attempting to relight a gas boiler, the writer lists the essential tools and protective gear needed for a safe procedure.
They note the importance of confirming gas supply integrity and testing a working carbon monoxide detector.
A brief ventilation and flue inspection checklist is also recommended to guarantee clear exhaust paths and adequate airflow.
Essential tools and protective gear
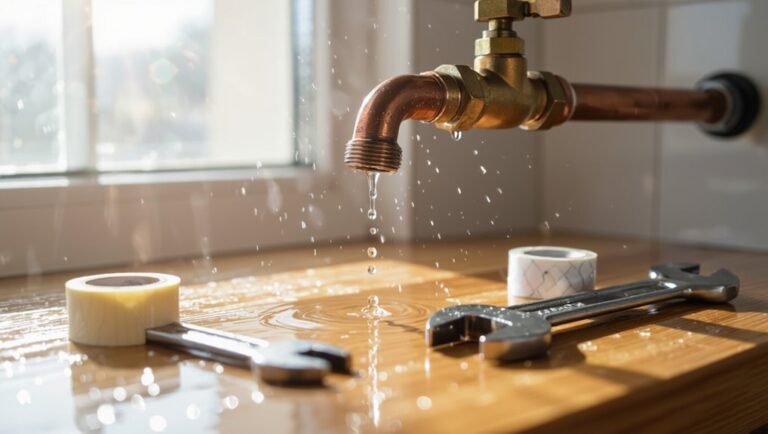
A compact kit of the right tools and protective gear is essential for relighting a gas boiler safely: a flashlight, insulated screwdrivers, adjustable wrench, pipe-sealing tape, a long-stem lighter or pilot igniter, and a carbon monoxide detector should be on hand, while safety glasses, heat-resistant gloves, and a dust mask protect the operator from sparks, hot surfaces, and fumes.
- Flashlight and spare batteries
- Insulated hand tools
- Heat-resistant gloves and glasses
Gas supply and carbon monoxide detector checks
With tools and protective gear in place, attention turns to verifying the fuel source and atmosphere: the gas shutoff valve, supply line integrity, and a functioning carbon monoxide (CO) detector.
Confirm the valve is closed then slowly open and check for leaks with soapy water or a gas detector.
Verify the CO alarm is within its test date, powered, and positioned per manufacturer guidelines.
Ventilation and flue inspection checklist
One clear priority is ensuring that the boiler’s ventilation and flue are unobstructed and in good condition before attempting relighting.
A concise checklist aids verification: inspect flue terminals, check seals and joints, and confirm ventilation openings are clear. Record any damage and avoid relighting if corrosion, blockages, or animal nests are present.
- Inspect flue terminals and caps
- Check seals, joints, and corrosion
- Verify ventilation openings are clear
Basic Boiler Components Every Homeowner Should Know
The most important parts to recognize are the pilot light, main burner, thermocouple, and gas valve, since each plays a distinct role in ignition and safety.
A brief explanation of the typical ignition sequence — pilot lighting, thermocouple sensing, and gas valve opening to feed the main burner — clarifies how these parts interact.
Homeowners should also note common visual signs of failure, such as a weak or yellow pilot flame, soot on the burner, or visible corrosion at the gas valve.
Pilot light, main burner, thermocouple, and gas valve explained
A functioning gas boiler relies on a few small but critical parts: the pilot light that provides a continuous flame, the main burner where fuel combustion heats water, the thermocouple that senses flame presence and signals safety, and the gas valve that controls fuel flow to both pilot and burner.
Each part’s role: pilot sustains ignition, burner supplies heat, thermocouple prevents gas leaks, valve regulates delivery.
How the ignition sequence works in common residential boilers
Having outlined the pilot light, main burner, thermocouple, and gas valve, attention shifts to how those parts work together during startup.
On ignition, the thermostat signals the gas valve to allow pilot flow; the thermocouple confirms flame and permits main gas release.
The main burner then lights, heat exchanger warms, and the system circulator engages to distribute heated water through the home.
Visual indicators of component failure
Recognizable signs often reveal when a boiler component is failing: soot buildup or yellow pilot flames indicate combustion issues. Persistent clicking or silence from the gas valve suggests ignition or electrical faults.
Leaking around fittings or the heat exchanger points to seal or corrosion failure, and fluctuating water temperature or loud banging hints at circulator or sediment problems.
Visual inspection also notes cracked pipes, corroded components, discolored wiring, and unusual odors.
Step-by-Step Guide to Relight a Standing Pilot Boiler
The procedure begins with clear shut-down and isolation: turn off the boiler, close the gas supply, and cut electrical power before proceeding.
Next, follow a precise sequence to light the pilot, confirm it remains lit while checking and adjusting the thermocouple as needed.
Finally, restore gas and power, restart the boiler, and observe several heating cycles to guarantee normal operation.
Shut-down and isolation steps (gas and power)
Before any attempt to relight a standing pilot, all sources of ignition and energy must be isolated to eliminate risk; this begins with shutting off the boiler’s main gas supply at the external meter or service valve and switching the boiler’s electrical power to the OFF position.
Confirm isolation, ventilate the area, and wait before proceeding.
- Verify gas valve is fully closed
- Isolate electrical supply at the consumer unit
- Place a visible tag or note indicating maintenance in progress
Lighting the pilot: detailed step sequence
Begin by confirming that all shutdown and isolation steps have been completed and that the work area is well ventilated; only then proceed to the pilot lighting sequence.
Open the pilot access, set the control knob to “pilot,” depress and hold it while pressing the igniter or applying a match.
Continue holding for the manufacturer’s specified time, then release slowly and observe ignition before returning the knob to “on.”
Verifying pilot stays lit and adjusting thermocouple
Check that the pilot flame remains steady and correctly positioned for at least the manufacturer’s recommended hold time; if it extinguishes or appears weak, proceed to inspect and adjust the thermocouple.
With the gas valve off and pilot lit, tighten or reposition the thermocouple nut at the gas control so the probe sits fully in the flame.
Replace damaged thermocouples.
Re-test stability before continuing.
Restarting the boiler and observing normal operation
With a stable pilot flame and a secure thermocouple, the boiler can be restarted and monitored for proper operation.
The operator opens the main gas valve, ignites the burner per manufacturer instructions, then observes ignition sequence, pressure gauges, and thermostat response.
Listen for unusual noises, check for leaks or soot, and confirm stable cycling.
If anomalies appear, shut down and contact a qualified technician immediately.
Step-by-Step Guide to Relight a Modern Electronic-Ignition Boiler
The section outlines the reset and control-panel procedures specific to modern boilers with electronic ignition.
It explains common safety interlocks, the typical reset buttons and their functions, and how to interpret control-panel error codes.
It also clarifies when a manual relight is not possible and a qualified technician should be called.
Reset and control-panel procedures
Begin by locating the boiler’s control panel and identifying the reset button, mode selector, and status indicators so the relighting sequence can proceed methodically.
Consult the boiler’s manual for model-specific labels and safety warnings before pressing any controls.
Verify power and gas valves are confirmed on, observe indicator lights for fault codes, select heating mode, press reset once, wait specified interval, and monitor for normal ignition.
Safety interlocks and common reset buttons
One essential safety layer on modern electronic-ignition boilers is the interlock system, which prevents ignition unless sensors and switches confirm safe conditions.
Understanding how these interlocks interact with common reset buttons is crucial before attempting a relight. Interlocks monitor flame, pressure, temperature, and ventilation.
A reset button often clears a fault latch but will not override active safety trips; follow diagnostics before retrying ignition.
When a manual relight is not possible
If a manual relight is not possible due to locked-out ignition or persistent faults, proceed with a systematic, safer approach that acknowledges the limits of homeowner intervention.
Verify gas supply and electrical power, note error codes, and shut off the boiler.
Do not force resets.
Contact a Gas Safe–registered engineer, provide observed symptoms and codes, and arrange inspection and repair to restore safe operation.
Troubleshooting Common Relighting Problems
When relighting fails, common faults include a pilot light that won’t stay lit, persistent clicking or no ignition on electronic models, and signs of low or blocked gas supply.
Typical causes to check are a faulty thermocouple, a misbehaving thermostat or gas valve, and obstructions or pressure issues in the gas line.
The following section explains symptoms, quick checks, and when to call a qualified engineer.
Pilot light won’t stay lit likely causes and fixes
Several common issues can cause a pilot light to extinguish repeatedly, and identifying the specific fault helps determine the appropriate fix.
Possible causes include debris, thermocouple failure, or gas supply interruptions. Each requires a distinct response: cleaning, component replacement, or checking gas pressure and valves. If uncertainty exists, consult a qualified technician.
- Debris/clogged pilot orifice
- Faulty thermocouple
- Gas pressure or valve issue
Clicking, sparking, or failed ignition on electronic boilers
Inspecting an electronic boiler that clicks, sparks, or fails to ignite requires a methodical approach because these symptoms point to ignition-system faults rather than pilot issues.
Check electrode condition and alignment, guarantee clean, dry connections, and verify spark timing.
Test the ignition transformer and control board for error codes.
If corrosion, damaged electrodes, or persistent faults are found, stop and contact a qualified engineer.
Low gas pressure or blocked gas supply symptoms
If the boiler struggles to light or the flame is weak despite a functioning ignition system, low gas pressure or a blocked supply should be considered.
Symptoms include slow ignition, yellow or unstable flame, intermittent loss of heat, and low hot-water flow.
External signs may include other gas appliances underperforming.
Recommend checking mains valve, visible pipework for obstructions, and contacting the gas supplier or a qualified engineer.
Issues with thermocouple, thermostat, or gas valve
Diagnose common control faults by focusing on three components that most often prevent relighting: the thermocouple, the thermostat, and the gas valve.
Check a thermocouple for wear or loose connection; a faulty unit stops pilot operation.
Verify thermostat settings, batteries and wiring continuity.
Inspect the gas valve for stuck or seized operation and listen for clicking; replace or call a qualified technician if faults persist.
When Relighting Is Unsafe or Unsuitable
If there is any sign of a gas leak—smell of rotten eggs, hissing near the appliance, or dead houseplants—relighting should not be attempted and the gas supplier and emergency services must be contacted immediately.
Symptoms suggesting carbon monoxide exposure—headache, nausea, dizziness, or unexplained flu-like illness—require evacuating the premises, calling emergency services, and seeking medical attention.
Visible damage to the boiler, flue, or venting that could impair combustion or exhaust should be treated as a professional repair issue rather than a relighting task.
Signs of gas leaks and required immediate actions
When a persistent sulfurous odor, hissing near pipe joints, dead vegetation or unexplained soot around the boiler, or symptoms like dizziness and nausea in occupants are present, relighting should not be attempted and immediate safety actions are required.
Evacuate all occupants, avoid flames or electrical switches, ventilate from outside if safe, and call the gas emergency number and a qualified technician.
Carbon monoxide warning signs and emergency steps
How can one recognize carbon monoxide (CO) danger before attempting to relight a boiler?
Symptoms include headache, dizziness, nausea, confusion, and flu-like signs among occupants; soot, yellow pilot flame, or unexplained soot deposits near the appliance.
If CO is suspected, evacuate immediately, call emergency services, ventilate if safe from outside, and do not relight the boiler until cleared by qualified personnel with CO detection equipment.
Structural or flue damage that requires professional repair
After addressing immediate carbon monoxide risks and evacuating if necessary, attention should turn to visible or suspected structural and flue damage that makes relighting unsafe or inappropriate.
Cracked flues, displaced chimney liners, corroded connectors, blocked vents, or damaged seals require immediate professional inspection.
A qualified gas engineer or chimney specialist must assess, repair, and certify the system before any attempt to restart the boiler.
Maintenance Steps to Reduce Future Relight Events
Routine inspection and cleaning of accessible components reduces soot buildup and spotting of wear before it causes shutdowns.
Annual professional servicing verifies safe operation, tests controls and gas connections, and catches issues beyond homeowner skills.
Simple homeowner tasks — bleeding radiators, checking pressure, and replacing small valves or batteries — further lower the likelihood of future relight events.
Regular inspection and cleaning tasks
A regular schedule of inspection and basic cleaning greatly lowers the chance of an unexpected boiler shutdown by identifying wear, soot buildup, and component faults before they escalate.
Routine homeowner checks focus on visible leaks, pilot flame condition, and pressure readings. Simple cleaning prevents soot and dust accumulation; tightening loose connections reduces vibration damage.
- Check flue and vent clearances
- Clean burner and pilot areas
- Inspect seals and pipework for corrosion
Scheduling annual professional servicing
Reliability improves when a qualified technician performs an annual boiler service, since professional inspection uncovers issues that casual homeowner checks can miss.
Certified technicians test combustion, safety controls, seals and ventilation, adjust settings, and document findings.
Scheduling yearly visits reduces unexpected shutdowns, guarantees warranty compliance, and prioritizes safety.
Homeowners should keep service records and promptly arrange repairs recommended by the technician.
Simple homeowner adjustments and replacements to prevent failures
Perform basic upkeep and replace a few common parts to lower the chance of boiler shutdowns and relight events.
Homeowners should bleed radiators, check and top up system pressure, and clear external vents.
Replace worn seals, thermostats, and condensate trap components.
Inspect and clean magnetic filters and strainers to remove sludge.
Keep pilot and ignition areas free of dust and debris.
Cost and Time Considerations: DIY vs Professional Service
Estimates for a professional relight and minor repairs vary by region and provider, often ranging from a modest service call fee to higher charges for parts and labor.
A homeowner attempting a DIY relight can typically complete the basic steps in 15–45 minutes, while a technician visit may require scheduling and take one to several hours on site.
Attempting DIY work can affect liability and may void warranties, so the trade-offs between time, cost, and protection should be considered.
Typical costs for professional relighting and minor repairs
Costs for having a qualified technician relight a gas boiler and carry out minor repairs typically range from a modest service call fee up to a few hundred dollars, depending on location, complexity, and parts required. Pricing often includes diagnostics, labor, and simple parts; emergency visits cost more. Typical examples:
| Service | Typical cost |
|---|---|
| Call-out | $50–$100 |
| Relight only | $40–$120 |
| Minor repair | $80–$300 |
| Parts | $10–$150 |
Time estimates for DIY relight steps vs technician visit
Time is the primary practical consideration when deciding between a DIY relight and calling a technician.
A straightforward relight and safety checks typically take 15–45 minutes for a competent homeowner. Troubleshooting intermittent faults or bleeding radiators may add 30–90 minutes.
A technician visit usually requires a booked slot plus travel, totaling 1.5–4 hours, though it resolves complex issues more reliably.
Liability and warranty implications of DIY relighting
Beyond minutes and scheduling, homeowners should weigh how relighting a gas boiler themselves can affect liability and any existing warranties.
DIY relighting may void manufacturer or service warranties if improper procedures or modifications occur. Additionally, personal liability rises if negligent actions cause damage or injury.
Hiring a certified technician preserves warranty coverage, guarantees documented service, and reduces legal and safety risks.
How to Record and Report Boiler Issues
Before contacting a technician, document the model and serial number, error codes or warning lights, recent symptoms, and the time and sequence of events.
Prepare concise questions for the heating engineer about safety risks, likely causes, required repairs, estimated costs and turnaround time.
Check warranty terms, service contracts, and manufacturer support options and have relevant paperwork or account details ready to reference.
What information to document before calling a technician
A concise record of symptoms and conditions can speed diagnosis and repair when a technician arrives.
Note dates, times, ignition attempts, error codes, noises, smells, and recent interventions.
Record ambient conditions and thermostat settings, and whether other appliances are affected.
Include contact details and accessibility notes.
- Dates, times, and error codes
- Description of sounds, smells, and behavior
- Recent maintenance or DIY attempts
Questions to ask your heating engineer
Why ask specific questions when a heating engineer arrives? Homeowners should request clear explanations of observed faults, diagnostic steps taken, and safety checks performed.
Ask for part names, reasons for failure, estimated repair time, and cost breakdown. Request written findings, recommended next steps, and any temporary safety measures.
Confirm whether further monitoring or follow-up visits are needed.
How to use warranty, service contracts, and manufacturer support
After asking clear questions and obtaining written findings from the heating engineer, the homeowner should know how to record and report the issue for warranty, service contract, or manufacturer support.
Record dates, serial numbers, symptom descriptions, engineer report and photos.
Contact provider promptly via documented channels, follow claim procedures, retain copies of all correspondence, and note reference numbers and repair authorizations for warranty validation and service-contract compliance.
Quick Reference Checklist for Safe Boiler Relight
A concise, one-page pre-relight checklist summarizes required safety checks and step-by-step relight actions for quick reference.
A separate post-relight observation checklist outlines symptoms and readings to monitor over the next 24 to 48 hours.
Together these sheets provide a clear, time‑limited protocol to reduce risk and support proper reporting.
One-page pre-relight safety and relight checklist
Several clear steps should be completed before attempting to relight a gas boiler to guarantee safety and prevent damage.
The one-page checklist condenses essential pre-relight actions: confirm gas supply off/on status, inspect for leaks and smells, verify pilot/controls ready.
Use only trained procedures; postpone if any doubt exists.
- Check gas isolation and meter
- Inspect for odors or damage
- Confirm electrical and control readiness
Post-relight observation checklist for 24 to 48 hours
Why monitor the boiler closely for the next 24 to 48 hours? A brief observation period verifies stable operation, detects leaks, and confirms safe combustion.
The homeowner should log conditions, respond to anomalies, and isolate faults promptly.
- Check flame color, pressure, and unusual noises hourly.
- Inspect for water or gas odors near joints.
- Record thermostat behavior and heating consistency.
Conclusion
When a homeowner follows the safety checks, gathers the right tools, and uses the correct relight method, the boiler can be restored without incident. For example, after routine pilot outages in a Victorian terrace, a tenant safely relit a standing-pilot unit after checking for gas leaks, ventilating the room, and following manufacturer steps, then logged the event for the landlord. Consistent maintenance and prompt reporting minimize risks and repeated interruptions.